19 Thanksgiving Treats to Make Your Holiday Extra Special

Looking for some tasty Thanksgiving treats to make your holiday even sweeter?
In this article, we’ll share fun and easy recipes that everyone will enjoy.
From pies to cookies, these Thanksgiving treats are perfect for celebrating with family and friends.
Let’s get started!
1. Pumpkin Pie Bars
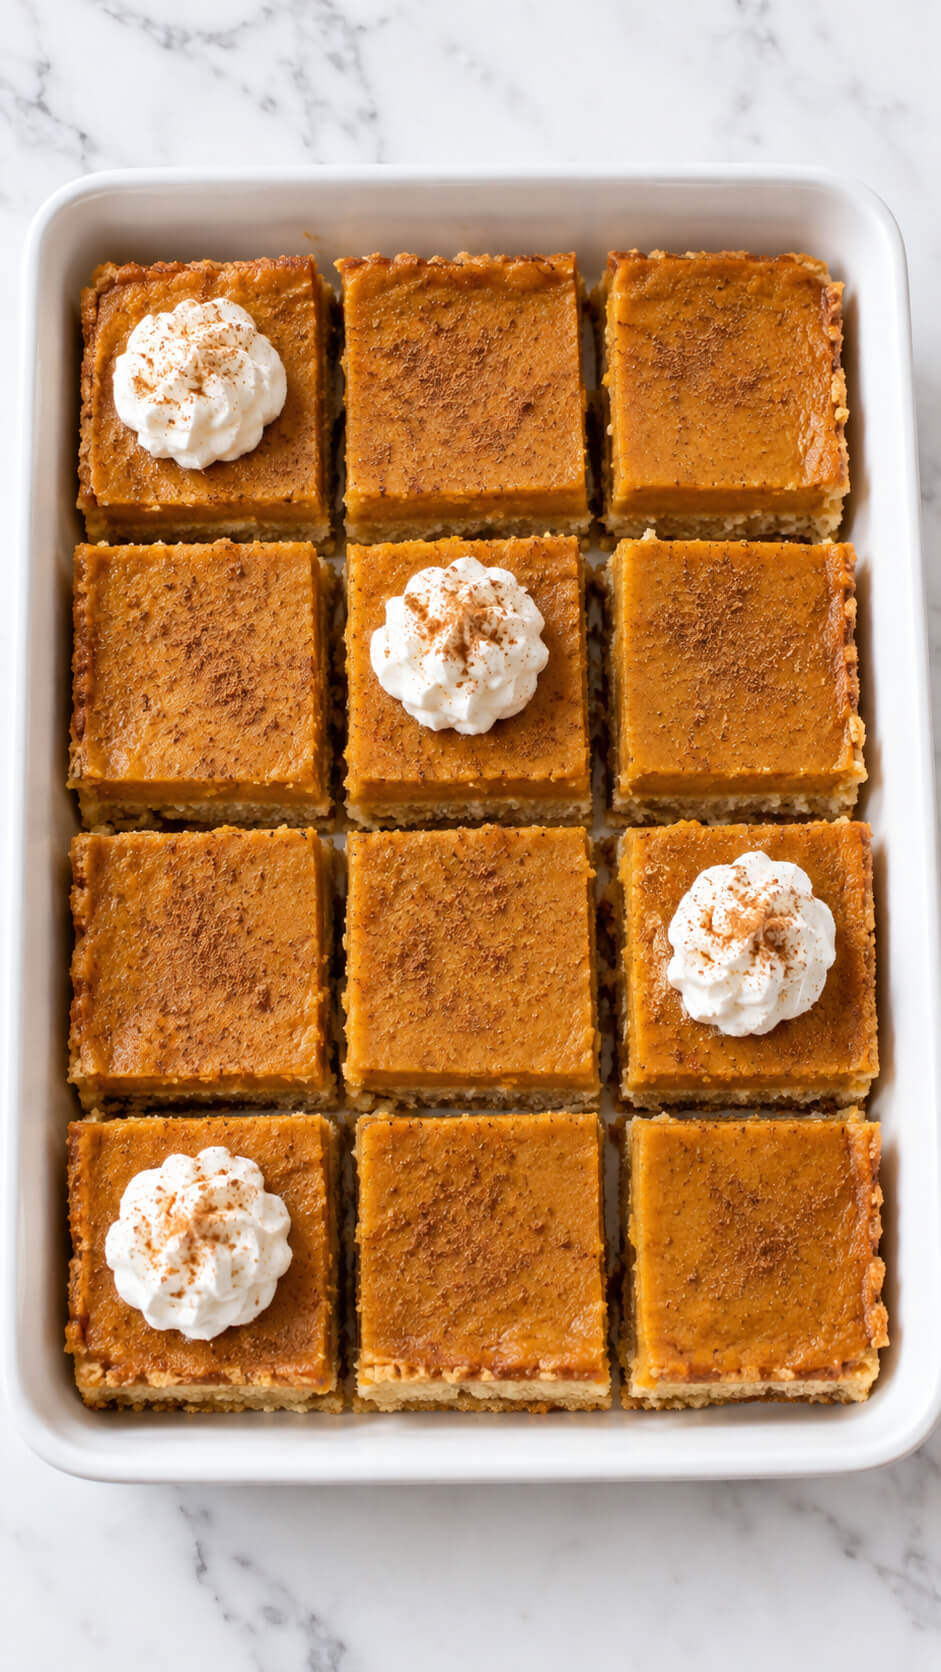
Pumpkin pie is a Thanksgiving staple, but pumpkin pie bars make it easier to serve.
These treats offer the classic flavors of a pumpkin pie—cinnamon, nutmeg, and creamy pumpkin filling—in a convenient handheld form.
Perfect for guests who want a little sweet bite without committing to a full slice of pie.
They’re easy to make ahead of time and can be topped with whipped cream or a sprinkle of cinnamon sugar for extra flair.
Ingredients
- 1½ cups all-purpose flour
- ½ cup unsalted butter, melted
- ¼ cup granulated sugar
- ¼ teaspoon salt
- 1 can (15 ounces) pumpkin purée
- ¾ cup packed brown sugar
- 2 large eggs
- 1 teaspoon vanilla extract
- 1½ teaspoons ground cinnamon
- ½ teaspoon ground ginger
- ¼ teaspoon ground nutmeg
- ¼ teaspoon ground cloves
- ½ teaspoon salt
- ¾ cup evaporated milk
- Whipped cream, for topping
Instructions
1. Prepare the crust
Preheat the oven to 350°F (175°C). Line a 9-by-13-inch baking pan with parchment paper, leaving some overhang for easy removal. Mix the flour, melted butter, sugar, and salt until a soft, crumbly dough forms. Press it firmly and evenly into the bottom of the prepared pan.
2. Bake the crust
Bake the crust for 15–18 minutes, until the edges are lightly golden. Remove it from the oven and let it cool slightly while you prepare the pumpkin filling.
3. Mix the pumpkin filling
In a large bowl, whisk together the pumpkin purée, brown sugar, eggs, vanilla, cinnamon, ginger, nutmeg, cloves, and salt until smooth. Gradually whisk in the evaporated milk until the mixture is creamy and evenly combined.
4. Add the pumpkin layer
Pour the pumpkin mixture over the warm crust and gently spread it into an even layer. Tap the pan lightly on the counter to release any large air bubbles.
5. Bake the bars
Return the pan to the oven and bake for 40–50 minutes, until the pumpkin filling is set around the edges and the center has only a slight jiggle. Avoid overbaking, as the filling will continue to firm as it cools.
6. Cool the pumpkin bars
Place the pan on a wire rack and let the bars cool completely. For cleaner slices, refrigerate them for at least 2 hours once they have reached room temperature.
7. Cut and serve the bars
Lift the chilled bars from the pan using the parchment-paper overhang and cut them into neat squares. Dust each bar lightly with cinnamon and add a small dollop of whipped cream just before serving.
Tip
For the cleanest cuts and the creamiest texture, chill the pumpkin bars thoroughly before slicing. Wipe your knife clean between cuts to keep the layers neat and defined.
2. Cranberry Brie Bites
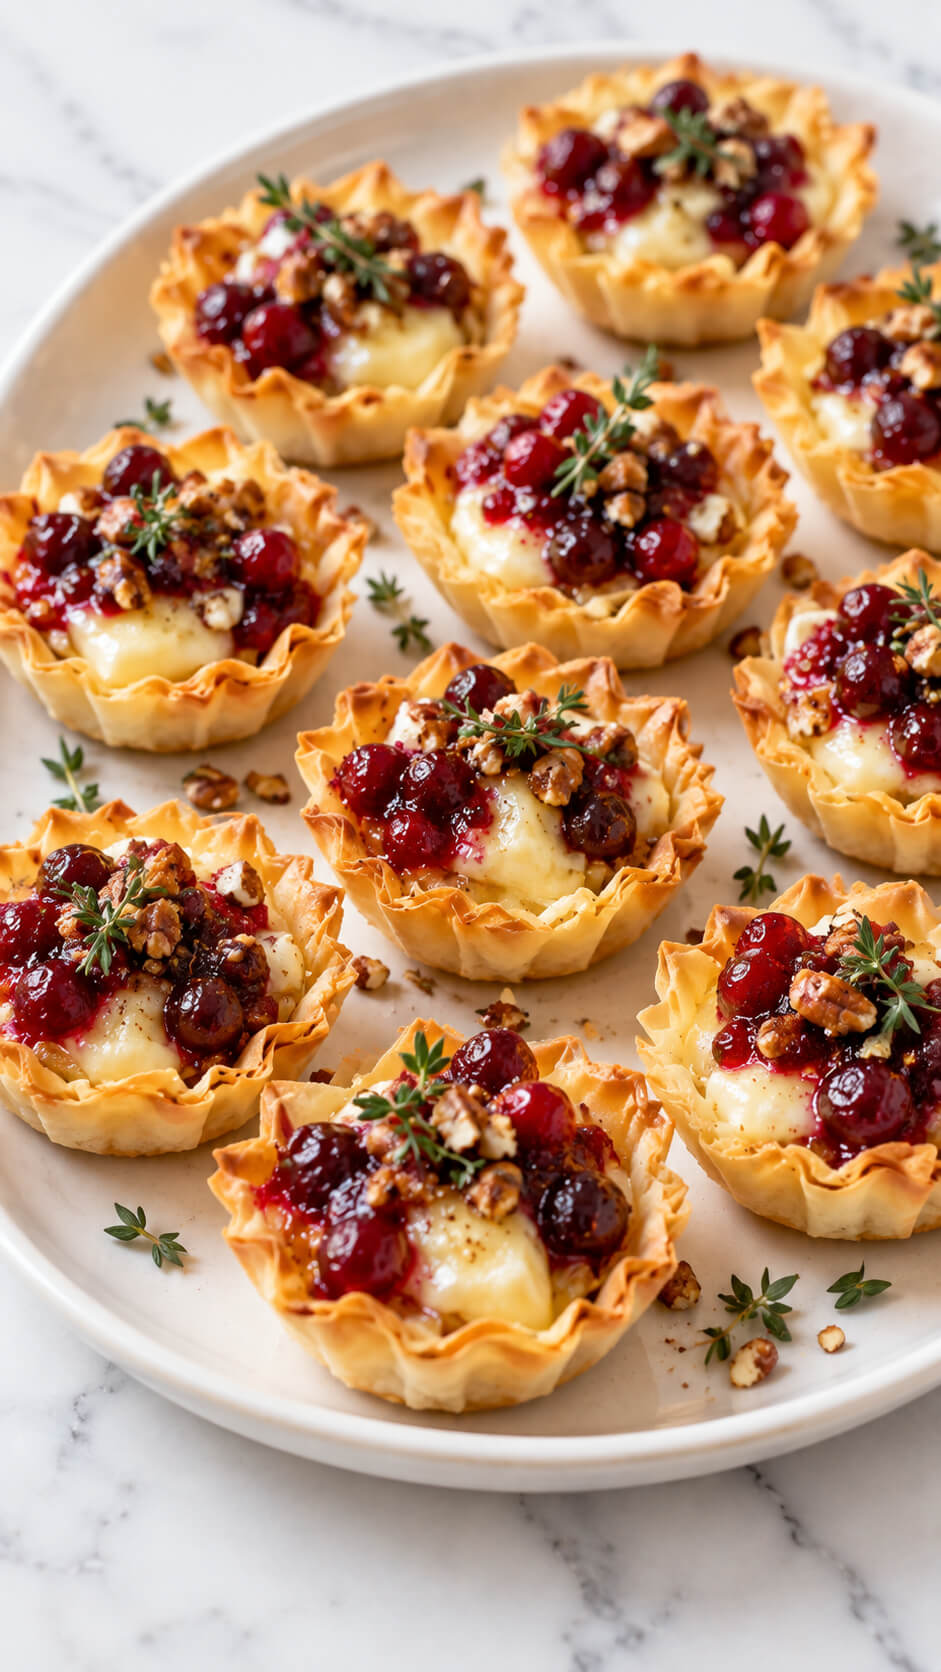
These small, savory-sweet appetizers combine the richness of melted brie with tart cranberry sauce, all nestled in a crispy phyllo shell.
Cranberry brie bites are a sophisticated snack that fits right into the Thanksgiving theme.
They’re easy to serve, mess-free, and full of fall flavors. Perfect for guests to grab before the main course, while mingling and enjoying a glass of wine.
Ingredients
- 1 package (15 ounces) frozen phyllo shells, about 15 shells
- 6 ounces Brie cheese, cut into small cubes
- ½ cup cranberry sauce or cranberry relish
- ¼ cup chopped pecans or walnuts
- 1 tablespoon fresh thyme leaves
- ¼ teaspoon freshly ground black pepper
- Honey, for drizzling, optional
Instructions
1. Preheat the oven
Preheat the oven to 350°F (175°C). Arrange the frozen phyllo shells on a baking sheet, leaving a little space between each one so they bake evenly.
2. Fill the phyllo shells
Place a small cube of Brie into each phyllo shell, making sure the cheese sits comfortably inside without overflowing.
3. Add the cranberry sauce
Spoon about 1 teaspoon of cranberry sauce over each piece of Brie. Keep the filling slightly below the top of the shell to prevent it from spilling over as it melts.
4. Add the pecans and seasoning
Sprinkle the chopped pecans evenly over the filled shells. Add a small pinch of black pepper and a few fresh thyme leaves to each bite.
5. Bake the bites
Bake for 12–15 minutes, or until the phyllo shells are crisp and golden and the Brie is melted and creamy. Watch them closely during the final few minutes so the pastry does not become too dark.
6. Garnish the bites
Remove the bites from the oven and let them cool for 2–3 minutes. Finish with a few fresh thyme leaves and, if desired, a very light drizzle of honey.
7. Serve the appetizers
Transfer the warm cranberry Brie bites to a serving platter and serve immediately while the cheese is soft and melted.
Tip
For an especially festive flavor, use whole-berry cranberry sauce and toast the chopped pecans in a dry skillet for 3–4 minutes before adding them to the bites.
3. Sweet Potato Casserole Cups
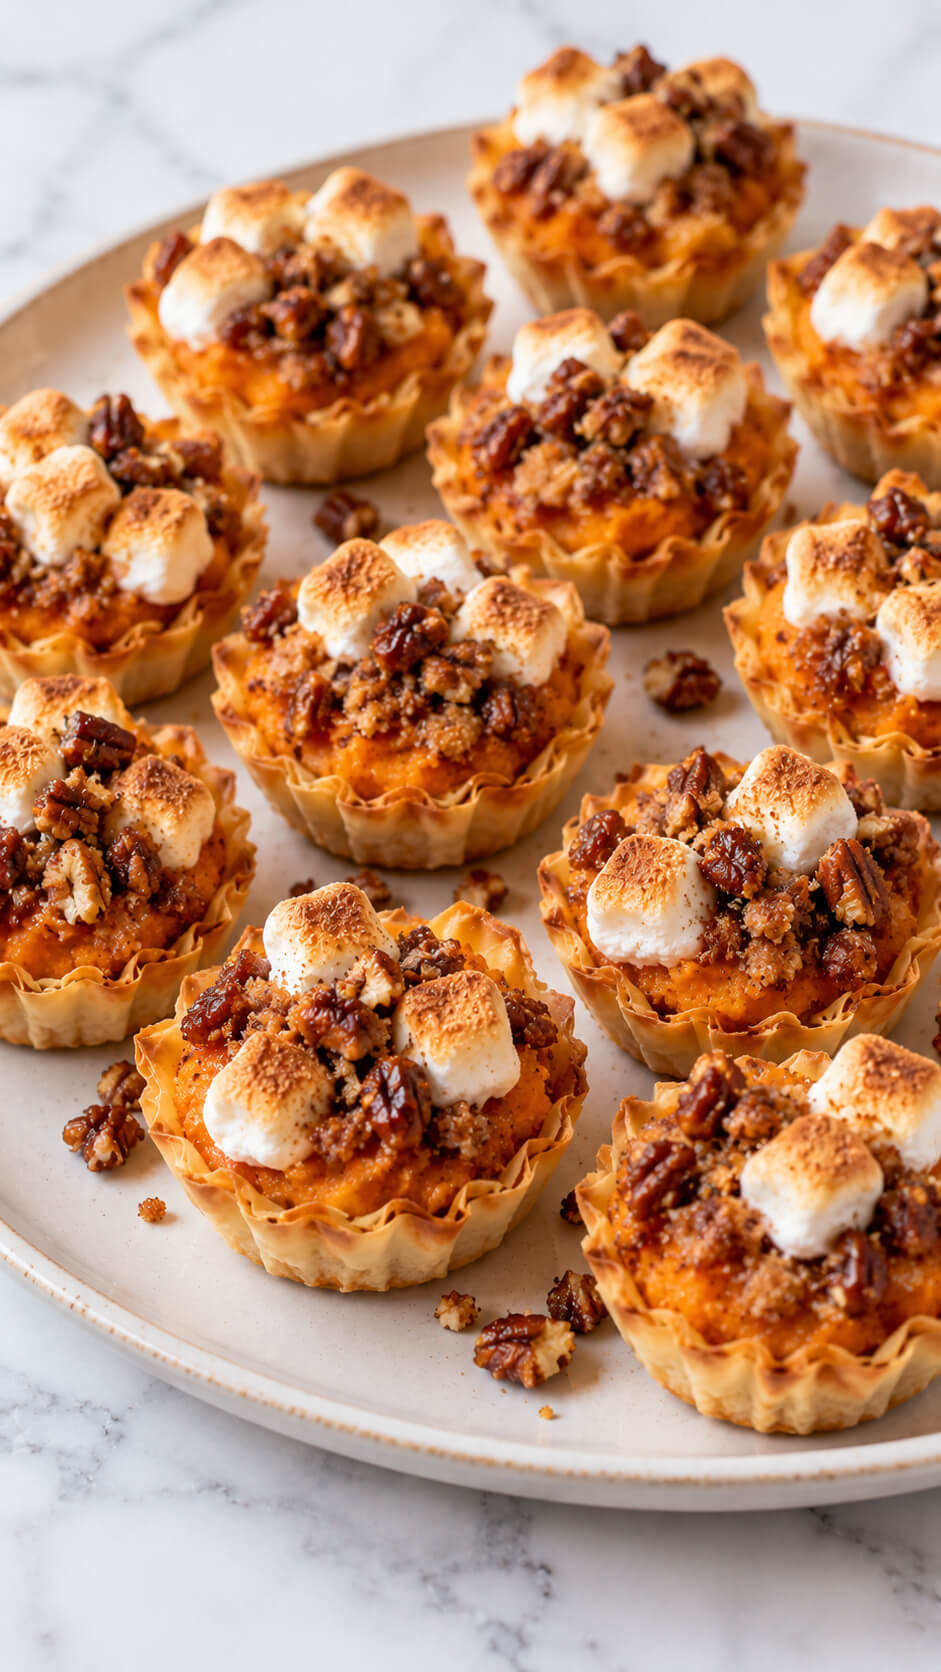
Why not make sweet potato casserole a bit more fun by serving it in individual portions?
Sweet potato casserole cups are a great way to offer a personal-size version of this classic dish.
Topped with mini marshmallows and a pecan crumble, these mini servings are adorable, convenient, and a big hit for both kids and adults alike.
Ingredients
- 12 frozen phyllo shells
- 2 medium sweet potatoes, peeled and cubed
- 2 tablespoons unsalted butter, melted
- 2 tablespoons brown sugar
- ½ teaspoon ground cinnamon
- ¼ teaspoon ground nutmeg
- ½ teaspoon vanilla extract
- ¼ teaspoon salt
- 2 tablespoons milk
- ¾ cup mini marshmallows
- ½ cup chopped pecans
- 2 tablespoons all-purpose flour
- 2 tablespoons brown sugar
- 2 tablespoons cold butter, cut into small pieces
Instructions
1. Cook the sweet potatoes
Place the peeled and cubed sweet potatoes in a saucepan of salted water and bring to a boil. Cook for 12–15 minutes, or until the potatoes are very tender. Drain thoroughly.
2. Mash the sweet potatoes
Transfer the cooked sweet potatoes to a bowl and mash until mostly smooth. Add the melted butter, brown sugar, cinnamon, nutmeg, vanilla, salt, and milk. Stir until creamy and well combined.
3. Prepare the crumble
Combine the chopped pecans, flour, and brown sugar in a small bowl. Add the cold butter and use your fingertips to rub it into the mixture until coarse crumbs form.
4. Fill the phyllo shells
Arrange the phyllo shells on a baking sheet. Spoon the sweet potato mixture evenly into each shell, filling them almost to the top.
5. Add the toppings
Sprinkle each cup with the pecan crumble, then arrange a few mini marshmallows over the top of each one.
6. Bake the casserole cups
Bake in a preheated 350°F (175°C) oven for 15–18 minutes, until the phyllo shells are golden and crisp and the sweet potato filling is heated through.
7. Toast the marshmallows
Increase the oven to broil and place the cups under the broiler for 30–60 seconds, watching them closely, until the marshmallows are lightly toasted and golden brown.
8. Serve the casserole cups
Let the cups cool for 3–5 minutes before serving. Serve them warm while the sweet potato filling is creamy and the marshmallow topping is soft and toasted.
Tip
For an extra-crispy topping, toast the pecans in a dry skillet for 3–4 minutes before making the crumble. Let them cool slightly before mixing them with the other ingredients.
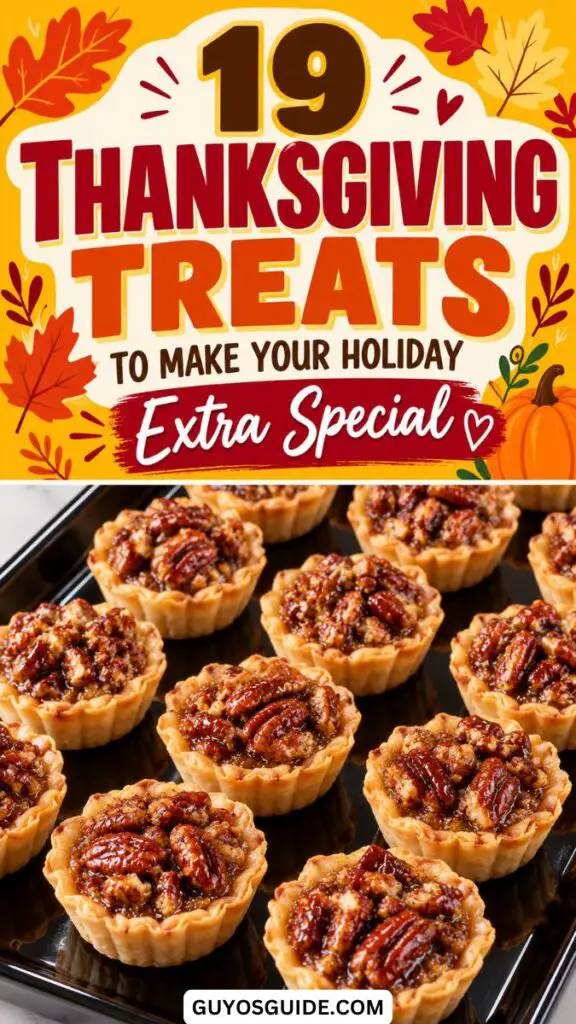
4. Pecan Pie Bites
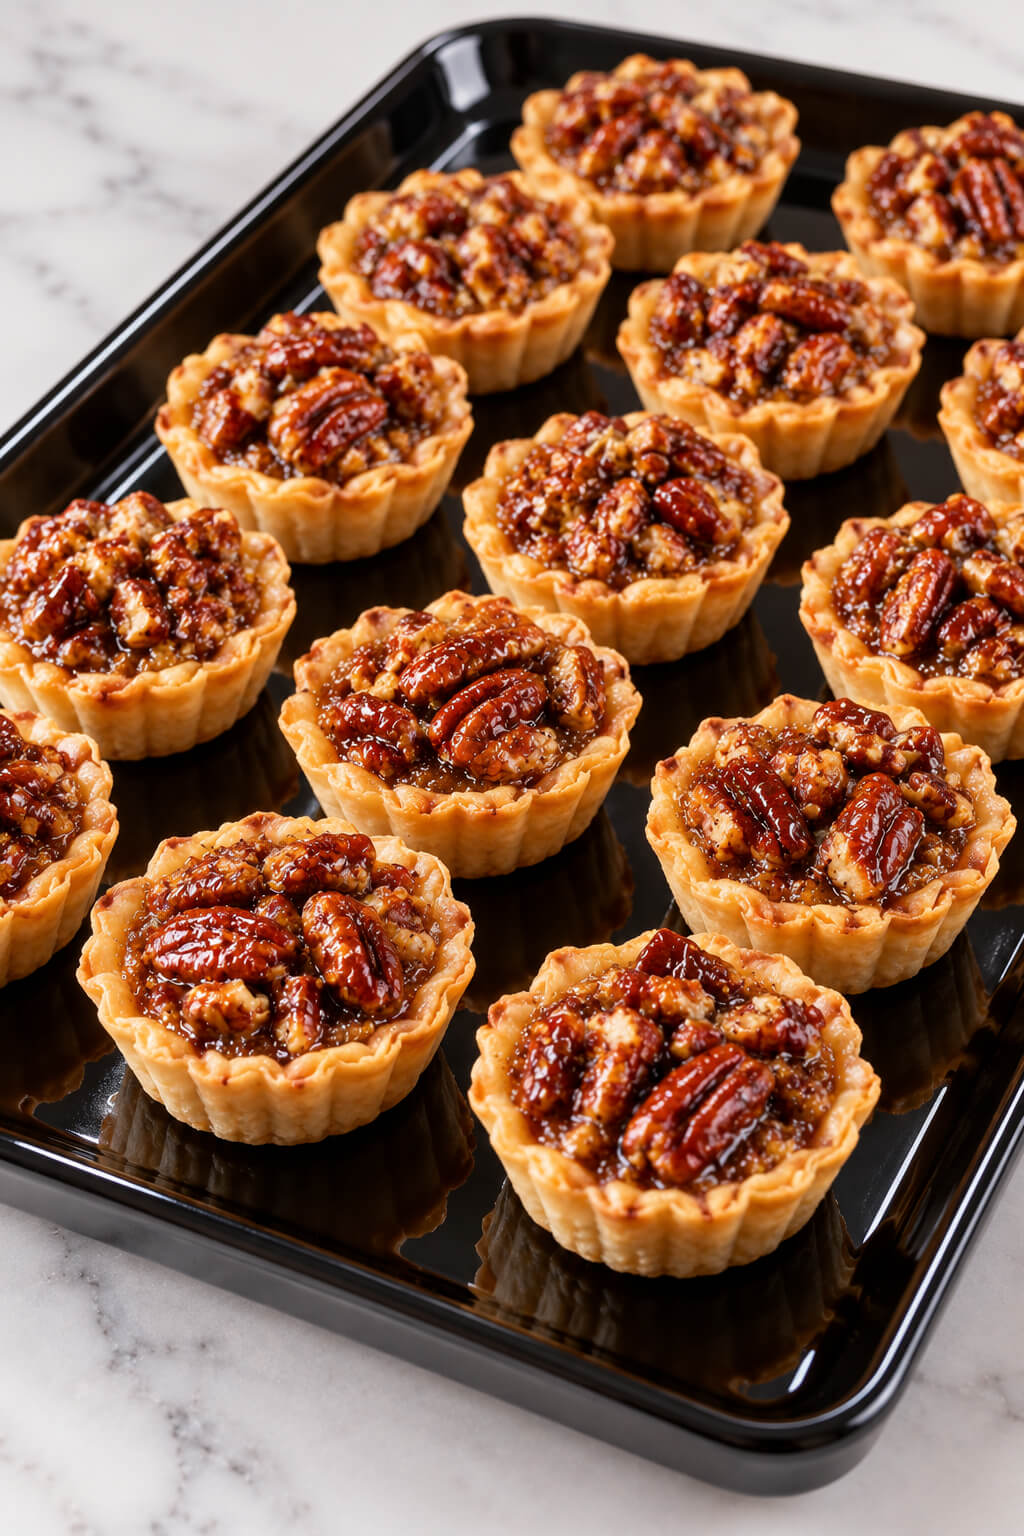
Pecan pie is a rich and decadent Thanksgiving dessert, but in bite-sized form, it becomes a treat that everyone can enjoy without guilt.
These little bites pack all the gooey sweetness of traditional pecan pie into a small, manageable portion.
They have a buttery crust, sticky caramel filling, and crunchy pecans on top, making them perfect for a dessert table spread.
Ingredients
- 1 package refrigerated pie crusts, 2 crusts
- 1 cup pecan halves, roughly chopped
- ½ cup packed brown sugar
- ¼ cup light corn syrup
- 2 tablespoons unsalted butter, melted
- 1 large egg
- 1 teaspoon vanilla extract
- ¼ teaspoon salt
- ½ teaspoon ground cinnamon
- ¼ teaspoon ground nutmeg
Instructions
1. Prepare the pie crust
Preheat the oven to 350°F (175°C). Lightly grease a 24-cup mini muffin pan. Unroll the pie crusts and cut out small circles slightly larger than the muffin cups. Press each circle gently into a cup, forming a small pastry shell.
2. Prepare the pecan filling
In a bowl, whisk together the brown sugar, corn syrup, melted butter, egg, vanilla, salt, cinnamon, and nutmeg until smooth. Stir in the chopped pecans until they are evenly coated in the caramel mixture.
3. Fill the pastry shells
Spoon the pecan mixture into each pastry shell, filling each one about two-thirds full. Avoid overfilling, as the filling will bubble and expand while baking.
4. Bake the pecan bites
Bake for 18–22 minutes, until the pastry edges are golden brown and the pecan filling is bubbling and set around the edges. The center should still have a slight softness when removed from the oven.
5. Cool the bites
Let the pecan pie bites cool in the muffin pan for about 10 minutes. Carefully transfer them to a wire rack and allow them to cool completely so the caramel filling can firm up.
6. Arrange the bites
Place the cooled pecan pie bites on a glossy black serving tray. Arrange them in neat rows or a slightly staggered pattern so the golden crust and caramelized pecans stand out against the dark surface.
7. Serve the pecan bites
Serve the bites at room temperature or slightly warm. For an extra festive presentation, add a light dusting of powdered sugar immediately before serving.
Tip
Toast the pecans in a dry skillet over medium heat for 3–5 minutes before using them. This brings out their natural flavor and gives the bites an especially rich, nutty taste.
5. Turkey-Shaped Sugar Cookies
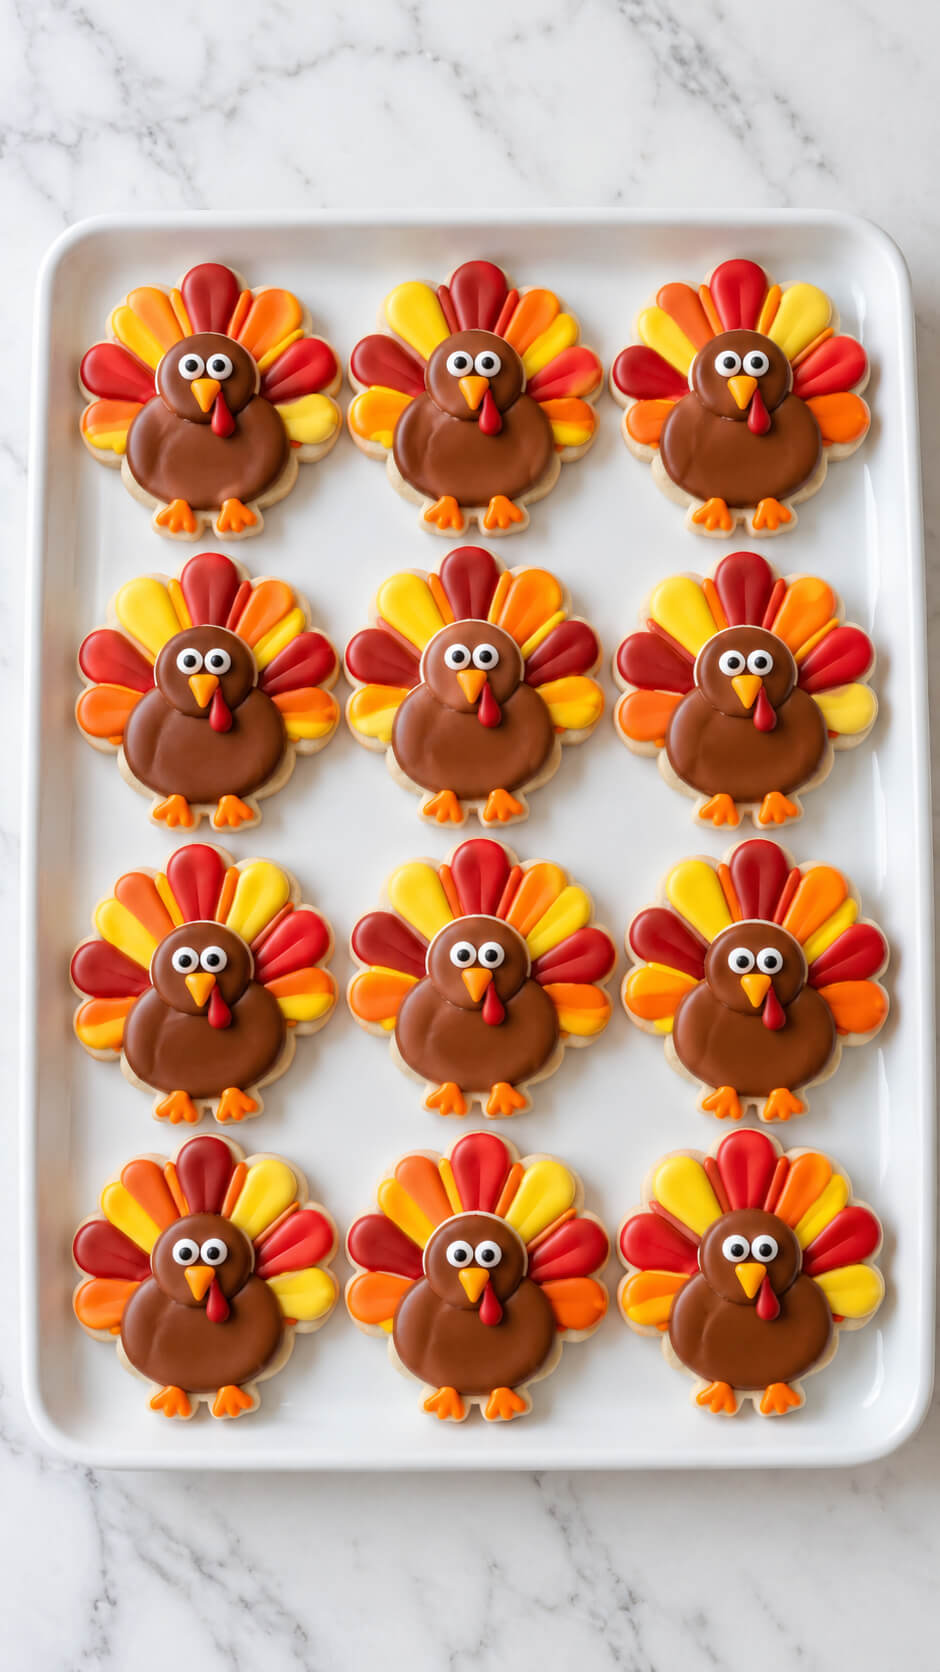
Bring some fun to the dessert table with turkey-shaped sugar cookies.
These festive cookies can be decorated with icing, sprinkles, and candies to make them resemble adorable turkeys.
Not only are they tasty, but they’re also a great activity for kids and adults to decorate together.
They add a playful element to your Thanksgiving dessert spread.
Ingredients
- 2½ cups all-purpose flour
- ½ teaspoon baking powder
- ¼ teaspoon salt
- ¾ cup unsalted butter, softened
- ¾ cup granulated sugar
- 1 large egg
- 2 teaspoons vanilla extract
For the royal icing
- 3 cups powdered sugar
- 2 tablespoons meringue powder
- 5–6 tablespoons warm water
- ½ teaspoon vanilla extract
- Brown gel food coloring
- Red gel food coloring
- Orange gel food coloring
- Yellow gel food coloring
Instructions
1. Mix the cookie dough
Whisk together the flour, baking powder, and salt in a medium bowl. In a separate large bowl, beat the softened butter and sugar until light and creamy. Add the egg and vanilla extract and mix until smooth. Gradually add the dry ingredients and mix until a soft dough forms.
2. Chill the dough
Divide the dough into two portions and flatten each into a disk. Wrap them in plastic wrap and refrigerate for at least 1 hour. Chilling helps the cookies hold their turkey shape while baking.
3. Cut out the turkey shapes
Preheat the oven to 350°F (175°C) and line baking sheets with parchment paper. Roll the chilled dough to about ¼-inch thickness on a lightly floured surface. Cut out turkey-shaped cookies using a turkey cookie cutter and arrange them on the prepared baking sheets.
4. Bake the cookies
Bake the cookies for 9–11 minutes, or until the edges are lightly golden while the centers remain pale. Let them cool on the baking sheet for 5 minutes, then transfer them to a wire rack to cool completely before decorating.
5. Prepare the royal icing
Whisk the powdered sugar, meringue powder, warm water, and vanilla extract until the icing is smooth and thick. Divide it among several bowls and tint portions brown, red, orange, and yellow with gel food coloring.
6. Decorate the turkey bodies
Pipe brown icing over the body and head of each cooled cookie, using a small spatula or the back of a spoon to smooth the surface. Allow the icing to set slightly before adding the remaining details.
7. Add the colorful feathers
Pipe fan-shaped feathers behind each turkey using red, orange, and yellow icing. Layer the colors from the outside toward the center to create a bright, colorful tail. Let each color set slightly before adding the next layer for clean edges.
8. Add the turkey details
Use brown icing to define the turkey’s head and body, then pipe orange icing for the beak and feet and red icing for the wattle. Add small white and black icing details for the eyes to give the turkeys their playful appearance.
9. Let the cookies set
Leave the decorated cookies at room temperature for several hours, or until the royal icing is completely firm. Once dry, carefully arrange the turkey cookies on a white serving tray.
Tip
For especially neat feathers, use piping bags fitted with small round tips and let each icing color dry for a few minutes before piping the next layer.
6. Caramel Apple Slices
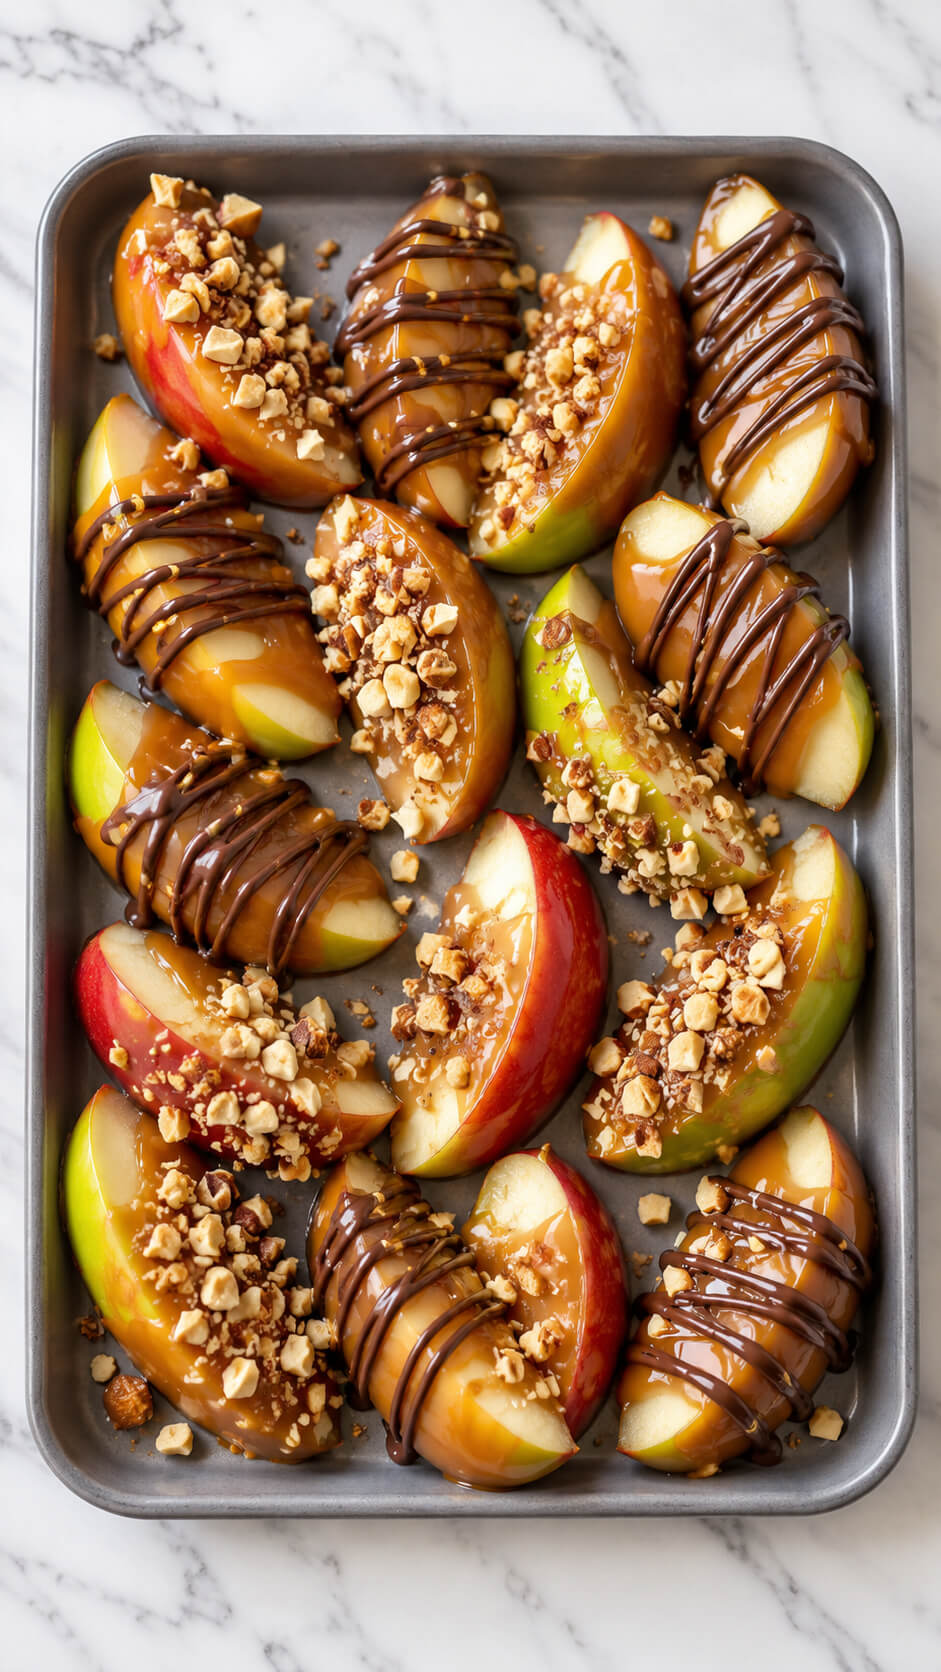
Caramel apples are a fall favorite, but whole apples can be difficult to eat.
Caramel apple slices offer the same delicious combination of tart apples and gooey caramel in a more convenient, bite-sized form.
You can dip them in chocolate, roll them in nuts, or even add a drizzle of white chocolate for extra flair.
A great treat that appeals to all ages!
Ingredients
- 4 medium apples, preferably Granny Smith or Honeycrisp
- 1 cup soft caramel candies
- 2 tablespoons heavy cream
- ½ cup semi-sweet or milk chocolate chips
- ½ cup chopped peanuts, almonds, or hazelnuts
- 1 tablespoon lemon juice
- 1 teaspoon vegetable oil or coconut oil
Instructions
1. Slice the apples
Wash and dry the apples thoroughly, then cut each apple into 6–8 wedges. Remove the seeds and cores. Toss the slices gently with lemon juice to help prevent browning, then pat them dry with paper towels.
2. Melt the caramel
Place the caramel candies and heavy cream in a microwave-safe bowl. Heat in 20–30-second intervals, stirring well after each interval, until the caramel is completely melted and smooth.
3. Coat the apple slices
Dip each apple slice into the warm caramel, coating about half to two-thirds of the slice. Let the excess caramel drip back into the bowl, then place the slices on a parchment-lined tray.
4. Melt the chocolate
Combine the chocolate chips and vegetable or coconut oil in a clean microwave-safe bowl. Heat in 20-second intervals, stirring between each one, until the chocolate is smooth and easy to drizzle.
5. Decorate the apples
Drizzle the melted chocolate over the caramel-coated apple slices in thin swirls and zigzag patterns. While the chocolate is still soft, sprinkle the chopped nuts over the slices so they stick to the caramel.
6. Chill the caramel apples
Place the tray in the refrigerator for 20–30 minutes, or until the caramel and chocolate have firmed up. This also makes the slices easier to handle and serve.
7. Serve the apple slices
Arrange the finished caramel apple slices on a gray serving tray and serve chilled or slightly softened at room temperature. For the best texture, enjoy them the same day.
Tip
Make sure the apple slices are very dry before dipping them in caramel. Moisture can cause the caramel to slide off the apples instead of forming a smooth, glossy coating.
7. Mini Pumpkin Cheesecakes
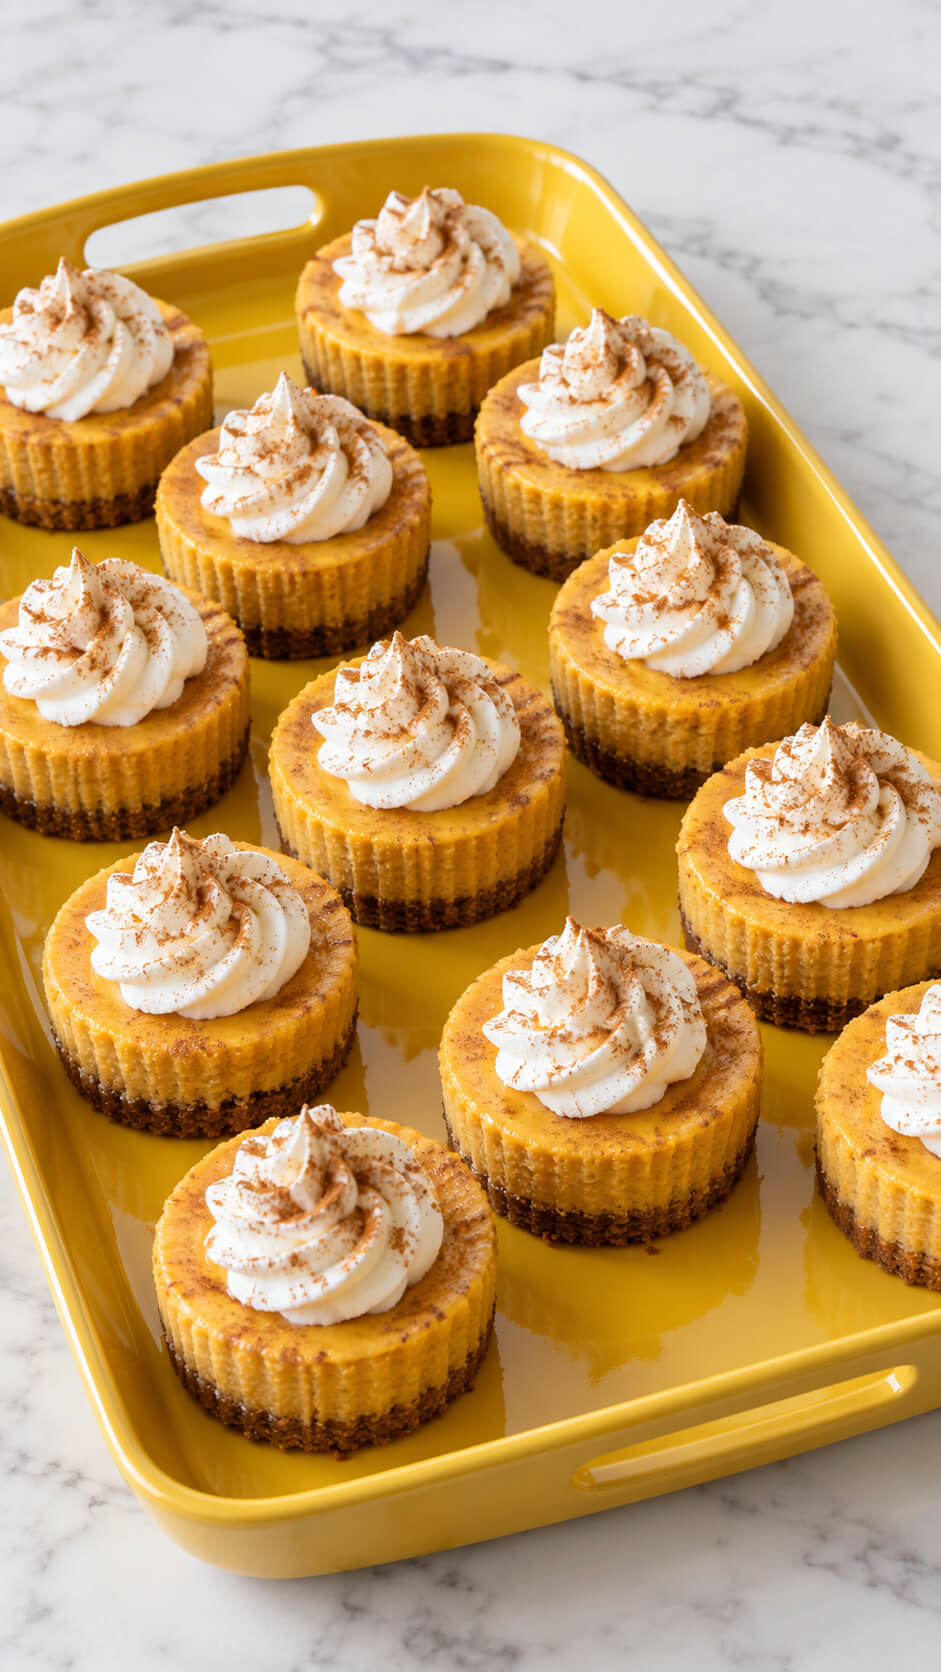
If you’re looking for a twist on traditional pumpkin pie, mini pumpkin cheesecakes are the way to go.
These individual cheesecakes combine creamy cheesecake filling with spiced pumpkin flavor, all on top of a buttery graham cracker crust.
They’re perfectly portioned and ideal for Thanksgiving gatherings where guests may want to sample a variety of desserts.
Ingredients
- 1½ cups graham cracker crumbs
- 3 tablespoons granulated sugar
- 5 tablespoons unsalted butter, melted
- 16 ounces cream cheese, softened
- ½ cup granulated sugar
- 2 large eggs
- 1 cup pumpkin purée
- 1 teaspoon vanilla extract
- 1 teaspoon ground cinnamon
- ½ teaspoon ground ginger
- ¼ teaspoon ground nutmeg
- ¼ teaspoon salt
- ½ cup whipped cream, for topping
- Ground cinnamon, for sprinkling
Instructions
1. Prepare the crust
Preheat the oven to 350°F (175°C). Line a 12-cup muffin pan with paper liners. In a bowl, combine the graham cracker crumbs, 3 tablespoons sugar, and melted butter until the mixture resembles wet sand. Divide it evenly among the liners, pressing the crumbs firmly into the bottoms.
2. Make the pumpkin filling
Beat the softened cream cheese and ½ cup sugar until smooth and creamy. Add the eggs one at a time, mixing just until incorporated. Stir in the pumpkin purée, vanilla extract, cinnamon, ginger, nutmeg, and salt until the filling is smooth and evenly colored.
3. Fill the cheesecake cups
Spoon the pumpkin cheesecake mixture over the prepared crusts, filling each liner about three-quarters full. Gently tap the pan on the counter once or twice to release any large air bubbles.
4. Bake the cheesecakes
Bake for 20–25 minutes, or until the centers are almost set and have only a slight jiggle when the pan is gently moved. Avoid overbaking, as the cheesecakes will continue to firm up as they cool.
5. Cool the cheesecakes
Remove the pan from the oven and allow the cheesecakes to cool at room temperature for about 30 minutes. Transfer them to the refrigerator and chill for at least 2 hours, or until completely firm and cold.
6. Add the whipped cream
Just before serving, pipe or spoon a swirl of whipped cream onto each chilled cheesecake. Finish with a light sprinkle of ground cinnamon for a festive fall touch.
7. Serve the cheesecakes
Carefully remove the mini cheesecakes from the liners and arrange them on a serving tray. Serve chilled for the creamiest texture and best flavor.
Tip
For the cleanest-looking cheesecakes, chill them overnight before adding the whipped cream. The extra chilling time helps the pumpkin filling become firm and creamy while making the cheesecakes easier to remove from their liners.
8. Maple Glazed Donuts
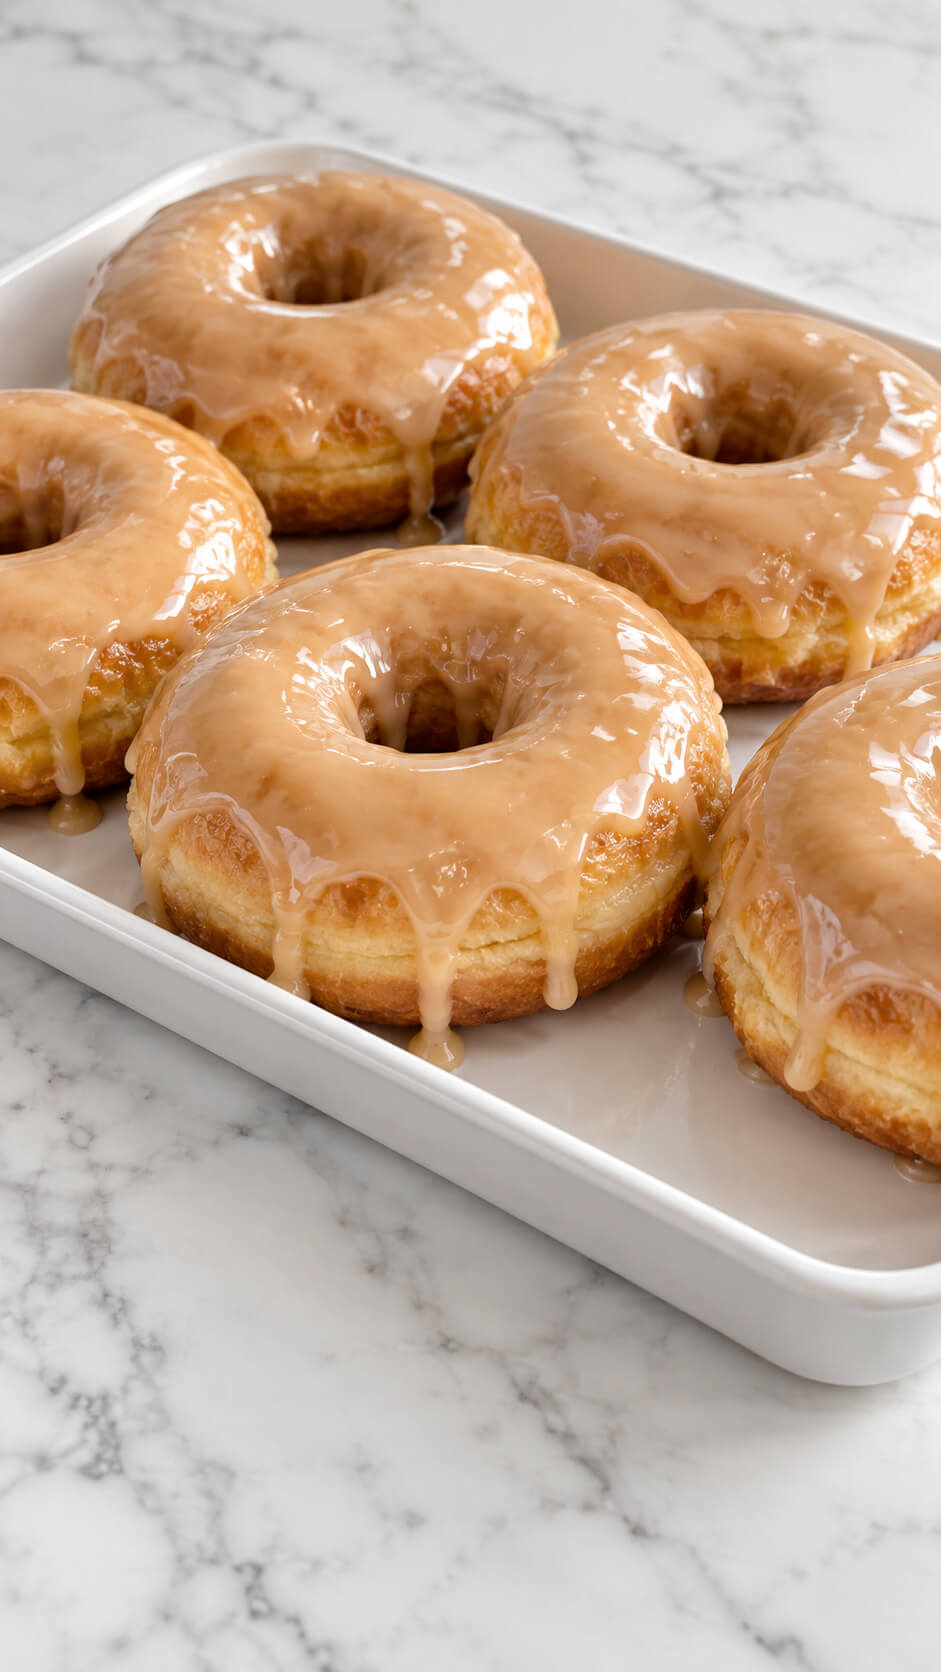
For a unique Thanksgiving dessert, try serving maple-glazed donuts.
The rich, sweet flavor of maple pairs beautifully with the fall spices that are often associated with the season.
These donuts can be baked or fried and are perfect for a casual, laid-back gathering.
Serve them warm for an extra-cozy treat, and they’ll disappear in no time.
Ingredients
- 3 cups all-purpose flour
- 2¼ teaspoons active dry yeast
- ¼ cup granulated sugar
- ½ teaspoon salt
- ¾ cup warm whole milk
- 2 large eggs
- 4 tablespoons unsalted butter, melted
- 1 teaspoon vanilla extract
- Vegetable oil, for frying
For the maple glaze
- 1½ cups powdered sugar
- ⅓ cup pure maple syrup
- 2 tablespoons melted unsalted butter
- 1–2 tablespoons milk
- ½ teaspoon vanilla extract
- Pinch of salt
Instructions
1. Activate the yeast
Combine the warm milk, yeast, and 1 tablespoon of the sugar in a small bowl. Let it sit for 5–10 minutes, until the mixture becomes foamy, which indicates that the yeast is active.
2. Mix the donut dough
Whisk together the flour, remaining sugar, and salt in a large bowl. Add the yeast mixture, eggs, melted butter, and vanilla. Mix until a soft, slightly sticky dough forms.
3. Knead the dough
Transfer the dough to a lightly floured surface and knead for about 6–8 minutes, until it becomes smooth and elastic. Place it in a lightly greased bowl, cover, and let it rise in a warm place for about 1 hour, or until doubled in size.
4. Shape the donuts
Roll the risen dough to about ½-inch thickness on a lightly floured surface. Cut out donut shapes using a donut cutter or two round cutters. Place the donuts on a lightly floured tray, cover loosely, and let them rise for another 30–40 minutes.
5. Fry the donuts
Heat about 2 inches of vegetable oil in a deep, heavy saucepan to 350°F (175°C). Fry the donuts in small batches for about 1–2 minutes per side, until puffed and golden brown. Transfer them to a wire rack lined underneath with paper towels to drain.
6. Make the maple glaze
Whisk the powdered sugar, maple syrup, melted butter, vanilla, and salt together in a bowl. Add milk a little at a time until the glaze is smooth, glossy, and thick enough to coat the donuts while still dripping slowly.
7. Glaze the donuts
Dip the slightly cooled donuts into the maple glaze, coating the tops generously. Place them on a wire rack and allow the excess glaze to drip down the sides and set for several minutes.
8. Serve the donuts
Serve the maple-glazed donuts while fresh and slightly warm. The glaze should remain shiny and sticky, with a soft, fluffy donut underneath.
Tip
For an especially glossy maple glaze, use pure maple syrup and dip the donuts while they are slightly warm. Let the glaze set for 5–10 minutes before serving.
9. Apple Pie Bars
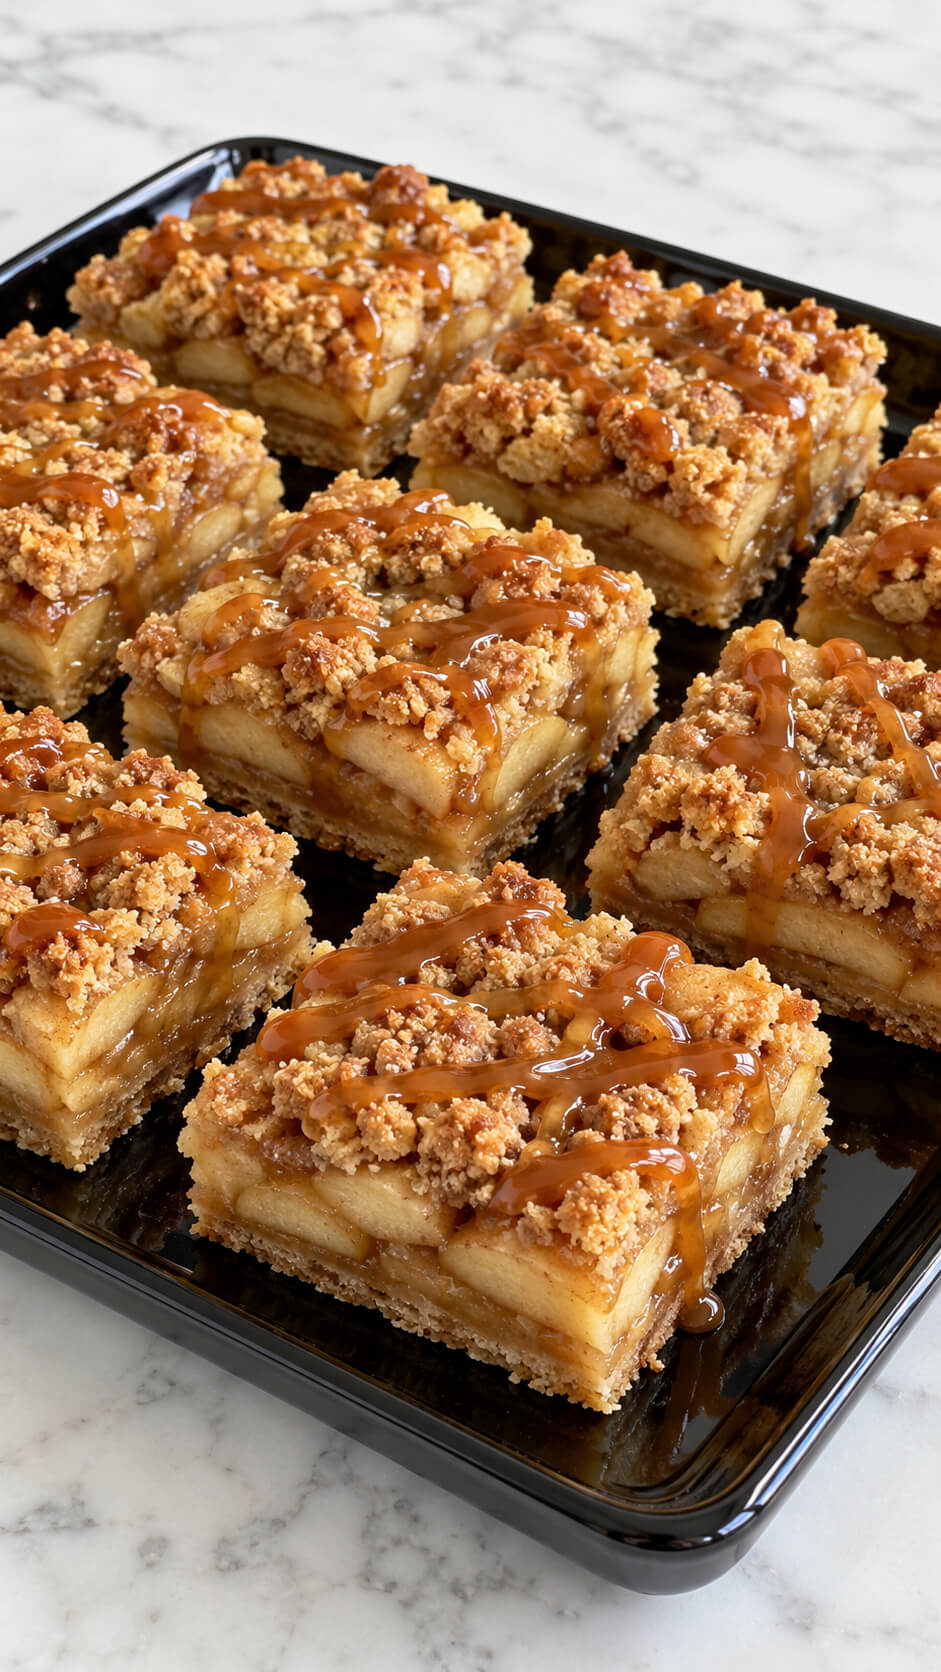
Apple pie is a must-have at Thanksgiving, but apple pie bars make serving easier.
These bars have all the elements of traditional apple pie—tender apples, cinnamon, and flaky crust—but in a more convenient, sliceable form.
They’re easy to transport and can be eaten by hand, making them a great option for larger gatherings.
Ingredients
- 2 cups all-purpose flour
- ½ cup granulated sugar
- ½ teaspoon salt
- ¾ cup unsalted butter, melted
- 1 teaspoon vanilla extract
- 5–6 medium apples, peeled, cored, and thinly sliced
- ¼ cup granulated sugar
- 2 tablespoons all-purpose flour
- 1 teaspoon ground cinnamon
- ¼ teaspoon ground nutmeg
- 1 tablespoon lemon juice
For the cinnamon streusel
- 1 cup all-purpose flour
- ½ cup old-fashioned rolled oats
- ½ cup packed brown sugar
- ½ teaspoon ground cinnamon
- ¼ teaspoon salt
- ½ cup unsalted butter, melted
For the caramel drizzle
- ½ cup caramel sauce, homemade or store-bought
Instructions
1. Prepare the baking pan
Preheat the oven to 350°F (175°C). Line a 9 × 13-inch baking pan with parchment paper, leaving some overhang on the sides to make the bars easier to remove after baking.
2. Make the shortbread crust
Combine the flour, granulated sugar, and salt in a large bowl. Stir in the melted butter and vanilla until a soft, crumbly dough forms. Press the mixture firmly and evenly into the prepared pan, then bake for 15–18 minutes, until the edges are lightly golden.
3. Prepare the apple filling
Place the sliced apples in a large bowl and toss them with the sugar, flour, cinnamon, nutmeg, and lemon juice. Mix gently until the apples are evenly coated and the flour has been absorbed.
4. Layer the apples
Arrange the seasoned apple slices evenly over the warm crust, slightly overlapping them to create a generous layer. Press them down gently so the filling stays compact while baking.
5. Make the cinnamon streusel
Combine the flour, oats, brown sugar, cinnamon, and salt in a bowl. Pour in the melted butter and stir with a fork until coarse, crumbly clusters form. Sprinkle the streusel evenly over the apples.
6. Bake the apple pie bars
Bake for 40–50 minutes, until the streusel is golden brown and the apples are tender and bubbling around the edges. If the topping begins to brown too quickly, loosely cover the pan with foil for the remaining baking time.
7. Cool the bars completely
Let the bars cool in the pan for at least 1 hour, then refrigerate for another 1–2 hours for cleaner slices. Use the parchment overhang to lift the chilled slab from the pan and cut it into neat squares.
8. Add the caramel drizzle
Warm the caramel sauce slightly if needed so it is easy to drizzle. Spoon or drizzle the caramel over the individual apple pie bars just before serving.
Tip
For the cleanest cuts and the most defined apple layers, chill the bars thoroughly before slicing. For an especially indulgent finish, warm individual bars slightly before serving and add an extra drizzle of caramel.
10. Roasted Cinnamon Almonds
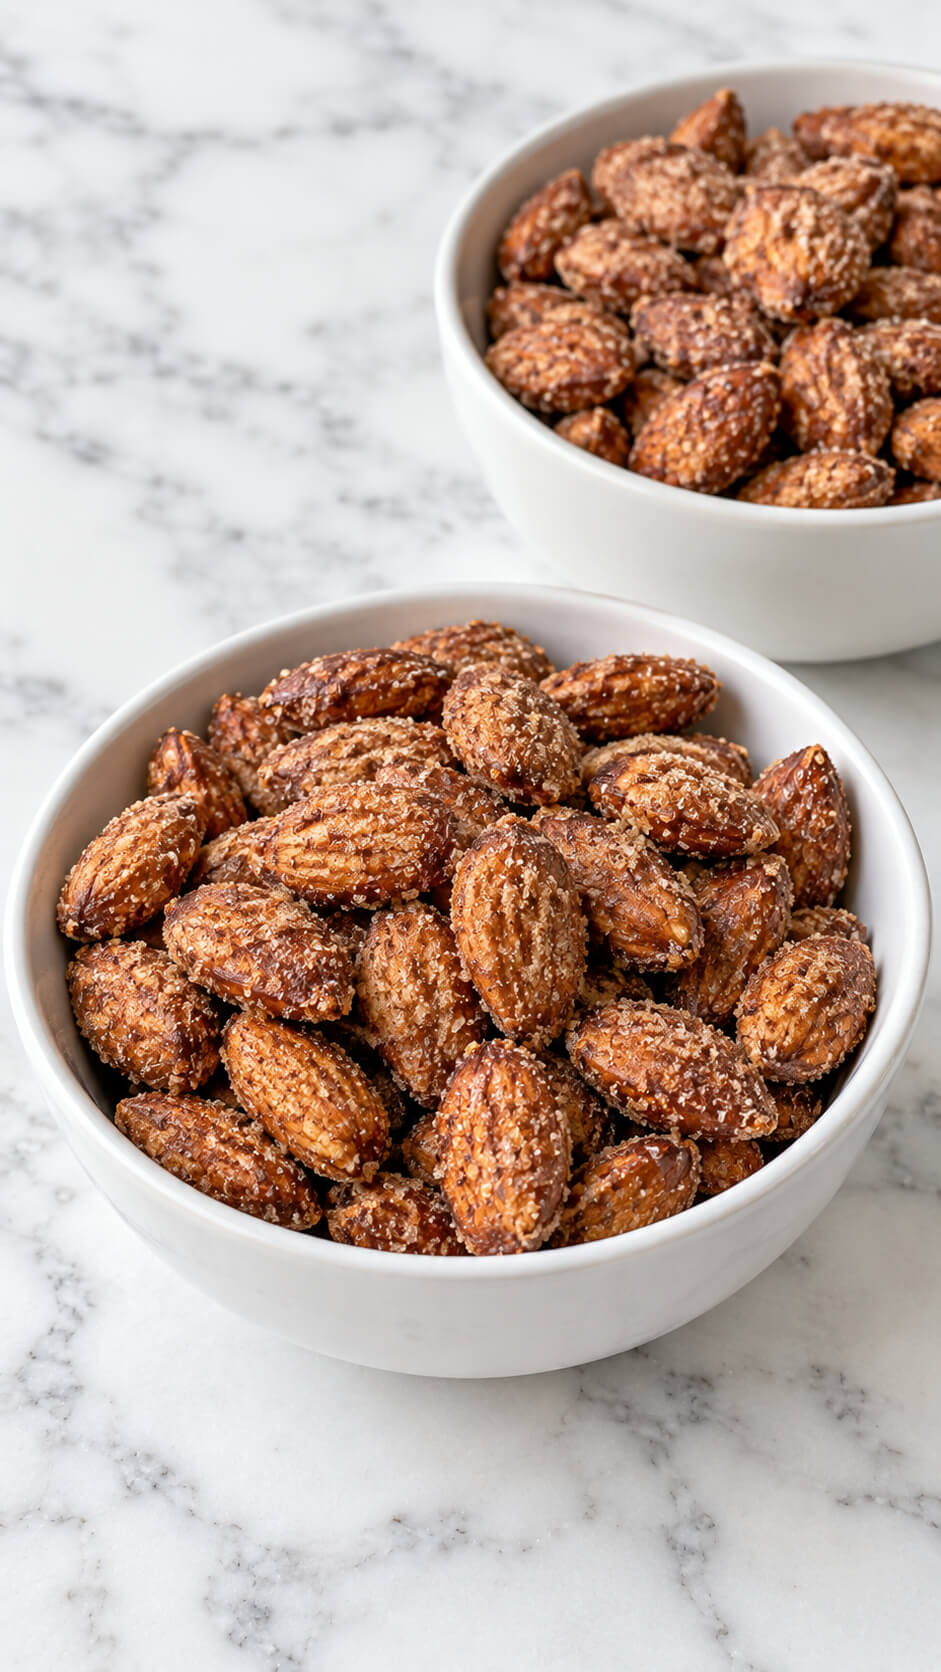
A tasty snack that fills the air with the scent of cinnamon, roasted cinnamon almonds are a crunchy, sweet treat that’s perfect for Thanksgiving.
They’re easy to prepare in advance and can be placed in small bowls around the house for guests to munch on.
Plus, they offer a healthier alternative to some of the more indulgent Thanksgiving sweets.
Ingredients
- 2 cups raw whole almonds
- ½ cup granulated sugar
- 1½ teaspoons ground cinnamon
- ¼ teaspoon salt
- 1 egg white
- 1 teaspoon vanilla extract
- 1 tablespoon water
Instructions
1. Prepare the oven
Preheat the oven to 300°F (150°C). Line a baking sheet with parchment paper to prevent the cinnamon-sugar coating from sticking.
2. Make the cinnamon-sugar mixture
Combine the granulated sugar, ground cinnamon, and salt in a small bowl. Stir well until the cinnamon is evenly distributed throughout the sugar.
3. Coat the almonds
Whisk the egg white, vanilla extract, and water in a large bowl until foamy. Add the almonds and toss thoroughly until every almond is lightly coated with the egg-white mixture.
4. Add the cinnamon sugar
Pour the cinnamon-sugar mixture over the coated almonds. Stir until the almonds are evenly covered and the sugar mixture clings to their surfaces.
5. Spread the almonds
Transfer the coated almonds to the prepared baking sheet and spread them into a single layer. Separate any almonds that are stuck together so they develop an even, crisp coating.
6. Roast the almonds
Bake for 30–40 minutes, stirring every 10 minutes to help the coating brown evenly. The almonds are ready when the coating is dry, crisp, and fragrant.
7. Cool the almonds
Remove the baking sheet from the oven and let the almonds cool completely. The cinnamon-sugar coating will become noticeably crispier as it cools.
8. Serve the almonds
Once completely cool, transfer the roasted almonds to serving bowls. Enjoy them as a snack or store them in an airtight container at room temperature.
Tip
For a more rustic, heavily textured coating, let the egg-white mixture become slightly foamy before adding the almonds, and avoid overcrowding the baking sheet.
11. Cranberry Orange Scones
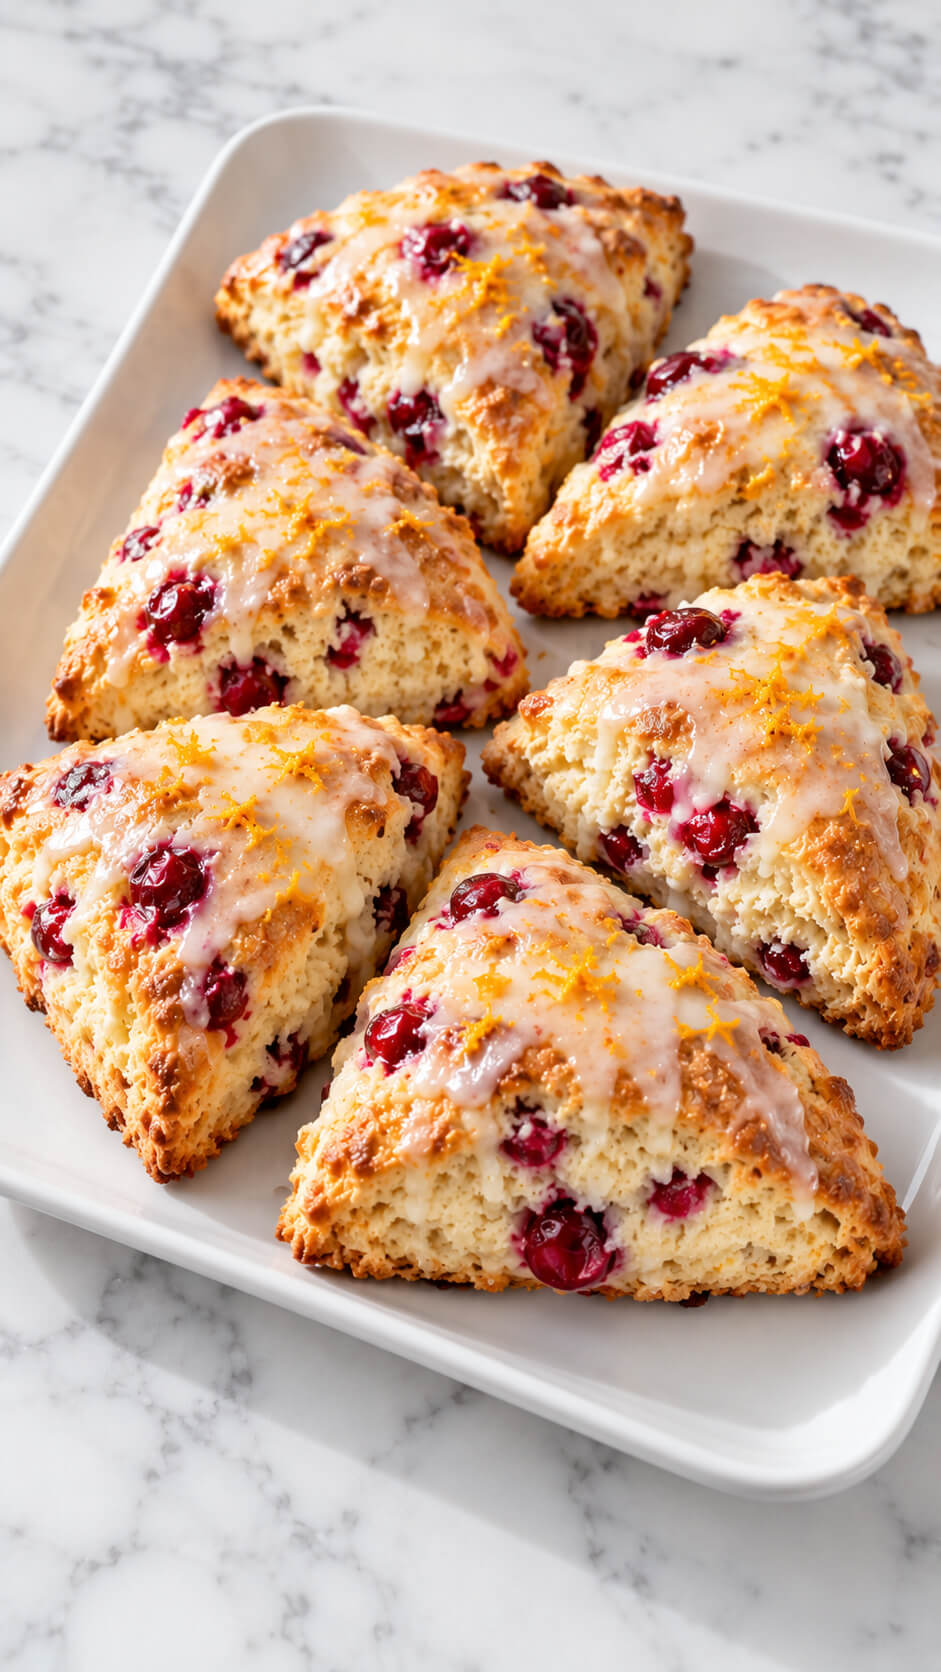
Cranberry orange scones are the perfect blend of tart and sweet.
The bright flavors of fresh cranberries and zesty orange make these scones a delightful addition to any Thanksgiving brunch or dessert spread.
Lightly sweetened and served with butter or jam, these scones are a treat that pairs wonderfully with coffee or tea, adding a refreshing twist to the dessert table.
Ingredients
- 2 cups all-purpose flour
- ⅓ cup granulated sugar
- 2 teaspoons baking powder
- ½ teaspoon salt
- ½ cup cold unsalted butter, cut into small cubes
- ¾ cup dried cranberries
- 1 tablespoon finely grated orange zest
- ½ cup heavy cream
- 1 large egg
- 1 teaspoon vanilla extract
For the orange glaze
- 1 cup powdered sugar
- 2 tablespoons fresh orange juice
- ½ teaspoon finely grated orange zest
Instructions
1. Prepare the oven and baking sheet
Preheat the oven to 400°F (200°C). Line a baking sheet with parchment paper and set it aside.
2. Combine the dry ingredients
Whisk together the flour, granulated sugar, baking powder, and salt in a large mixing bowl until evenly combined.
3. Cut in the cold butter
Add the cold cubed butter to the flour mixture. Use a pastry cutter or your fingertips to work the butter into the flour until the mixture resembles coarse crumbs with a few pea-sized pieces of butter remaining.
4. Add the cranberries and orange zest
Stir the dried cranberries and finely grated orange zest into the flour mixture, distributing them evenly throughout the dough.
5. Mix the wet ingredients
In a separate bowl, whisk together the heavy cream, egg, and vanilla extract until smooth and well combined.
6. Form the scone dough
Pour the wet mixture into the dry ingredients and gently stir until a shaggy dough forms. Avoid overmixing, as this can make the scones tough.
7. Shape the scones
Transfer the dough to a lightly floured surface and gently bring it together. Shape it into a round about 1-inch thick, then cut it into 8 wedges. Arrange the wedges on the prepared baking sheet, leaving space between them.
8. Bake the scones
Bake for 18–22 minutes, or until the tops are golden brown and the edges are lightly crisp. Transfer the scones to a wire rack and let them cool for about 10 minutes.
9. Make the orange glaze
Whisk the powdered sugar, fresh orange juice, and orange zest together in a small bowl until smooth. Add a little more orange juice if needed to create a pourable glaze.
10. Glaze the scones
Drizzle the orange glaze over the slightly cooled scones. Let the glaze sit for a few minutes until it begins to set, then serve.
Tip
For especially tender, flaky scones, keep the butter and cream as cold as possible and handle the dough gently. You can also chill the shaped scones for 15 minutes before baking for an even better rise.
12. Pumpkin Spice Truffles
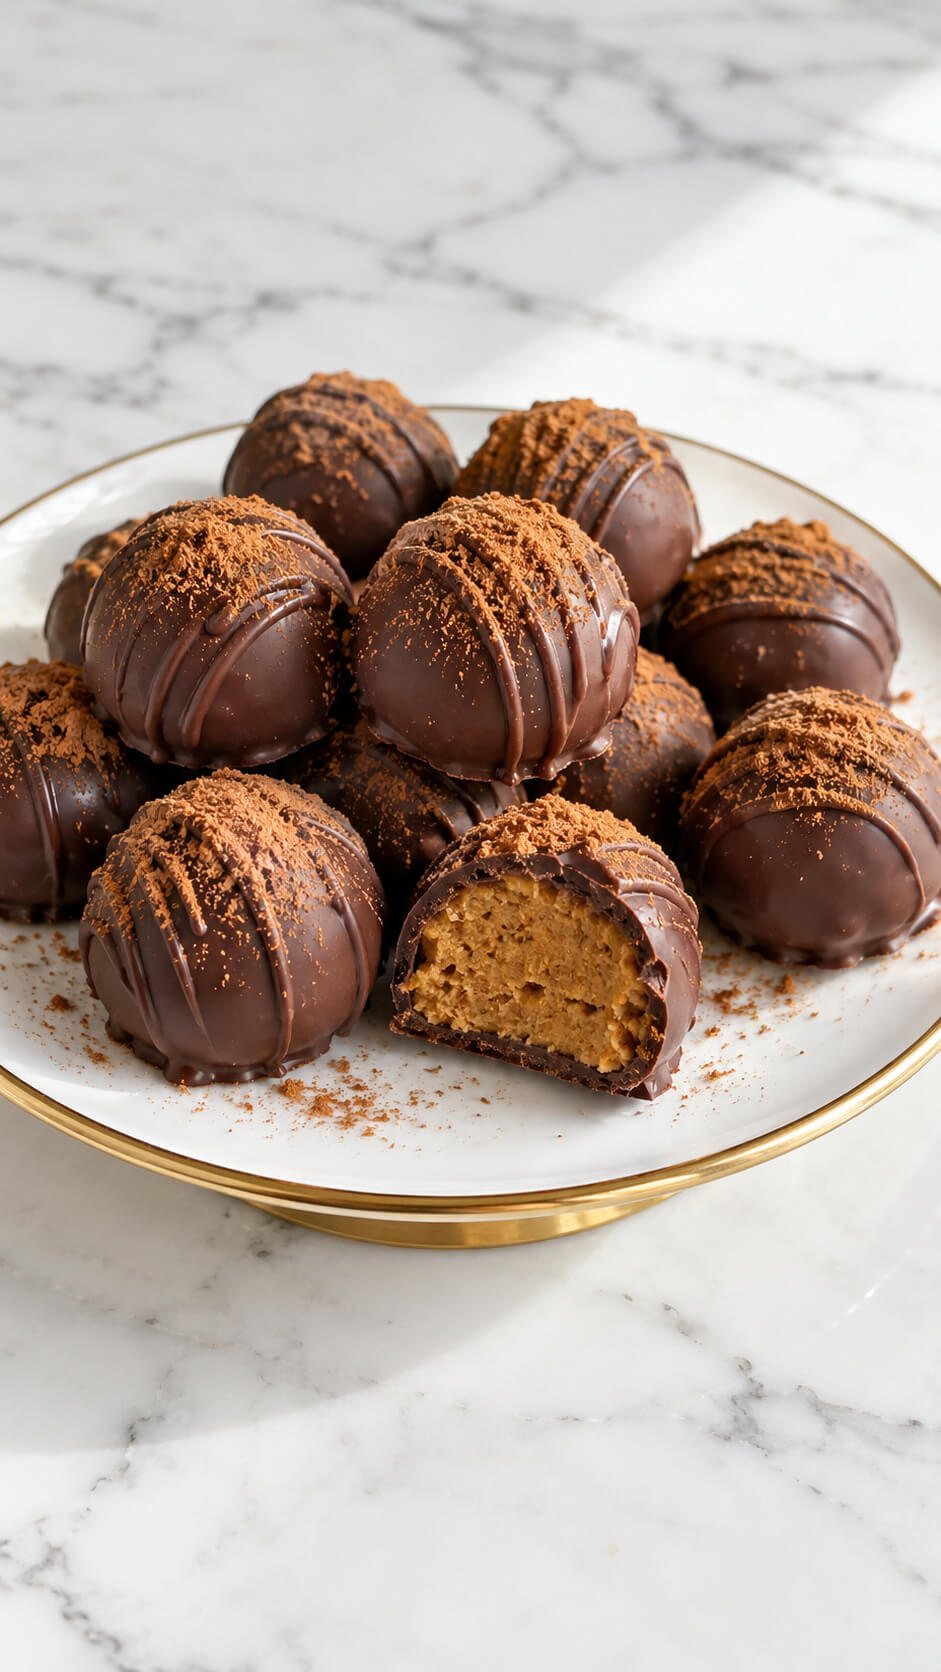
For a truly indulgent treat, pumpkin spice truffles deliver a rich, creamy flavor.
These bite-sized delights are packed with spiced pumpkin and dipped in chocolate, making them a sophisticated and satisfying dessert option.
They can be made ahead and stored in the fridge, making them a low-maintenance yet impressive addition to your Thanksgiving feast.
Ingredients
- 1 cup pumpkin purée
- 1½ cups crushed graham crackers
- ½ cup powdered sugar
- ½ cup creamy peanut butter
- 2 tablespoons melted butter
- 1 teaspoon pumpkin pie spice
- ½ teaspoon ground cinnamon
- ¼ teaspoon salt
- 2 cups dark or semi-sweet chocolate chips
- 1 tablespoon coconut oil
- 1 teaspoon ground cinnamon, for dusting
Instructions
1. Combine the pumpkin filling
In a large bowl, mix the pumpkin purée, crushed graham crackers, powdered sugar, peanut butter, melted butter, pumpkin pie spice, cinnamon, and salt until the mixture forms a thick, cohesive dough.
2. Chill the mixture
Cover the bowl and refrigerate the pumpkin mixture for about 30 minutes, or until it is firm enough to shape easily.
3. Shape the truffles
Scoop out approximately 1 tablespoon of the chilled mixture at a time and roll it between your palms to form smooth, round balls. Place the truffles on a parchment-lined baking sheet.
4. Chill the truffles again
Refrigerate the shaped truffles for 20–30 minutes to firm them up. This helps them hold their shape when dipped in chocolate.
5. Melt the chocolate coating
Place the chocolate chips and coconut oil in a microwave-safe bowl. Heat in 20-second intervals, stirring well between each interval, until the chocolate is completely melted and smooth.
6. Coat the truffles
Dip each chilled truffle into the melted chocolate using a fork or dipping tool, allowing excess chocolate to drip back into the bowl. Return each coated truffle to the parchment-lined baking sheet.
7. Add the cinnamon finish
While the chocolate is still soft, lightly dust each truffle with ground cinnamon. For a decorative finish, drizzle a little extra melted chocolate over the tops.
8. Set the chocolate coating
Refrigerate the truffles for 20–30 minutes, or until the chocolate coating has completely hardened. Allow them to sit at room temperature for a few minutes before serving.
Tip
For an especially smooth, luxurious coating, use good-quality chocolate and make sure the pumpkin filling is thoroughly chilled before dipping. Store the finished truffles in an airtight container in the refrigerator for up to 5 days.
13. Cornbread Muffins
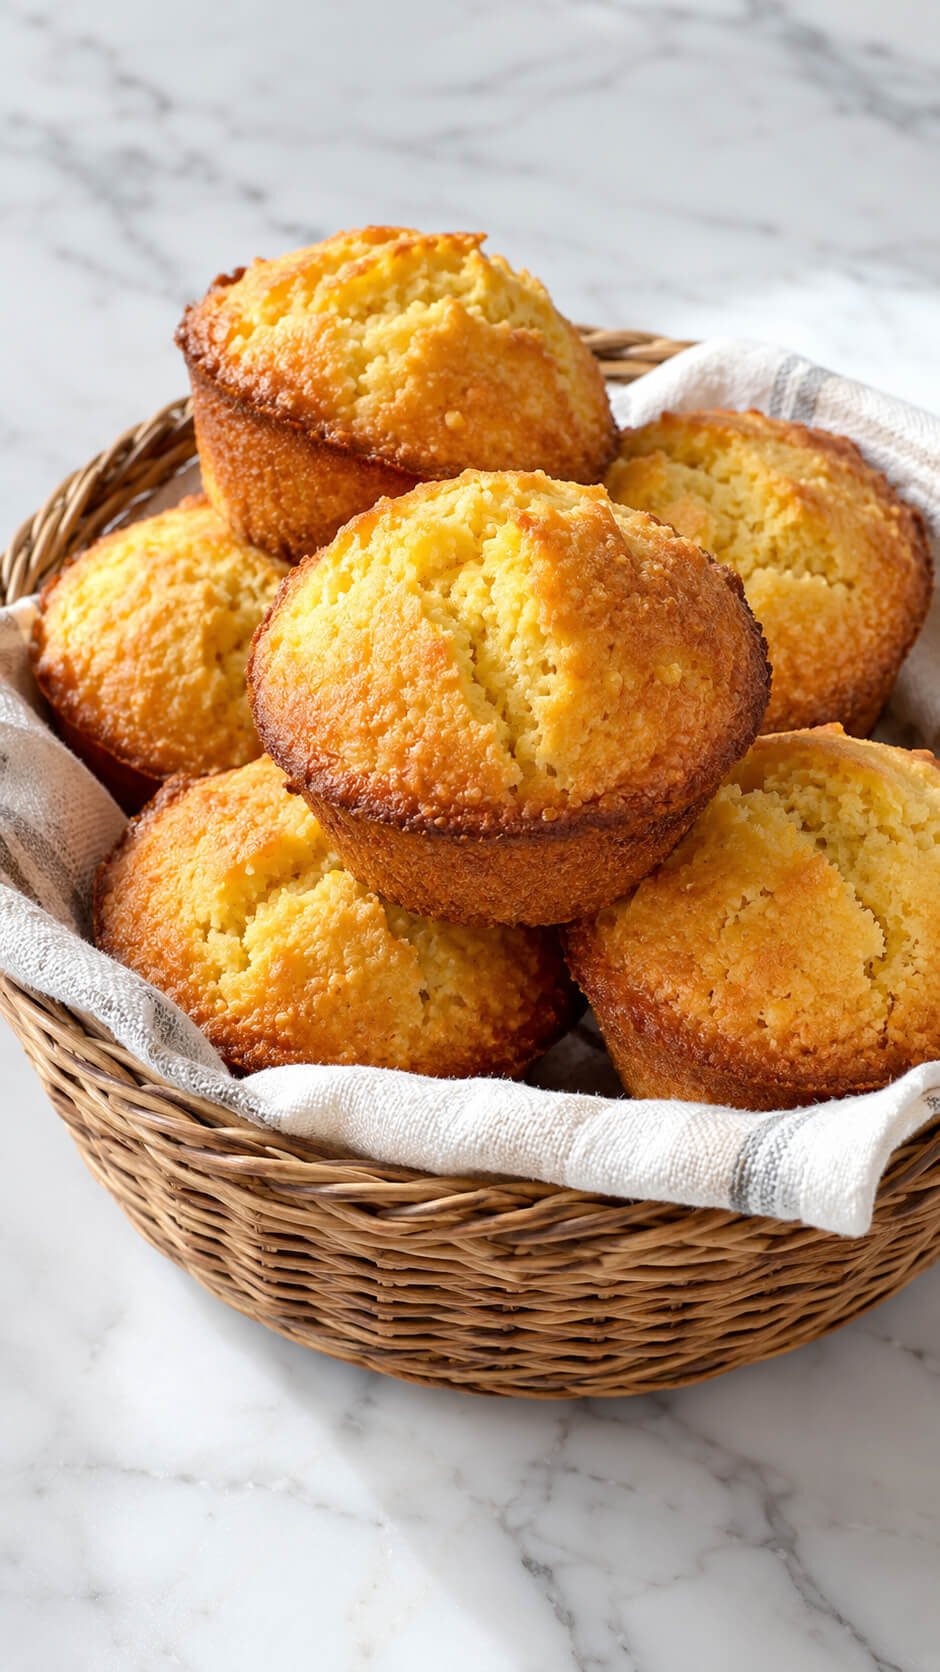
Cornbread is a Thanksgiving classic, and serving it as individual muffins makes it even easier.
These mini cornbreads can be savory or slightly sweet, and they’re perfect for pairing with soups, salads, or the main course.
Add a touch of honey butter for a delightful finishing touch that guests will love.
Ingredients
- 1½ cups yellow cornmeal
- 1 cup all-purpose flour
- ⅓ cup granulated sugar
- 1 tablespoon baking powder
- ½ teaspoon salt
- 2 large eggs
- 1 cup whole milk
- ½ cup unsalted butter, melted and slightly cooled
- ¼ cup honey
- 1 cup fresh or canned corn kernels, optional
Instructions
1. Preheat the oven
Preheat the oven to 400°F (200°C). Grease a 12-cup muffin pan lightly with butter or cooking spray, or line it with paper muffin liners.
2. Combine the dry ingredients
In a large bowl, whisk together the cornmeal, flour, sugar, baking powder, and salt until evenly combined and there are no visible lumps.
3. Mix the wet ingredients
In a separate bowl, whisk the eggs, milk, melted butter, and honey until smooth and well combined. Make sure the melted butter has cooled slightly so it does not cook the eggs.
4. Make the batter
Pour the wet ingredients into the bowl with the dry ingredients. Stir gently with a spatula just until combined. If using corn kernels, fold them in at the end. Avoid overmixing, as this can make the muffins dense.
5. Fill the muffin cups
Divide the batter evenly among the prepared muffin cups, filling each about three-quarters full. For taller, more generously domed muffins, fill them slightly closer to the top.
6. Bake the muffins
Bake for 16–20 minutes, until the tops are golden brown and cracked and a toothpick inserted into the center comes out clean or with a few moist crumbs attached.
7. Cool the muffins
Let the muffins cool in the pan for about 5 minutes, then transfer them to a wire rack. Serve warm for the softest, fluffiest texture.
Tip
For especially crisp, golden-brown edges, preheat the greased muffin pan in the oven for a few minutes before adding the batter. The hot pan helps the batter develop beautifully browned edges while keeping the centers tender.
14. Chocolate-Pecan Tartlets
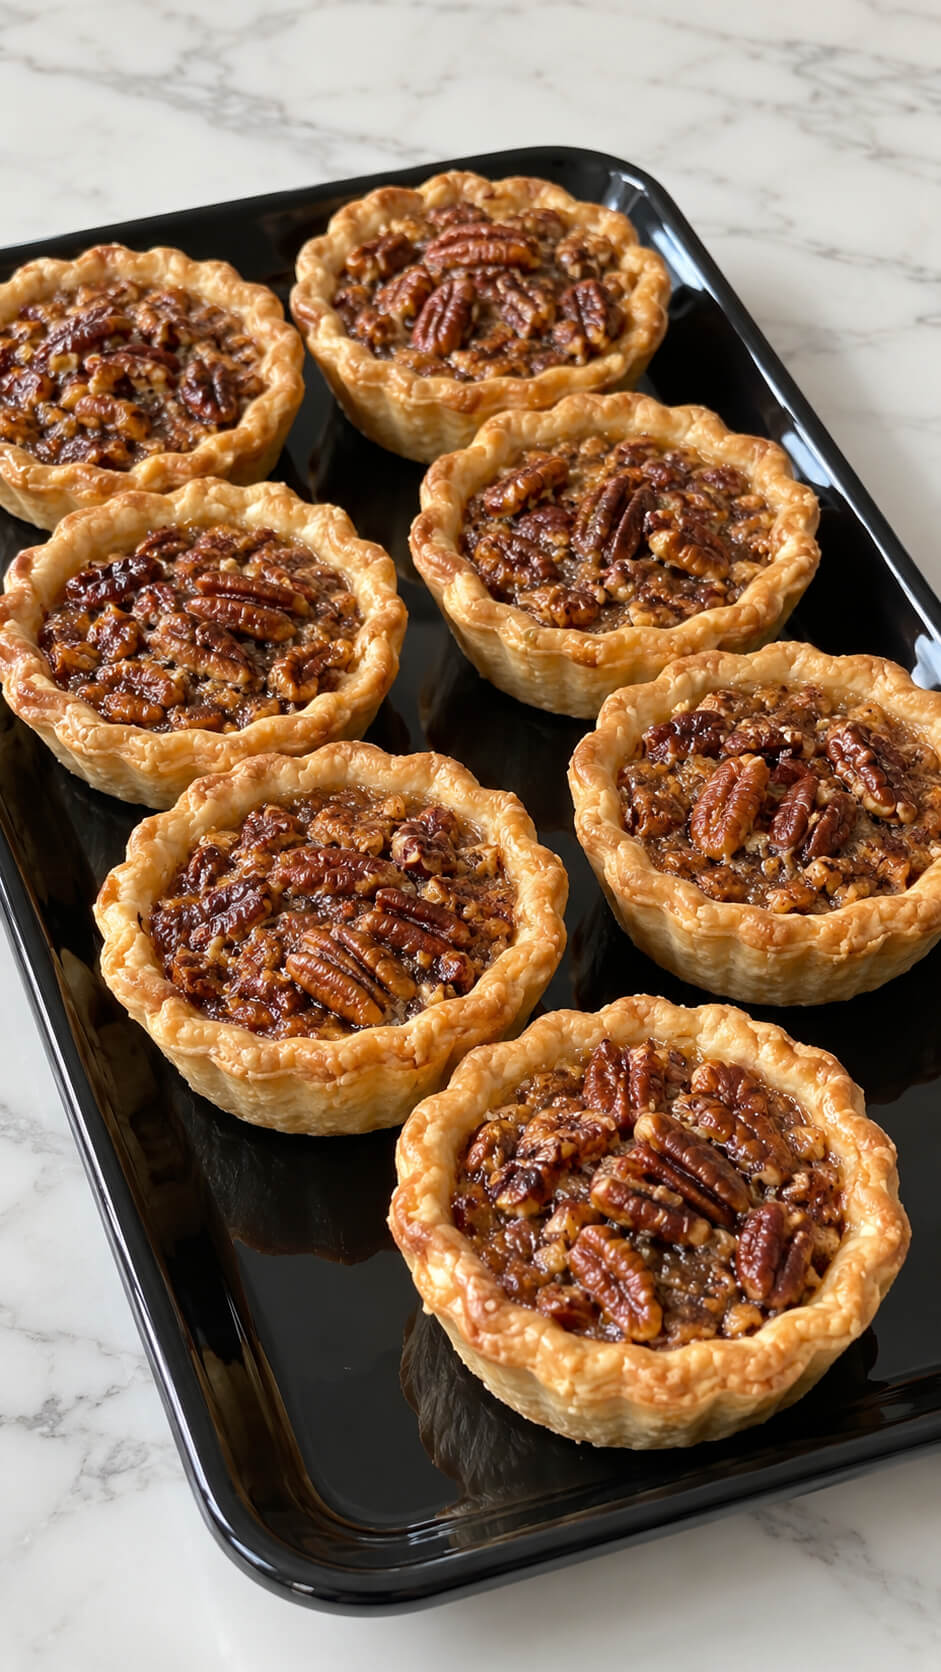
For a twist on the traditional pecan pie, try serving chocolate-pecan tartlets.
These mini tarts have a rich, chocolatey filling with a crunchy pecan topping, offering a delicious balance of textures and flavors.
The individual portions make them easy to serve and enjoy, and the combination of chocolate and pecans feels extra indulgent for the holiday.
Ingredients
- 1½ cups all-purpose flour
- ½ teaspoon salt
- 1 tablespoon granulated sugar
- ½ cup cold unsalted butter, cut into small cubes
- 3–4 tablespoons ice-cold water
- 1 cup pecan halves, roughly chopped
- ½ cup packed light brown sugar
- ⅓ cup light corn syrup
- ¼ cup unsalted butter, melted
- 1 large egg
- 1 teaspoon vanilla extract
- ¼ teaspoon salt
Instructions
1. Make the pie crust
Mix the flour, salt, and sugar in a bowl. Cut in the cold butter with a pastry cutter or your fingertips until the mixture resembles coarse crumbs. Add the ice-cold water, 1 tablespoon at a time, mixing just until the dough comes together. Shape into a disk, wrap, and refrigerate for 30 minutes.
2. Prepare the pecan filling
Combine the brown sugar, corn syrup, melted butter, egg, vanilla extract, and salt in a bowl. Whisk until smooth, then fold in the chopped pecans, making sure they are evenly coated in the caramel mixture.
3. Shape the mini crusts
Preheat the oven to 350°F (175°C). Lightly grease a muffin tin. Roll the chilled dough out on a lightly floured surface to about ⅛-inch thickness. Cut out circles slightly larger than the muffin cups and gently press each circle into a cup, shaping the dough up the sides.
4. Fill the pie crusts
Spoon the pecan mixture into each prepared crust, filling each one about three-quarters full. Arrange a few whole pecan halves on top of each pie for an attractive finish and extra crunch.
5. Bake the mini pies
Bake for 22–28 minutes, until the crusts are golden brown and the pecan filling is bubbling and set around the edges. The centers should still have a slight jiggle when the pan is gently moved.
6. Cool the pies
Let the pies cool in the muffin tin for about 10–15 minutes before carefully removing them. Transfer them to a wire rack and allow them to cool completely so the caramel filling can firm up.
Tip
For an especially glossy, bakery-style finish, brush the exposed crust lightly with beaten egg before baking. Toasting the pecans for 5–7 minutes at 350°F (175°C) before chopping will also give the pies a deeper, richer flavor.
15. Maple Pecan Popcorn
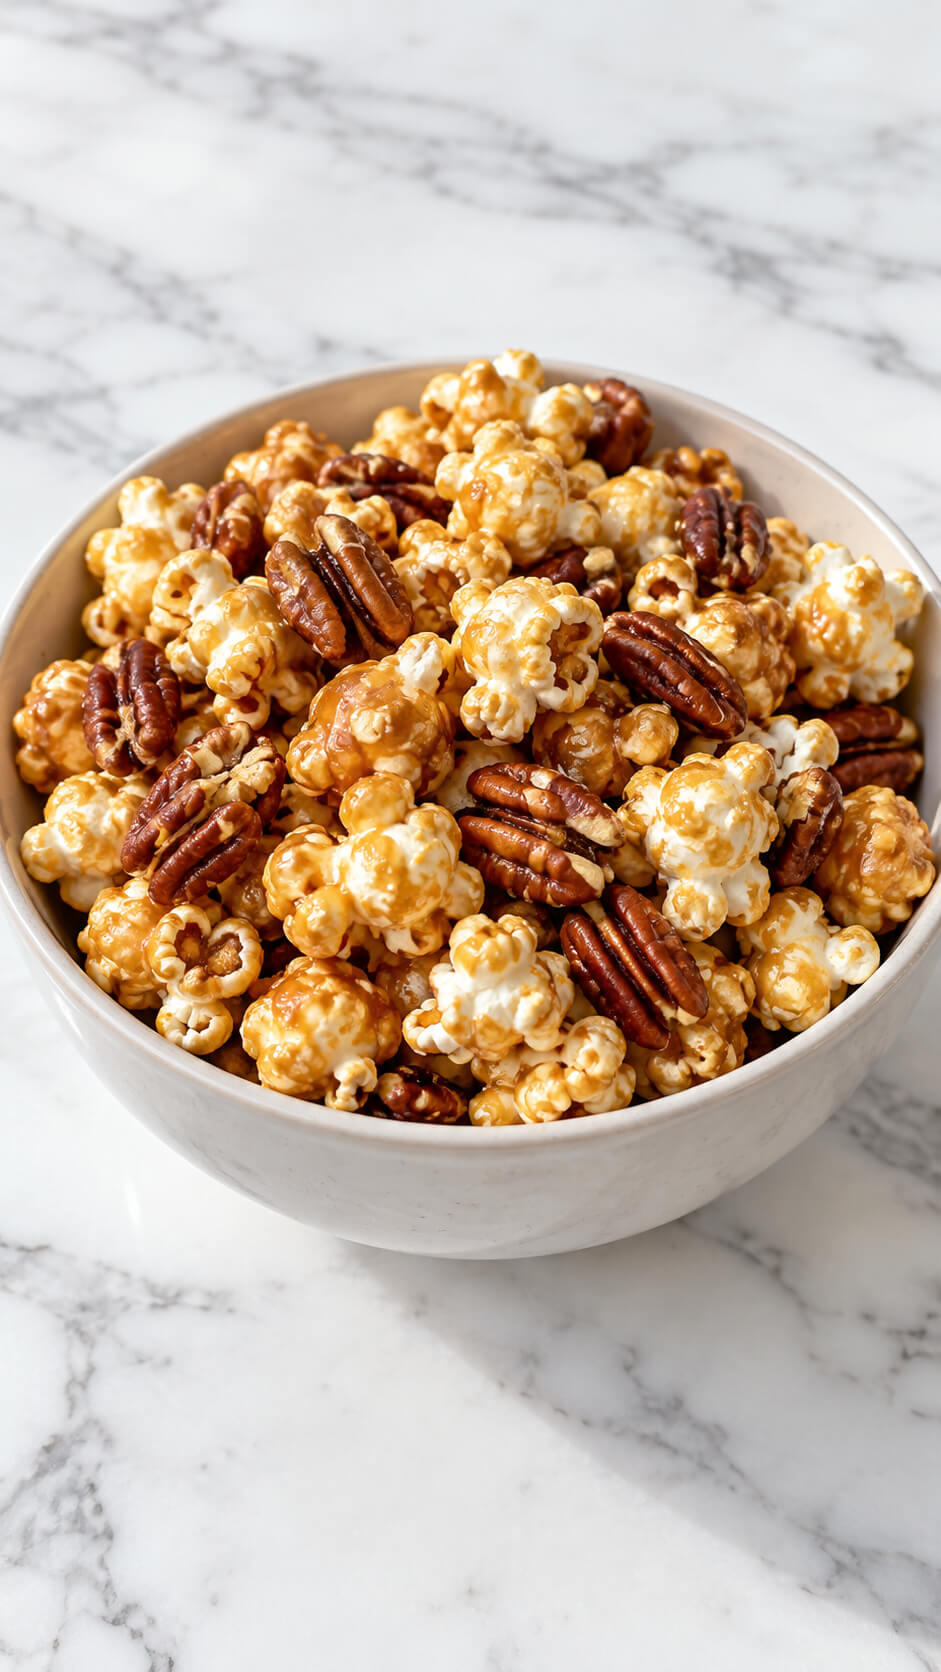
This sweet and salty snack is the perfect way to keep guests munching throughout the holiday.
Maple pecan popcorn combines the rich sweetness of maple syrup with the buttery crunch of pecans and popcorn.
It’s an easy treat to whip up and makes for a great party favor or late-night snack during Thanksgiving festivities.
Ingredients
- 8 cups popped popcorn
- 1 cup pecan halves, roughly chopped
- ½ cup pure maple syrup
- ¼ cup unsalted butter
- ¼ cup packed brown sugar
- ½ teaspoon vanilla extract
- ¼ teaspoon salt
- ¼ teaspoon baking soda
Instructions
1. Prepare the popcorn and pecans
Preheat the oven to 300°F (150°C). Line a large baking sheet with parchment paper. Place the popped popcorn and chopped pecans in a large bowl and set aside.
2. Make the maple glaze
Melt the butter in a small saucepan over medium heat. Add the maple syrup, brown sugar, and salt, stirring until the mixture comes to a gentle boil. Cook for 2–3 minutes, stirring occasionally, until slightly thickened. Remove from the heat and stir in the vanilla extract and baking soda.
3. Coat the popcorn
Pour the warm maple glaze over the popcorn and pecans. Gently toss with a spatula or large spoon until the popcorn and pecans are evenly coated, working quickly while the glaze is still warm.
4. Bake the popcorn
Spread the coated popcorn evenly over the prepared baking sheet. Bake for 20–25 minutes, stirring every 8–10 minutes, until the coating becomes glossy, golden, and slightly crisp.
5. Cool the popcorn
Remove the baking sheet from the oven and let the popcorn cool completely. As it cools, the maple coating will firm up and create crunchy clusters of popcorn and pecans.
6. Break apart the clusters
Once completely cool, gently break apart any large clusters with your hands. Transfer the maple pecan popcorn to a serving bowl and enjoy.
Tip
For the crispiest texture, let the popcorn cool completely before serving and store leftovers in an airtight container at room temperature.
16. Spiced Pumpkin Bread
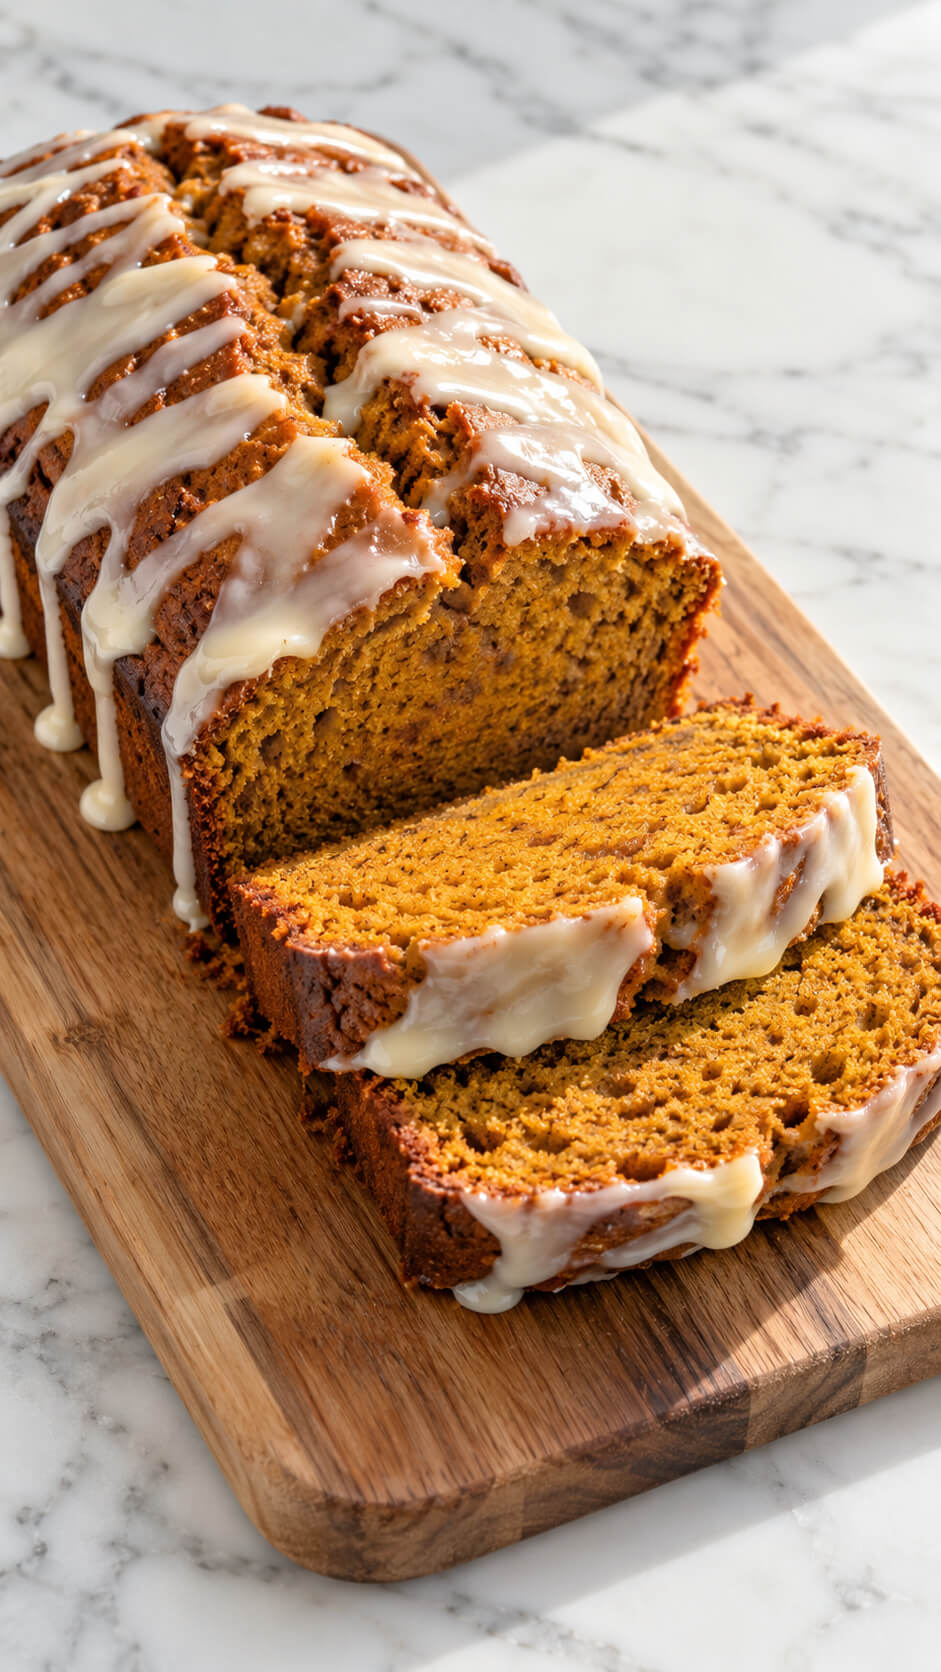
Spiced pumpkin bread is a flavorful addition to any Thanksgiving table.
Moist and packed with warm spices like cinnamon, nutmeg, and cloves, this bread makes a great snack or dessert.
Serve it warm with a bit of butter, or for an extra treat, add a cream cheese frosting drizzle.
It’s perfect for cozying up after a big Thanksgiving meal.
Ingredients
- 1¾ cups all-purpose flour
- 1 cup pumpkin purée
- ¾ cup granulated sugar
- ½ cup light brown sugar, packed
- ½ cup vegetable oil
- 2 large eggs
- 1 teaspoon vanilla extract
- 1 teaspoon ground cinnamon
- ½ teaspoon ground nutmeg
- ½ teaspoon ground ginger
- ½ teaspoon baking soda
- ½ teaspoon baking powder
- ¼ teaspoon salt
- ¼ cup milk
For the cream cheese icing
- 4 ounces cream cheese, softened
- 1 cup powdered sugar
- 2 tablespoons milk
- ½ teaspoon vanilla extract
Instructions
1. Preheat the oven
Preheat the oven to 350°F (175°C). Grease a 9 × 5-inch loaf pan and line it with parchment paper, leaving some overhang on the sides to make the finished bread easier to remove.
2. Combine the dry ingredients
Whisk the flour, cinnamon, nutmeg, ginger, baking soda, baking powder, and salt together in a medium bowl. Mixing the spices evenly through the flour helps distribute their flavor throughout the loaf.
3. Mix the pumpkin batter
In a large bowl, whisk together the pumpkin purée, granulated sugar, brown sugar, vegetable oil, eggs, vanilla, and milk until smooth and well combined. Gradually add the dry ingredients and stir just until no visible streaks of flour remain. Avoid overmixing so the bread stays soft and tender.
4. Fill the loaf pan
Pour the batter into the prepared loaf pan and smooth the surface with a spatula. The batter should fill the pan to roughly two-thirds full, leaving enough room for the loaf to rise and develop its characteristic cracked top.
5. Bake the bread
Bake for 50–60 minutes, or until the top is cracked and a toothpick inserted into the center comes out with a few moist crumbs attached. If the top begins browning too quickly, loosely cover it with aluminum foil during the final 15 minutes.
6. Cool the loaf
Let the pumpkin bread cool in the pan for about 10–15 minutes, then use the parchment overhang to transfer it to a wire rack. Allow it to cool completely before adding the icing so the cream cheese drizzle doesn’t melt away.
7. Make the cream cheese icing
Beat the softened cream cheese until smooth. Gradually add the powdered sugar, then mix in the milk and vanilla extract until the icing is glossy and thick enough to drizzle. Add a little more milk if necessary to reach the desired consistency.
8. Drizzle the icing
Place the cooled pumpkin bread on a serving board and drizzle the cream cheese icing generously over the top, allowing it to run naturally down the sides. For the appearance shown in the image, use a spoon or piping bag to create thick, uneven ribbons of icing.
9. Slice and serve the bread
Allow the icing to set for a few minutes before slicing the loaf with a sharp serrated knife. Serve the slices at room temperature with the moist, spiced pumpkin center and glossy cream cheese icing visible on top.
Tip
For the moistest pumpkin bread, use 100% pumpkin purée rather than pumpkin pie filling, and don’t overmix the batter once the flour is added. For an even stronger cinnamon-and-nutmeg flavor, let the fully iced loaf rest for 30 minutes before serving.
17. Mini Apple Crumbles
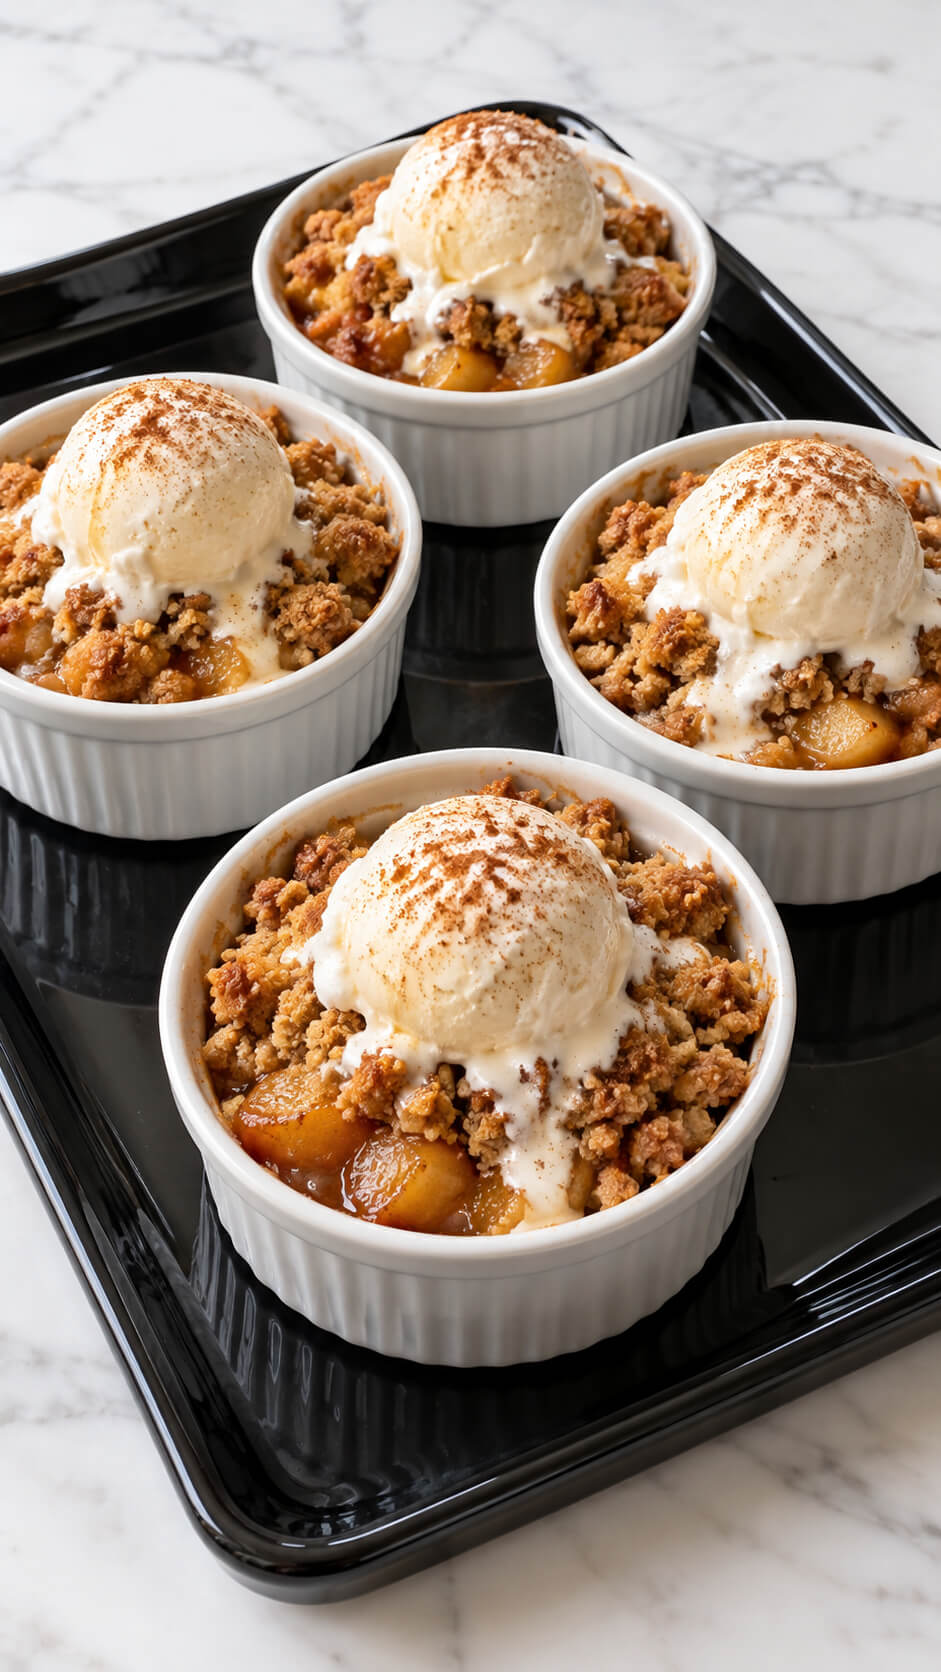
These individual apple crumbles are the perfect single-serving dessert for Thanksgiving.
Made with tender, cinnamon-spiced apples and topped with a buttery crumble, they bring the comfort of traditional apple pie in a more portable form.
Serve them warm with a scoop of vanilla ice cream for a crowd-pleasing treat.
Ingredients
- 4 medium apples, peeled, cored, and diced into small pieces
- 2 tablespoons granulated sugar
- 1 tablespoon brown sugar
- 1 tablespoon lemon juice
- 1 teaspoon ground cinnamon
- ¼ teaspoon ground nutmeg
- 1 teaspoon vanilla extract
- 1 tablespoon all-purpose flour
- 1 cup all-purpose flour
- ½ cup rolled oats
- ½ cup brown sugar
- ½ teaspoon ground cinnamon
- ¼ teaspoon salt
- ½ cup unsalted butter, melted
- Vanilla ice cream, for serving
- Ground cinnamon, for sprinkling
Instructions
1. Prepare the apple filling
Preheat the oven to 350°F (175°C). Combine the diced apples, granulated sugar, brown sugar, lemon juice, cinnamon, nutmeg, vanilla, and 1 tablespoon flour in a bowl. Stir until the apples are evenly coated.
2. Make the crumble topping
In a separate bowl, combine the flour, rolled oats, brown sugar, cinnamon, and salt. Pour in the melted butter and mix with a fork until coarse, crumbly pieces form.
3. Fill the ramekins
Divide the apple mixture evenly among four small oven-safe ramekins. Gently press the apples down so they are packed into the dishes, leaving a little room at the top for the crumble.
4. Add the buttery topping
Sprinkle the crumble mixture generously over each ramekin, covering the apples completely. Place the ramekins on a baking sheet to catch any bubbling juices during baking.
5. Bake the apple crumbles
Bake for 30–35 minutes, until the apples are bubbling around the edges and the crumble topping is golden brown and crisp. Let the crumbles cool for about 5 minutes after removing them from the oven.
6. Add the ice cream
Place a scoop of vanilla ice cream on top of each warm apple crumble. Finish with a light sprinkle of ground cinnamon and serve immediately.
Tip
For an especially crisp topping, chill the assembled crumbles for 10 minutes before baking and avoid covering the ramekins while they cook.
18. Butterscotch Blondies
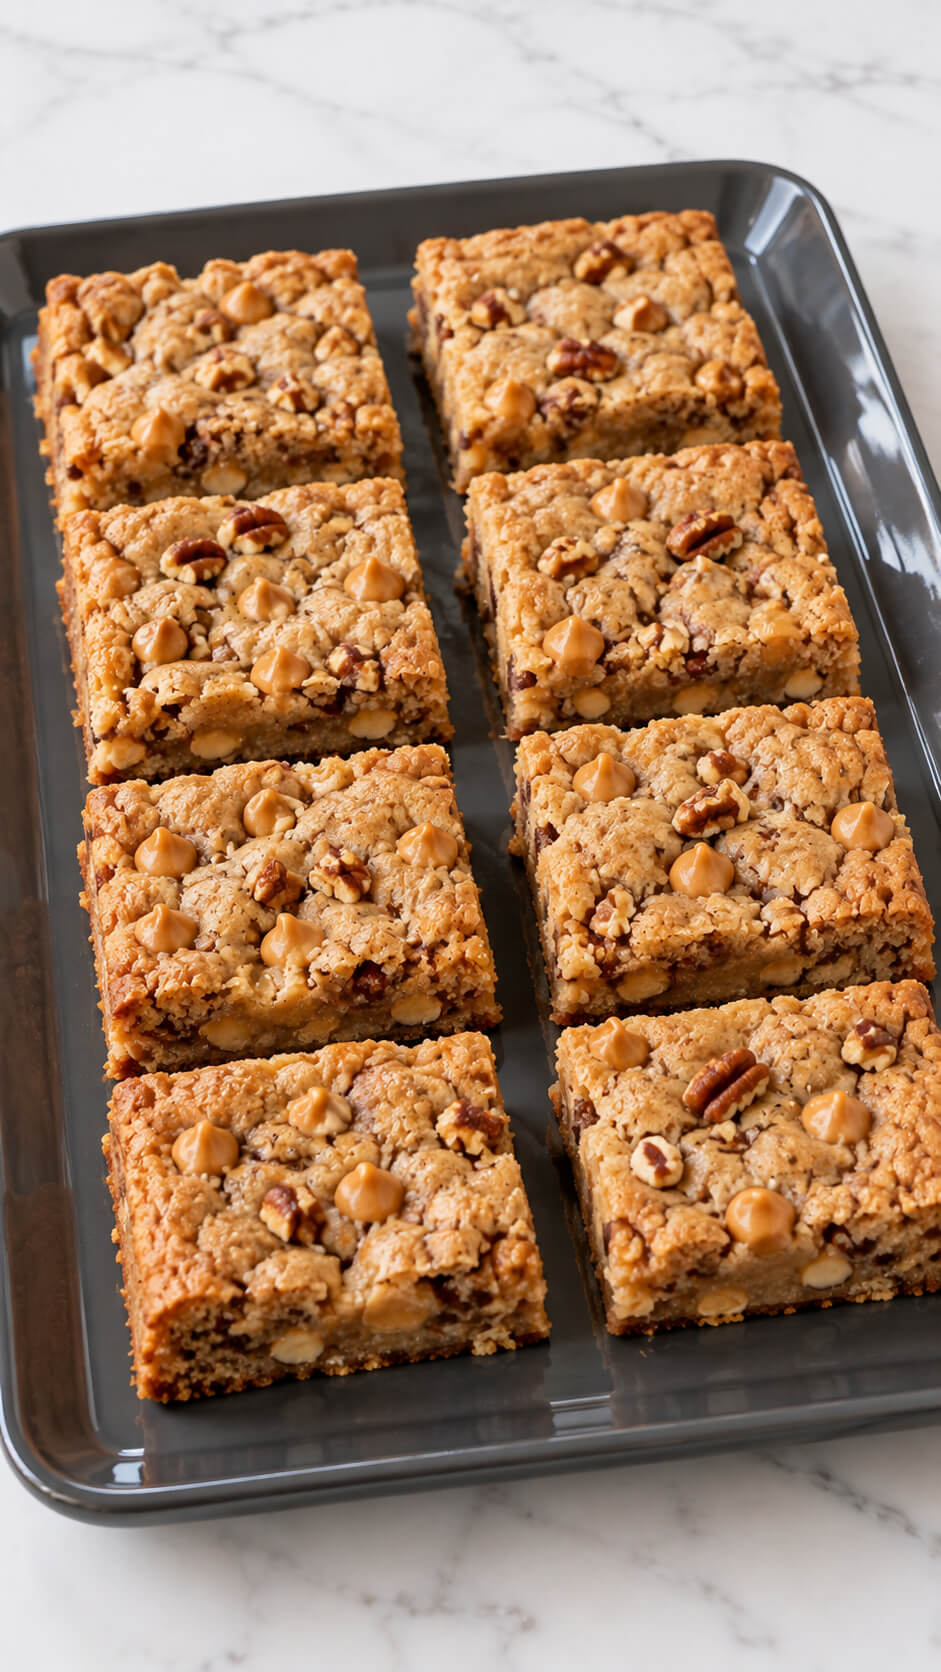
Blondies with a rich butterscotch flavor make a wonderful alternative to brownies.
The warm, caramel-like sweetness of butterscotch pairs beautifully with fall spices, making these treats a hit for Thanksgiving.
They’re easy to cut into squares and serve alongside other desserts, and they offer a delicious chewiness that contrasts nicely with more traditional pies and tarts.
Ingredients
- ½ cup (115 g) unsalted butter, melted and slightly cooled
- ¾ cup (150 g) light brown sugar, packed
- ¼ cup (50 g) granulated sugar
- 1 large egg
- 1 teaspoon vanilla extract
- 1 cup (125 g) all-purpose flour
- ½ teaspoon baking powder
- ¼ teaspoon salt
- ½ cup (90 g) butterscotch chips
- ½ cup (60 g) chopped pecans or walnuts
Instructions
1. Prepare the baking pan
Preheat the oven to 350°F (175°C). Line an 8-inch (20 cm) square baking pan with parchment paper, leaving some overhang on the sides so the blondies can be lifted out easily. Lightly grease the parchment with butter or cooking spray.
2. Combine the melted butter and sugars
Pour the melted butter into a large mixing bowl and add the brown sugar and granulated sugar. Whisk for about 1–2 minutes until the mixture is smooth, glossy, and well combined.
3. Add the egg and vanilla
Whisk the egg and vanilla extract into the butter mixture until fully incorporated. Continue whisking until the mixture looks smooth and slightly thickened.
4. Mix the dry ingredients
In a separate bowl, whisk together the flour, baking powder, and salt. This distributes the baking powder and salt evenly throughout the flour.
5. Combine the blondie batter
Gradually add the dry ingredients to the wet mixture and fold gently with a spatula until just combined. Avoid overmixing, as this can make the blondies less tender.
6. Fold in the butterscotch chips and nuts
Add the butterscotch chips and chopped pecans or walnuts to the batter. Fold gently until they are evenly distributed, reserving a small handful of each for the top if desired.
7. Fill the baking pan
Transfer the batter to the prepared pan and spread it evenly into the corners. Sprinkle the reserved butterscotch chips and chopped nuts over the surface for a golden, textured topping.
8. Bake the blondies
Bake for 22–27 minutes, until the edges are lightly golden and the center is set but still slightly soft. Do not overbake, because the blondies will continue to firm up as they cool.
9. Cool the blondies
Let the blondies cool completely in the pan for at least 30–45 minutes. Use the parchment overhang to lift them onto a cutting board, then cut into 8 square bars.
10. Serve the blondies
Serve the blondies at room temperature for a slightly crumbly texture, or warm them for a softer, chewier center. Store leftovers in an airtight container for up to 4 days.
Tip
For the best texture, slightly underbake the blondies rather than waiting for the center to become completely firm. Letting them cool fully will give them a buttery, chewy center with lightly crisp edges.
19. Pumpkin Spice Cupcakes
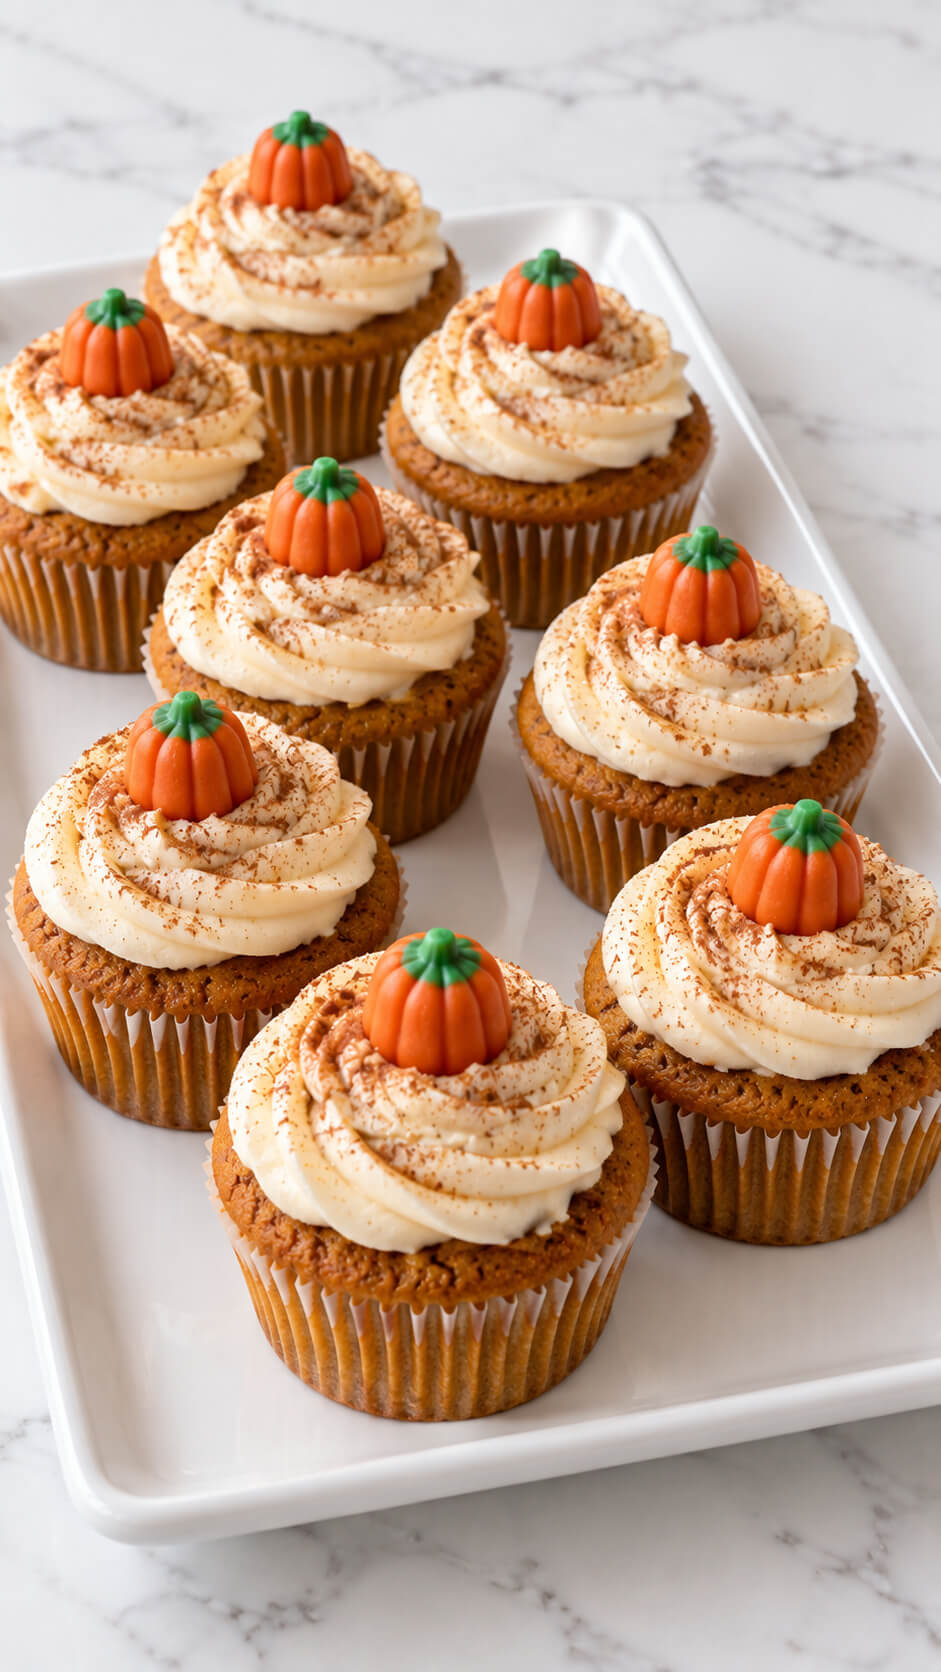
Finish off your Thanksgiving feast with pumpkin spice cupcakes.
These moist, flavorful cupcakes are packed with the fall flavors of pumpkin, cinnamon, and nutmeg, and are topped with a swirl of cream cheese frosting.
Easy to serve and enjoy, these cupcakes are a festive way to end the meal and will appeal to both kids and adults.
Ingredients
- 1½ cups all-purpose flour
- 1 teaspoon baking powder
- ½ teaspoon baking soda
- ½ teaspoon salt
- 1½ teaspoons ground cinnamon
- ½ teaspoon ground nutmeg
- ¼ teaspoon ground ginger
- ¼ teaspoon ground cloves
- ½ cup unsalted butter, softened
- ¾ cup brown sugar
- ¼ cup granulated sugar
- 2 large eggs
- 1 cup pumpkin purée
- 1 teaspoon vanilla extract
- ¼ cup milk
For the cream cheese frosting
- 8 ounces cream cheese, softened
- ½ cup unsalted butter, softened
- 2 cups powdered sugar
- 1 teaspoon vanilla extract
- 1–2 tablespoons heavy cream or milk, as needed
For decorating
- Ground cinnamon, for sprinkling
- 12 mini pumpkin candies
Instructions
1. Preheat the oven
Preheat the oven to 350°F (175°C). Line a 12-cup muffin pan with cupcake liners and set it aside.
2. Combine the dry ingredients
In a medium bowl, whisk together the flour, baking powder, baking soda, salt, cinnamon, nutmeg, ginger, and cloves until evenly combined.
3. Cream the butter and sugars
In a large bowl, beat the softened butter, brown sugar, and granulated sugar for 2–3 minutes until light and fluffy. Add the eggs one at a time, beating well after each addition, then mix in the pumpkin purée and vanilla extract.
4. Mix the cupcake batter
Add the dry ingredients to the pumpkin mixture in two additions, alternating with the milk. Mix gently just until the batter is smooth and no dry streaks remain. Avoid overmixing so the cupcakes stay tender.
5. Fill the cupcake liners
Divide the batter evenly among the 12 cupcake liners, filling each about two-thirds full. This gives the cupcakes enough room to rise without overflowing.
6. Bake the cupcakes
Bake for 18–22 minutes, or until a toothpick inserted into the center of a cupcake comes out clean or with a few moist crumbs. Let the cupcakes cool in the pan for 5 minutes, then transfer them to a wire rack to cool completely.
7. Make the cream cheese frosting
Beat the softened cream cheese and butter together until smooth and creamy. Gradually add the powdered sugar, beating until fluffy, then mix in the vanilla. Add a little heavy cream or milk if needed to achieve a smooth, pipeable consistency.
8. Frost the cupcakes
Once the cupcakes are completely cool, pipe a generous swirl of cream cheese frosting onto each one. Use a piping bag fitted with a large star tip to create the tall, decorative swirls shown in the image.
9. Add the festive toppings
Lightly sprinkle the frosting with ground cinnamon, then place a mini pumpkin candy in the center of each cupcake. Serve immediately or refrigerate until ready to enjoy.
Tip
For the prettiest frosting swirls, make sure the cupcakes are completely cool before decorating. If the cream cheese frosting becomes too soft, refrigerate it for 15–20 minutes before piping.
Wrap Up
Thanksgiving is the perfect time to enjoy delicious treats with family and friends.
From pumpkin pie bars to maple pecan popcorn, these sweet and savory ideas will make your holiday extra special.
Try a few of these treats, and your guests will be truly thankful!
Enjoy!