19 Festive Christmas Cookie Recipes to Brighten Your Holidays

I used to think Christmas cookies had to look perfect—like the ones in fancy magazines. Every year, I’d try and end up with flour everywhere and cookies that looked… well, “creative.”
But then I realized it’s not about perfection—it’s about fun, flavor, and a little holiday magic. After testing, tasting, and a few baking fails, I’ve found some easy, crowd-pleasing recipes anyone can make.
These Christmas cookie ideas aren’t just delicious—they’ll make your kitchen smell amazing and your holidays feel extra special.
So grab your apron and let’s get baking!
1. Classic Sugar Cookies

Every Christmas, these buttery sugar cookies steal the show.
They hold their shape perfectly for stars, trees, and reindeer, making them ideal for decorating with royal icing and colorful sprinkles.
Kids love helping roll the dough, and honestly, so do adults—it’s half the fun and all the nostalgia.
Ingredients
- 3 cups (375g) all-purpose flour
- 1 teaspoon baking powder
- ½ teaspoon salt
- 1 cup (225g) unsalted butter, softened
- 1 cup (200g) granulated sugar
- 1 large egg
- 2 teaspoons vanilla extract
- ½ teaspoon almond extract (optional)
For the royal icing
- 4 cups (480g) powdered sugar, sifted
- 3 tablespoons meringue powder
- 6–8 tablespoons warm water
- ½ teaspoon vanilla extract
- Pink gel food coloring
- Light blue gel food coloring
- Mint green gel food coloring
- White decorating icing
For decoration
- White pearl sprinkles
- Gold sugar pearls
- Red and white nonpareils
- Pastel decorative sprinkles
Instructions
1. Prepare the dry ingredients
In a medium mixing bowl, whisk together the all-purpose flour, baking powder, and salt until evenly combined. Set aside while you prepare the butter mixture.
2. Cream the butter and sugar
In a large mixing bowl, beat the softened butter and granulated sugar using an electric mixer on medium speed for 2–3 minutes until light, fluffy, and creamy. This creates a smooth base for the cookie dough.
3. Add the egg and vanilla
Add the egg, vanilla extract, and almond extract to the butter mixture. Beat until everything is fully incorporated and smooth, scraping down the sides of the bowl as needed.
4. Combine the cookie dough
Gradually add the dry ingredients to the wet mixture, mixing on low speed until a soft dough forms. Avoid overmixing, as this can make the cookies tough. If the dough feels sticky, add a tablespoon of flour at a time.
5. Chill the cookie dough
Divide the dough into two portions and flatten each into a disc. Wrap in plastic wrap and refrigerate for at least 1 hour. Chilling helps the cookies maintain their festive shapes during baking.
6. Cut out the Christmas shapes
Preheat the oven to 350°F (175°C). Lightly flour your work surface and roll the chilled dough to approximately ¼-inch thickness. Use Christmas cookie cutters to cut out stars, Christmas trees, and snowflakes. Transfer the shapes to baking sheets lined with parchment paper.
7. Bake the sugar cookies
Bake for 8–11 minutes, depending on the size of the cookies, until the edges are just beginning to turn lightly golden. The centers should remain pale and soft. Allow the cookies to cool on the baking sheets for 5 minutes before transferring them to a wire rack.
8. Prepare the royal icing
In a large mixing bowl, combine the powdered sugar, meringue powder, vanilla extract, and 6 tablespoons of warm water. Beat with an electric mixer for 4–5 minutes until thick, smooth, and glossy. Add additional water gradually until the icing reaches a consistency suitable for decorating.
9. Divide and color the icing
Divide the royal icing into separate small bowls. Tint one portion pastel pink, another soft mint green, and another pale blue using gel food coloring. Keep a portion of the icing white for additional decorative details. Transfer the different colors into piping bags.
10. Decorate the Christmas trees
Outline each Christmas tree cookie with mint-green icing, then flood the center with the same icing until smooth. While the icing is still wet, add delicate white icing garlands and tiny red, white, and gold sprinkles. Allow the icing to begin setting.
11. Decorate the star cookies
Outline the star-shaped cookies with pastel pink icing and fill the centers evenly. Use white icing to create delicate borders and decorative patterns. Add small white pearls, gold sugar pearls, and pastel sprinkles for a festive finish.
12. Decorate the snowflake cookies
Cover the snowflake cookies with pale blue or white royal icing. Once the base icing is slightly set, pipe delicate white snowflake patterns across the surface, following the natural branches of each shape. Finish with tiny pearl sprinkles for a beautiful snowy effect.
13. Allow the icing to set
Arrange the decorated cookies in a single layer and leave them undisturbed at room temperature for 6–8 hours, or preferably overnight. The royal icing should become completely dry and firm before serving or storing.
14. Serve the Christmas cookies
Once the icing has fully hardened, arrange the star, tree, and snowflake cookies together for a festive holiday presentation. The finished cookies should have crisp golden edges, beautifully detailed pastel icing, and a delicious buttery flavor.
Tip
For perfectly smooth royal icing, make sure it is not too thick or too runny. Add water a few drops at a time until the icing flows smoothly when piped. Always allow each decorated layer to dry slightly before adding intricate details. Store the completely dried cookies in an airtight container at room temperature for up to 1 week to maintain their freshness and crisp texture.
2. Gingerbread Men

There’s something magical about the smell of gingerbread men baking.
Molasses, cinnamon, and ginger fill the kitchen with cozy warmth.
Decorate them with tiny buttons, smiles, and maybe even scarves made of icing.
They’re almost too cute to eat—almost. Hang a few on the tree if you can resist!
Ingredients
- 3 cups (375g) all-purpose flour
- ¾ cup (170g) unsalted butter, softened
- ¾ cup (150g) packed brown sugar
- ½ cup (170g) molasses
- 1 large egg
- 1 teaspoon vanilla extract
- 1 teaspoon baking soda
- 1 tablespoon ground ginger
- 2 teaspoons ground cinnamon
- ¼ teaspoon ground cloves
- ¼ teaspoon ground nutmeg
- ½ teaspoon salt
For the icing
- 1½ cups (180g) powdered sugar
- 1½ tablespoons milk
- ½ teaspoon vanilla extract
- 1 teaspoon lemon juice (optional)
For decoration
- Red candy buttons or mini red candies
- Green candy buttons or mini green candies
- White decorating icing
- Small candy decorations (optional)
Instructions
1. Prepare the gingerbread dough
In a medium bowl, whisk together the flour, baking soda, ground ginger, cinnamon, cloves, nutmeg, and salt. In a separate large mixing bowl, beat the softened butter and brown sugar until light and creamy. Add the molasses, egg, and vanilla extract, mixing until everything is smooth and well combined.
2. Combine the ingredients
Gradually add the dry ingredients to the butter mixture, mixing on low speed until a thick, slightly sticky dough forms. Scrape down the sides of the bowl as needed to ensure all the ingredients are evenly incorporated. Avoid overmixing to keep the cookies tender.
3. Chill the gingerbread dough
Divide the dough into two portions and flatten each into a disc. Wrap tightly in plastic wrap and refrigerate for at least 2 hours or until firm. Chilling helps prevent the cookies from spreading too much during baking and makes the dough easier to roll and cut.
4. Roll out the gingerbread dough
Preheat the oven to 350°F (175°C). Lightly flour a clean work surface and rolling pin. Remove one portion of dough from the refrigerator and roll it out to approximately ¼-inch thickness. Keep the thickness even so the cookies bake uniformly.
5. Cut out the gingerbread men
Use a gingerbread man cookie cutter to cut out the shapes. Carefully transfer each cookie to a baking sheet lined with parchment paper, leaving about 2 inches of space between them. Gather the leftover dough, gently reroll it, and continue cutting until all the dough is used.
6. Bake the gingerbread cookies
Bake in the preheated oven for 8–10 minutes, depending on the size of your cookies. The edges should look set while the centers remain slightly soft. Avoid overbaking, as the cookies will continue to firm up as they cool.
7. Cool the baked cookies
Remove the baking sheets from the oven and allow the cookies to rest for about 5 minutes. Carefully transfer them to a wire cooling rack and let them cool completely before decorating. Decorating warm cookies can cause the icing to melt and lose its shape.
8. Prepare the decorating icing
In a small bowl, combine the powdered sugar, milk, vanilla extract, and lemon juice. Whisk until the icing is smooth, thick, and easy to pipe. If it is too thick, add a few drops of milk; if it is too thin, gradually add more powdered sugar.
9. Decorate the gingerbread men
Transfer the icing into a piping bag fitted with a small round tip. Pipe two small eyes and a cheerful curved smile onto each cookie. Add wavy icing details around the arms and legs to create decorative cuffs. Pipe small dots of icing down the center of each cookie and gently press red and green candies onto them to create colorful buttons.
10. Allow the decorations to set
Arrange the decorated cookies in a single layer and allow the icing to dry for approximately 30–60 minutes, or until firm to the touch. This helps the decorations stay in place when the cookies are handled or stacked.
11. Serve the gingerbread cookies
Once the icing has completely set, arrange the gingerbread men in a casual stack on a large serving platter. Their rich molasses color, smiling icing faces, and festive red and green decorations make them a lovely treat for Christmas celebrations, holiday parties, or afternoon snacks.
Tip
For perfectly shaped gingerbread men, always chill the dough before rolling and cutting. If the dough becomes too soft while working, return it to the refrigerator for 10–15 minutes. For beautifully defined decorations, use thick royal icing instead of runny icing, and allow each cookie to dry completely before stacking. Store the finished cookies in an airtight container at room temperature for up to one week.
3. Peppermint Crinkle Cookies
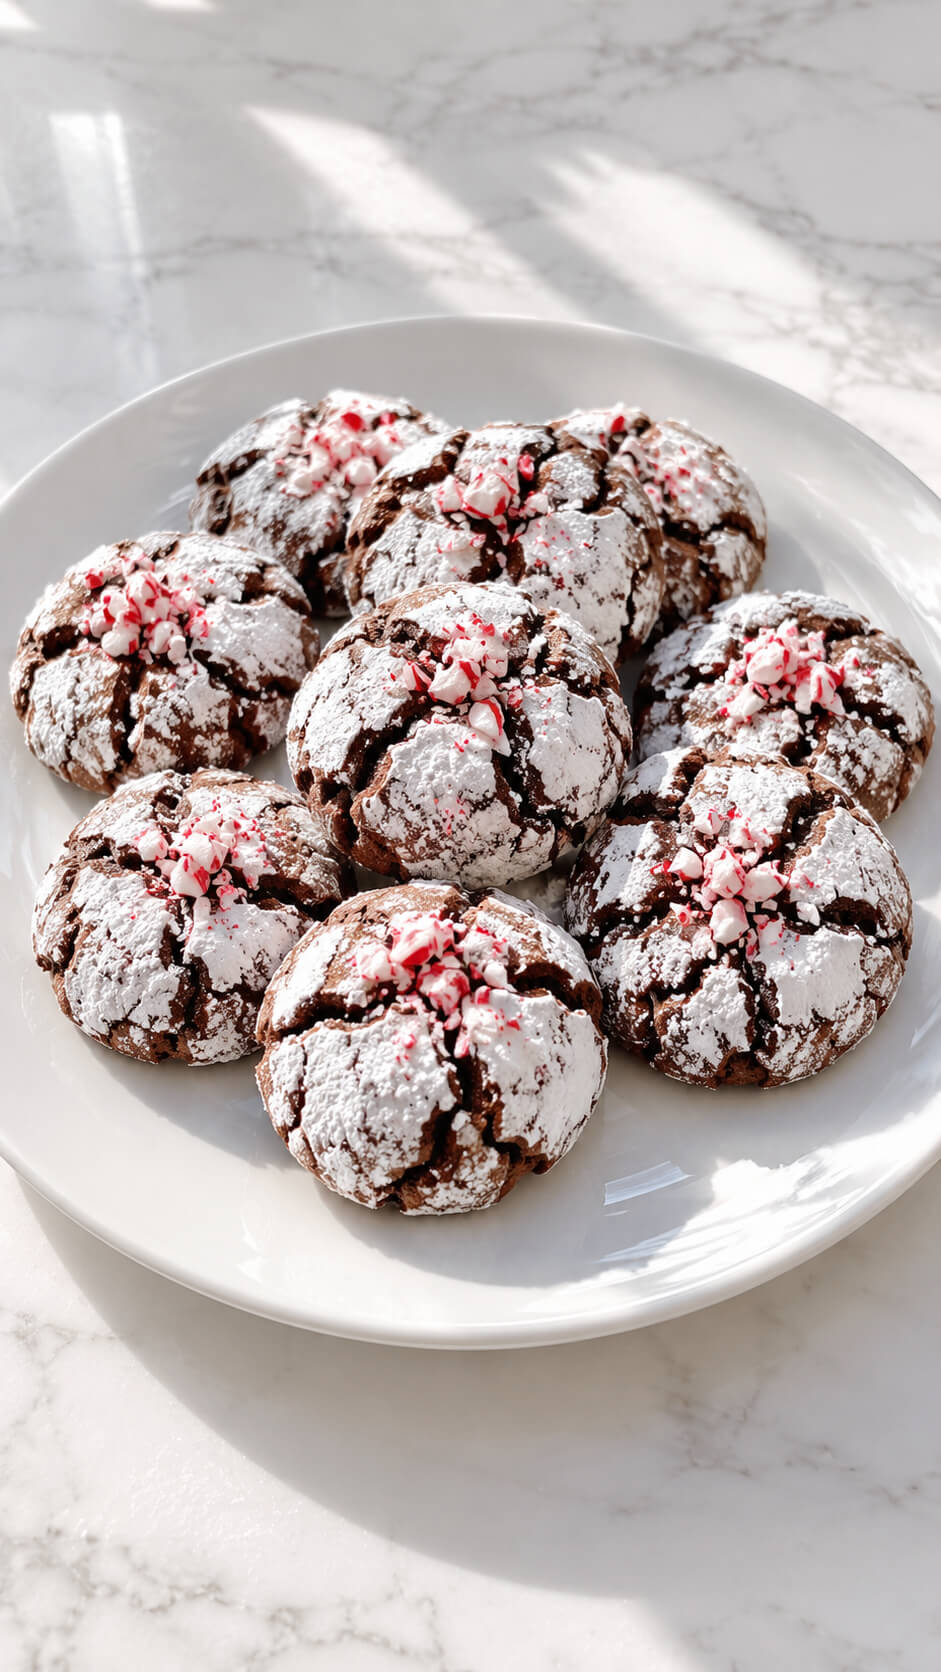
These fudgy chocolate cookies dusted in powdered sugar look like they’ve been kissed by snow.
The peppermint flavor gives them a cool, festive twist, and their soft, brownie-like texture makes them melt in your mouth.
Pair with a mug of hot cocoa for the perfect winter night treat.
Ingredients
- 1 cup (125 g) all-purpose flour
- ½ cup (50 g) unsweetened cocoa powder
- 1 teaspoon baking powder
- ¼ teaspoon salt
- ¾ cup (150 g) granulated sugar
- ¼ cup (60 ml) vegetable oil
- 2 large eggs
- 1 teaspoon vanilla extract
- ½ teaspoon peppermint extract
- ½ cup crushed peppermint candies or candy canes
For the powdered sugar coating
- ½ cup (60 g) powdered sugar
- ¼ cup (50 g) granulated sugar
Instructions
1. Combine the dry ingredients
In a medium mixing bowl, whisk together the all-purpose flour, cocoa powder, baking powder, and salt until evenly combined. Break up any lumps in the cocoa powder to ensure the cookies have a smooth, consistent chocolate flavor.
2. Mix the wet ingredients
In a separate large bowl, whisk together the granulated sugar and vegetable oil until well combined. Add the eggs one at a time, mixing after each addition. Stir in the vanilla extract and peppermint extract until the mixture is smooth.
3. Prepare the chocolate cookie dough
Gradually add the dry ingredients to the wet mixture, stirring gently until a thick chocolate dough forms. Fold in the crushed peppermint candies, distributing them evenly throughout the dough without overmixing.
4. Chill the cookie dough
Cover the mixing bowl with plastic wrap and refrigerate the dough for at least 2 hours. Chilling helps firm up the dough, making it easier to roll into balls and allowing the cookies to maintain their shape while baking.
5. Prepare the oven and coating
Preheat the oven to 350°F (175°C). Line two baking sheets with parchment paper. Place the powdered sugar in a small bowl and keep the granulated sugar in a separate bowl for coating the cookies.
6. Shape the chocolate cookies
Remove the chilled dough from the refrigerator. Scoop approximately 1 tablespoon of dough at a time and roll it between your palms to form smooth balls. Keep the cookie balls roughly the same size so they bake evenly.
7. Coat the cookie dough balls
Roll each dough ball first in granulated sugar, then generously in powdered sugar until completely coated. The granulated sugar helps create a barrier that keeps the powdered sugar coating more visible as the cookies spread and crack during baking.
8. Arrange the cookies for baking
Place the coated dough balls on the prepared baking sheets, leaving approximately 2 inches (5 cm) between each cookie. This allows enough room for the cookies to spread as they bake without sticking together.
9. Bake the peppermint crinkle cookies
Bake for 10–12 minutes, or until the cookies have spread and developed deep chocolate cracks across their surfaces. The centers should still look slightly soft when removed from the oven because they will continue setting as they cool.
10. Cool the cookies
Allow the cookies to rest on the baking sheets for about 5 minutes before carefully transferring them to a wire rack. Let them cool completely so the centers develop a soft, fudgy texture while the outside becomes slightly crisp.
11. Serve the cookies
Once cooled, serve the peppermint chocolate crinkle cookies with their beautiful powdered sugar coating and rich chocolate centers. Add a light extra dusting of powdered sugar if desired for an even more snow-covered appearance.
Tip
For the prettiest crinkle effect, coat the cookie dough balls generously with powdered sugar just before baking. Avoid skipping the granulated sugar coating, as it helps prevent the powdered sugar from disappearing into the dough. For an extra peppermint flavor, use finely crushed candy canes rather than large pieces, and be careful not to overbake the cookies so the centers remain soft and fudgy.
4. Snickerdoodle Snowballs
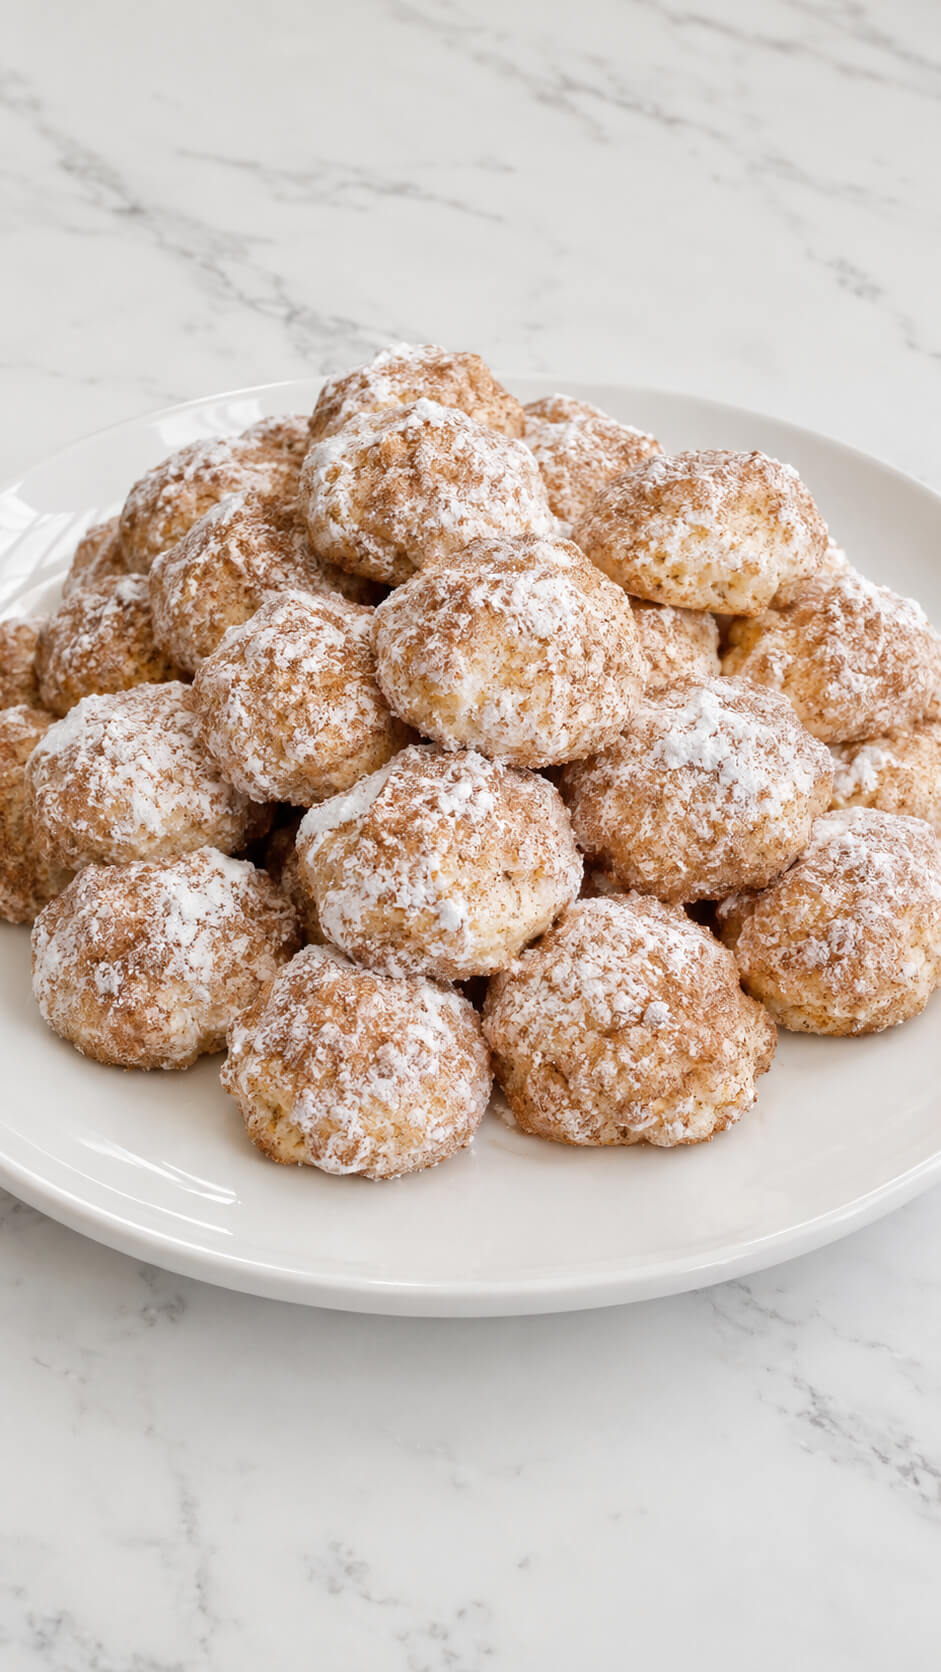
Cinnamon-sugar heaven, but make it festive!
These snickerdoodle snowballs are soft, buttery, and coated in just the right amount of spice.
They’re quick to make and even quicker to disappear.
Perfect for those who love cozy flavors without the fuss of icing or fancy decorations.
Ingredients
- 1 cup (226 g) unsalted butter, softened
- ½ cup powdered sugar
- 1 teaspoon vanilla extract
- 2¼ cups (280 g) all-purpose flour
- ¼ teaspoon salt
- 1 teaspoon ground cinnamon
- ½ cup finely chopped pecans (optional)
For the cinnamon sugar coating
- 1 cup powdered sugar
- 1½ teaspoons ground cinnamon
Instructions
1. Prepare the oven and baking sheet
Preheat your oven to 350°F (175°C). Line a large baking sheet with parchment paper to prevent the cookies from sticking and ensure even baking.
2. Cream the butter and sugar
In a large mixing bowl, beat the softened butter and ½ cup powdered sugar together until light, fluffy, and creamy. Add the vanilla extract and mix until fully incorporated.
3. Combine the dry ingredients
In a separate bowl, whisk together the all-purpose flour, salt, and ground cinnamon. This helps distribute the cinnamon evenly throughout the dough and prevents clumps.
4. Make the cookie dough
Gradually add the dry ingredients to the butter mixture, mixing on low speed until a soft dough forms. Stir in the finely chopped pecans if using. Avoid overmixing to keep the cookies tender and delicate.
5. Shape the cookies
Scoop approximately 1 tablespoon of dough and roll it between your palms to form small, evenly sized balls. Arrange them on the prepared baking sheet, leaving about 1 inch of space between each cookie.
6. Bake the cookies
Bake for 12–15 minutes, or until the bottoms are lightly golden and the tops are set. The cookies should remain fairly pale rather than becoming deeply browned. Allow them to cool on the baking sheet for about 5 minutes.
7. Prepare the cinnamon sugar coating
While the cookies are baking, combine the powdered sugar and ground cinnamon in a medium bowl. Whisk until evenly blended, breaking up any lumps to create a smooth coating.
8. Coat the warm cookies
While the cookies are still slightly warm, gently roll each one in the cinnamon powdered sugar mixture until completely covered. Handle them carefully because they are delicate when warm.
9. Coat the cookies again
Allow the cookies to cool completely, then roll them in the cinnamon sugar mixture a second time. This creates a beautiful, generous coating and gives them their signature snowy appearance.
10. Serve the cookies
Arrange the finished snickerdoodle snowball cookies on a large serving platter, piling them gently on top of one another. Serve with coffee, tea, or your favorite holiday drink.
Tip
For the softest, most tender snowball cookies, avoid adding too much flour when measuring. Spoon the flour into your measuring cup and level it off rather than scooping directly from the bag. For an extra snowy finish, dust the cookies with a little additional powdered sugar just before serving.
5. Linzer Cookies

Elegant and classic, Linzer cookies bring a touch of European charm to your holiday table.
With almond dough and a peekaboo heart filled with raspberry jam, they’re as lovely as they are delicious.
A light dusting of powdered sugar makes them sparkle like freshly fallen snow.
Ingredients
- 2½ cups (315 g) all-purpose flour
- 1 cup (100 g) finely ground almond flour
- ¾ cup (170 g) unsalted butter, softened
- ½ cup (100 g) granulated sugar
- 1 large egg yolk
- 1 teaspoon vanilla extract
- ½ teaspoon almond extract
- ¼ teaspoon salt
- ½ teaspoon ground cinnamon (optional)
- ½ cup (160 g) raspberry jam
- ½ cup powdered sugar, for dusting
Instructions
1. Prepare the cookie dough
In a large mixing bowl, beat the softened butter and granulated sugar together until light, fluffy, and creamy. Add the egg yolk, vanilla extract, and almond extract, then mix until fully combined. In a separate bowl, whisk together the all-purpose flour, almond flour, salt, and cinnamon. Gradually add the dry ingredients to the butter mixture, mixing until a soft dough forms.
2. Chill the cookie dough
Divide the dough into two equal portions and flatten each portion into a disc. Wrap them tightly in plastic wrap and refrigerate for at least 1 hour. Chilling helps firm up the butter, making the dough easier to roll and helping the cookies maintain their shape during baking.
3. Roll out the dough
Remove one portion of dough from the refrigerator and place it on a lightly floured surface. Roll it out evenly to approximately ⅛ inch (3 mm) thick. If the dough feels too firm, allow it to sit at room temperature for a few minutes until it becomes easier to handle.
4. Cut out the cookie shapes
Use a round or fluted cookie cutter to cut out an equal number of cookie circles. Leave half of the circles whole and use a small heart-shaped cutter to create heart openings in the remaining circles. Carefully transfer the cookies to baking trays lined with parchment paper, keeping them slightly apart.
5. Bake the cookies
Preheat the oven to 350°F (175°C). Bake the cookies for 10–12 minutes, or until the edges are lightly golden and the centers are set. Avoid overbaking because Linzer cookies should remain delicate and slightly tender. Remove them from the oven and allow them to cool completely on a wire rack.
6. Dust the cookies with powdered sugar
Arrange the cooled cookies with the heart-shaped openings on a separate surface. Generously dust them with powdered sugar, ensuring the sugar lightly coats the tops and edges. Dusting them before assembling helps keep the raspberry jam glossy and visible.
7. Prepare the raspberry jam filling
Place the raspberry jam in a small bowl and stir gently until smooth and spreadable. If the jam is too thick, warm it in the microwave for approximately 5–10 seconds to make it easier to spread. Allow it to cool slightly before assembling the cookies.
8. Assemble the Linzer cookies
Spread approximately 1 teaspoon of raspberry jam onto the flat side of each whole cookie, leaving a small border around the edges. Carefully place a powdered-sugar-dusted cookie with a heart-shaped opening on top. Press gently so the jam spreads slightly and becomes visible through the heart-shaped center.
9. Serve the Linzer cookies
Arrange the finished Linzer cookies neatly on a serving platter. Allow them to rest for about 20–30 minutes so the jam can settle and hold the cookies together. Serve them once the filling has set slightly, with the beautiful raspberry centers showing through the delicate heart-shaped openings.
Tip
For the prettiest Linzer cookies, use thick raspberry jam with visible fruit pieces and avoid adding too much filling, as it can spill over the edges. For an extra beautiful finish, dust the top cookies with powdered sugar before assembling them so the red raspberry hearts stand out clearly. Store the assembled cookies in an airtight container at room temperature for up to 3 days.
6. Chocolate-Dipped Shortbread
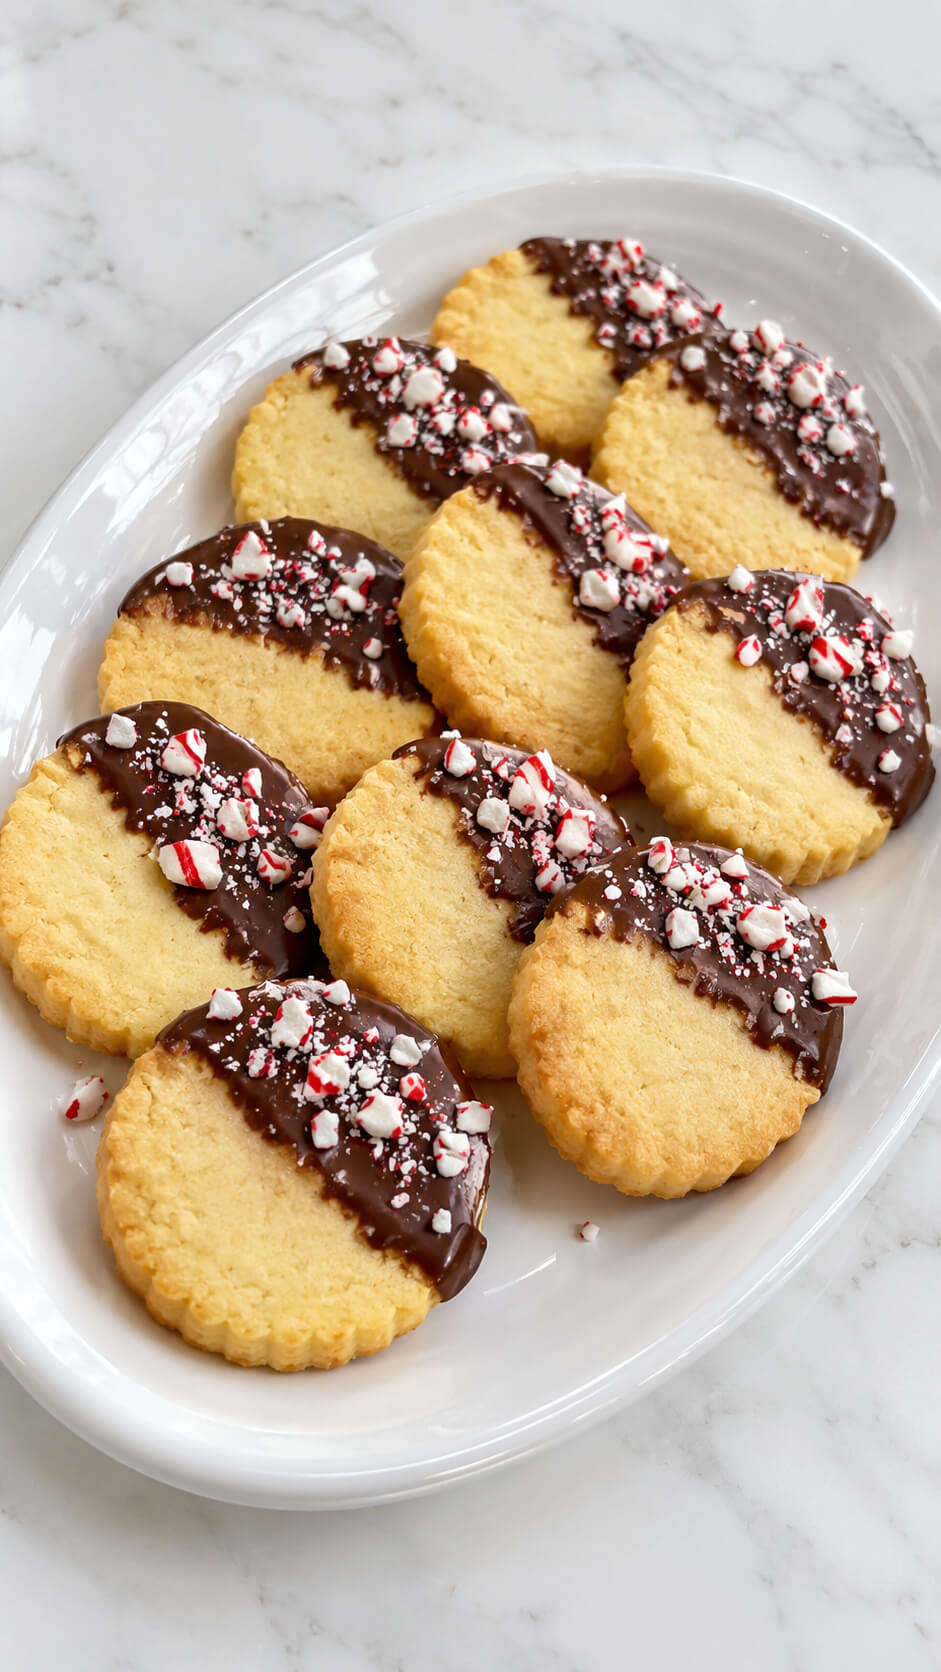
Crisp, buttery shortbread is already delightful, but dip it halfway in silky dark chocolate and sprinkle crushed candy canes on top—you’ve just made magic.
These cookies look bakery-perfect yet couldn’t be simpler.
They store beautifully, too, which makes them a holiday gifting lifesaver.
Ingredients
- 2 cups (250 g) all-purpose flour
- ¾ cup (170 g) unsalted butter, softened
- ½ cup (100 g) granulated sugar
- 1 teaspoon vanilla extract
- ¼ teaspoon salt
- 1 tablespoon milk (if needed)
- 200 g dark chocolate, chopped
- ½ cup crushed candy canes or peppermint candies
Instructions
1. Prepare the shortbread dough
In a large mixing bowl, beat the softened butter and granulated sugar together until light, creamy, and smooth. Add the vanilla extract and salt, then mix until everything is well combined. Gradually add the flour and mix on low speed until a soft dough forms. If the mixture feels too crumbly, add a tablespoon of milk to help bring it together.
2. Chill the dough
Gather the dough into a ball and gently flatten it into a disc. Wrap it in plastic wrap and refrigerate for 30 minutes. Chilling helps firm up the butter, making the dough easier to roll and helping the cookies maintain their shape during baking.
3. Prepare the cookies
Preheat your oven to 350°F (175°C) and line a baking sheet with parchment paper. Remove the chilled dough from the refrigerator and roll it out on a lightly floured surface to approximately ¼-inch thickness. Use a round or fluted cookie cutter to cut out the cookies, then carefully transfer them to the prepared baking sheet, leaving a little space between each one.
4. Bake the shortbread cookies
Bake the cookies for 12–15 minutes, or until the edges are lightly golden and the centers are set. Avoid allowing them to become too brown, as shortbread should have a delicate, buttery texture. Remove them from the oven and let them cool on the baking sheet for about 5 minutes before transferring them to a wire rack to cool completely.
5. Melt the dark chocolate
Place the chopped dark chocolate in a microwave-safe bowl and heat in 20-second intervals, stirring between each interval until completely melted and smooth. Alternatively, melt the chocolate in a heatproof bowl set over a saucepan of gently simmering water, making sure the bottom of the bowl does not touch the water.
6. Prepare the crushed candy canes
Place the candy canes or peppermint candies in a sealed food bag and gently crush them using a rolling pin. Aim for a mixture of small pieces and fine peppermint crumbs. Transfer the crushed candy into a small bowl so it is ready for decorating.
7. Dip the cookies in chocolate
Once the shortbread cookies have cooled completely, dip one half of each cookie into the melted dark chocolate. Allow any excess chocolate to drip back into the bowl before placing the cookies on a parchment-lined baking sheet. Make sure the chocolate coating is smooth and evenly distributed for a beautiful finish.
8. Sprinkle with crushed candy canes
While the chocolate is still wet, generously sprinkle the crushed candy canes over the chocolate-coated portions of the cookies. Gently press larger pieces into the chocolate so they stick properly. Work with a few cookies at a time to prevent the chocolate from setting before decorating.
9. Allow the chocolate to set
Place the decorated cookies in a cool area for approximately 30–45 minutes, or refrigerate them for 15–20 minutes until the chocolate is completely firm. Once set, carefully remove the cookies from the parchment paper. The finished cookies should have a crisp, buttery texture with a glossy chocolate coating and a refreshing peppermint crunch.
10. Serve the shortbread cookies
Arrange the finished chocolate-dipped shortbread cookies on a large serving platter and serve once the chocolate has fully set. They are perfect alongside a cup of coffee, tea, or hot chocolate and make a lovely festive treat for sharing with family and friends.
Tip
For the best results, make sure the shortbread cookies are completely cool before dipping them in chocolate. Even a little warmth can cause the chocolate to melt unevenly or lose its glossy finish. Use good-quality dark chocolate for a rich flavor that balances the buttery sweetness of the cookies and the refreshing peppermint topping. Store the finished cookies in an airtight container at room temperature for up to 5 days.
7. Eggnog Cookies
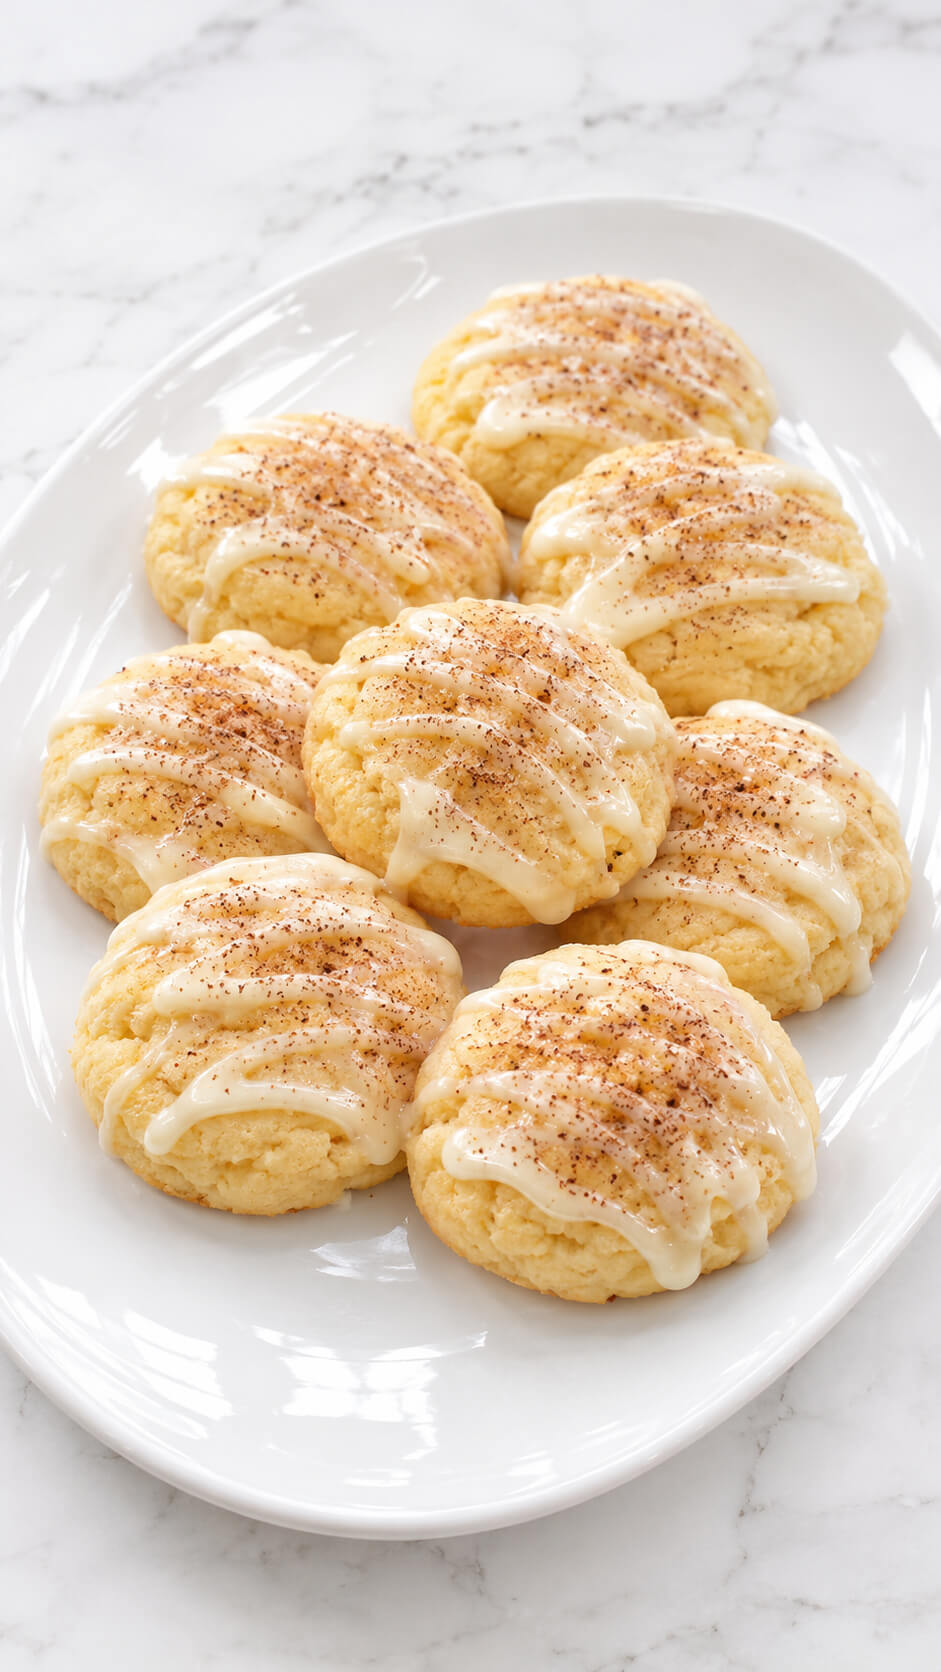
All the flavor of your favorite holiday drink, baked into a soft, spiced cookie.
With nutmeg, rum extract, and a creamy eggnog glaze, these are pure Christmas comfort.
They smell incredible while baking—warm, sweet, and nostalgic.
Serve them with coffee or, naturally, a glass of eggnog.
Ingredients
- 2½ cups all-purpose flour
- 1 teaspoon baking powder
- ½ teaspoon ground nutmeg
- ½ teaspoon ground cinnamon
- ¼ teaspoon salt
- ½ cup unsalted butter, softened
- ¾ cup granulated sugar
- ¼ cup brown sugar
- 1 large egg
- ½ cup eggnog
- 1 teaspoon vanilla extract
For the creamy glaze
- 1 cup powdered sugar
- 2–3 tablespoons eggnog
- ½ teaspoon vanilla extract
- ¼ teaspoon ground nutmeg, for sprinkling
Instructions
1. Prepare the dry ingredients
In a medium mixing bowl, whisk together the all-purpose flour, baking powder, ground nutmeg, ground cinnamon, and salt. Mix until evenly combined. Set aside while you prepare the cookie dough.
2. Cream the butter and sugars
In a large mixing bowl, beat the softened butter, granulated sugar, and brown sugar using an electric mixer for 2–3 minutes until the mixture becomes light, fluffy, and creamy. This helps create soft, tender cookies with a delicate texture.
3. Add the eggnog and vanilla
Add the egg and vanilla extract to the butter mixture and beat until well combined. Gradually pour in the eggnog, mixing until the ingredients form a smooth, creamy mixture. Scrape down the sides of the bowl to ensure everything is evenly incorporated.
4. Combine the wet and dry ingredients
Gradually add the prepared flour mixture to the wet ingredients. Mix on low speed just until a soft dough forms. Avoid overmixing, as this can make the cookies dense instead of soft and pillowy.
5. Shape the cookies
Preheat your oven to 350°F (175°C). Line a baking sheet with parchment paper. Scoop the dough into evenly sized portions, approximately 1½ tablespoons each, and place them on the prepared baking sheet, leaving about 2 inches between each cookie.
6. Bake until lightly golden
Bake the cookies for 12–15 minutes, or until the edges are set and the centers look slightly puffed and soft. Avoid overbaking because the cookies should remain tender and moist. Remove them from the oven and allow them to cool on the baking sheet for 5 minutes before transferring them to a wire rack.
7. Prepare the creamy glaze
In a small bowl, whisk together the powdered sugar, 2 tablespoons of eggnog, and vanilla extract until smooth. Add a little more eggnog if needed to achieve a thick but pourable consistency. The glaze should be creamy enough to drizzle beautifully over the cookies.
8. Drizzle the glaze over the cookies
Once the cookies have cooled completely, use a spoon to drizzle the creamy glaze generously over each cookie. Allow some of the glaze to naturally run down the sides for a beautiful homemade finish.
9. Add the nutmeg topping
While the glaze is still wet, lightly sprinkle ground nutmeg over the cookies. This adds a warm, aromatic flavor that perfectly complements the sweetness of the eggnog glaze.
10. Allow the glaze to set
Let the cookies rest for approximately 15–20 minutes, or until the glaze becomes slightly firm. This helps the topping stay in place while keeping the cookies soft and delicious underneath.
11. Serve the eggnog cookies
Serve them once the glaze has set. Enjoy these soft, buttery eggnog cookies with a creamy drizzle and a delicate dusting of nutmeg. They are perfect for holiday gatherings, afternoon treats, or sharing with family and friends.
Tip
For the softest, most flavorful eggnog cookies, avoid overmixing the dough and be careful not to overbake them. Make sure the cookies are completely cool before adding the glaze to prevent it from melting. For an extra festive flavor, add a tiny pinch of freshly grated nutmeg to the glaze. Store leftover cookies in an airtight container at room temperature for up to 3 days or refrigerate for up to 5 days.
8. Cranberry White Chocolate Cookies
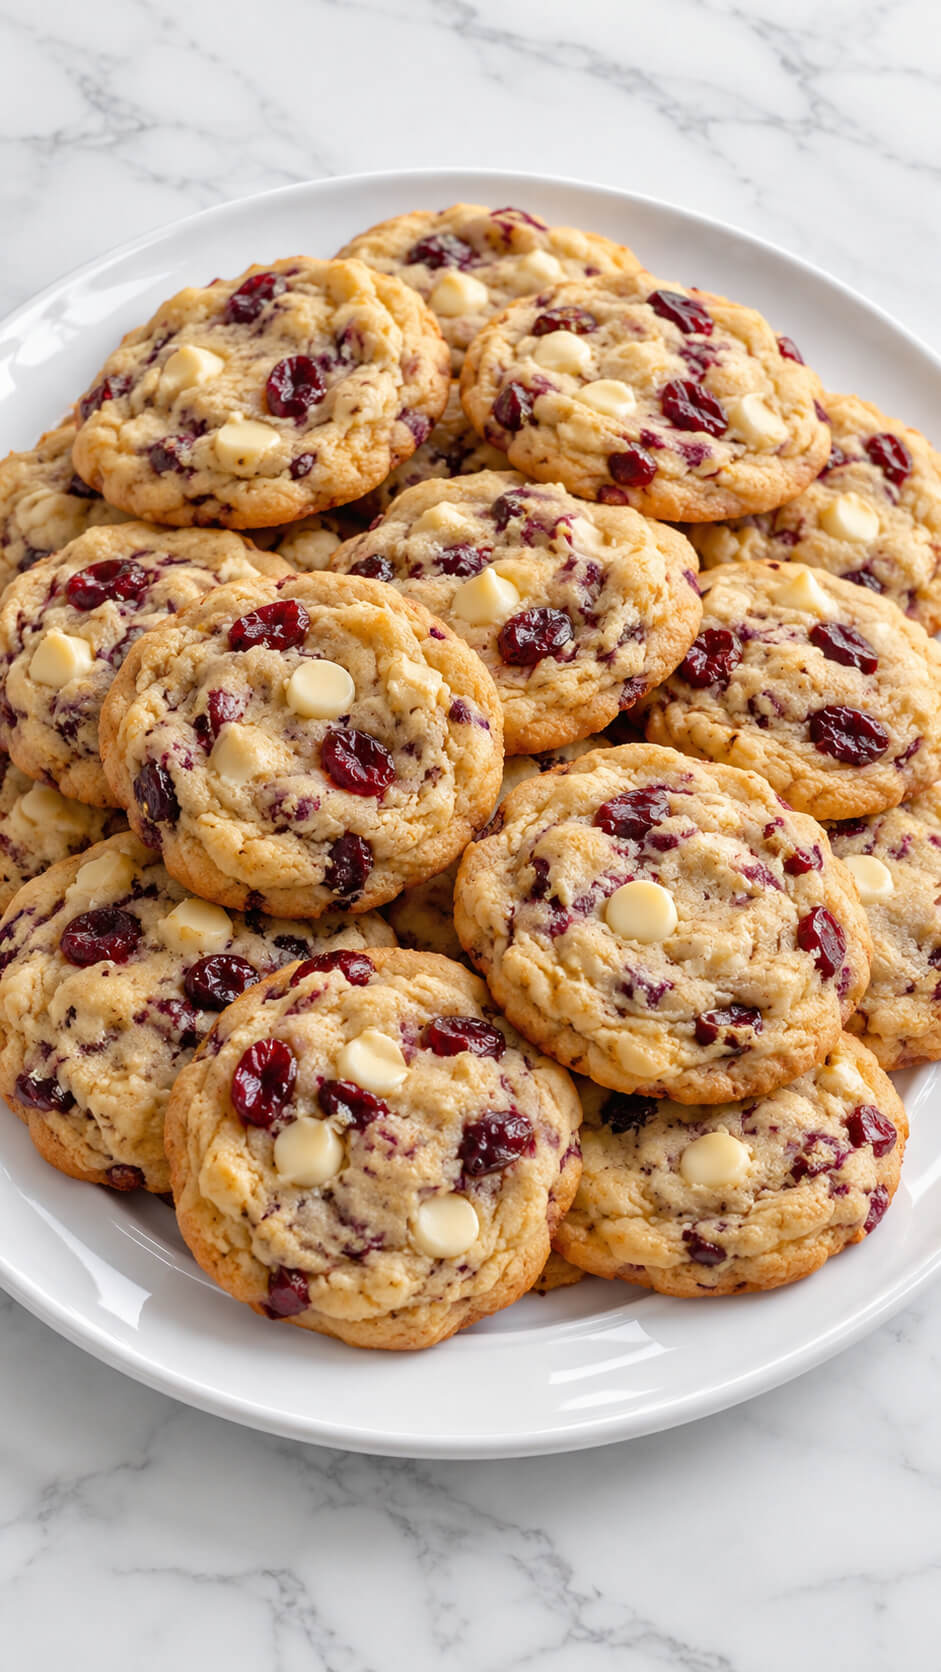
These cookies are festive in both color and flavor—chewy, buttery dough filled with tart cranberries and creamy white chocolate chips.
The balance is perfection: sweet, tangy, and slightly chewy.
They make a gorgeous addition to cookie platters and last beautifully in tins for gifting.
Ingredients
- 2½ cups all-purpose flour
- 1 teaspoon baking soda
- ½ teaspoon salt
- ¾ cup unsalted butter, softened
- ¾ cup brown sugar, packed
- ½ cup granulated sugar
- 1 large egg
- 1 large egg yolk
- 2 teaspoons vanilla extract
- 1 tablespoon milk
- 1 cup dried cranberries
- 1 cup white chocolate chips
Instructions
1. Combine the dry ingredients
In a medium-sized bowl, whisk together the all-purpose flour, baking soda, and salt until evenly combined. Set the mixture aside while you prepare the wet ingredients.
2. Cream the butter and sugars
In a large mixing bowl, beat the softened butter, brown sugar, and granulated sugar using an electric mixer for 2–3 minutes until the mixture becomes light, fluffy, and creamy. This helps create cookies with a soft, chewy texture.
3. Add the eggs and vanilla
Add the egg, egg yolk, and vanilla extract to the butter mixture. Beat until everything is smooth and fully incorporated. Pour in the milk and mix briefly to combine.
4. Combine the wet and dry ingredients
Gradually add the flour mixture to the wet ingredients, mixing on low speed until a soft cookie dough forms. Avoid overmixing, as this can make the cookies tough instead of tender.
5. Fold in the cranberries and white chocolate
Add the dried cranberries and white chocolate chips to the cookie dough. Gently fold them in using a spatula until they are evenly distributed throughout the dough, ensuring every cookie is filled with delicious sweet and tart flavors.
6. Chill the cookie dough
Cover the mixing bowl with plastic wrap and refrigerate the dough for at least 30–60 minutes. Chilling helps prevent the cookies from spreading too much during baking while allowing the flavors to develop.
7. Prepare the oven and baking sheets
Preheat your oven to 350°F (175°C). Line two baking sheets with parchment paper. Remove the chilled dough from the refrigerator and allow it to sit for a few minutes if it is too firm to scoop.
8. Shape the cookies
Scoop approximately 2 tablespoons of dough for each cookie and roll into balls. Arrange them on the prepared baking sheets, leaving about 2 inches of space between each cookie to allow for spreading. Press a few extra white chocolate chips and cranberries gently onto the tops for a beautiful finish.
9. Bake the cookies until golden
Bake for 10–13 minutes, or until the edges are lightly golden while the centers still look slightly soft and underbaked. Avoid overbaking because the cookies will continue cooking slightly from the residual heat after being removed from the oven.
10. Cool the cookies
Remove the baking sheets from the oven and allow the cookies to rest for 5–10 minutes. This helps them firm up while keeping their centers soft and chewy. Carefully transfer them to a wire rack to cool completely.
11. Serve the cookies
Serve them once they have cooled slightly, allowing the white chocolate to set while the centers remain deliciously soft and chewy. Enjoy them with a cup of coffee, tea, or a glass of cold milk.
Tip
For extra soft and chewy cookies, use more brown sugar than granulated sugar and avoid overbaking. For an attractive bakery-style finish, press a few additional white chocolate chips and dried cranberries onto the cookie dough balls just before baking. You can also refrigerate the dough overnight for a richer flavor and even better texture.
9. Hot Cocoa Cookies
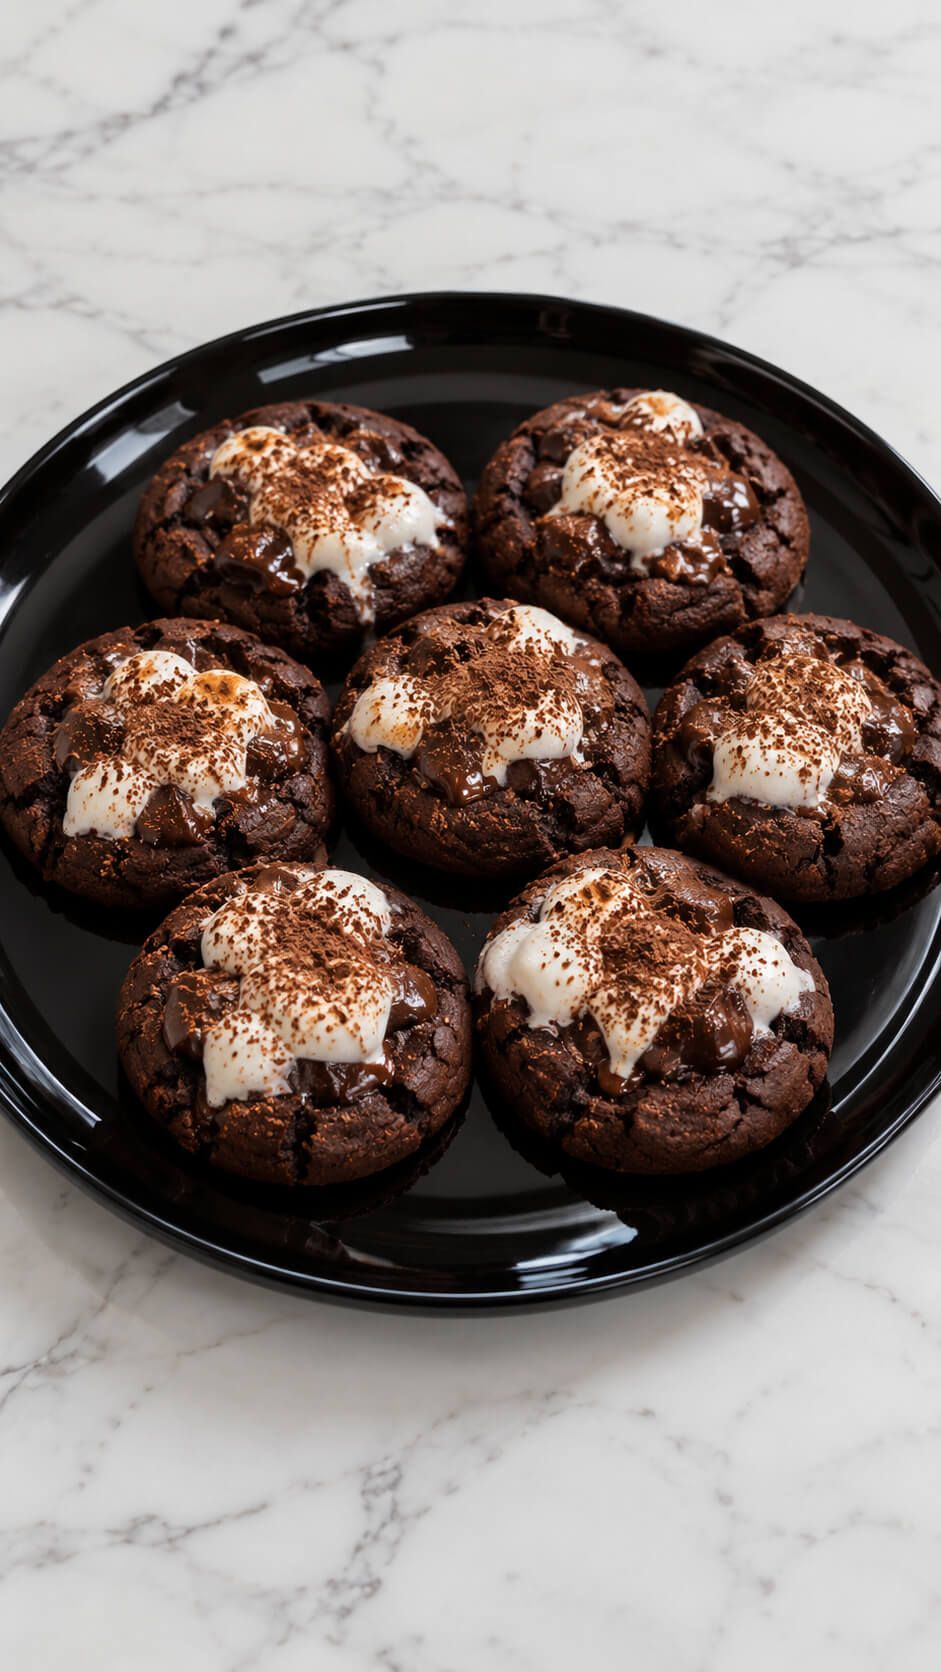
A chocolate lover’s dream come true.
These fudgy cookies are topped with gooey marshmallows and a sprinkle of cocoa powder.
It’s like drinking hot chocolate by the fire, only better—because you can eat it.
You can add a crushed candy cane on top for a peppermint twist.
Ingredients
- 1½ cups all-purpose flour
- ½ cup unsweetened cocoa powder
- ½ teaspoon baking soda
- ¼ teaspoon salt
- ½ cup unsalted butter, softened
- ¾ cup granulated sugar
- ½ cup brown sugar, packed
- 1 large egg
- 1 teaspoon vanilla extract
- ½ cup semi-sweet chocolate chips
- ½ cup chocolate chunks
- 12–14 large marshmallows, cut in half
- 2 tablespoons cocoa powder, for dusting
Instructions
1. Prepare the oven and baking sheet
Preheat the oven to 350°F (175°C). Line a baking sheet with parchment paper and set it aside. This will prevent the cookies from sticking and help them bake evenly.
2. Combine the dry ingredients
In a medium-sized bowl, whisk together the all-purpose flour, cocoa powder, baking soda, and salt until evenly combined. Set the mixture aside while you prepare the wet ingredients.
3. Cream the butter and sugars
In a large mixing bowl, beat the softened butter, granulated sugar, and brown sugar together for 2–3 minutes until light, fluffy, and creamy. This creates a soft cookie texture and gives the cookies a rich sweetness.
4. Add the egg and vanilla
Add the egg and vanilla extract to the butter mixture. Beat until smooth and fully incorporated, scraping down the sides of the bowl if necessary.
5. Combine the cookie dough
Gradually add the dry ingredients to the wet mixture, mixing on low speed until a thick chocolate dough forms. Fold in the chocolate chips and chocolate chunks until evenly distributed throughout the dough.
6. Shape the chocolate cookies
Scoop the dough into approximately 12–14 equal portions and roll each portion into a ball. Arrange them on the prepared baking sheet, leaving about 2 inches of space between each cookie to allow for spreading.
7. Bake the cookies
Bake for 9–11 minutes, until the edges are set but the centers still look slightly soft. Avoid overbaking because the cookies will continue to firm up as they cool.
8. Add the marshmallows
Remove the cookies from the oven and gently press half a marshmallow onto the center of each cookie. Return them to the oven for another 2–3 minutes, until the marshmallows become soft, puffy, and slightly melted.
9. Melt the chocolate topping
While the cookies are still warm, gently press a few extra chocolate chunks into the melted marshmallow topping if desired. Allow the residual heat to soften the chocolate, creating a rich, gooey finish.
10. Dust with cocoa powder
Allow the cookies to rest for approximately 5 minutes. Using a fine-mesh sieve, lightly dust the marshmallow toppings with cocoa powder. This adds a beautiful finishing touch and enhances the chocolate flavor.
11. Cool the cookies
Transfer the cookies carefully to a wire rack and allow them to cool for another 10–15 minutes. The marshmallow will remain soft and gooey while the chocolate cookie centers settle.
12. Serve the cookies
Arrange the chocolate marshmallow cookies on a serving platter. Serve them slightly warm while the chocolate is still soft and the marshmallow topping is deliciously gooey.
Tip
For extra-rich and fudgy cookies, refrigerate the cookie dough for 30 minutes before baking. This helps prevent excessive spreading and develops a deeper chocolate flavor. For an even more indulgent finish, use a combination of semi-sweet and dark chocolate chunks. Avoid adding the marshmallows too early, as they can melt excessively or become too brown.
10. Pecan Snowball Cookies
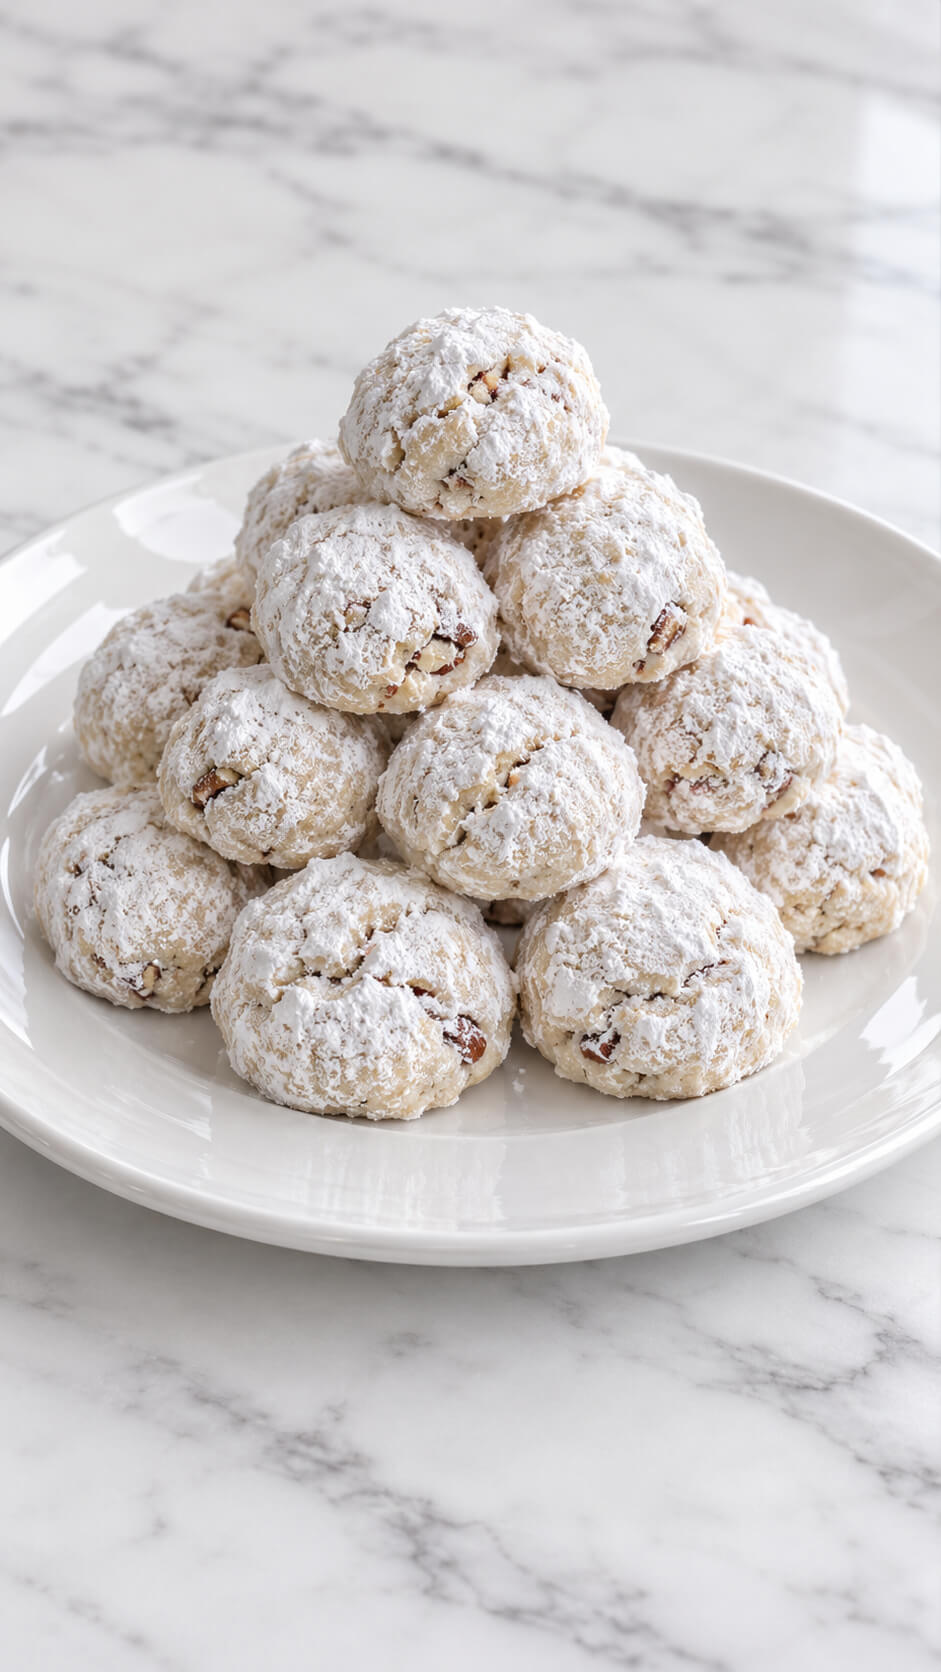
These dainty, melt-in-your-mouth cookies taste like buttery clouds dusted in powdered sugar.
The finely chopped pecans give them a subtle crunch and a toasty, nutty flavor.
They’re old-fashioned in the best way—simple, sweet, and dangerously easy to eat by the handful.
Ingredients
- 1 cup (226 g) unsalted butter, softened
- ½ cup powdered sugar
- 2 teaspoons vanilla extract
- 2 cups (250 g) all-purpose flour
- 1 cup (110 g) finely chopped pecans
- ¼ teaspoon salt
- 1 cup powdered sugar, for coating the cookies
Instructions
1. Prepare the oven and baking sheet
Preheat your oven to 350°F (175°C). Line a large baking sheet with parchment paper to prevent the cookies from sticking and ensure even baking. Set it aside while you prepare the dough.
2. Cream the butter and powdered sugar
In a large mixing bowl, beat the softened butter and ½ cup powdered sugar together using an electric mixer for 2–3 minutes until light, fluffy, and smooth. Add the vanilla extract and mix until fully incorporated. Creaming the butter properly helps create the cookies’ delicate, tender texture.
3. Combine the dry ingredients
In a separate bowl, whisk together the all-purpose flour and salt until evenly combined. Gradually add the dry ingredients to the butter mixture, mixing on low speed until a soft dough begins to form. Avoid overmixing, as this can make the cookies less tender.
4. Add the chopped pecans
Fold the finely chopped pecans into the dough using a spatula. Mix gently until the pecans are evenly distributed throughout. The pecans add a delicious nutty flavor and a subtle crunch to the buttery cookies.
5. Shape the cookie dough
Scoop out approximately 1 tablespoon of dough at a time and roll it between your palms to form small, round balls. Place each ball onto the prepared baking sheet, leaving about 1–2 inches of space between them. Keep the cookies relatively uniform in size so they bake evenly.
6. Bake the cookies until set
Place the baking sheet in the preheated oven and bake for 12–15 minutes, or until the cookies are set and their bottoms are lightly golden. The tops should remain fairly pale. Avoid overbaking, as these cookies should have a soft, delicate, crumbly texture.
7. Cool the cookies slightly
Remove the baking sheet from the oven and allow the cookies to cool for approximately 5 minutes. They will be delicate while warm, so let them firm up slightly before handling. This makes them easier to coat without breaking.
8. Coat the cookies in powdered sugar
Place the remaining powdered sugar in a shallow bowl. While the cookies are still slightly warm, gently roll each one in the powdered sugar until completely coated. Transfer them to a wire rack and allow them to cool completely.
9. Add the final sugar coating
Once the cookies have cooled completely, roll them in powdered sugar a second time. This creates a beautiful, snowy coating that gives the cookies their classic snowball appearance. Make sure each cookie is generously covered.
10. Serve the pecan snowball cookies
Arrange the finished cookies into a lovely pyramid on a serving platter. Serve them once completely cooled, allowing their delicate powdered sugar coating and nutty centers to shine. Enjoy them with coffee, tea, or a glass of milk.
Tip
For the best texture and flavor, finely chop the pecans rather than leaving them in large pieces. You can lightly toast them in a dry skillet over medium-low heat for 3–5 minutes before adding them to the dough. Allow them to cool completely first. For an extra beautiful snowy finish, always roll the cookies in powdered sugar twice: once while slightly warm and again after they have cooled completely.
11. Red Velvet Crinkle Cookies
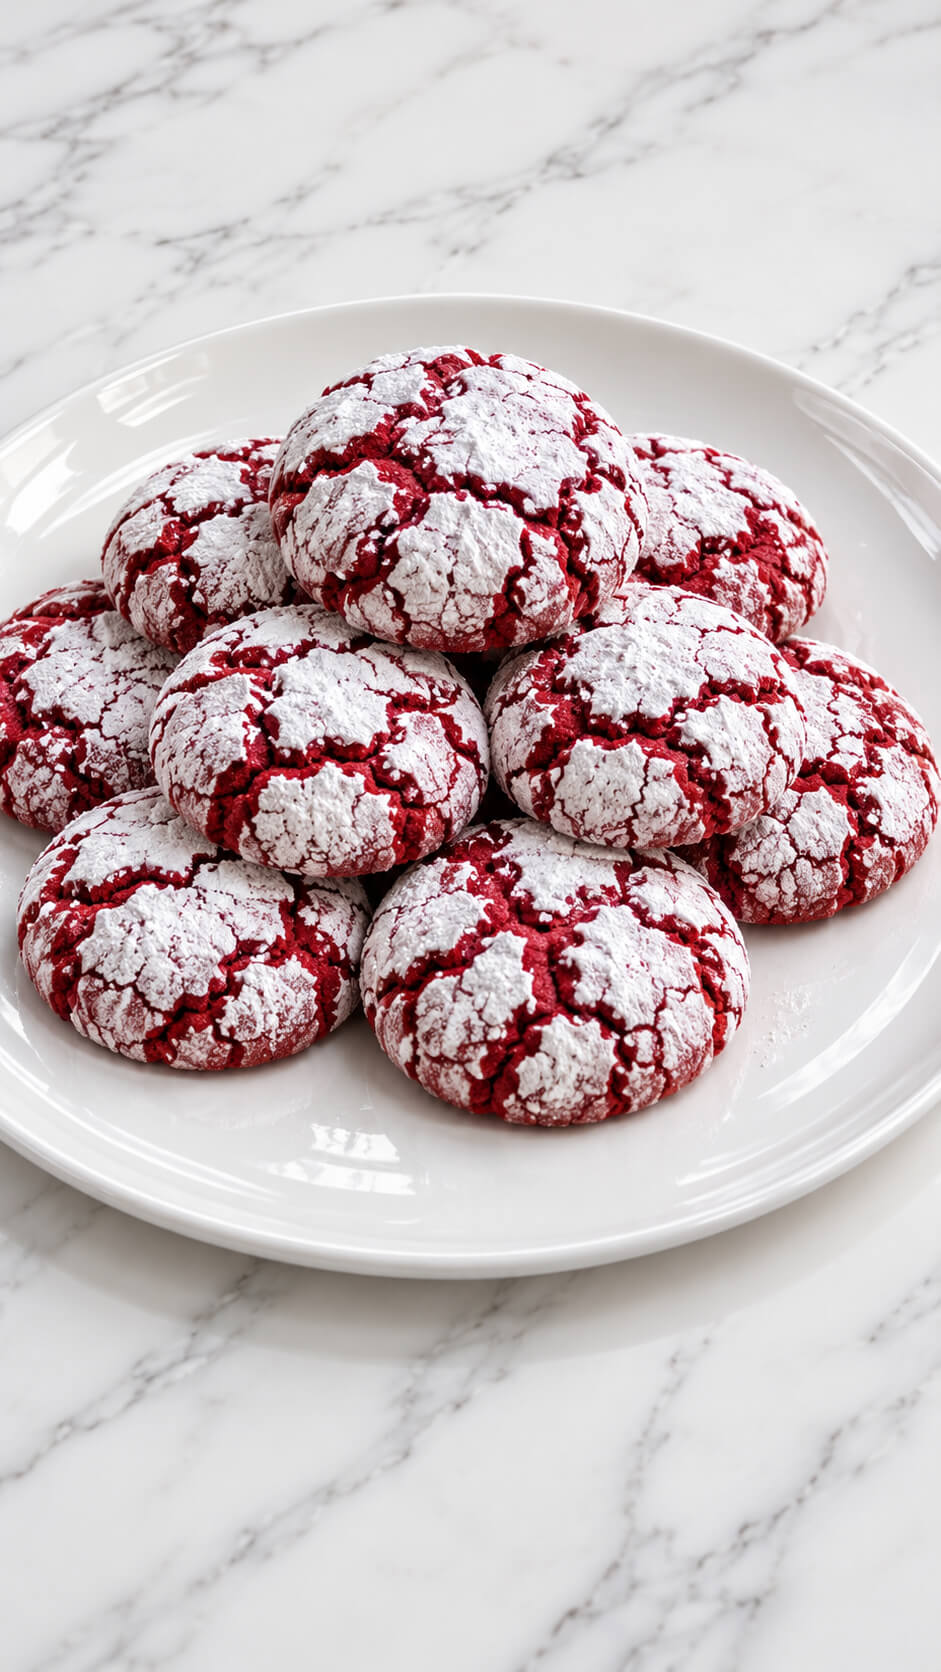
Bold, bright, and a little dramatic—these red velvet crinkles are the star of any Christmas cookie tray.
Soft and chewy with a hint of cocoa, they’re rolled in powdered sugar for that beautiful snowy effect.
Serve them warm and watch everyone swoon after the first bite.
Ingredients
- 2 cups (250g) all-purpose flour
- ¼ cup (25g) unsweetened cocoa powder
- 1 teaspoon baking powder
- ¼ teaspoon baking soda
- ¼ teaspoon salt
- ½ cup (115g) unsalted butter, softened
- 1 cup (200g) granulated sugar
- 2 large eggs, at room temperature
- 1 tablespoon milk
- 2 teaspoons vanilla extract
- 1 tablespoon red food coloring (adjust as needed)
- 1 teaspoon white vinegar
For the coating
- ½ cup (100g) granulated sugar
- 1 cup (120g) powdered sugar
Instructions
1. Combine the dry ingredients
In a medium-sized bowl, whisk together the all-purpose flour, cocoa powder, baking powder, baking soda, and salt until evenly combined. Set the mixture aside while preparing the wet ingredients.
2. Cream the butter and sugar
In a large mixing bowl, beat the softened butter and granulated sugar using an electric mixer for about 2–3 minutes until the mixture becomes light, fluffy, and creamy. This helps create a soft cookie texture.
3. Add the eggs and flavorings
Add the eggs one at a time, beating well after each addition. Mix in the vanilla extract, milk, white vinegar, and red food coloring until the mixture is smooth and evenly colored.
4. Incorporate the dry ingredients
Gradually add the flour mixture to the wet ingredients, mixing on low speed until a soft, thick cookie dough forms. Avoid overmixing, as this can make the cookies dense instead of tender.
5. Chill the cookie dough
Cover the bowl with plastic wrap and refrigerate the dough for at least 1–2 hours. Chilling helps firm up the dough, making it easier to roll and allowing the cookies to maintain their shape during baking.
6. Prepare the sugar coating
Place the granulated sugar in one small bowl and the powdered sugar in another. Line a baking tray with parchment paper and preheat the oven to 350°F (175°C).
7. Shape the cookies
Scoop approximately 1 tablespoon of chilled dough and roll it between your palms to form smooth balls. Repeat with the remaining dough, keeping the cookies approximately the same size for even baking.
8. Coat the cookie dough balls
Roll each dough ball first in granulated sugar, then generously coat it in powdered sugar until completely covered. The granulated sugar helps prevent the powdered sugar from dissolving into the dough, giving the cookies their beautiful crinkled appearance.
9. Arrange the cookies for baking
Place the coated dough balls on the prepared baking tray, leaving approximately 2 inches of space between each cookie. This allows them to spread without sticking together as they bake.
10. Bake the cookies
Bake in the preheated oven for 10–12 minutes, until the cookies have spread and developed their signature cracked surfaces. The edges should be set while the centers remain slightly soft. Avoid overbaking to maintain their chewy texture.
11. Cool the cookies
Remove the baking tray from the oven and allow the cookies to rest for about 5 minutes. Carefully transfer them to a wire rack and let them cool completely. They will firm up slightly as they cool while keeping their soft, tender centers.
12. Serve the cookies
Once completely cooled, arrange the red velvet crinkle cookies in a stack and serve them. Their deep red color, snowy powdered sugar coating, and beautifully cracked tops make them a delicious treat for any occasion.
Tip
For the prettiest crinkle effect, coat the dough balls generously with powdered sugar just before baking. Make sure the dough is thoroughly chilled before shaping, and avoid skipping the granulated sugar coating. For an extra soft and fudgy center, remove the cookies from the oven while the middle still looks slightly underbaked.
12. Chocolate Peppermint Bark Cookies
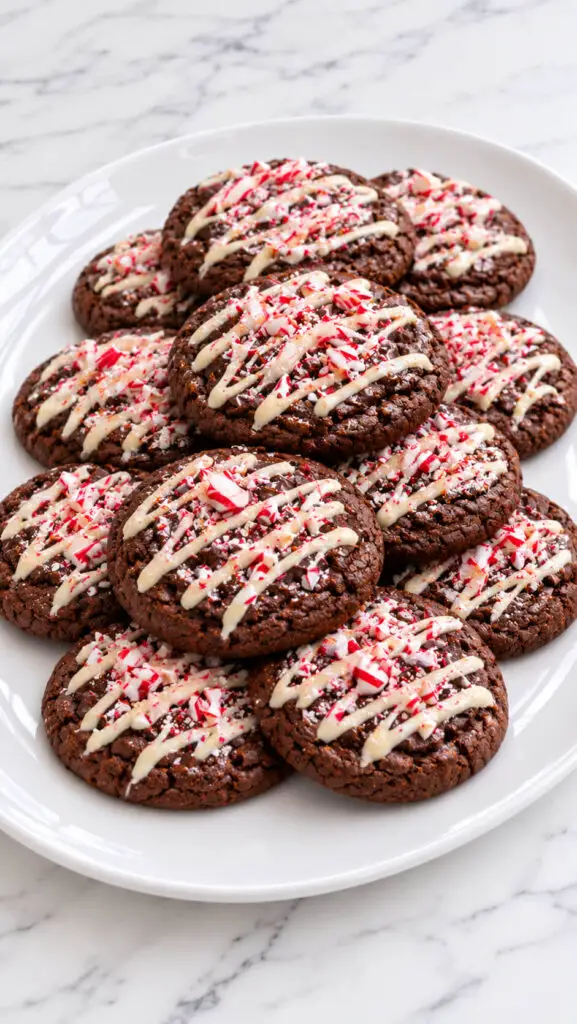
If peppermint bark and cookies had a baby, this would be it.
A rich chocolate base is topped with melted white chocolate and sprinkled with crushed candy canes.
They’re festive, fun, and oh-so-pretty.
Perfect for cookie swaps, gift boxes, or sneaky late-night snacking.
Ingredients
- 1½ cups all-purpose flour
- ½ cup unsweetened cocoa powder
- 1 teaspoon baking soda
- ½ teaspoon salt
- ½ cup unsalted butter, softened
- ¾ cup granulated sugar
- ½ cup packed light brown sugar
- 2 large eggs
- 1 teaspoon vanilla extract
- ½ teaspoon peppermint extract
- ½ cup semi-sweet chocolate chips
- ½ cup chopped dark chocolate
For the white chocolate topping
- 1 cup white chocolate chips or chopped white chocolate
- ½ teaspoon coconut oil (optional)
- ½ cup crushed candy canes
Instructions
1. Prepare the dry ingredients
In a medium mixing bowl, whisk together the all-purpose flour, cocoa powder, baking soda, and salt until evenly combined. Set aside while you prepare the wet ingredients.
2. Cream the butter and sugars
In a large mixing bowl, beat the softened butter, granulated sugar, and brown sugar together for 2–3 minutes until light and fluffy. This creates a smooth, creamy base that helps give the cookies their soft, chewy texture.
3. Add the eggs and extracts
Add the eggs one at a time, mixing well after each addition. Stir in the vanilla extract and peppermint extract until everything is fully incorporated and fragrant.
4. Combine the wet and dry ingredients
Gradually add the dry ingredient mixture to the wet ingredients. Mix on low speed until just combined, being careful not to overmix the dough. Fold in the semi-sweet chocolate chips and chopped dark chocolate until evenly distributed.
5. Chill the cookie dough
Cover the mixing bowl and refrigerate the dough for 30–45 minutes. Chilling helps the cookies hold their shape while baking and creates a thicker, fudgier texture.
6. Prepare the oven and baking sheets
Preheat your oven to 350°F (175°C). Line two baking sheets with parchment paper to prevent the cookies from sticking and ensure even baking.
7. Shape the cookies
Scoop approximately 2 tablespoons of dough for each cookie and roll into balls. Place them on the prepared baking sheets, leaving about 2 inches between each cookie to allow room for spreading.
8. Bake the chocolate cookies
Bake for 10–12 minutes, until the edges are set and the centers still look slightly soft. Avoid overbaking, as the cookies will continue to firm up while cooling.
9. Cool the cookies completely
Remove the baking sheets from the oven and allow the cookies to rest for about 5 minutes. Transfer them to a wire rack and let them cool completely before adding the white chocolate topping.
10. Melt the white chocolate
Place the white chocolate chips in a microwave-safe bowl. Microwave in 20-second intervals, stirring between each interval until smooth and completely melted. Stir in the coconut oil if desired to create a smoother consistency for drizzling.
11. Add the white chocolate topping
Drizzle or spread the melted white chocolate generously over each cooled cookie. Work while the chocolate is still warm so the crushed candy canes stick easily.
12. Sprinkle with crushed candy canes
Immediately sprinkle the crushed candy canes over the melted white chocolate. Distribute them evenly so every cookie gets a beautiful combination of peppermint crunch and creamy sweetness.
13. Allow the chocolate to set
Arrange the cookies in a single layer and let them sit at room temperature for 30–45 minutes, or refrigerate for about 10–15 minutes, until the white chocolate has completely hardened.
14. Serve the cookies
Serve them once the white chocolate topping has set. These festive Chocolate Peppermint Bark Cookies are delicious on their own and make a beautiful addition to Christmas dessert spreads, holiday cookie boxes, and seasonal gatherings.
Tip
For the prettiest peppermint bark finish, crush the candy canes into a mixture of small pieces and fine crumbs. Sprinkle them over the white chocolate while it is still melted so they stick properly. Avoid crushing them into powder, as the larger pieces add a lovely crunch and make the cookies look extra festive.
Storage
- Room temperature: Store in an airtight container for up to 5 days.
- Refrigerator: Keep in an airtight container for up to 1 week.
- Freezer: Freeze the baked cookies for up to 2 months. Thaw at room temperature before serving.
13. Oatmeal Cranberry Spice Cookies
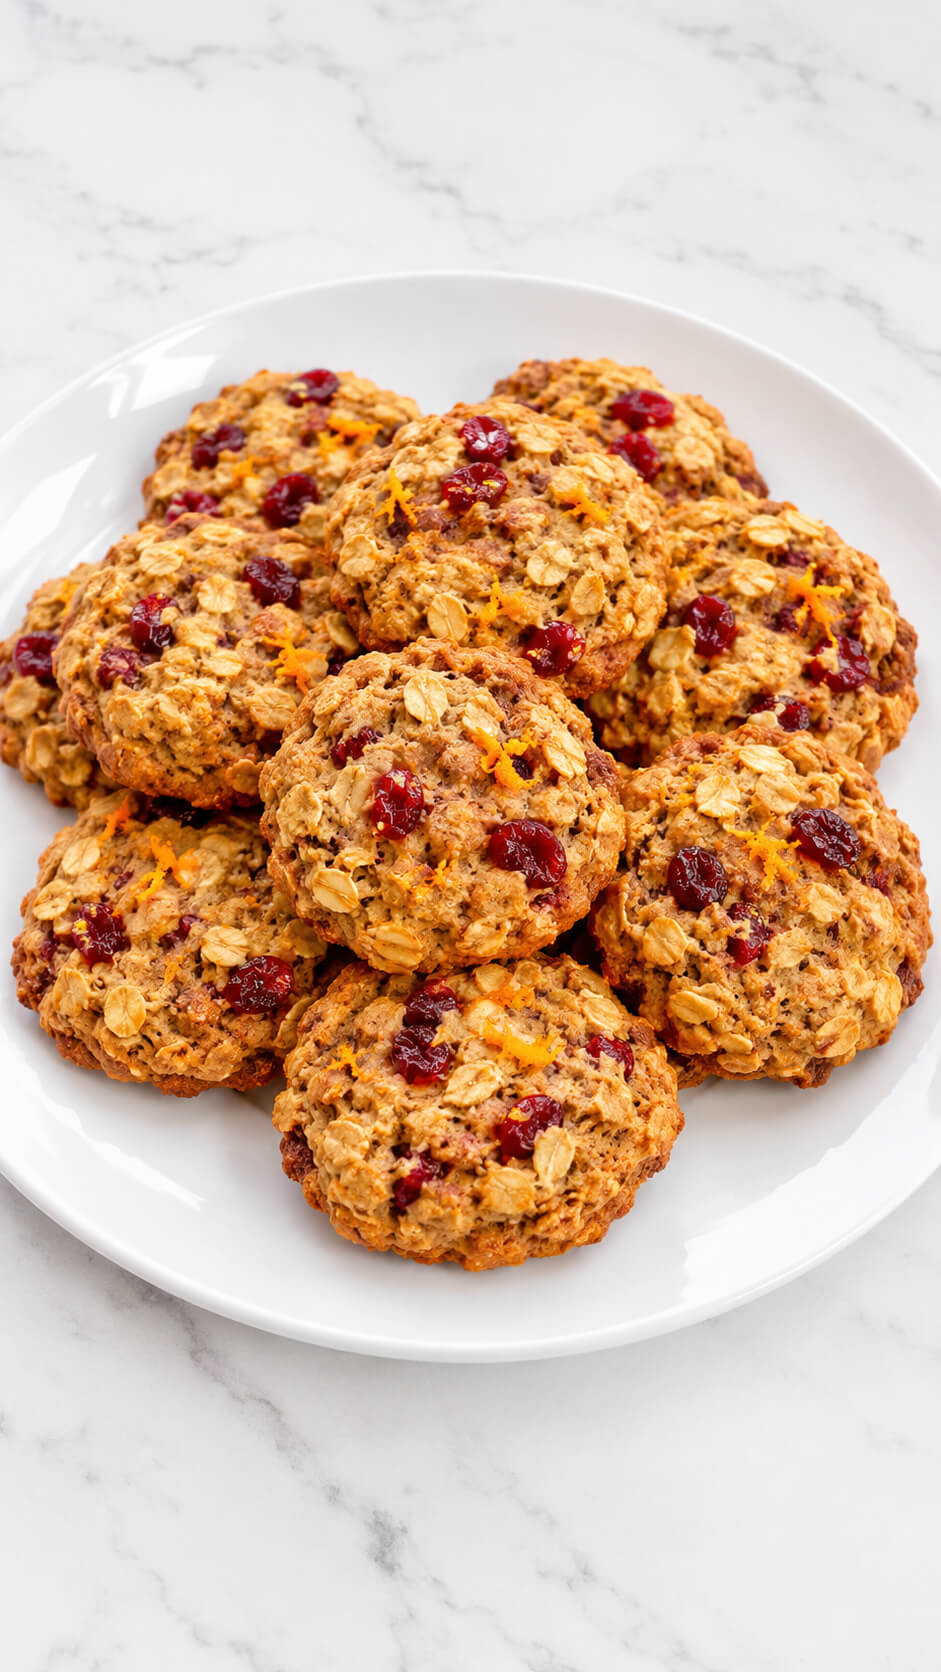
Think of these as oatmeal cookies dressed up for the holidays.
Cinnamon, cloves, and orange zest mingle with tart dried cranberries for a cozy, fragrant bite.
They’re hearty yet festive—a cookie that feels like a warm hug.
Great with tea, or even for breakfast (no judgment).
Ingredients
- 1 cup (225 g) unsalted butter, softened
- ¾ cup (150 g) brown sugar, packed
- ¼ cup (50 g) granulated sugar
- 1 large egg
- 1 teaspoon vanilla extract
- 1 tablespoon fresh orange zest
- 1½ cups (190 g) all-purpose flour
- 2 cups (180 g) old-fashioned rolled oats
- 1 cup (120 g) dried cranberries
- ½ teaspoon baking soda
- ½ teaspoon baking powder
- ½ teaspoon ground cinnamon
- ¼ teaspoon ground nutmeg
- ¼ teaspoon ground ginger
- ½ teaspoon salt
Instructions
1. Prepare the oven and baking sheets
Preheat your oven to 350°F (175°C). Line two baking sheets with parchment paper to prevent the cookies from sticking and ensure even baking. Set them aside while you prepare the cookie dough.
2. Cream the butter and sugars
In a large mixing bowl, beat the softened butter, brown sugar, and granulated sugar together using an electric mixer for 2–3 minutes until the mixture becomes light, fluffy, and creamy. Properly creaming the butter and sugars helps create cookies with a soft, chewy texture.
3. Add the egg and flavorings
Add the egg and vanilla extract to the butter mixture. Beat until everything is well combined. Stir in the fresh orange zest, making sure it is evenly distributed throughout the mixture to give the cookies a refreshing citrus aroma.
4. Combine the dry ingredients
In a separate bowl, whisk together the all-purpose flour, baking soda, baking powder, ground cinnamon, nutmeg, ginger, and salt. Mix thoroughly to distribute the spices and raising agents evenly throughout the flour.
5. Prepare the cookie dough
Gradually add the dry ingredients to the wet mixture, mixing on low speed until just combined. Avoid overmixing, as this can make the cookies dense. Fold in the rolled oats and dried cranberries using a spatula until they are evenly incorporated into the dough.
6. Shape the cookies
Scoop approximately 2 tablespoons of cookie dough for each cookie and roll gently into balls. Place them onto the prepared baking sheets, leaving about 2 inches of space between each cookie to allow room for spreading. Gently flatten each dough ball slightly with your fingers.
7. Bake the cookies until golden
Place the baking sheets in the preheated oven and bake for 10–13 minutes, or until the edges are lightly golden brown and the centers look slightly soft. Avoid overbaking because the cookies will continue to firm up as they cool.
8. Cool the baked cookies
Remove the cookies from the oven and allow them to rest on the baking sheets for approximately 5 minutes. Carefully transfer them to a wire cooling rack and let them cool completely. This helps the cookies set while maintaining their soft and chewy centers.
9. Serve the cookies
Serve them once they have cooled slightly or completely. Enjoy these oatmeal cranberry spice cookies with a cup of tea, coffee, or a glass of milk. They are perfect for breakfast treats, afternoon snacks, or sharing with family and friends.
Tip
For extra flavorful cookies, soak the dried cranberries in warm water or orange juice for 5–10 minutes before adding them to the dough. Drain and pat them dry thoroughly to prevent excess moisture. You can also sprinkle a little extra orange zest over the cookies before baking for a stronger citrus aroma. Store leftover cookies in an airtight container at room temperature for up to 5 days.
14. Almond Spritz Cookies

These classic pressed cookies are buttery, crisp, and delicately flavored with almond extract.
Use a cookie press to make festive shapes—trees, wreaths, or stars—and top with colored sugar.
They’re charmingly old-school and look like they came straight from Grandma’s kitchen. Always a hit!
Ingredients
- 1 cup (225g) unsalted butter, softened
- ¾ cup (150g) granulated sugar
- 1 large egg
- 1 teaspoon vanilla extract
- ½ teaspoon almond extract
- 2¼ cups (280g) all-purpose flour
- ¼ teaspoon salt
- ½ teaspoon baking powder
- 2 tablespoons milk, if needed
- Red, green, and white decorative sugar sprinkles
- Colored sanding sugar for decoration
Instructions
1. Preheat the oven
Preheat your oven to 350°F (175°C). Line two baking sheets with parchment paper and set them aside. Make sure the butter is softened to room temperature so it blends smoothly with the sugar.
2. Cream the butter and sugar
In a large mixing bowl, beat the softened butter and granulated sugar together using an electric mixer for 2–3 minutes until the mixture becomes light, fluffy, and creamy. This creates a smooth base for the cookies and helps give them their delicate, buttery texture.
3. Add the egg and extracts
Add the egg, vanilla extract, and almond extract to the butter mixture. Beat until everything is thoroughly combined and smooth. The almond extract gives these spritz cookies their distinctive sweet, nutty flavor.
4. Combine the dry ingredients
In a separate bowl, whisk together the all-purpose flour, salt, and baking powder. Gradually add the dry ingredients to the butter mixture, mixing on low speed until a soft, smooth dough forms. If the dough feels too stiff, add milk one teaspoon at a time until it reaches a consistency suitable for pressing.
5. Fill the cookie press
Transfer the cookie dough into a cookie press fitted with your preferred decorative discs. Choose Christmas tree, wreath, and star shapes to create a festive assortment. Pack the dough firmly into the press to remove any air pockets and ensure the cookies hold their shapes.
6. Shape the cookies
Press the dough directly onto the prepared baking sheets, leaving approximately 1 inch between each cookie. Create an assortment of trees, wreaths, and stars. If the first few cookies do not release properly, wipe the baking sheet clean and try again without using parchment paper, as some cookie presses work best directly on an ungreased baking sheet.
7. Decorate the cookies
Sprinkle the shaped cookies with red, green, and white decorative sugar before baking. Add green sprinkles to the Christmas trees, colorful sprinkles to the wreaths, and red sanding sugar to the star-shaped cookies. Gently press larger decorations into the dough so they stay in place during baking.
8. Bake until lightly golden
Place the baking sheets in the preheated oven and bake for 8–10 minutes, or until the cookies are set and their edges are just beginning to turn lightly golden. Avoid overbaking because spritz cookies should remain pale and tender rather than becoming deeply browned.
9. Cool the cookies
Remove the baking sheets from the oven and allow the cookies to rest for about 5 minutes. Carefully transfer them to a wire cooling rack and let them cool completely. They will become firmer as they cool while maintaining their delicate, buttery texture.
10. Serve the cookies
Arrange the cooled almond spritz cookies together, displaying the Christmas trees, wreaths, and decorated stars. Serve them as a festive holiday treat alongside coffee, tea, or hot chocolate. Store any remaining cookies in an airtight container to keep them fresh and crisp.
Tip
For beautifully shaped spritz cookies, make sure your dough is soft enough to pass easily through the cookie press but not overly sticky. Avoid chilling the dough before pressing, as room-temperature dough releases more easily and creates sharper decorative shapes. For an extra festive appearance, use different sprinkle combinations for each cookie shape and allow the decorations to stand out.
15. Molasses Spice Cookies
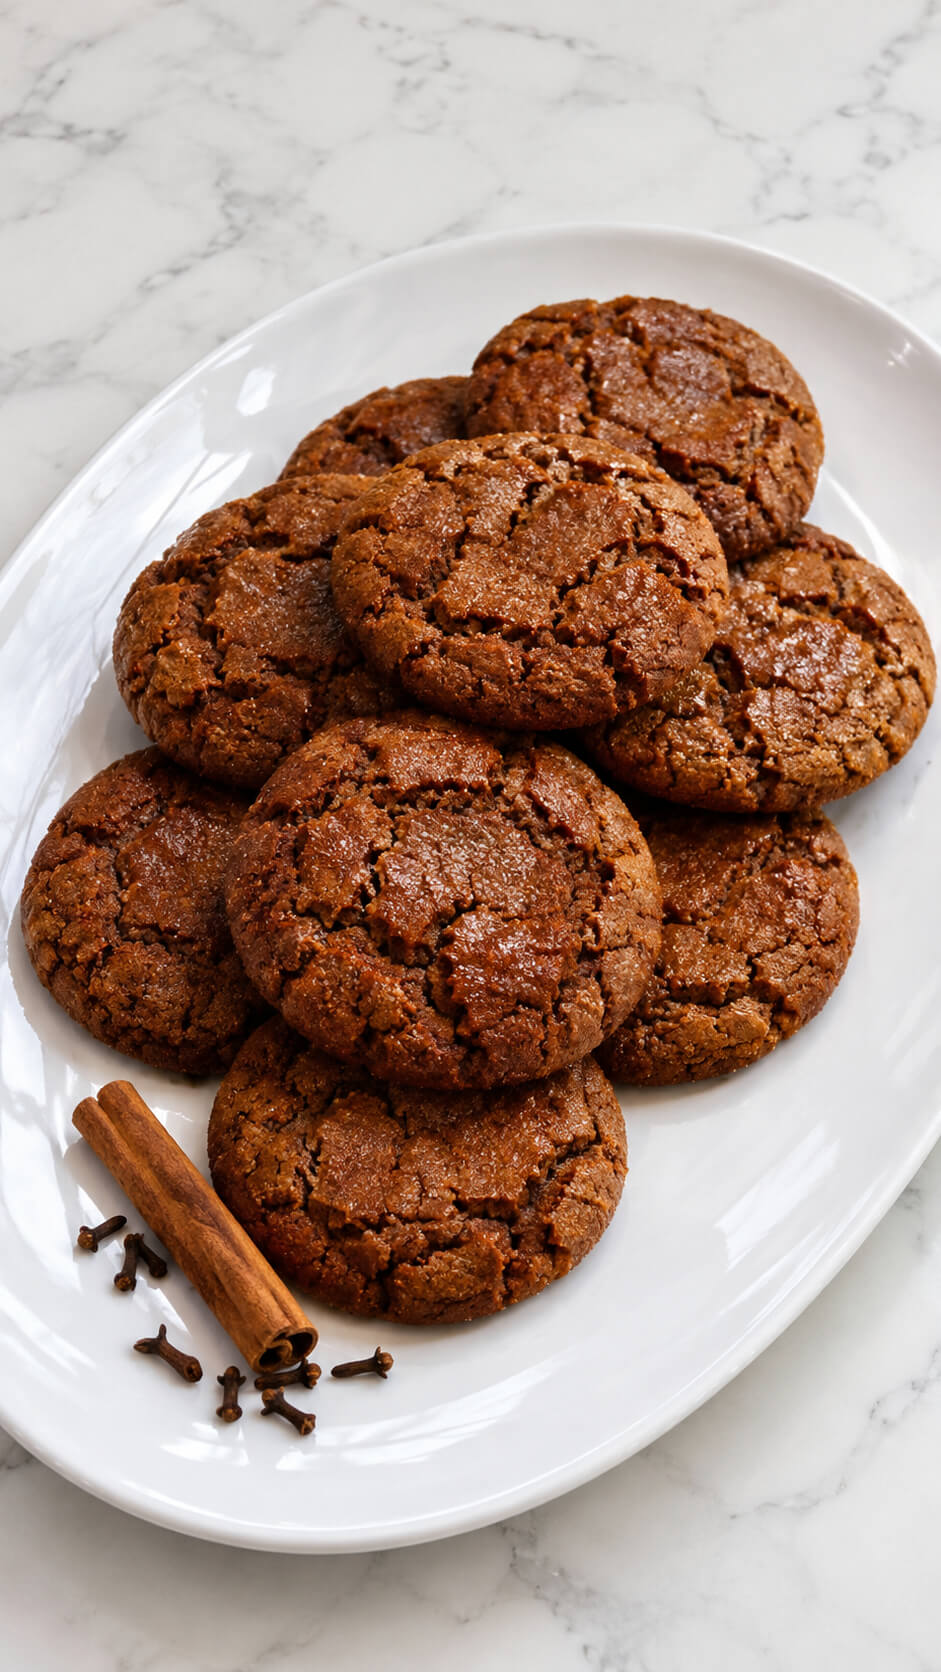
Soft, chewy, and packed with deep flavor, these cookies taste like the essence of Christmas.
Molasses brings a rich caramel note, while ginger and cloves add that cozy spice.
They fill the house with the most comforting aroma—and disappear faster than Santa’s cookies on Christmas Eve.
Ingredients
- 2¼ cups all-purpose flour
- ¾ cup unsalted butter, softened
- ¾ cup brown sugar, packed
- ¼ cup unsulphured molasses
- 1 large egg
- 2 teaspoons vanilla extract
- 2 teaspoons ground ginger
- 1 teaspoon ground cinnamon
- ½ teaspoon ground cloves
- ½ teaspoon ground nutmeg
- 1 teaspoon baking soda
- ¼ teaspoon salt
- ¼ cup granulated sugar, for rolling the cookies
For serving
- 1 cinnamon stick
- A few whole cloves
Instructions
1. Prepare the dry ingredients
In a medium bowl, whisk together the all-purpose flour, ground ginger, cinnamon, cloves, nutmeg, baking soda, and salt. Mix until all the spices are evenly distributed throughout the flour. Set aside.
2. Cream the butter and sugar
In a large mixing bowl, beat the softened butter and brown sugar together for 2–3 minutes until light, creamy, and fluffy. This helps create cookies with a soft, tender texture.
3. Add the molasses and egg
Add the molasses, egg, and vanilla extract to the butter mixture. Beat until smooth and fully combined. The mixture should look thick, glossy, and evenly blended.
4. Combine the wet and dry ingredients
Gradually add the dry ingredients to the wet mixture. Mix on low speed until a soft cookie dough forms. Avoid overmixing, as this can make the cookies dense instead of tender.
5. Chill the cookie dough
Cover the dough and refrigerate for 30–45 minutes. Chilling helps firm up the butter, makes the dough easier to handle, and prevents the cookies from spreading too much during baking.
6. Shape the cookies
Preheat the oven to 350°F (175°C) and line a baking sheet with parchment paper. Scoop the chilled dough into tablespoon-sized portions and roll each portion into a smooth ball. Roll each ball in granulated sugar until lightly coated.
7. Arrange the cookies for baking
Place the cookie dough balls on the prepared baking sheet, leaving approximately 2 inches between each one. This gives the cookies enough room to spread while baking.
8. Bake the cookies
Bake for 9–12 minutes, until the edges are set and the tops develop beautiful cracks. The centers should still look slightly soft when removed from the oven. Avoid overbaking to maintain their chewy texture.
9. Cool the cookies
Allow the cookies to rest on the baking sheet for 5 minutes before transferring them to a wire rack. They will continue to set as they cool while retaining their soft, chewy centers.
10. Serve the cookies
Arrange the cooled molasses spice cookies in a beautiful stack and serve them with a cinnamon stick and a few whole cloves for a warm, aromatic presentation. Enjoy them with coffee, tea, or a glass of milk.
Tip
For extra soft and chewy cookies, avoid baking them until they look completely firm. Remove them when the centers are still slightly soft, as they will continue cooking from the residual heat. For an even deeper molasses flavor, refrigerate the dough overnight before baking.
16. Pistachio Thumbprint Cookies
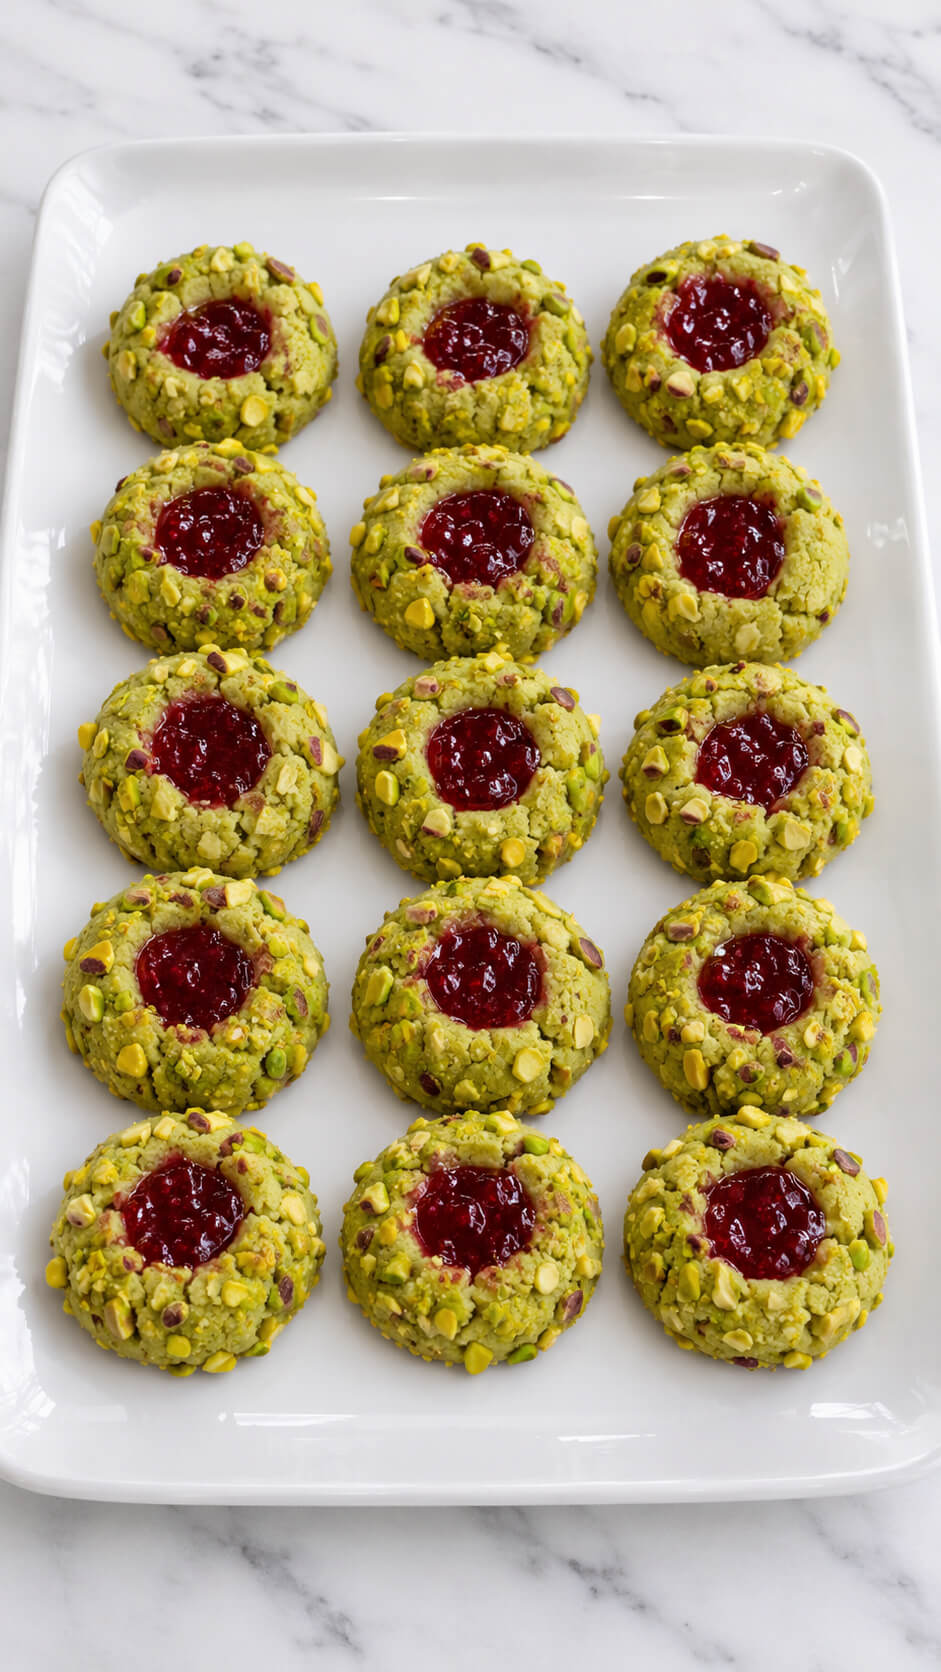
Pretty enough for a cookie exchange and fancy enough for gifting, these pistachio thumbprints are a holiday gem.
The green hue from the nuts looks gorgeous against ruby-red jam centers.
They’re buttery, nutty, and slightly crisp around the edges—a perfectly elegant bite that feels as festive as it looks.
Ingredients
- 1 cup (225 g) unsalted butter, softened
- ½ cup (100 g) granulated sugar
- 1 large egg yolk
- 1 teaspoon vanilla extract
- ¼ teaspoon almond extract (optional)
- 2 cups (250 g) all-purpose flour
- ½ cup (60 g) finely ground pistachios
- ¼ teaspoon salt
- ½ teaspoon baking powder
- ½ cup (60 g) finely chopped pistachios, for coating
- ½ cup (160 g) raspberry jam
Instructions
1. Prepare the cookie dough
In a large mixing bowl, beat the softened butter and granulated sugar together for 2–3 minutes until light and creamy. Add the egg yolk, vanilla extract, and almond extract, then mix until everything is well combined.
2. Combine the dry ingredients
In a separate bowl, whisk together the all-purpose flour, finely ground pistachios, salt, and baking powder. Gradually add the dry ingredients to the butter mixture, mixing on low speed until a soft dough forms. Avoid overmixing to keep the cookies tender.
3. Chill the cookie dough
Cover the dough and refrigerate for 30–45 minutes. Chilling helps firm up the butter, making the dough easier to shape and helping the cookies maintain their shape while baking.
4. Shape the cookies
Preheat your oven to 350°F (175°C) and line a baking sheet with parchment paper. Scoop the chilled dough into small portions, approximately 1 tablespoon each, and roll them between your palms to form smooth balls.
5. Coat the cookies with pistachios
Place the finely chopped pistachios in a small bowl. Roll each dough ball gently in the chopped pistachios, pressing lightly so the nuts stick to the outside. Arrange the coated dough balls on the prepared baking sheet, leaving about 2 inches between each cookie.
6. Create the thumbprint centers
Use your thumb or the back of a small measuring spoon to gently press an indentation into the center of each cookie. Make sure the indentation is deep enough to hold the raspberry jam without pressing all the way through the dough.
7. Fill the cookies with raspberry jam
Stir the raspberry jam until smooth. Using a small spoon, carefully fill each indentation with approximately ½ teaspoon of jam. Avoid overfilling, as the jam may bubble and spill over during baking.
8. Bake the cookies
Bake in the preheated oven for 12–15 minutes, or until the edges are lightly golden and the cookies are set. The centers should remain slightly soft. Remove from the oven and allow the cookies to cool on the baking sheet for 5 minutes before transferring them to a wire rack.
9. Cool and serve the cookies
Allow the cookies to cool completely so the jam centers can set. Arrange them neatly on a serving platter, keeping the ruby-red jam centers visible. Serve them with tea, coffee, or your favorite dessert beverage.
Tip
For the best flavor and texture, use finely chopped roasted pistachios for coating and good-quality raspberry jam with a slightly tart flavor. If the indentations puff up during baking, gently press the centers again while the cookies are still warm. Store the completely cooled cookies in an airtight container at room temperature for up to 4 days.
17. Brown Butter Toffee Cookies
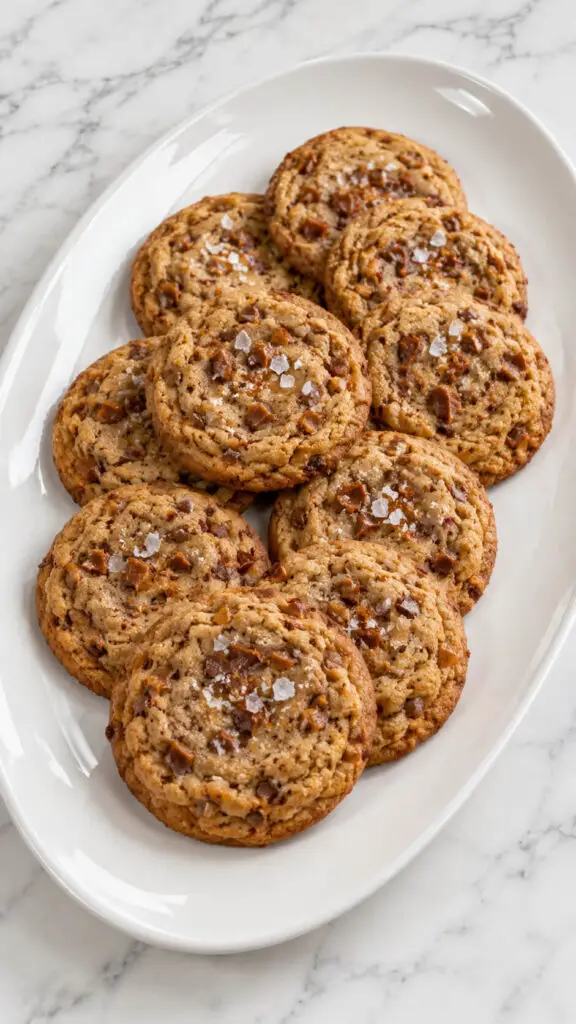
If cozy had a flavor, it would taste like these cookies.
The brown butter gives a nutty, caramel depth, while bits of toffee melt into golden sweetness.
Sprinkle a pinch of sea salt on top to make them extra special.
They’re warm, rich, and impossible to forget after one bite.
Ingredients
- 1 cup (226 g) unsalted butter
- 1 cup packed light brown sugar
- ½ cup granulated sugar
- 2 large eggs, room temperature
- 2 teaspoons vanilla extract
- 2½ cups all-purpose flour
- 1 teaspoon baking soda
- ½ teaspoon baking powder
- ¾ teaspoon salt
- 1 cup toffee bits, such as chopped Heath bars
- ¾ cup semisweet chocolate chips or chopped chocolate
- 1 teaspoon flaky sea salt, for topping
Instructions
1. Brown the butter
Place the unsalted butter in a medium saucepan over medium heat. Allow it to melt, stirring frequently as it begins to foam and bubble. Continue cooking for 5–8 minutes until golden brown bits form at the bottom and the butter develops a rich, nutty aroma. Immediately transfer the browned butter to a heatproof bowl, scraping in the browned bits, and let it cool for 15–20 minutes until warm but not hot.
2. Mix the butter and sugars
In a large mixing bowl, combine the cooled brown butter, brown sugar, and granulated sugar. Beat with a hand mixer or whisk until the mixture is smooth and well combined. The brown sugar adds moisture and creates the signature chewy texture, while the granulated sugar helps the cookies develop slightly crispy edges.
3. Add the eggs and vanilla
Add the eggs one at a time, mixing well after each addition. Pour in the vanilla extract and continue mixing until the mixture becomes smooth, thick, and glossy. Make sure the browned butter has cooled sufficiently before adding the eggs to prevent them from cooking.
4. Combine the dry ingredients
In a separate bowl, whisk together the all-purpose flour, baking soda, baking powder, and salt. Gradually add the dry ingredients to the wet mixture, stirring gently with a spatula until a soft cookie dough forms. Avoid overmixing, as this can make the cookies tough instead of tender and chewy.
5. Fold in the toffee and chocolate
Add the toffee bits and chocolate chips to the cookie dough. Gently fold them in with a spatula until evenly distributed throughout the mixture. Reserve a small handful of toffee bits and chocolate pieces to press onto the cookies before baking for an extra delicious appearance.
6. Chill the cookie dough
Cover the mixing bowl with plastic wrap and refrigerate the cookie dough for at least 30 minutes. Chilling allows the flour to absorb moisture, helps the browned butter firm up, and prevents the cookies from spreading too much during baking. For a deeper caramel-like flavor, refrigerate the dough for up to 24 hours.
7. Preheat the oven
Preheat the oven to 350°F (175°C). Line two large baking sheets with parchment paper to prevent sticking and encourage even baking. Position the oven rack in the center for consistent heat distribution.
8. Shape the cookies
Scoop approximately 2 tablespoons of chilled cookie dough for each cookie and roll into balls. Arrange them on the prepared baking sheets, leaving about 2 inches between each cookie to allow room for spreading. Gently press a few reserved toffee bits and chocolate pieces onto the tops.
9. Bake the cookies
Bake for 10–12 minutes, or until the edges are golden brown and the centers appear slightly soft and underbaked. The cookies will continue to firm up as they cool, creating crispy edges and perfectly chewy centers. Avoid overbaking to maintain their soft texture.
10. Add the flaky sea salt
Remove the cookies from the oven and immediately sprinkle a small amount of flaky sea salt over each one while still warm. The salt balances the sweetness of the toffee and chocolate while enhancing the rich, nutty flavor of the browned butter.
11. Cool the cookies
Allow the cookies to rest on the baking sheets for 5–10 minutes before transferring them to a wire rack. This resting period helps the centers set without losing their soft, chewy texture. Let them cool slightly before serving so the caramelized toffee pieces can firm up.
12. Serve the cookies
Serve the Brown Butter Toffee Cookies slightly warm or at room temperature. Enjoy their buttery, caramel-like flavor, crunchy toffee pieces, and soft chocolate-filled centers. They are perfect for holiday gatherings, dessert platters, afternoon treats, or sharing with family and friends.
Tip
For extra-rich Brown Butter Toffee Cookies, chill the dough overnight before baking. This allows the flavors to develop, giving the cookies a deeper caramel taste and a thicker, chewier texture. For an extra bakery-style finish, gently press a few additional toffee pieces onto the warm cookies immediately after baking and finish with a light sprinkle of flaky sea salt.
18. Candy Cane Kiss Cookies
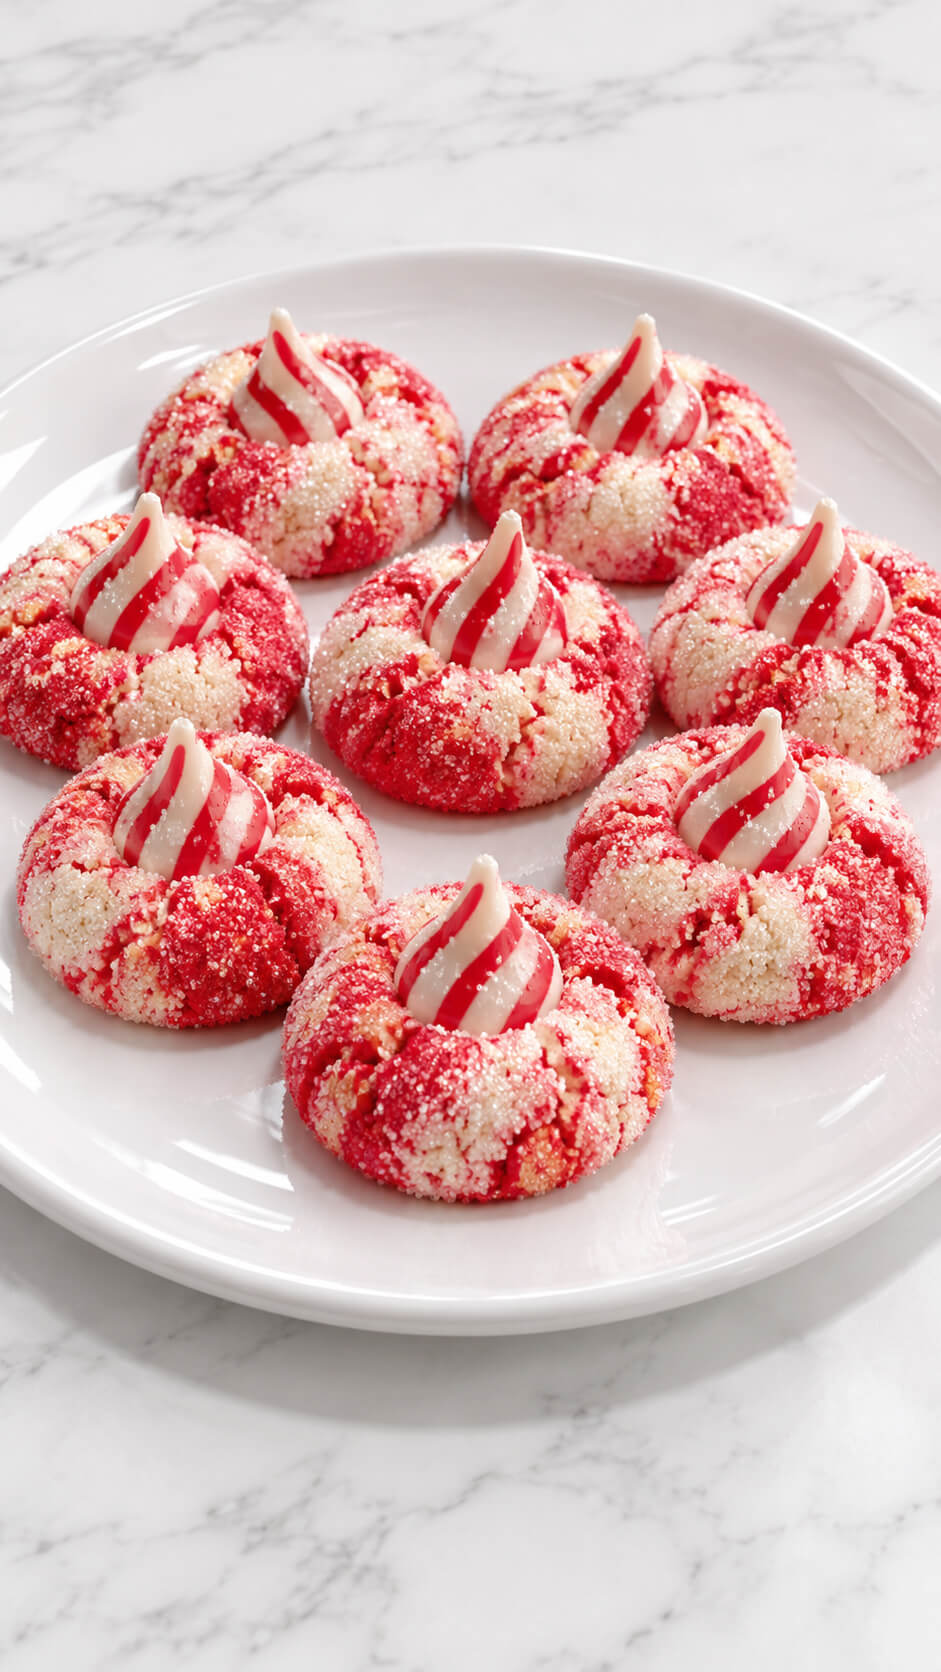
These cheerful little cookies are as fun to look at as they are to eat.
Soft sugar cookie dough gets rolled in sparkling red and white sugar, then crowned with a peppermint Hershey’s Kiss.
They’re sweet, minty, and the definition of Christmas joy—ideal for baking with kids.
Ingredients
- 2½ cups all-purpose flour
- 1 teaspoon baking powder
- ¼ teaspoon salt
- ½ cup unsalted butter, softened
- 1 cup granulated sugar
- 1 large egg
- 1 teaspoon vanilla extract
- ½ teaspoon peppermint extract
- 2 tablespoons milk
- Red food coloring
- ½ cup red sanding sugar
- ½ cup white granulated sugar
- 24 Candy Cane Hershey’s Kisses, unwrapped
Instructions
1. Prepare the dry ingredients
In a medium bowl, whisk together the all-purpose flour, baking powder, and salt until evenly combined. Set the mixture aside while you prepare the cookie dough.
2. Cream the butter and sugar
In a large mixing bowl, beat the softened butter and granulated sugar together for 2–3 minutes until light, fluffy, and creamy. This helps create soft cookies with a tender texture.
3. Add the wet ingredients
Add the egg, vanilla extract, peppermint extract, and milk to the butter mixture. Beat until everything is smooth and well combined.
4. Combine the cookie dough
Gradually add the dry ingredients to the wet mixture, mixing on low speed until a soft dough forms. Avoid overmixing, as this can make the cookies tough.
5. Divide and color the dough
Divide the dough into two equal portions. Leave one portion plain and add a few drops of red food coloring to the other. Mix until the red color is evenly distributed throughout the dough.
6. Chill the cookie dough
Cover both portions of dough and refrigerate for 30–45 minutes. Chilling helps firm up the dough, making it easier to roll and helping the cookies maintain their shape while baking.
7. Prepare the sugar coating
Place the red sanding sugar in one small bowl and the white granulated sugar in another. Keep them separate so you can coat the cookie dough in both colors.
8. Shape the cookies
Take small portions of red and plain dough and gently combine them to create a marbled red-and-white appearance. Roll each portion between your palms into a ball about 1 inch in diameter.
9. Coat the cookies in sugar
Roll each dough ball in the red and white sugars until completely coated. Make sure the sugar sticks evenly to the surface to create a beautiful sparkling finish after baking.
10. Arrange the cookies for baking
Place the coated dough balls on a baking sheet lined with parchment paper, leaving approximately 2 inches between each cookie to allow room for spreading.
11. Bake the cookies
Preheat the oven to 350°F (175°C). Bake the cookies for 9–11 minutes, until the edges are set and the centers are slightly soft. Avoid overbaking to keep the cookies tender.
12. Add the candy cane kisses
Remove the cookies from the oven and immediately press one Candy Cane Hershey’s Kiss gently into the center of each warm cookie. The cookie should crack slightly around the edges as the chocolate settles into place.
13. Allow the cookies to cool
Let the cookies rest on the baking sheet for about 5 minutes before carefully transferring them to a wire rack. Allow them to cool completely so the chocolate kisses can firm up.
14. Serve the cookies
Once completely cooled, serve them and enjoy their soft, buttery centers, crunchy sugar coating, and sweet peppermint chocolate topping. They are especially lovely for holiday dessert tables and Christmas cookie trays.
Tip
For the prettiest cookies, unwrap the Candy Cane Hershey’s Kisses before baking and keep them in a cool place until needed. Press them into the cookies immediately after baking, but avoid moving the cookies until the chocolate has set. For an extra festive sparkle, roll the dough balls generously in coarse sanding sugar before baking.
19. Stained Glass Window Cookies

These cookies are pure Christmas magic!
Sugar cookie dough is cut into festive shapes, and the centers are filled with crushed hard candies that melt into “stained glass” when baked.
Hang them on the tree or package them in clear bags—they’re edible art that sparkles like holiday lights.
Ingredients
- 2½ cups all-purpose flour
- ¾ cup unsalted butter, softened
- ¾ cup granulated sugar
- 1 large egg
- 1 teaspoon vanilla extract
- ½ teaspoon almond extract (optional)
- ½ teaspoon baking powder
- ¼ teaspoon salt
- ½ cup assorted hard candies (red, green, yellow, and orange)
- 2 tablespoons powdered sugar, for dusting (optional)
Instructions
1. Prepare the hard candies
Separate the hard candies by color and place each color in a separate small plastic bag. Crush them into small pieces using a rolling pin or the bottom of a sturdy glass. Keep the different colors separate so you can create beautiful, colorful stained-glass centers in the cookies.
2. Prepare the cookie dough
In a large mixing bowl, beat the softened butter and granulated sugar together for 2–3 minutes until light and fluffy. Add the egg, vanilla extract, and almond extract, then mix until smooth and well combined.
3. Combine the dry ingredients
In a separate bowl, whisk together the all-purpose flour, baking powder, and salt. Gradually add the dry ingredients to the butter mixture, mixing until a soft dough forms. Avoid overmixing to keep the cookies tender.
4. Chill the cookie dough
Divide the dough into two portions and flatten each into a disc. Wrap in plastic wrap and refrigerate for at least 30–45 minutes. Chilling helps the dough firm up, making it easier to roll and cut into festive shapes.
5. Cut out the festive cookies
Preheat the oven to 350°F (175°C) and line baking sheets with parchment paper. Roll the chilled dough on a lightly floured surface to approximately ¼-inch thickness. Use star, bell, and Christmas tree cookie cutters to cut out the shapes. Use a smaller cutter to remove the centers of each cookie, creating an opening for the colorful candy filling.
6. Arrange the cookies for baking
Carefully transfer the cookies to the prepared baking sheets, leaving about 2 inches between each cookie. Make sure the cookies remain intact and their center openings are clearly defined. Refrigerate the prepared cookies for another 10 minutes if the dough has become too soft.
7. Fill the cookie centers with crushed candy
Spoon the crushed hard candies into the center openings of the cookies. Use different colors to create vibrant stained-glass effects. Fill each opening evenly, making sure not to overfill because the candy will melt and spread during baking.
8. Bake the stained-glass cookies
Bake for 8–12 minutes, or until the cookie edges are lightly golden and the candy centers have completely melted. Keep a close eye on the cookies to prevent the candy from bubbling excessively or burning. The melted candy should look smooth, glossy, and translucent.
9. Cool the cookies completely
Remove the baking sheets from the oven and allow the cookies to cool undisturbed for 10–15 minutes. The melted candy centers will gradually harden into beautiful, glass-like windows. Once completely cool, gently lift the cookies from the parchment paper.
10. Serve the stained-glass cookies
Arrange the cooled cookies together and serve them once the candy centers have completely hardened. Their golden edges and vibrant translucent centers make them a beautiful festive treat for Christmas celebrations, holiday parties, and family gatherings.
Tip
For the clearest stained-glass effect, use brightly colored, translucent hard candies rather than opaque sweets. Crush the candies into small, evenly sized pieces to help them melt smoothly. Avoid moving the cookies while the candy centers are still warm, as they need to cool completely to become firm and glass-like. Store the finished cookies in an airtight container at room temperature, separating layers with parchment paper.