27 Tasty Coconut Milk Recipes You’ll Love to Try

Coconut milk is a yummy and healthy ingredient that can be used in many recipes!
From creamy soups to sweet desserts, it’s perfect for adding flavor.
In this article, we’ll share some simple and delicious coconut milk recipes that you can try at home.
Let’s get started!
1. Coconut Milk Smoothies
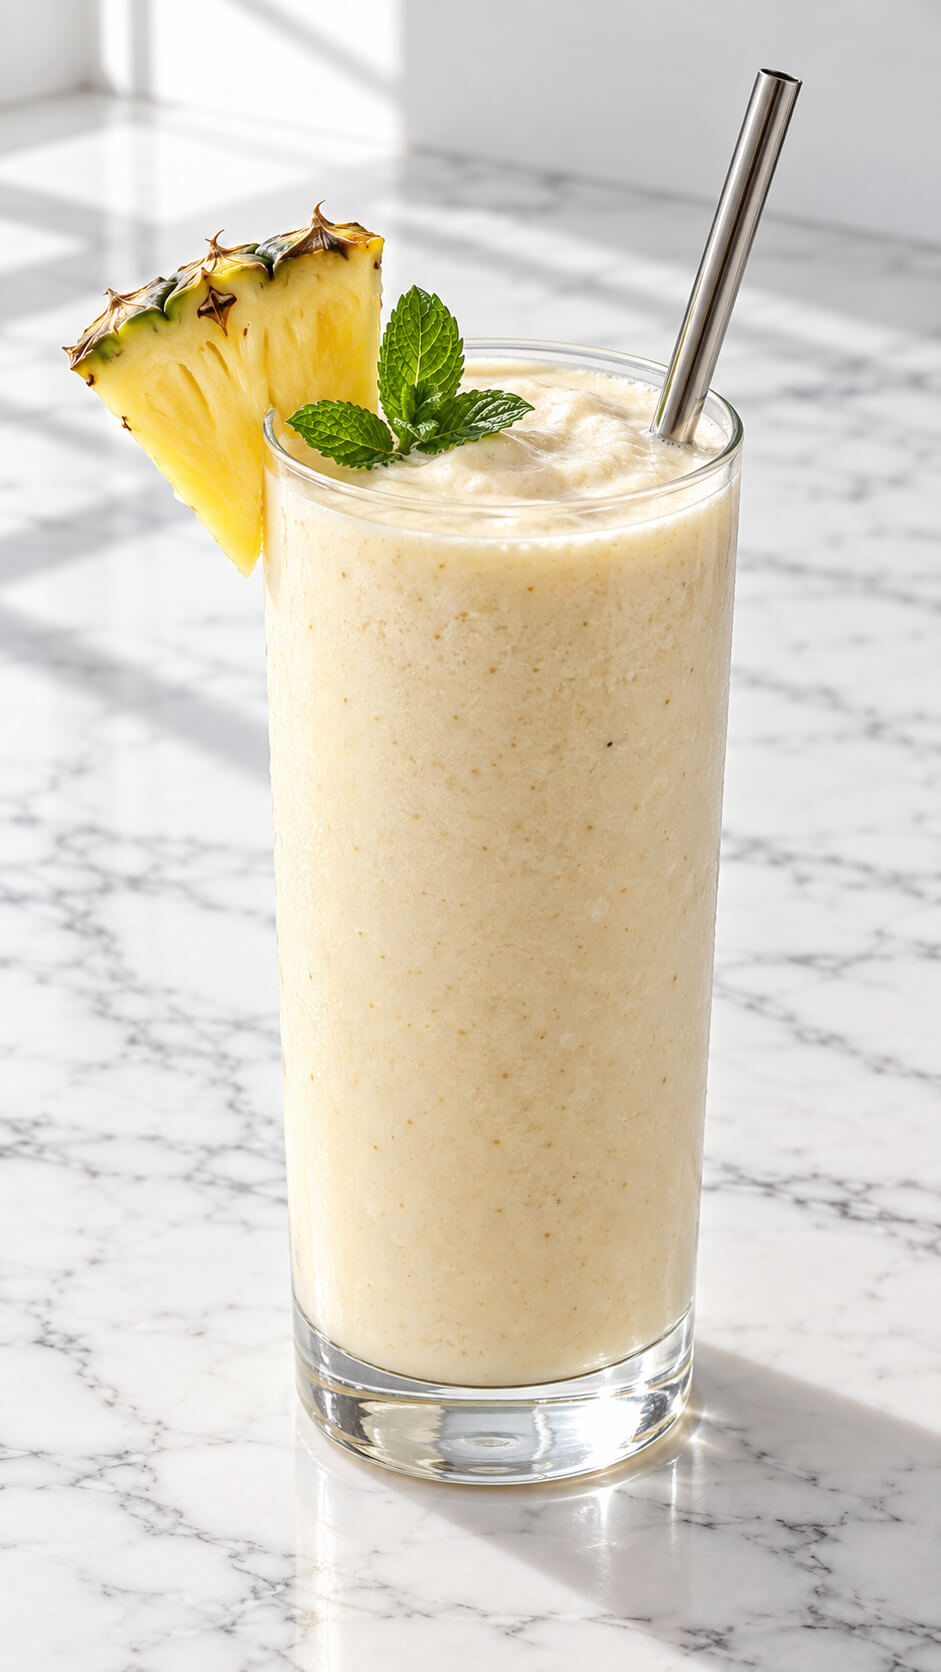
Nothing beats a tropical smoothie packed with coconut milk!
Combine coconut milk with fruits like mango, banana, pineapple, or berries for a refreshing, creamy drink.
You can also add a touch of honey or a sprinkle of cinnamon to elevate the flavor.
These smoothies are perfect for breakfast or as an afternoon pick-me-up.
Prep time: 5 minutes
Blend time: 1 minute
Servings: 1
Ingredients
- 1 cup fresh or frozen pineapple chunks
- 1 cup chilled coconut milk
- ½ banana, preferably frozen
- 1 tablespoon honey or maple syrup
- ½ cup ice cubes
- ½ teaspoon fresh lime juice
- 3–4 fresh mint leaves
- 1 small pineapple slice, for garnish
- 1 fresh mint leaf, for garnish
Instructions
1. Prepare the ingredients
Add the pineapple chunks, coconut milk, frozen banana, honey or maple syrup, ice, lime juice, and mint leaves to a blender.
2. Blend the smoothie
Blend on high for 45–60 seconds until the mixture becomes completely smooth, creamy, and thick. Add a small splash of coconut milk if the smoothie is too thick.
3. Check the sweetness
Taste the smoothie and add a little more honey or maple syrup if needed. Blend for another 5–10 seconds to combine.
4. Pour the smoothie
Pour the smoothie immediately into a tall chilled glass, leaving a little space at the top for the garnish.
5. Garnish the drink
Place a fresh pineapple slice on the rim and add a mint leaf on top. Insert a metal straw and serve immediately.
Tip
For an especially thick and creamy smoothie, freeze the pineapple and banana beforehand and use very little ice.
2. Coconut Milk Curry
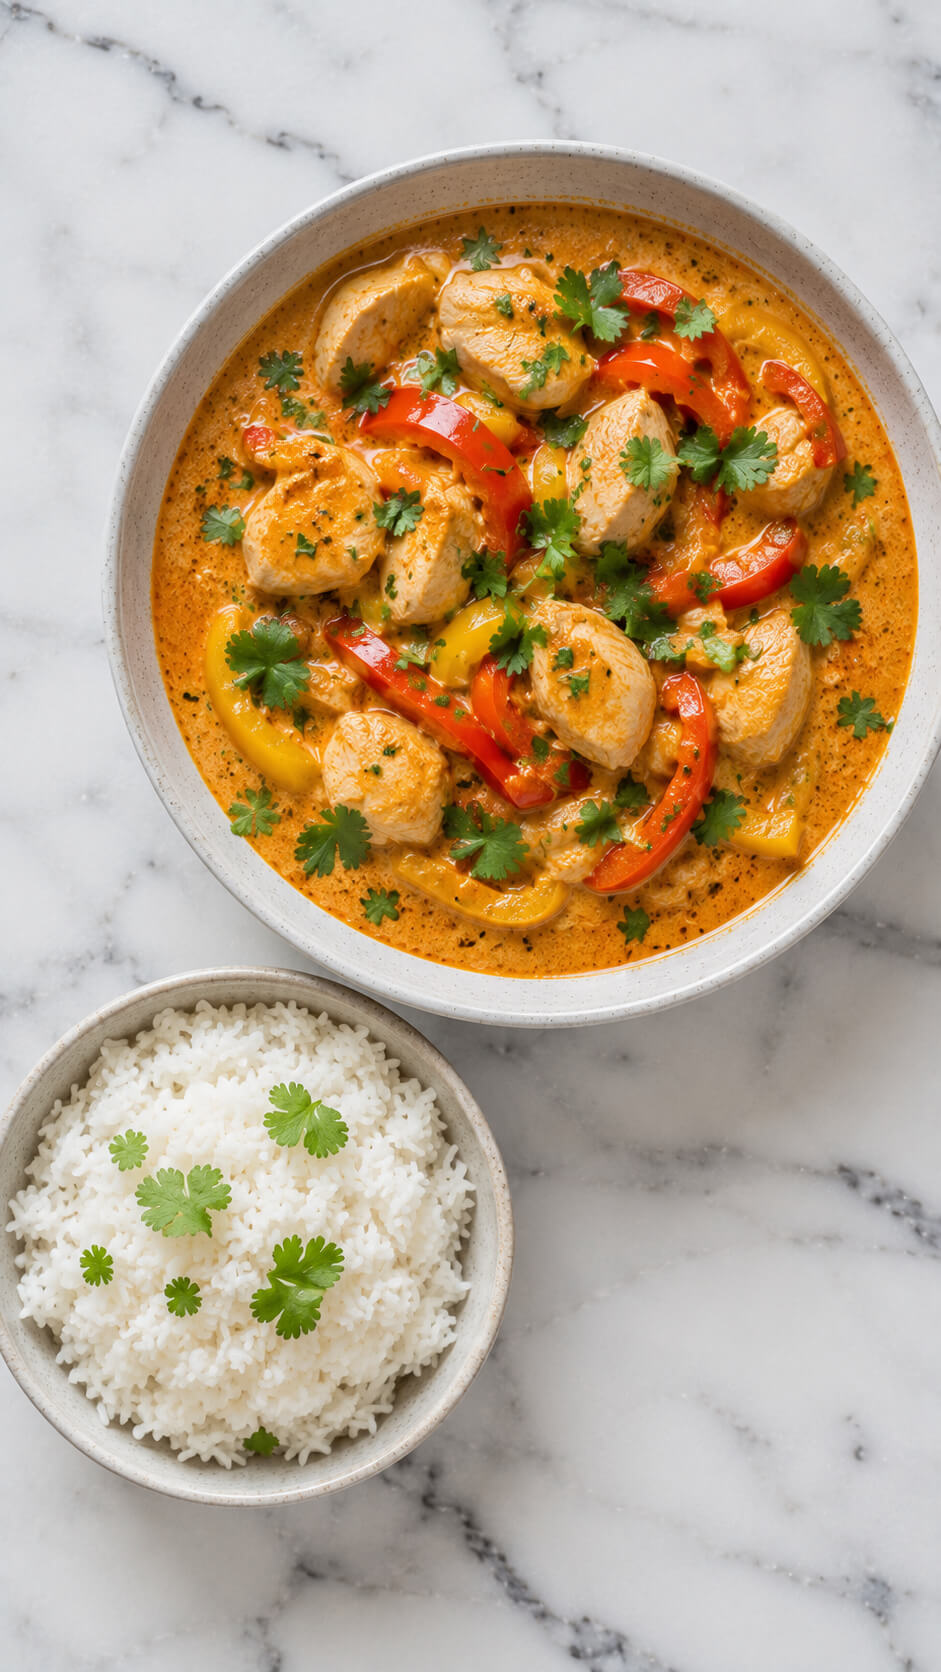
Rich, velvety coconut milk is a game-changer when it comes to curries.
Whether you’re making a chicken, shrimp, or vegetable curry, coconut milk adds depth and smoothness that you simply can’t get from regular cream.
The combination of spices like turmeric, cumin, and coriander, blended with coconut milk, creates a warm, comforting dish that pairs wonderfully with rice or naan.
Prep Time: 15 minutes
Cook Time: 35 minutes
Total Time: 50 minutes
Servings: 4
Ingredients
For the Curry:
- 2 tablespoons vegetable oil
- 1 medium onion, diced
- 4 cloves garlic, minced
- 1 tablespoon fresh ginger, grated
- 2 tablespoons red curry paste
- 1 teaspoon curry powder
- 1 teaspoon paprika
- 1½ pounds boneless, skinless chicken thighs or breasts, cut into bite-sized pieces
- 1 (13.5-ounce) can full-fat coconut milk
- 1 cup chicken broth
- 1 red bell pepper, sliced
- 1 yellow bell pepper, sliced
- 1 tablespoon fish sauce (optional)
- 1 teaspoon brown sugar
- 1 tablespoon lime juice
- Salt and black pepper, to taste
- ¼ cup chopped fresh cilantro, plus extra for garnish
For the Rice:
- 1½ cups jasmine rice
- 3 cups water
- ½ teaspoon salt
Instructions
1. Cook the rice
Rinse the jasmine rice under cold water until the water runs mostly clear. Add the rice, water, and salt to a saucepan, bring to a boil, then reduce the heat to low. Cover and cook for 15–18 minutes. Remove from the heat and let it rest, covered, for 10 minutes before fluffing with a fork.
2. Sauté the aromatics
Heat the vegetable oil in a large skillet or Dutch oven over medium heat. Add the diced onion and cook until softened, about 5 minutes. Stir in the garlic and ginger, then cook for another minute until fragrant.
3. Bloom the spices
Add the red curry paste, curry powder, and paprika to the pan. Stir continuously for 1–2 minutes so the spices become fragrant and evenly coat the onions.
4. Cook the chicken
Add the chicken pieces to the pan and cook for about 5–7 minutes, stirring occasionally, until lightly browned on the outside. The chicken does not need to be fully cooked at this stage.
5. Simmer the coconut curry
Pour in the coconut milk and chicken broth, then stir in the fish sauce and brown sugar. Bring the mixture to a gentle simmer and cook for about 15 minutes, allowing the chicken to become very tender and the sauce to thicken.
6. Add the bell peppers
Stir in the sliced red and yellow bell peppers during the last 5–7 minutes of cooking. This keeps them vibrant while allowing them to soften slightly.
7. Finish the curry
Remove the pan from the heat and stir in the lime juice and chopped cilantro. Taste the curry and adjust the seasoning with salt and black pepper as needed.
8. Serve the curry
Spoon the fluffy white rice into serving bowls, then ladle the coconut chicken curry over or alongside the rice. Garnish with additional fresh cilantro and serve immediately while hot.
Tip
For an even richer and more flavorful curry, let it rest for 10 minutes before serving. The flavors continue to meld together, and the sauce becomes even creamier. Leftovers also taste even better the next day.
3. Coconut Milk Ice Cream
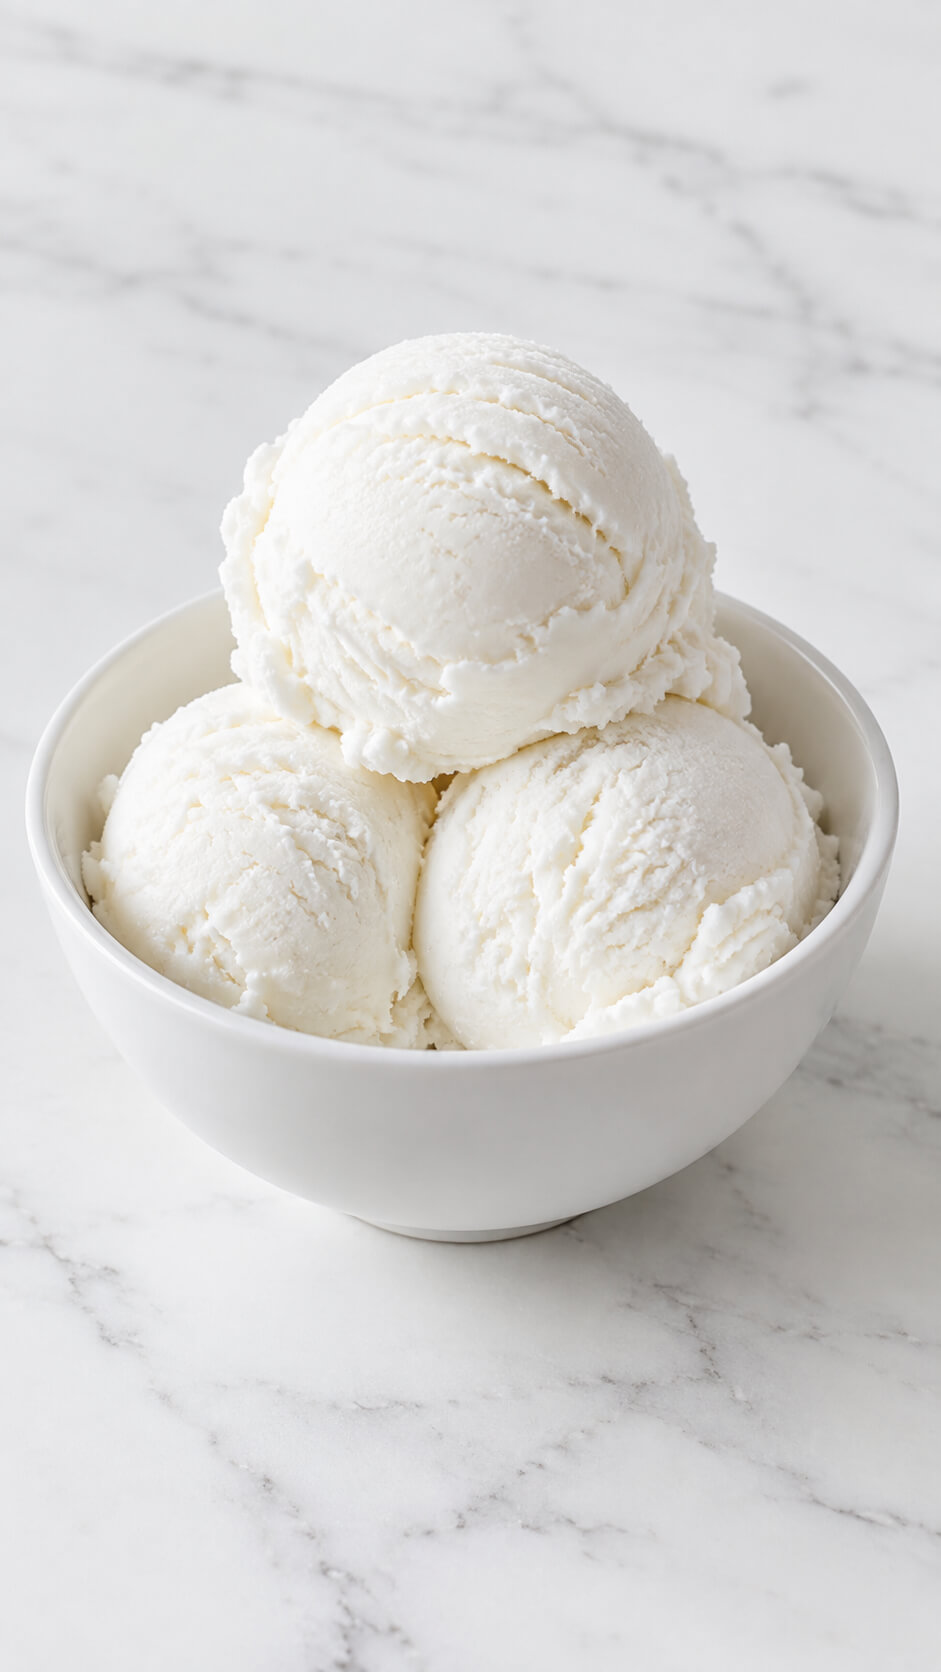
Indulge in a dairy-free treat with coconut milk ice cream!
It’s the perfect way to enjoy a creamy, frozen dessert without the dairy.
You can create your own flavors like chocolate, vanilla, or even coconut pineapple swirl.
Coconut milk provides a rich, smooth texture that’s perfect for any sweet tooth looking to try something new and refreshing.
Ingredients
- 2 cans (400 ml each) full-fat coconut milk
- 120 g granulated sugar
- 2 tbsp cornstarch
- 1 tsp vanilla extract
- 1/4 tsp fine salt
Instructions
1. Combine the coconut milk and sugar
Pour the coconut milk and sugar into a saucepan and whisk until the sugar begins to dissolve.
2. Thicken the ice cream base
Mix the cornstarch with 3 tablespoons of cold coconut milk until smooth. Add it to the saucepan and cook over medium-low heat, whisking constantly, until the mixture lightly thickens, about 4–6 minutes.
3. Add the vanilla and salt
Remove the saucepan from the heat and stir in the vanilla extract and salt. Mix thoroughly to distribute the flavors evenly.
4. Cool the mixture completely
Transfer the mixture to a clean container and let it cool to room temperature. Cover and refrigerate for at least 4 hours, preferably overnight.
5. Churn the ice cream
Pour the chilled mixture into an ice cream maker and churn according to the manufacturer’s instructions, usually for 20–30 minutes, until thick and creamy.
6. Freeze until scoopable
Transfer the churned ice cream to a freezer-safe container, smooth the surface, cover tightly, and freeze for 3–4 hours until firm.
7. Serve the ice cream
Let the ice cream sit at room temperature for 5–10 minutes before scooping. Serve three rounded scoops in a small white bowl for a clean presentation.
Tip
For especially creamy ice cream, use full-fat coconut milk and chill the mixture thoroughly before churning. A small amount of cornstarch also helps prevent the finished ice cream from becoming icy.
4. Coconut Milk Pancakes
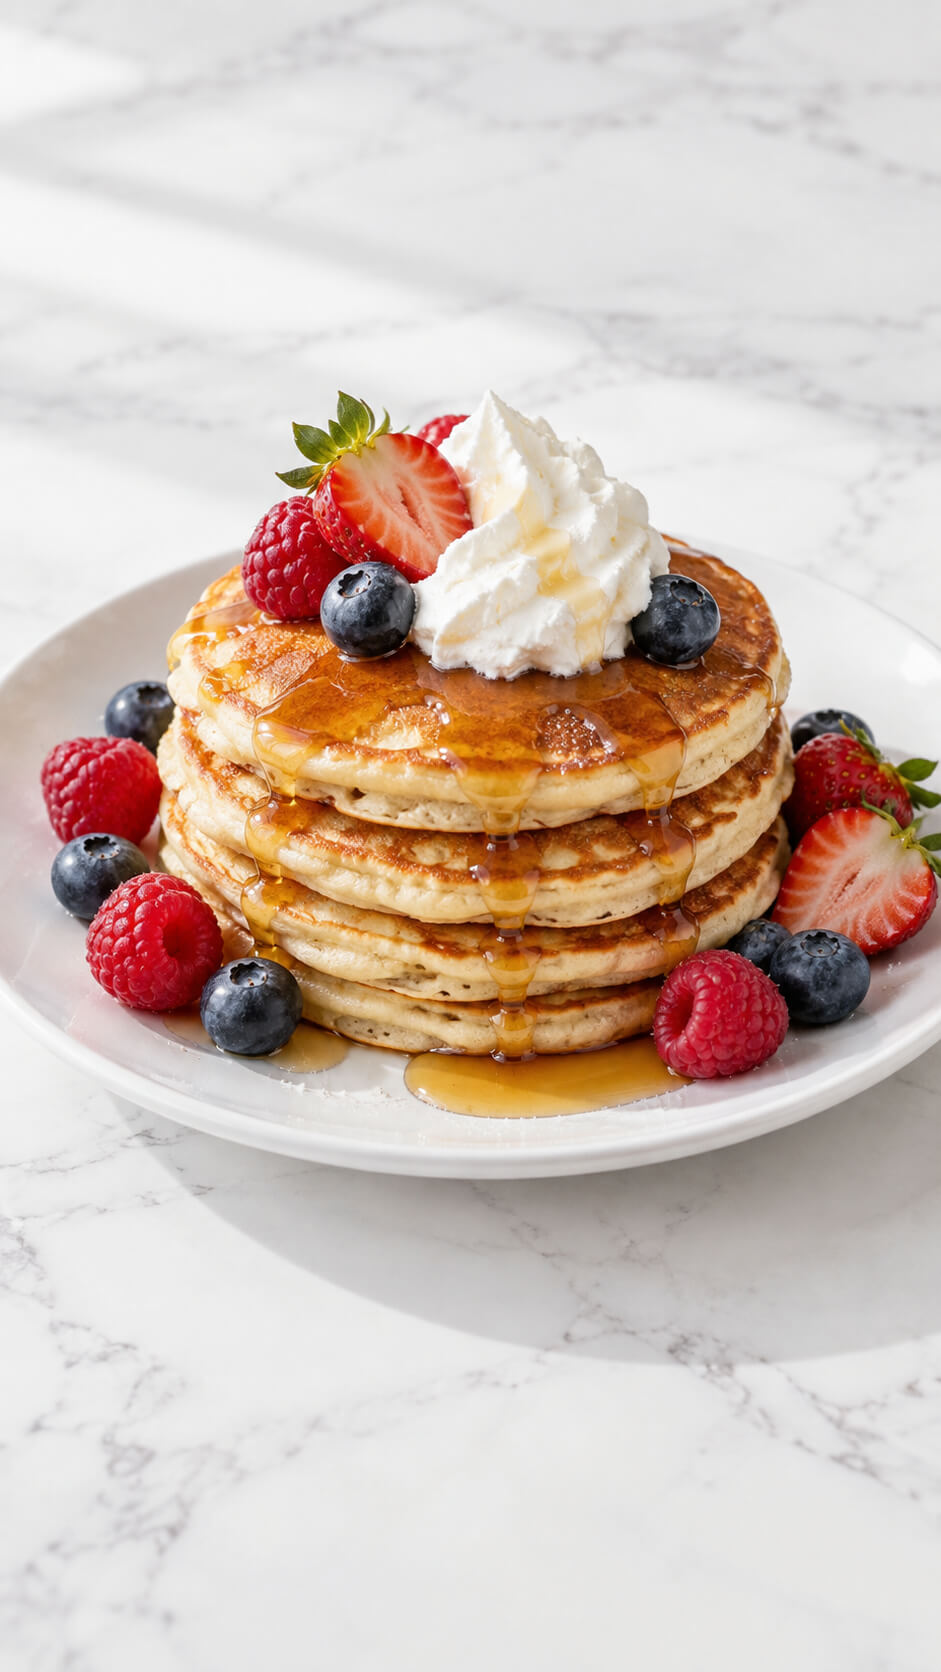
If you’re craving pancakes but want a dairy-free alternative, coconut milk is your best friend!
These pancakes are light, fluffy, and full of tropical flavor.
Simply swap out regular milk for coconut milk, and add a bit of coconut extract for an extra burst of coconut flavor.
Serve with maple syrup or fresh fruit for a breakfast that feels like a vacation.
Ingredients
- 1½ cups all-purpose flour
- 2 tablespoons granulated sugar
- 2 teaspoons baking powder
- ½ teaspoon baking soda
- ¼ teaspoon salt
- 1 large egg
- 1¼ cups full-fat coconut milk
- 2 tablespoons melted butter or coconut oil
- 1 teaspoon vanilla extract
- Butter or coconut oil, for cooking
For the Topping
- ½ cup whipped cream
- ⅓ cup pure maple syrup
- ½ cup fresh strawberries, sliced
- ½ cup fresh raspberries
- ½ cup fresh blueberries
Instructions
1. Whisk the dry ingredients together
In a large bowl, combine the flour, sugar, baking powder, baking soda, and salt. Whisk thoroughly so the leavening agents are evenly distributed throughout the flour.
2. Mix the coconut milk mixture
In a separate bowl, whisk together the egg, coconut milk, melted butter, and vanilla extract until smooth. The coconut milk gives the pancakes a subtle tropical flavor while keeping them tender.
3. Combine the wet and dry mixtures
Pour the coconut milk mixture into the dry ingredients and gently stir until just combined. A few small lumps are perfectly fine; avoid overmixing, as this can make the pancakes dense rather than fluffy.
4. Rest the pancake batter
Let the batter rest for about 5–10 minutes. This allows the flour to hydrate and gives the baking powder time to begin working, resulting in softer, thicker pancakes.
5. Cook the pancakes
Heat a lightly buttered nonstick skillet or griddle over medium heat. Pour about ¼ cup of batter for each pancake and cook until bubbles appear across the surface and the edges look set, about 2–3 minutes.
6. Flip until golden
Carefully flip each pancake and cook for another 1–2 minutes, until the second side is golden brown and the center is cooked through. Repeat with the remaining batter, adding a little butter or coconut oil to the pan as needed.
7. Build the pancake stack
Place the warm pancakes on a white plate, stacking four or five pancakes neatly on top of one another. Keep the stack slightly rustic rather than pressing the pancakes down so they retain their height and fluffy texture.
8. Drizzle with warm maple syrup
Warm the maple syrup gently for a few seconds so it flows easily, then drizzle it generously over the top pancake. Let some syrup naturally run down the sides and pool lightly around the base of the stack.
9. Add the whipped cream
Place a generous dollop of whipped cream directly on top of the pancake stack. For a fuller, restaurant-style appearance, spoon or pipe it into a soft mound rather than spreading it flat.
10. Finish with fresh berries
Arrange sliced strawberries, raspberries, and blueberries around the whipped cream and along the plate. Add a few berries around the base of the stack for a colorful, natural presentation.
Tip
For especially tall and fluffy pancakes, keep the batter slightly thick and resist the temptation to flatten it in the pan. For the glossy syrup effect shown in the image, drizzle the maple syrup immediately before serving.
5. Coconut Milk Rice Pudding
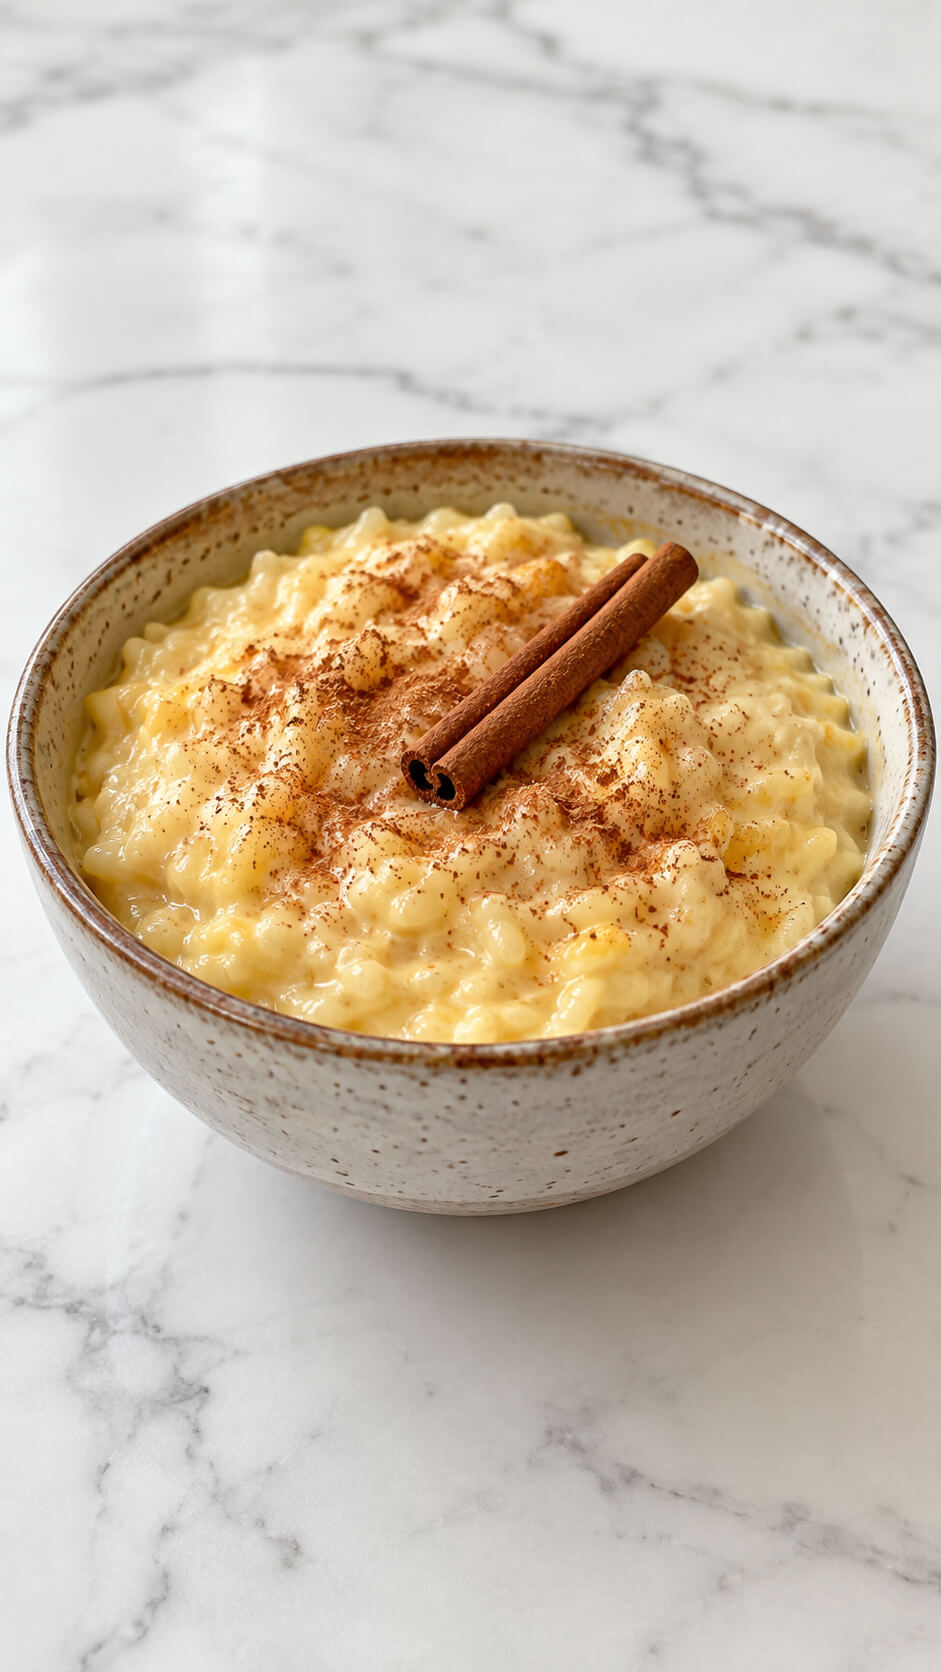
Rice pudding is a classic comfort food, and using coconut milk makes it even more decadent.
The coconut milk gives the pudding a silky texture and a subtly sweet coconut flavor.
You can make it extra special by adding vanilla, cinnamon, or raisins, or top it off with toasted coconut flakes for a delightful crunch.
Ingredients
- 1 cup white rice, preferably short- or medium-grain
- 2 cups water
- 1 can (400 ml) full-fat coconut milk
- 1 cup whole milk
- ⅓ cup granulated sugar
- 1 cinnamon stick
- 1 teaspoon vanilla extract
- ¼ teaspoon salt
- ½ teaspoon ground cinnamon, for garnish
- 1 tablespoon butter, optional
Instructions
1. Cook the rice
Add the rice, water, and salt to a medium saucepan. Bring to a boil, then reduce the heat, cover, and simmer for about 15 minutes, until the rice is tender and most of the water has been absorbed.
2. Add the coconut milk
Pour the coconut milk and whole milk into the cooked rice. Add the cinnamon stick and sugar, then stir gently to combine everything.
3. Simmer until creamy
Cook uncovered over low heat for 20–25 minutes, stirring frequently to prevent the rice from sticking. The mixture will gradually thicken into a smooth, creamy pudding while the rice becomes soft and plump.
4. Add the vanilla
Remove the saucepan from the heat and take out the cinnamon stick. Stir in the vanilla extract and butter, if using. Let the pudding sit for 5 minutes so it can thicken slightly more.
5. Finish with cinnamon
Spoon the warm pudding into a rustic ceramic bowl. Lightly dust the surface with ground cinnamon and place a cinnamon stick on top for a fragrant, beautiful finish.
Tip
For an especially creamy texture, use full-fat coconut milk and stir the pudding regularly during the final 10 minutes of cooking. If it becomes too thick, loosen it with a small splash of warm milk before serving.
6. Coconut Milk Soups
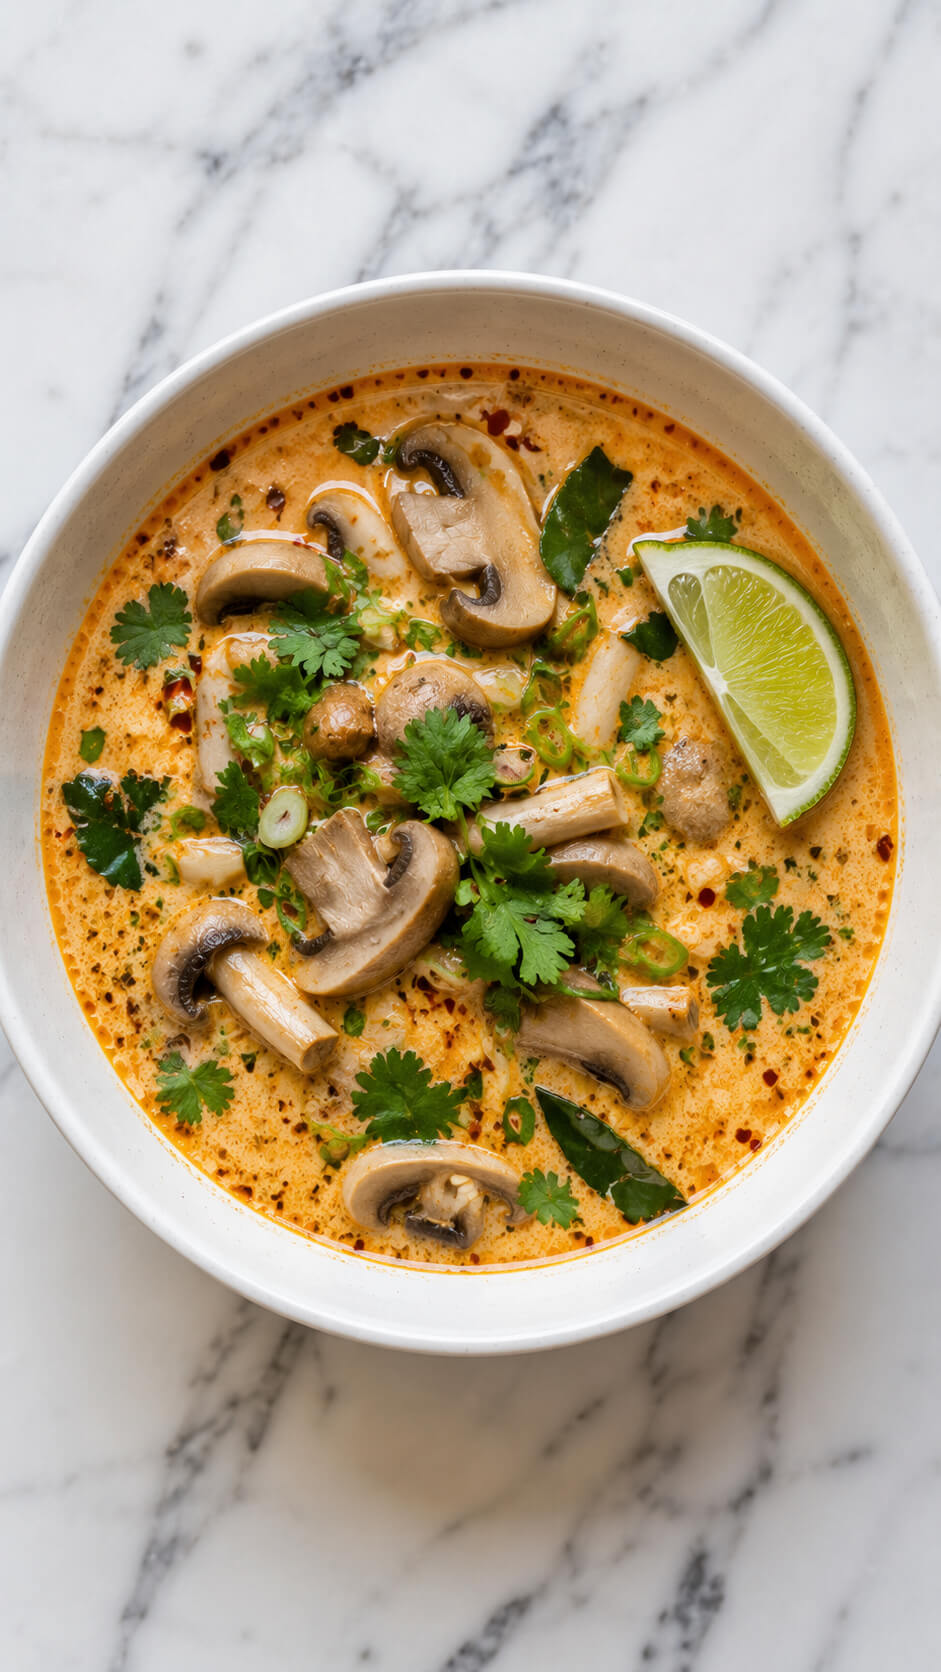
Whether you’re making a creamy tomato soup or a spicy Thai coconut soup, coconut milk brings a rich, velvety texture and flavor.
It’s perfect for adding creaminess without the heavy feeling of cream.
Coconut milk beautifully complements ingredients like lemongrass, ginger, and garlic, making it an ideal base for many soups.
Prep Time: 15 minutes
Cook Time: 20 minutes
Total Time: 35 minutes
Servings: 4
Ingredients
- 2 tablespoons coconut oil
- 1 small onion, finely diced
- 3 cloves garlic, minced
- 1 tablespoon fresh ginger, grated
- 1 tablespoon red Thai curry paste
- 8 ounces (225 g) white button mushrooms, sliced
- 4 ounces (115 g) oyster mushrooms, torn into bite-sized pieces
- 1 can (13.5 ounces) full-fat coconut milk
- 2 cups vegetable broth
- 1 tablespoon soy sauce
- 1 teaspoon brown sugar
- 1 tablespoon fresh lime juice
- 1 teaspoon lime zest (optional)
- 2 kaffir lime leaves (optional)
- 1 teaspoon chili flakes or chili oil (optional)
- Salt and black pepper, to taste
- 2 tablespoons chopped fresh cilantro
- 1 tablespoon chopped green onions
- Lime wedges, for serving
Instructions
1. Sauté the aromatics
Heat the coconut oil in a large pot over medium heat. Add the diced onion and cook until softened, about 4 minutes. Stir in the garlic, ginger, and Thai curry paste, cooking for another minute until fragrant.
2. Cook the mushrooms
Add the sliced button mushrooms and oyster mushrooms to the pot. Cook for 6–8 minutes, stirring occasionally, until the mushrooms release their moisture and begin to brown slightly.
3. Add the broth and coconut milk
Pour in the vegetable broth and coconut milk. Stir in the soy sauce, brown sugar, kaffir lime leaves, and lime zest if using. Bring the soup to a gentle simmer.
4. Simmer until the flavors develop
Reduce the heat to low and let the soup simmer for 10–12 minutes. This allows the mushrooms to become tender while the broth develops a rich, creamy flavor.
5. Finish with fresh lime juice
Remove the kaffir lime leaves if used. Stir in the fresh lime juice and season with salt and black pepper to taste. Add chili flakes or chili oil if you’d like extra heat.
6. Garnish and serve
Ladle the soup into serving bowls and garnish with chopped cilantro, green onions, and a lime wedge. Serve immediately while hot.
Tip
For the best flavor, use full-fat coconut milk and avoid boiling the soup after adding it, as gentle simmering keeps the broth silky and creamy. Fresh herbs and a squeeze of lime just before serving brighten the rich coconut flavors.
7. Coconut Milk Oatmeal
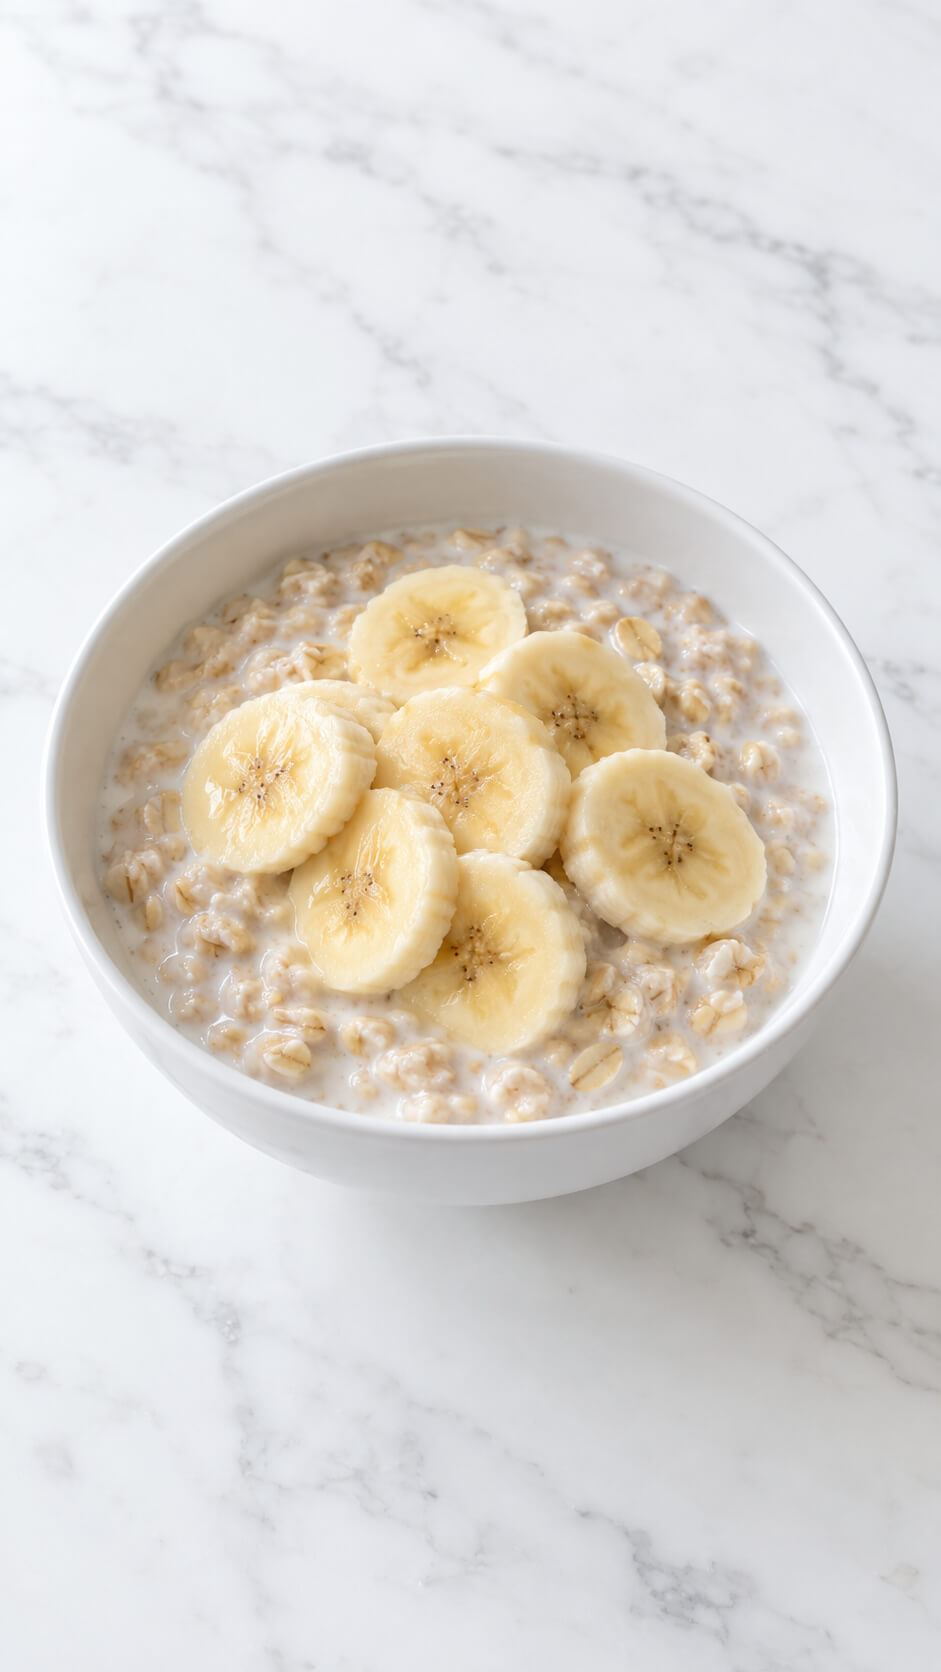
Start your morning with a hearty, filling bowl of oatmeal made with coconut milk.
The coconut milk adds a creamy, rich texture to the oats, while the natural sweetness balances perfectly with your favorite toppings, like sliced bananas, toasted nuts, or a drizzle of honey.
It’s an easy, nourishing breakfast option that feels indulgent.
Ingredients
- 1 cup rolled oats
- 2 cups coconut milk
- 1 ripe banana
- 1 tablespoon honey or maple syrup
- ½ teaspoon vanilla extract
- ¼ teaspoon ground cinnamon
- Pinch of salt
- 1 tablespoon shredded coconut, optional
Instructions
1. Combine the oats and coconut milk
Add the rolled oats, coconut milk, cinnamon, and salt to a medium saucepan. Stir well to combine everything before cooking.
2. Cook the oatmeal
Place the saucepan over medium heat and bring the mixture to a gentle simmer. Cook for 5–7 minutes, stirring occasionally, until the oats become soft and creamy.
3. Add the flavoring
Remove the oatmeal from the heat and stir in the vanilla extract and honey or maple syrup. Taste and adjust the sweetness if needed.
4. Slice the banana
Peel the banana and cut it into thin, even slices. Arrange the slices over the warm oatmeal so they slightly overlap for an attractive finish.
5. Add the toppings
Sprinkle shredded coconut over the banana slices if desired. Serve the oatmeal immediately while it is warm and creamy.
Tip
For extra-creamy oatmeal, use full-fat coconut milk and let the cooked oats rest for 2 minutes before serving.
8. Coconut Milk Granola
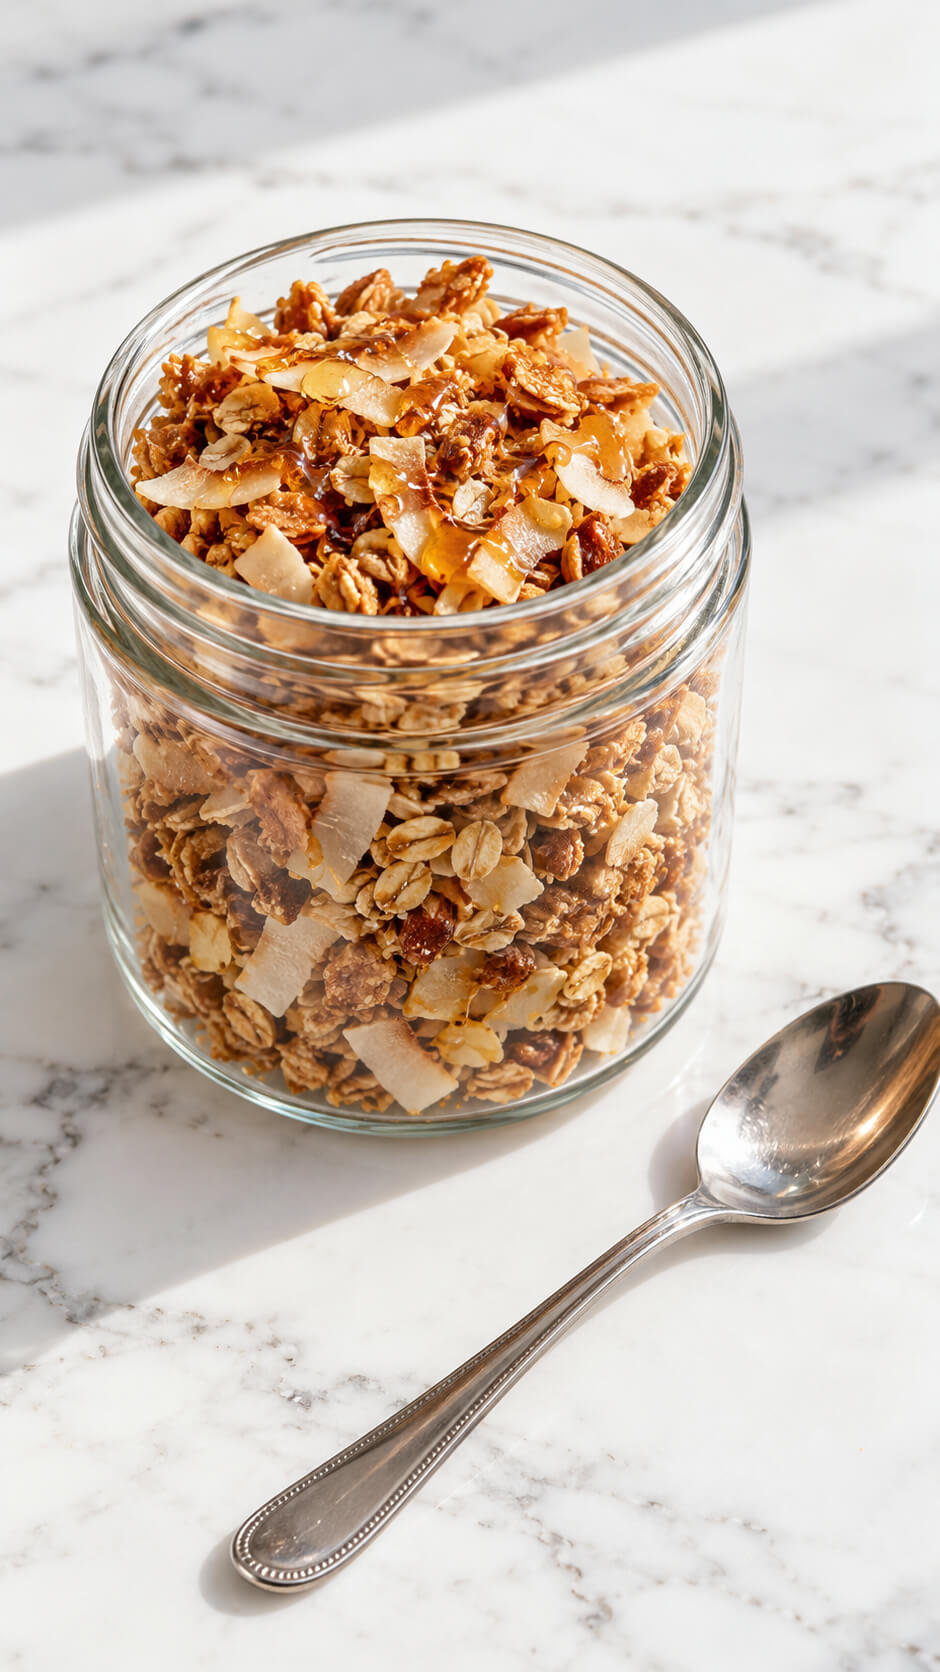
Coconut milk can take your homemade granola to the next level!
Mix it into the oats and nuts before baking, and the coconut milk will infuse the granola with a mild coconut flavor.
Add some dried fruit, seeds, and a touch of maple syrup for the perfect crunchy, sweet treat.
Enjoy it on its own or sprinkle it over yogurt for an extra boost.
Ingredients
- 3 cups rolled oats
- 1 cup unsweetened coconut flakes
- ½ cup chopped almonds or cashews
- ¼ cup sunflower seeds
- ½ teaspoon cinnamon
- ¼ teaspoon salt
- ½ cup coconut milk
- ⅓ cup honey
- ¼ cup melted coconut oil
- 1 teaspoon vanilla extract
Instructions
1. Preheat the oven
Preheat your oven to 160°C (325°F). Line a large baking sheet with parchment paper to prevent the granola from sticking.
2. Combine the dry ingredients
Add the rolled oats, coconut flakes, chopped nuts, sunflower seeds, cinnamon, and salt to a large bowl. Stir thoroughly so the ingredients are evenly distributed.
3. Prepare the coconut mixture
Whisk together the coconut milk, honey, melted coconut oil, and vanilla extract until smooth and well combined.
4. Coat the granola mixture
Pour the coconut mixture over the dry ingredients. Stir until every oat and coconut flake is lightly coated and the mixture looks evenly moistened.
5. Spread the granola
Transfer the mixture to the prepared baking sheet and spread it into an even layer. Press it down gently with the back of a spoon if you prefer larger crunchy clusters.
6. Bake the granola
Bake for 25–30 minutes, stirring gently halfway through, until the granola is fragrant and golden brown around the edges.
7. Add the honey drizzle
While the granola is still warm, drizzle a little extra honey over the top for a glossy, naturally sweet finish.
8. Cool the granola completely
Leave the granola on the baking sheet until completely cool. It will become crispier as it cools, so avoid stirring it too much during this stage.
9. Store the granola
Break the cooled granola into clusters and transfer it to an airtight glass jar. Store at room temperature for up to two weeks.
Tip
For extra-crunchy clusters, press the granola firmly onto the baking sheet before baking and let it cool completely without disturbing it.
9. Coconut Milk Frittata
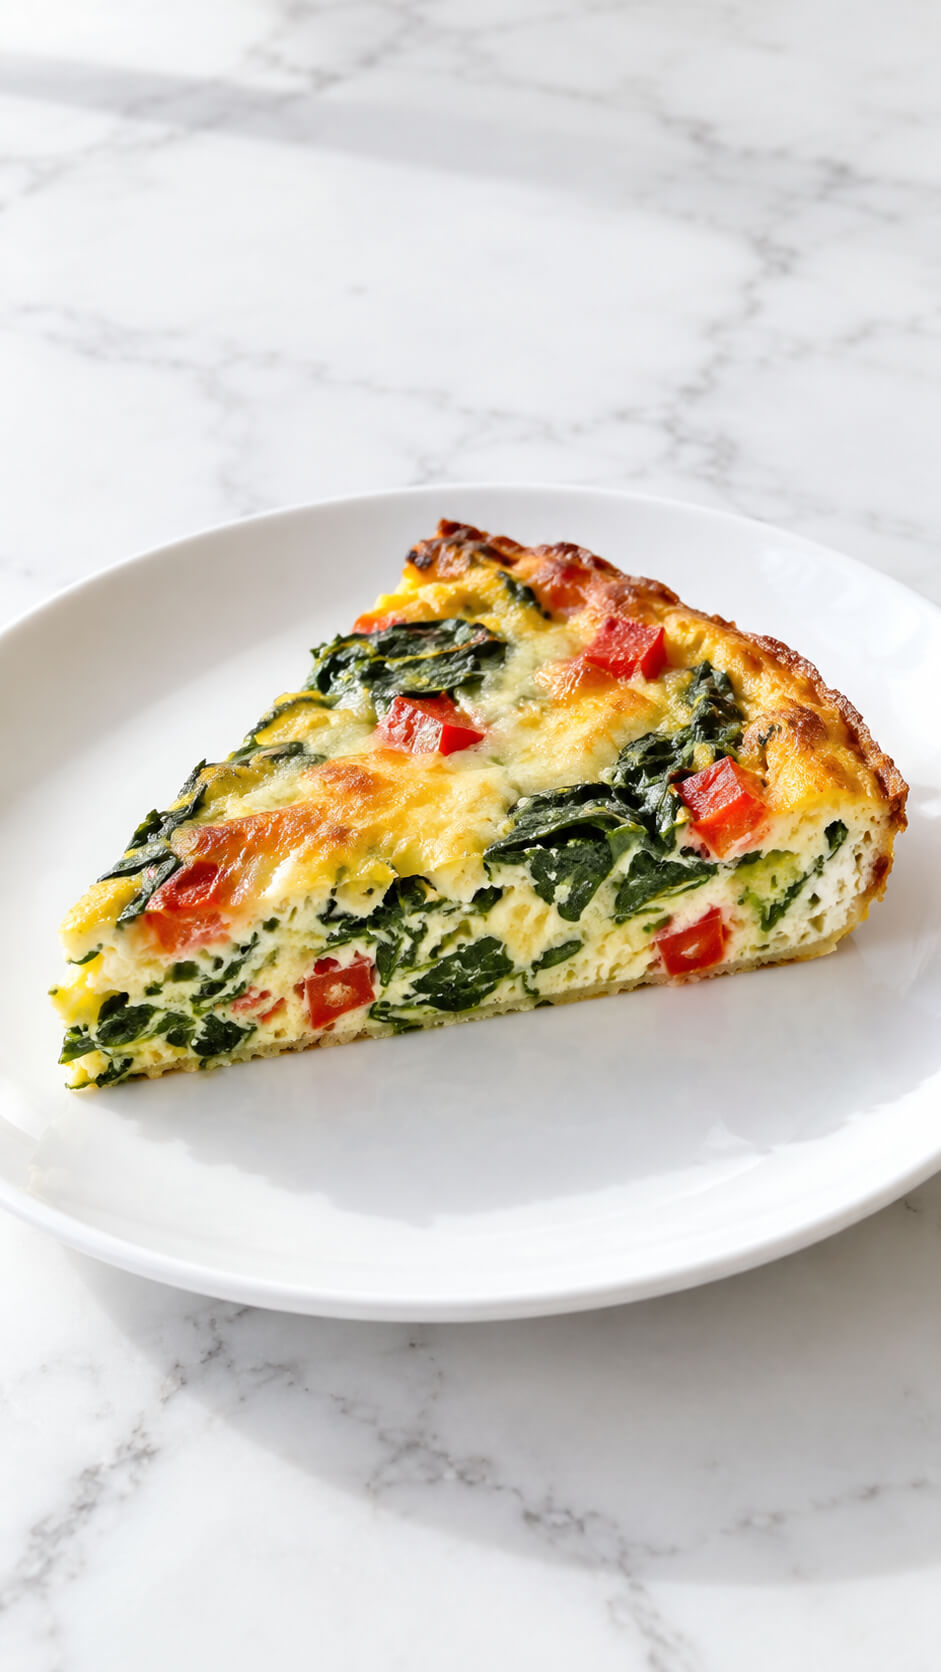
Who knew coconut milk could elevate a frittata?
Instead of using regular milk or cream, swap in coconut milk for a dairy-free, creamy texture.
Mix in your favorite vegetables, cheese, or even some meat, and bake until golden and fluffy.
The coconut milk helps bind everything together and adds a lovely richness to the dish.
Ingredients
- 6 large eggs
- ½ cup full-fat coconut milk
- 2 cups fresh spinach, roughly chopped
- ½ cup red bell pepper, finely chopped
- ½ cup shredded cheese, such as cheddar or mozzarella
- 1 tablespoon olive oil
- ¼ teaspoon salt
- ¼ teaspoon black pepper
- ¼ teaspoon garlic powder
- ¼ teaspoon paprika
Instructions
1. Preheat the oven
Preheat your oven to 180°C (350°F). Lightly grease a small oven-safe skillet or baking dish with olive oil so the frittata releases easily after cooking.
2. Whisk the eggs and coconut milk
Crack the eggs into a large bowl and whisk in the coconut milk, salt, black pepper, garlic powder, and paprika until the mixture is smooth and evenly combined.
3. Cook the spinach and peppers
Heat the olive oil in an oven-safe skillet over medium heat. Add the chopped red bell pepper and cook for 2–3 minutes, then add the spinach and cook until it wilts and most of the excess moisture has evaporated.
4. Add the egg mixture
Pour the seasoned egg and coconut milk mixture evenly over the cooked vegetables. Gently shake the skillet so the egg settles around the spinach and peppers.
5. Add the cheese
Sprinkle the shredded cheese evenly over the surface. Let the frittata cook on the stovetop for about 2 minutes, just until the edges begin to set.
6. Bake until golden
Transfer the skillet to the preheated oven and bake for 12–18 minutes, or until the center is just set and the top is lightly golden. Avoid overbaking so the coconut milk keeps the frittata tender.
7. Rest before serving
Remove the frittata from the oven and let it rest for 5 minutes. Slice into wedges and serve warm on a clean white plate.
Tip
For the most vibrant frittata, squeeze excess moisture from the spinach before adding the eggs. You can also reserve a few small pieces of red pepper and sprinkle them over the top before baking for extra color.
10. Coconut Milk Chia Pudding
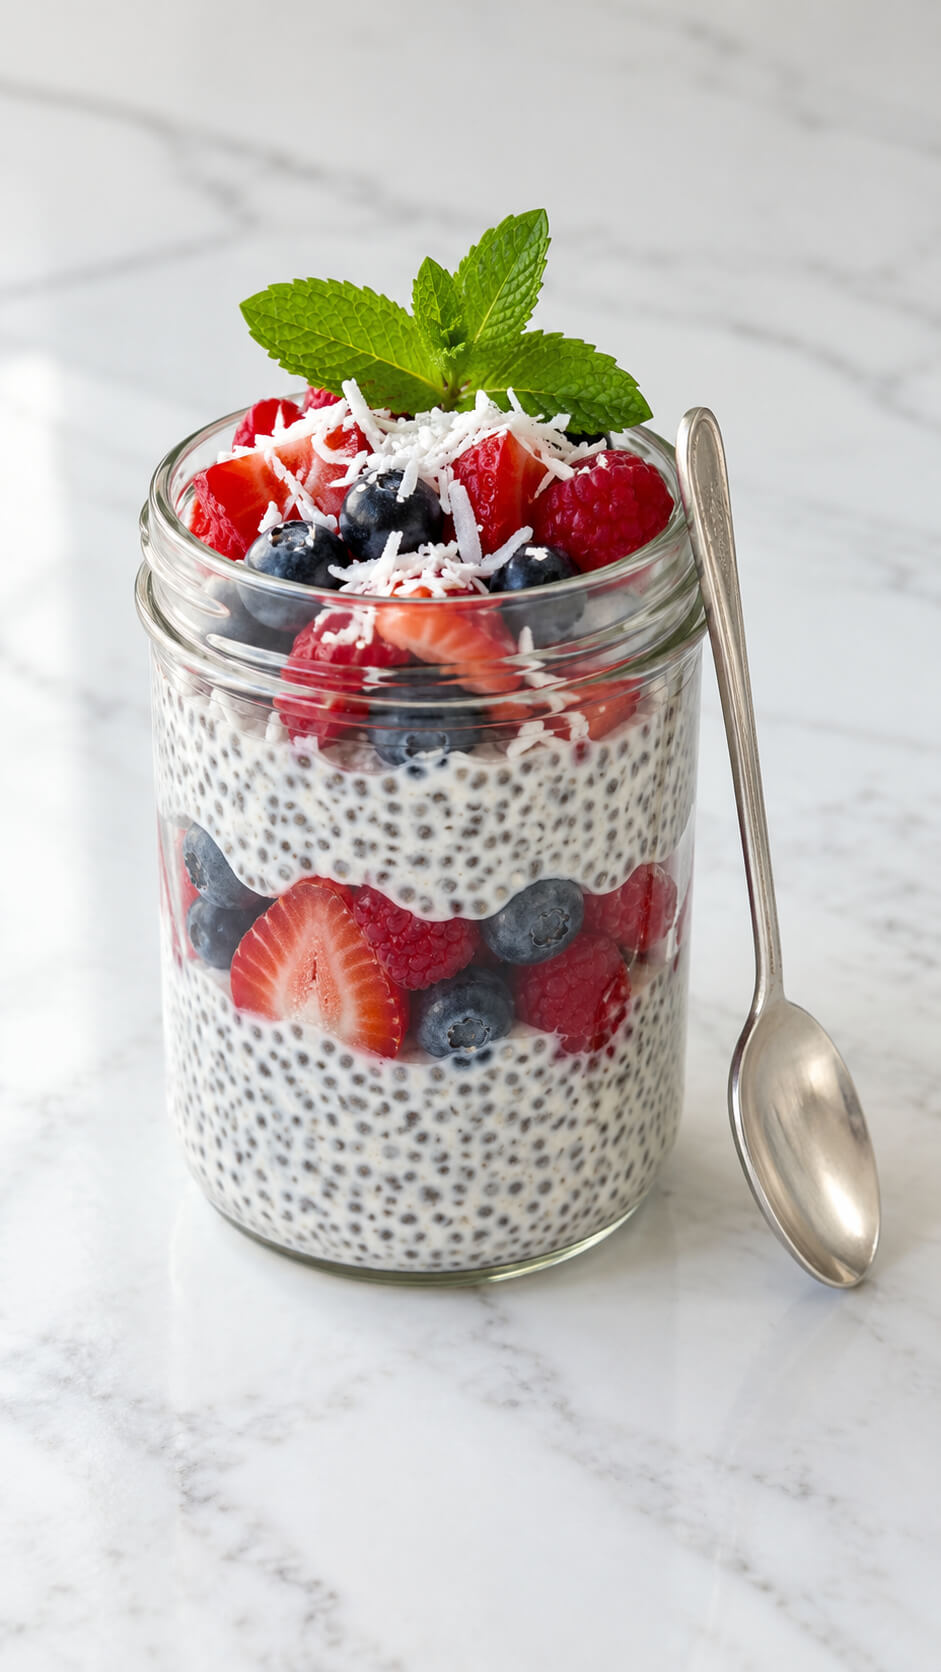
Chia pudding is an easy and healthy dessert, and using coconut milk makes it extra creamy.
Combine coconut milk, chia seeds, and a sweetener of your choice.
Let it sit overnight in the fridge, and you’ll wake up to a delicious, creamy pudding that’s perfect for breakfast or a snack.
Top with fresh fruit and a sprinkle of shredded coconut for a tropical touch.
Ingredients
- 1 cup full-fat coconut milk
- ¼ cup chia seeds
- 1–2 tablespoons maple syrup or honey
- ½ teaspoon vanilla extract
- ½ cup strawberries, sliced
- ½ cup blueberries
- ½ cup raspberries
- 2 tablespoons shredded coconut
- Fresh mint, for garnish
Instructions
1. Mix the coconut milk and chia seeds
Add the coconut milk, chia seeds, maple syrup or honey, and vanilla extract to a bowl or jar. Stir thoroughly until the chia seeds are evenly distributed throughout the liquid.
2. Let the pudding thicken
Cover the mixture and refrigerate for at least 4 hours, preferably overnight. Stir it once after about 20 minutes to prevent the chia seeds from settling and clumping together.
3. Prepare the berries
Wash the strawberries, blueberries, and raspberries. Slice the strawberries into bite-sized pieces while keeping some whole berries aside for the topping.
4. Layer the pudding and berries
Spoon a layer of chia pudding into a clean glass jar, followed by a layer of mixed berries. Continue alternating pudding and berries until the jar is nearly full.
5. Add the coconut topping
Finish the jar with a generous layer of fresh berries and sprinkle shredded coconut over the top for texture and flavor.
6. Garnish and serve
Place a small sprig of fresh mint on top and serve chilled. For the prettiest presentation, serve the pudding directly in the glass jar.
Tip
For an especially creamy texture, blend the coconut milk, sweetener, and vanilla before stirring in the chia seeds. Letting the pudding chill overnight also gives the chia seeds more time to develop a thick, spoonable consistency.
11. Coconut Milk Latte

Kickstart your morning with a dairy-free coconut milk latte.
Whether you use a Nespresso machine or a stovetop, simply brew your coffee and combine it with frothed coconut milk.
Add a dash of cinnamon, nutmeg, or vanilla for a cozy touch.
This latte is rich, creamy, and has a subtle sweetness that pairs beautifully with your coffee.
Ingredients
- 1–2 shots freshly brewed espresso
- ¾ cup unsweetened coconut milk, preferably barista-style
- 1 teaspoon maple syrup or honey, optional
- ¼ teaspoon vanilla extract, optional
- Ground cinnamon or cocoa powder, optional
Instructions
1. Brew the espresso
Prepare 1–2 shots of espresso and pour them into a warmed white ceramic cup or mug. A strong espresso provides the rich coffee base needed to balance the coconut milk.
2. Warm the coconut milk
Pour the coconut milk into a small saucepan and heat it gently over medium-low heat until steaming but not boiling. If using maple syrup and vanilla, stir them into the warm milk.
3. Froth the coconut milk
Use a milk frother, steam wand, or handheld whisk to create a smooth, fine foam. Aim for silky microfoam rather than large bubbles, which will make the latte art easier to create.
4. Pour the coconut milk
Slowly pour the steamed coconut milk into the espresso from a slight height, allowing the milk and coffee to blend. As the cup fills, lower the pouring point closer to the surface.
5. Create the latte art
When the cup is nearly full, gently pour a thin stream of milk into the center of the drink. Move the pitcher slightly from side to side to build a leaf or rosette pattern, then finish with a quick pull through the center.
6. Serve the latte
Serve the coconut milk latte immediately while it is hot and the foam is still silky. Place the mug on a white saucer for a clean, café-style presentation.
Tip
For the smoothest latte art, use barista-style coconut milk rather than regular canned coconut milk. Shake or stir the milk well before steaming, and avoid overheating it—around 60–65°C (140–150°F) gives you a creamy texture without scorching the milk.
12. Coconut Milk Smoothie Bowl
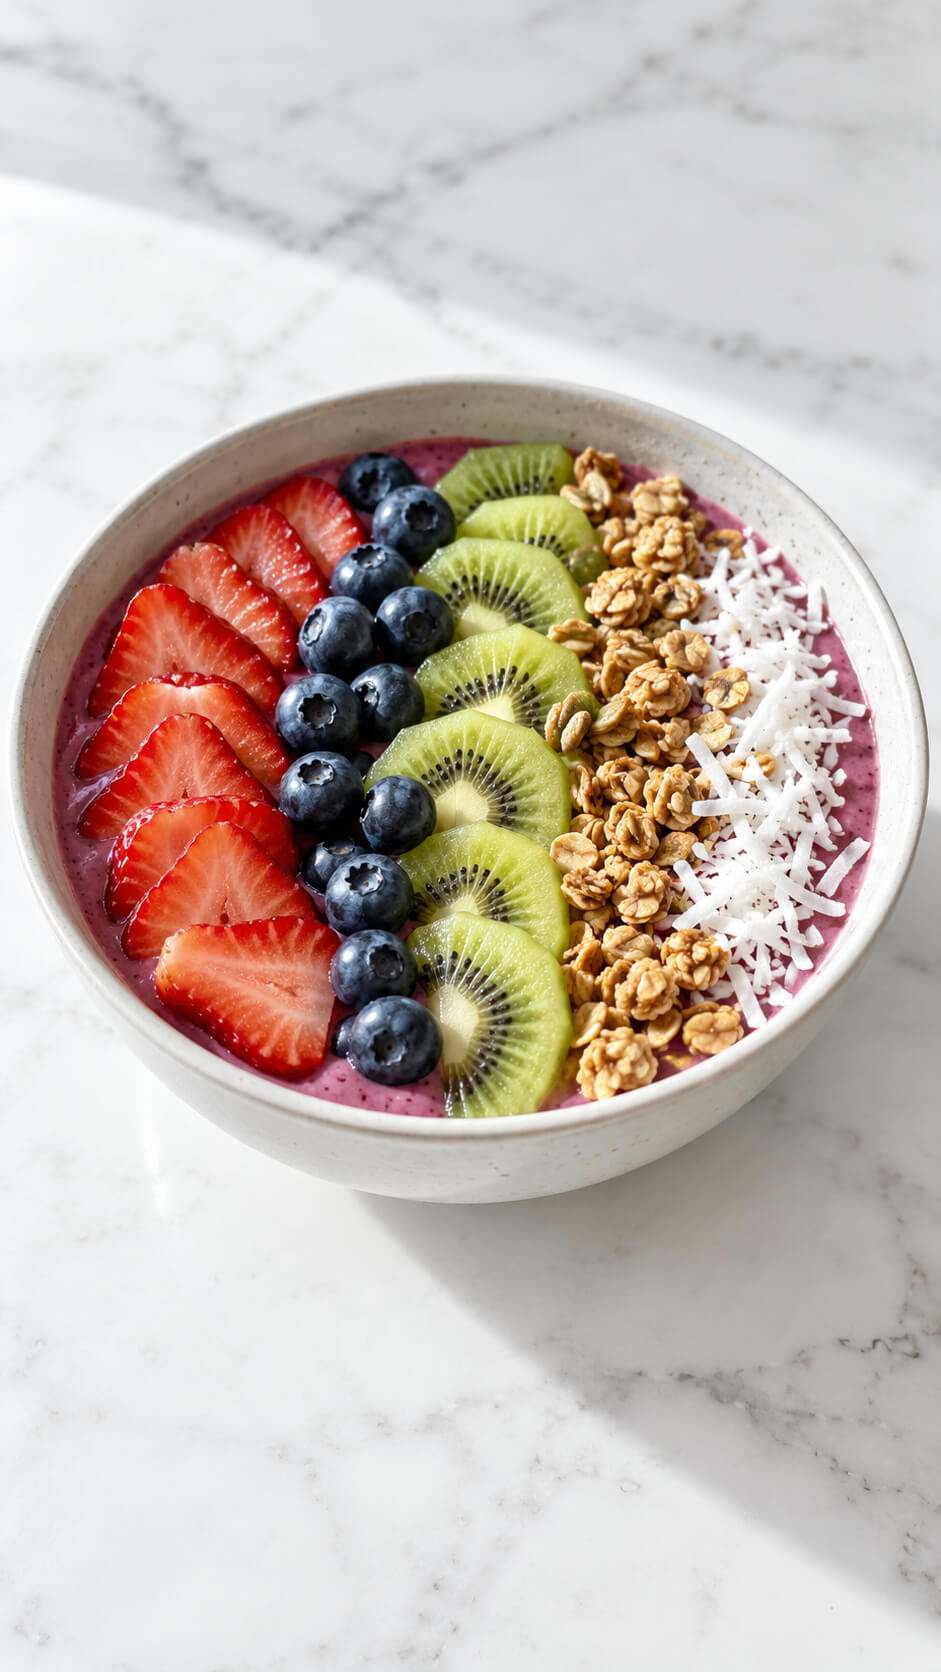
For a satisfying breakfast or snack, try making a coconut milk smoothie bowl.
Blend coconut milk with your favorite frozen fruits, and pour it into a bowl.
Top with granola, coconut flakes, chia seeds, and fresh fruit for a deliciously creamy and crunchy combination.
It’s a visually stunning dish that’s just as tasty as it is Instagram-worthy.
Ingredients
- 1 frozen banana
- 1 cup frozen mixed berries
- ½ cup coconut milk
- ½ cup fresh strawberries
- ½ cup blueberries
- 1 kiwi
- ¼ cup granola
- 2 tablespoons shredded coconut
- 1 teaspoon honey or maple syrup, optional
Instructions
1. Blend the smoothie base
Add the frozen banana, frozen berries, and coconut milk to a high-speed blender. Blend until thick and creamy, scraping down the sides as needed. Use just enough coconut milk to help everything blend while keeping the mixture spoon-thick.
2. Transfer to a bowl
Spoon the blended smoothie mixture into a wide bowl and gently spread the surface with the back of a spoon. A wide, shallow bowl makes it easier to arrange the toppings in neat rows.
3. Slice the fresh fruit
Hull and thinly slice the strawberries, peel the kiwi and cut it into rounds, and keep the blueberries whole. Pat the fruit dry if it is particularly juicy so the toppings stay fresh and vibrant.
4. Arrange the toppings
Arrange the sliced strawberries, blueberries, kiwi, and granola in separate rows across the smoothie. Finish by sprinkling shredded coconut over the granola and fruit for extra texture.
5. Serve immediately
Enjoy the smoothie bowl straight away while the base is cold and thick and the toppings are crisp. Add a small drizzle of honey or maple syrup if you prefer extra sweetness.
Tip
For an extra-thick smoothie bowl, freeze the banana and berries completely and start with less coconut milk. You can always add more, but too much liquid will make the bowl runny.
13. Coconut Milk Panna Cotta
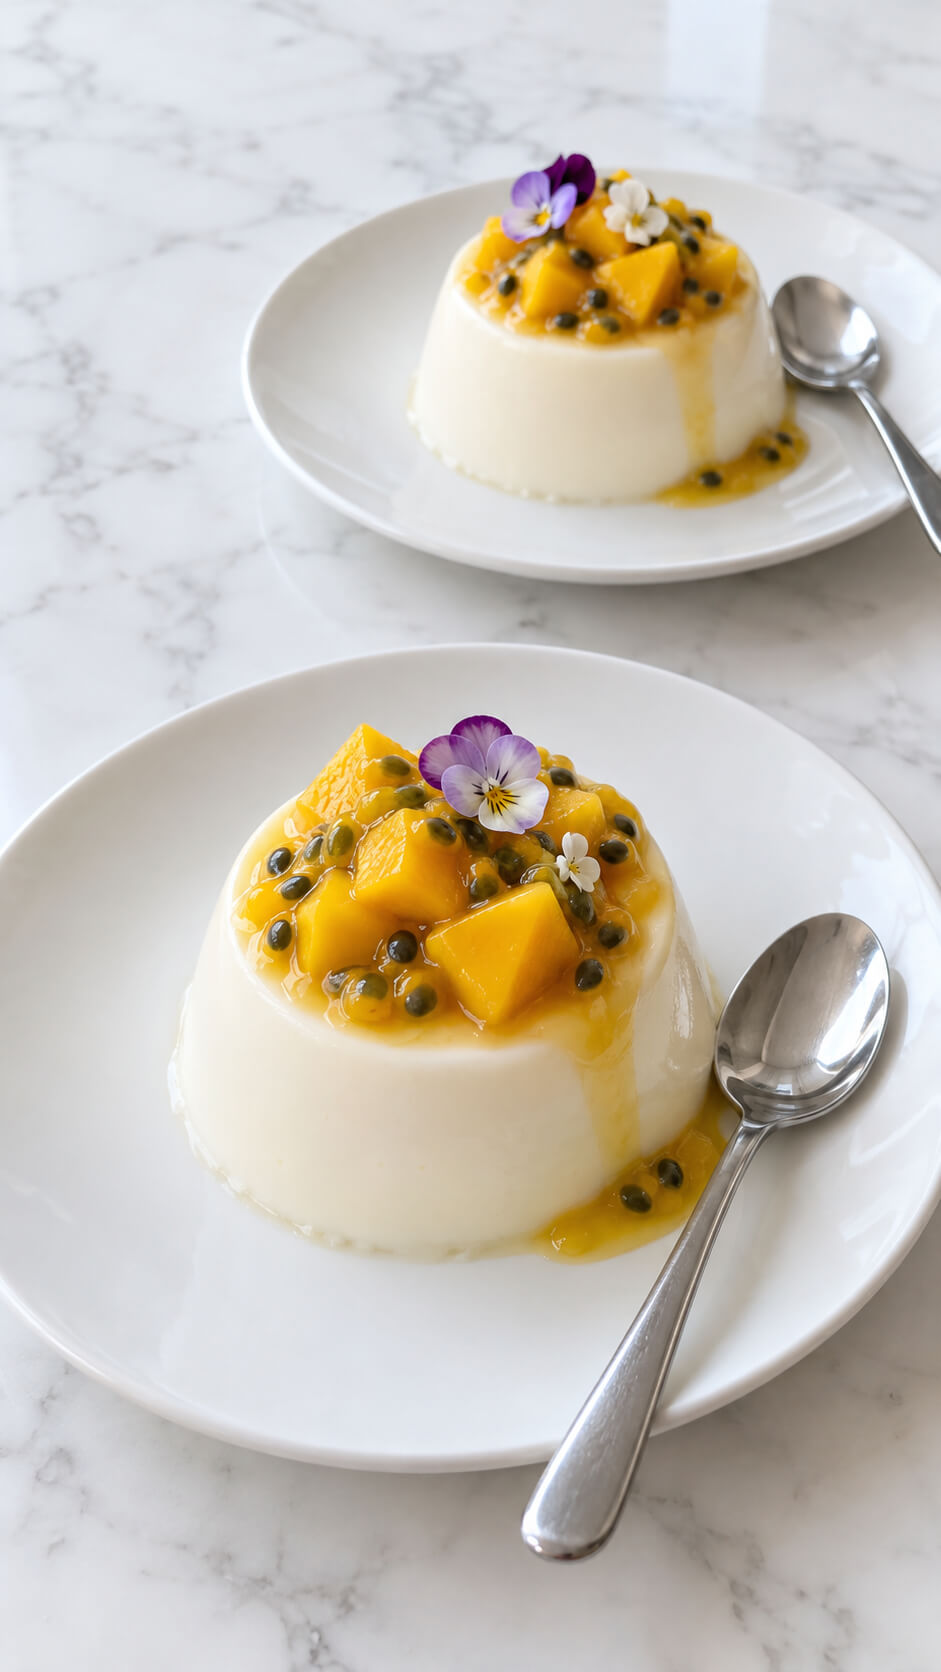
This Italian dessert gets a tropical makeover with coconut milk!
Panna cotta is usually made with cream, but swapping it for coconut milk gives it a beautiful, silky texture with a hint of coconut flavor.
Pair with a fruit compote, like mango or raspberry, to balance the sweetness and make it even more indulgent.
Ingredients
- 400 ml full-fat coconut milk
- 200 ml heavy cream
- 60 g granulated sugar
- 1 tsp vanilla extract
- 7 g powdered gelatin
- 3 tbsp cold water
Mango-Passion Fruit Compote
- 1 ripe mango, peeled and diced
- Pulp of 2 passion fruits
- 1 tbsp sugar
- 1 tbsp lime juice
- 1 tbsp water
Instructions
1. Bloom the gelatin
Sprinkle the gelatin over the cold water in a small bowl. Let it stand for 5–10 minutes until the gelatin absorbs the water and becomes soft.
2. Heat the coconut mixture
Combine the coconut milk, heavy cream, and sugar in a saucepan. Warm over medium-low heat, stirring occasionally, until the sugar dissolves and the mixture is hot but not boiling.
3. Add the gelatin
Remove the saucepan from the heat and stir in the bloomed gelatin until completely dissolved. Add the vanilla extract and mix well.
4. Pour into serving molds
Divide the mixture between four lightly oiled panna cotta molds or small ramekins. Let them cool slightly, then cover and refrigerate for at least 4 hours, preferably overnight, until firmly set.
5. Prepare the fruit compote
Place the diced mango, passion fruit pulp, sugar, lime juice, and water in a small saucepan. Cook over medium-low heat for 3–5 minutes, just until the mango softens slightly and the mixture becomes glossy. Cool completely.
6. Unmold the panna cotta
Run a thin knife around the edge of each panna cotta. Briefly dip the outside of the mold in warm water, then gently invert it onto a white serving plate.
7. Finish with the fruit
Spoon the cooled mango-passion fruit compote generously over each panna cotta, allowing a little of the glossy sauce to run down the sides.
8. Garnish and serve
Decorate with a few tiny edible flowers and serve immediately with a small stainless-steel spoon beside each plate.
Tip
For the cleanest restaurant-style presentation, chill the panna cotta overnight and make sure the compote is completely cool before spooning it over the dessert.
14. Coconut Milk Risotto
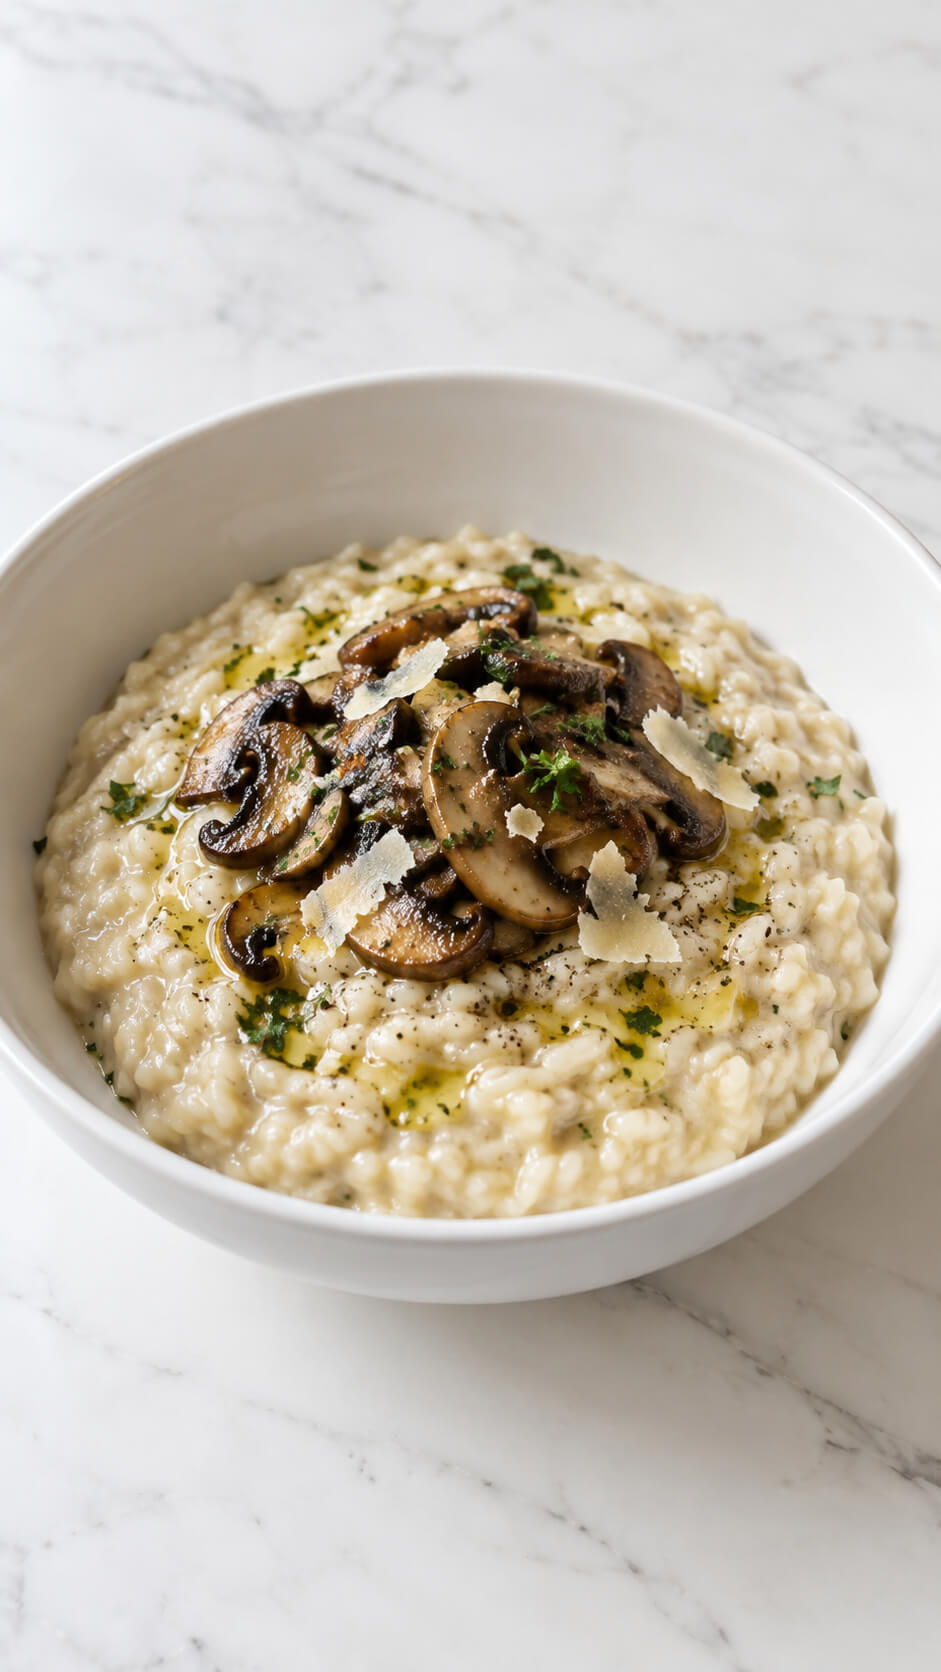
Creamy risotto is elevated with the richness of coconut milk.
The coconut adds a slight sweetness that pairs perfectly with savory ingredients like mushrooms, peas, or shrimp.
The coconut milk helps create a luscious, smooth texture, and when combined with the Arborio rice’s natural starches, it’s the ultimate comfort food.
Ingredients
- 1 cup Arborio rice
- 2 cups mushrooms, sliced
- 1 small onion, finely diced
- 2 cloves garlic, minced
- 3 cups vegetable stock, warmed
- 1 cup full-fat coconut milk
- 2 tablespoons olive oil
- 1 tablespoon butter
- 1 tablespoon truffle oil
- 2 tablespoons nutritional yeast or finely grated Parmesan
- ½ teaspoon salt
- ¼ teaspoon black pepper
- 1 tablespoon fresh parsley, chopped
Instructions
1. Sauté the mushrooms
Heat 1 tablespoon of olive oil in a large pan over medium-high heat. Add the sliced mushrooms and cook for 5–7 minutes, stirring occasionally, until golden brown and tender. Season lightly with salt and pepper, then transfer the mushrooms to a plate.
2. Soften the aromatics
Add the remaining olive oil and butter to the same pan. Stir in the diced onion and cook for 3–4 minutes until soft and translucent. Add the garlic and cook for another 30 seconds until fragrant.
3. Toast the rice
Add the Arborio rice and stir continuously for about 1–2 minutes, allowing the grains to become lightly toasted. This helps the rice develop a deeper flavor while maintaining its creamy texture.
4. Add the warm stock gradually
Pour in about ½ cup of warm vegetable stock and stir gently until most of the liquid has been absorbed. Continue adding the stock ½ cup at a time, stirring frequently and allowing each addition to absorb before adding more.
5. Stir in the coconut milk
When the rice is nearly tender, pour in the coconut milk and continue stirring for 3–5 minutes. Cook until the risotto is creamy and the rice is tender but still has a slight bite in the center.
6. Fold in the mushrooms
Return most of the sautéed mushrooms to the pan and gently fold them through the risotto. Stir in the nutritional yeast or Parmesan, then season with salt and freshly ground black pepper.
7. Finish with truffle oil
Remove the pan from the heat and drizzle the truffle oil over the risotto. Stir gently to distribute the aroma without overpowering the dish.
8. Serve the risotto
Spoon the risotto into a deep white bowl and top with the remaining sautéed mushrooms. Finish with a little chopped parsley and an extra, very light drizzle of truffle oil.
Tip
For the creamiest risotto, keep the vegetable stock warm throughout cooking and stir frequently rather than letting the rice sit. Add the truffle oil at the end so its delicate flavor stays noticeable.
15. Coconut Milk Popsicles
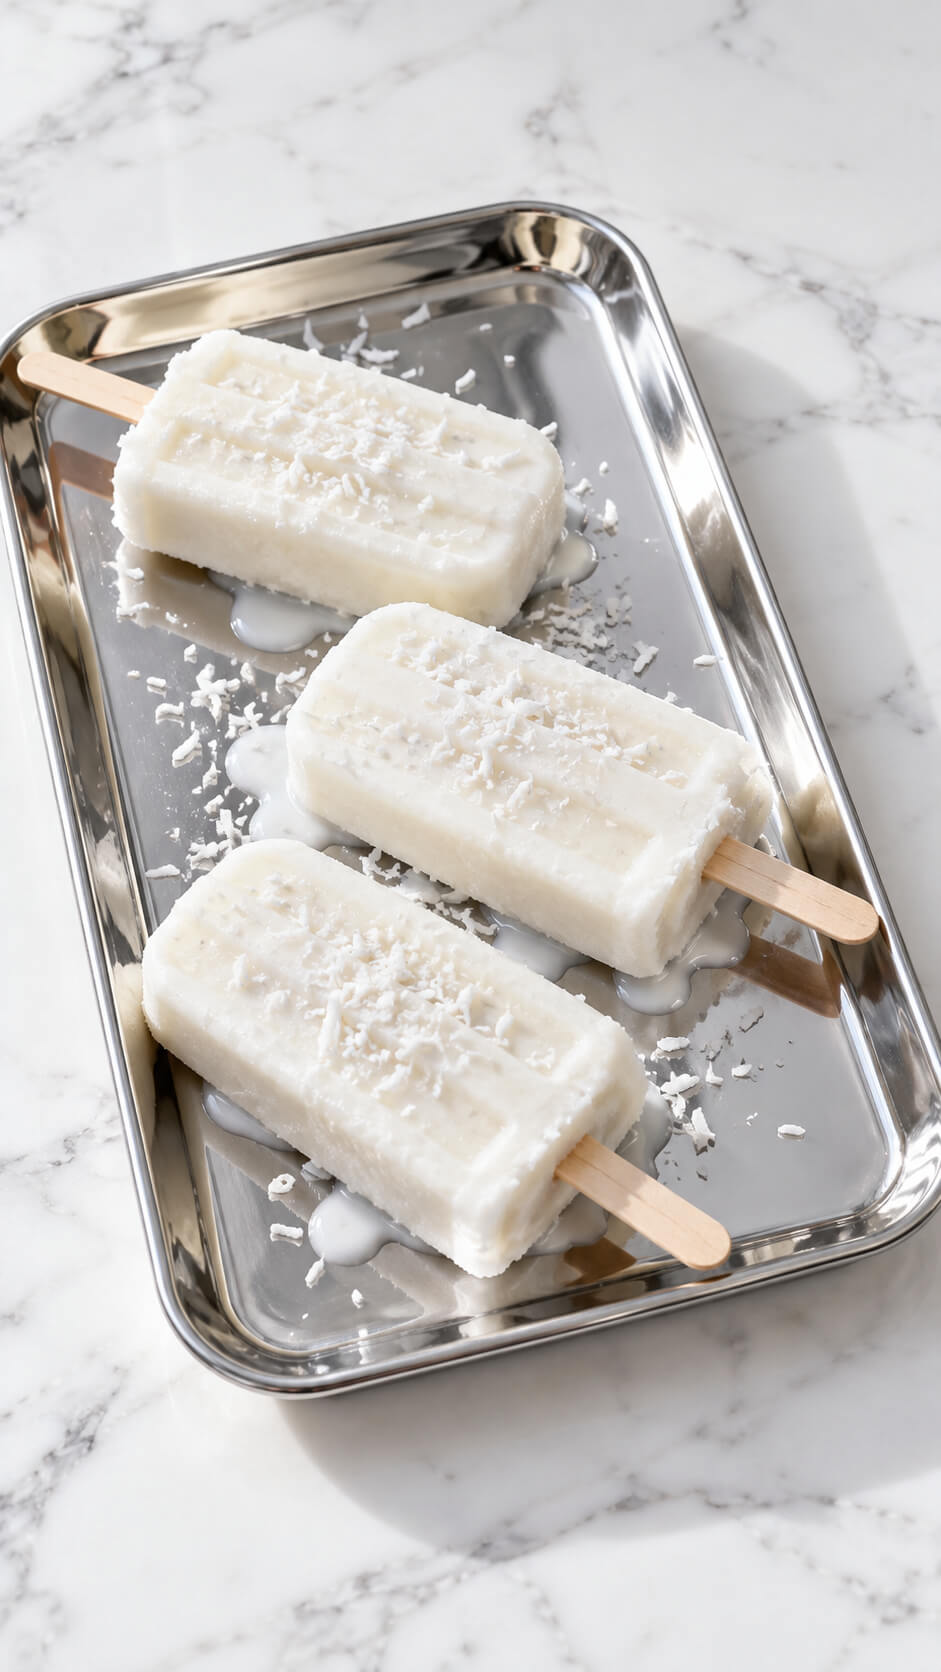
Cool off on a hot day with homemade coconut milk popsicles!
Blend coconut milk with your favorite fruit or even a little bit of chocolate or vanilla.
Pour the mixture into molds and freeze for a few hours.
These popsicles are a fun and refreshing treat, and you can experiment with different flavor combinations to find your perfect match.
Ingredients
- 2 cups full-fat coconut milk
- ½ cup sweetened condensed milk
- ½ cup finely shredded coconut
- 1 teaspoon vanilla extract
- ¼ teaspoon salt
- 2 tablespoons shredded coconut, for topping
- 6 wooden popsicle sticks
Instructions
1. Combine the coconut mixture
Whisk the coconut milk, condensed milk, vanilla extract, salt, and ½ cup shredded coconut together in a bowl until smooth and evenly combined.
2. Fill the popsicle molds
Pour the mixture evenly into six popsicle molds, leaving a small amount of space at the top for expansion as they freeze.
3. Insert the wooden sticks
Place the wooden sticks into the center of each mold, making sure they are straight and firmly positioned.
4. Freeze the popsicles
Freeze the molds for at least 5–6 hours, or preferably overnight, until the popsicles are completely firm.
5. Release the frozen popsicles
Run the outside of each mold briefly under warm water, then gently pull the popsicles out by their sticks.
6. Add the coconut topping
Immediately sprinkle the popsicles with shredded coconut, pressing it lightly onto the surface so it sticks to the slightly frosty exterior.
7. Serve the popsicles
Arrange the popsicles on a chilled glossy tray and serve immediately while they are cold and beginning to soften slightly.
Tip
For an extra-creamy texture, use full-fat coconut milk and shake the can thoroughly before opening. Avoid using light coconut milk, which can make the popsicles icier.
16. Coconut Milk Cake
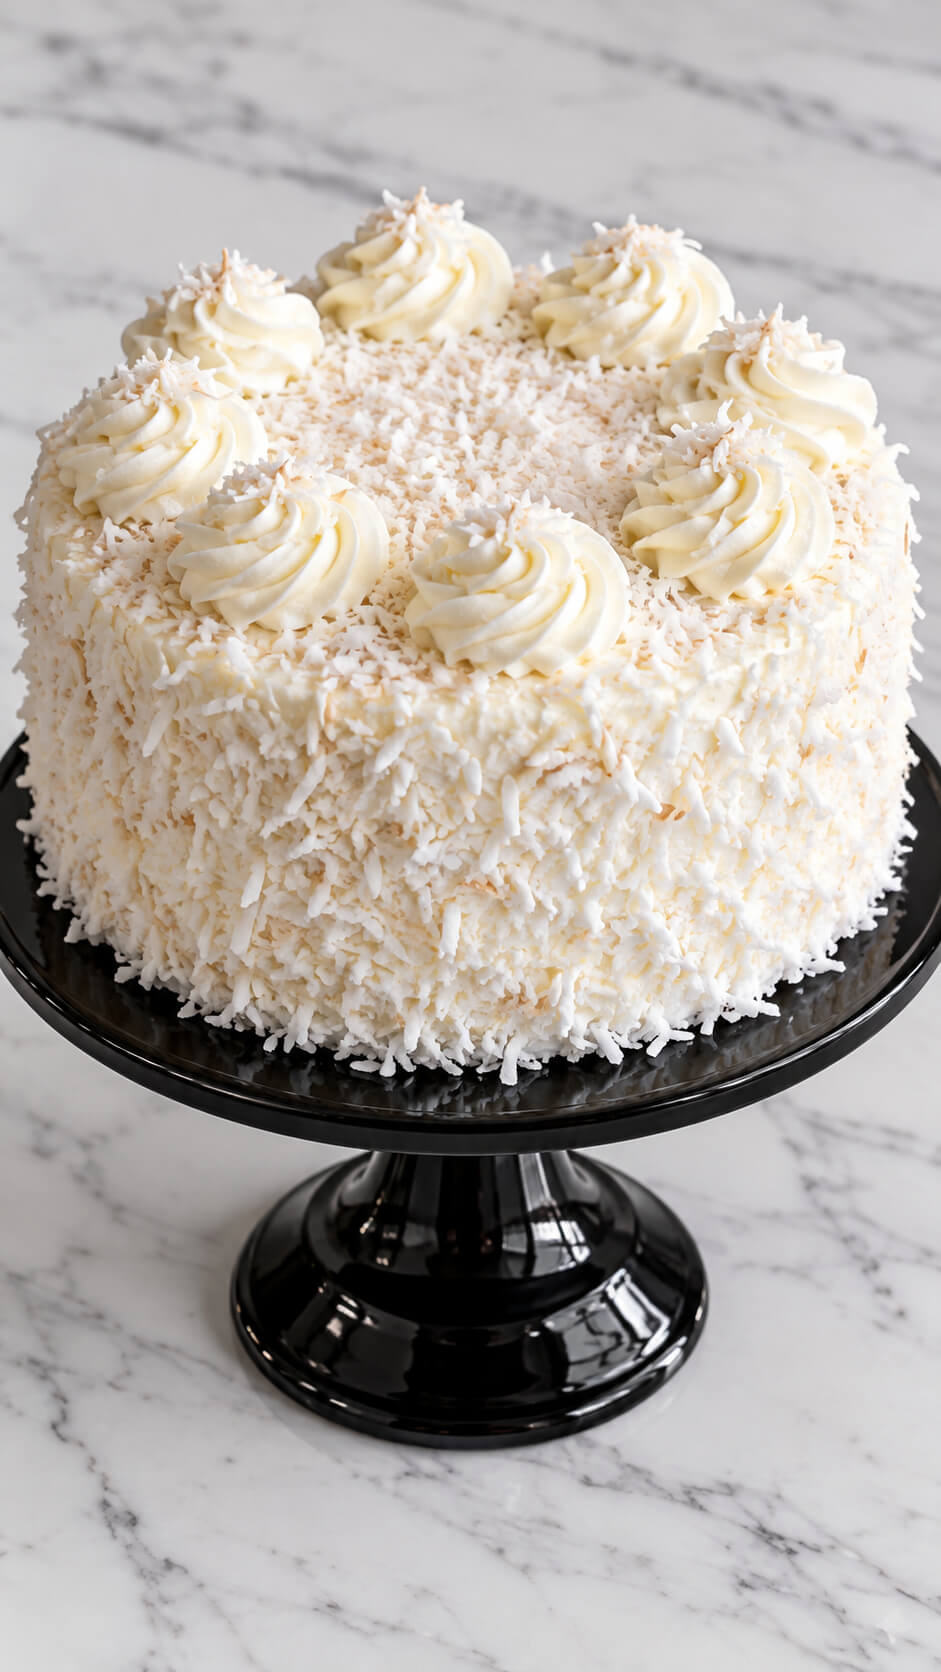
Make a decadent, moist cake using coconut milk in place of regular milk.
Whether you bake a simple coconut cake or add tropical fruits like pineapple or mango, the coconut milk adds richness and flavor.
Top with a coconut frosting or a drizzle of coconut cream for the ultimate dessert.
17. Coconut Milk Bread
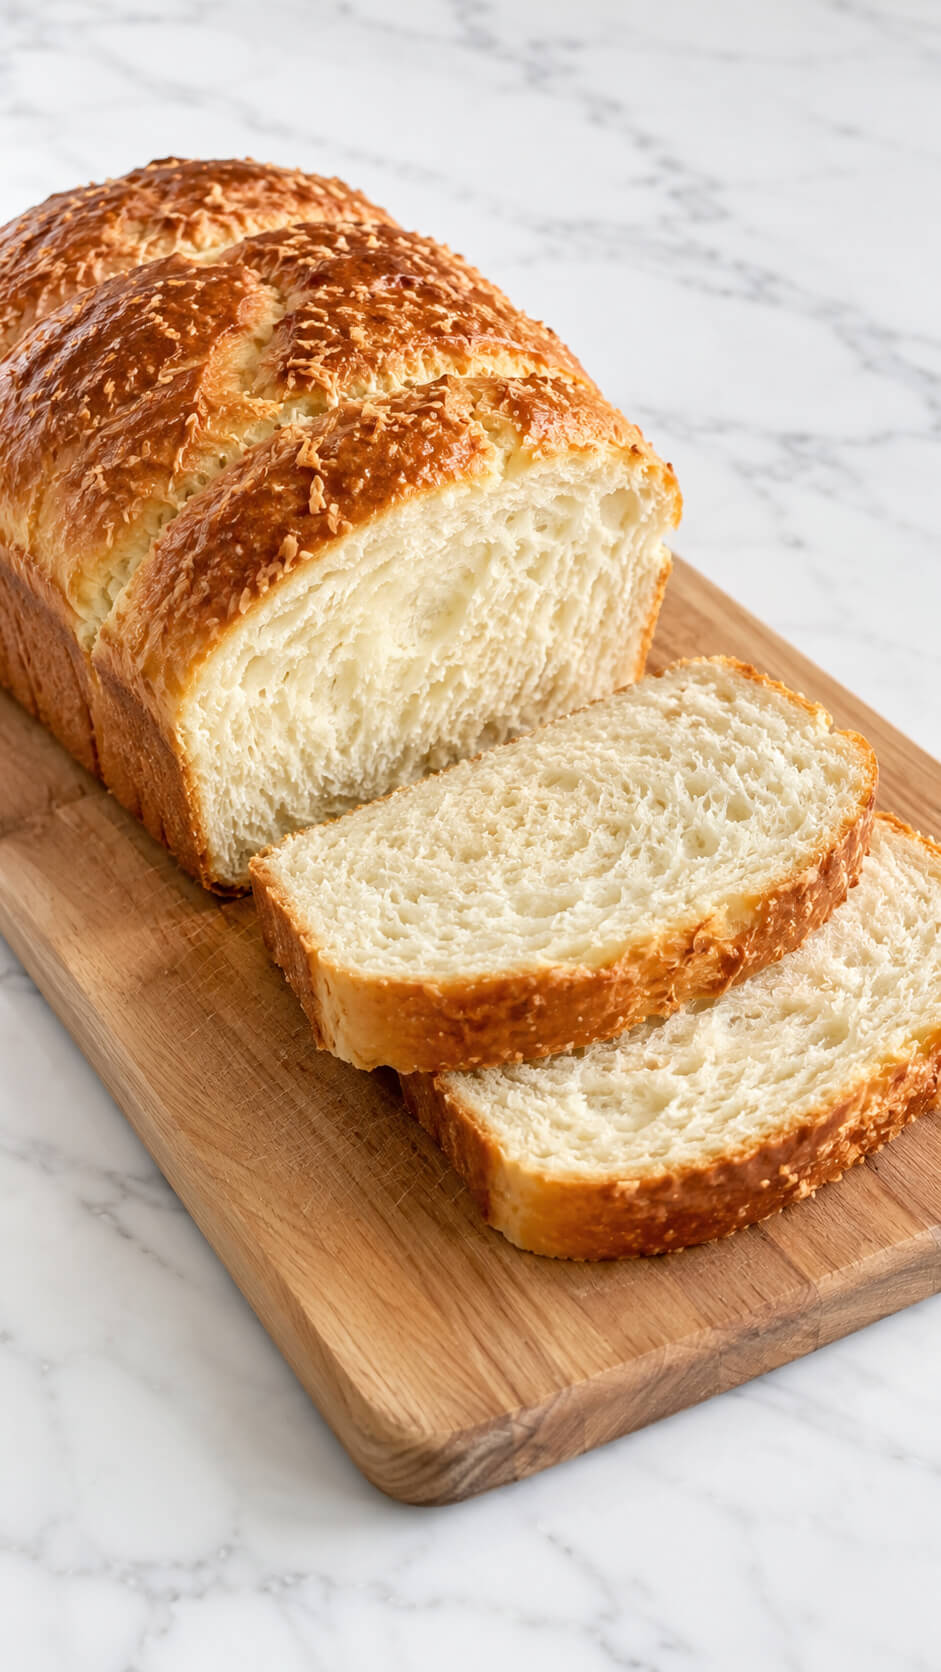
Coconut milk can transform ordinary bread into something special.
Add it to the dough for a slightly sweet, soft texture.
Coconut bread is perfect for breakfast with a slather of jam or as an accompaniment to your favorite stew or soup.
The slight coconut flavor makes it a delightful twist on your regular bread recipes.
Ingredients
- ¾ cup (180 ml) warm coconut milk
- 2¼ teaspoons (7 g) instant or active dry yeast
- ¼ cup (50 g) granulated sugar
- 1 large egg
- 3 tablespoons (42 g) unsalted butter, melted
- 3 cups (375 g) all-purpose flour
- 1 teaspoon salt
- ½ cup (40 g) unsweetened shredded coconut, optional
- 1 tablespoon melted butter, for brushing
Instructions
1. Activate the yeast
Combine the warm coconut milk, sugar, and yeast in a large bowl. Let the mixture stand for 5–10 minutes until slightly foamy. If using instant yeast, you can proceed immediately after mixing.
2. Mix the wet ingredients
Whisk the egg and melted butter into the coconut milk mixture until smooth and evenly combined.
3. Form the dough
Add the flour and salt gradually, mixing until a soft, slightly sticky dough forms. Stir in the shredded coconut if using. Avoid adding too much flour, as a softer dough produces a lighter loaf.
4. Knead the dough
Transfer the dough to a lightly floured surface and knead for 8–10 minutes until smooth, elastic, and slightly tacky. You can also knead it in a stand mixer with a dough hook for about 6–8 minutes.
5. Let the dough rise
Place the dough in a lightly greased bowl and cover it with a clean kitchen towel or plastic wrap. Leave it in a warm, draft-free place for about 1–1½ hours, or until doubled in size.
6. Shape the loaf
Gently press the air out of the risen dough and shape it into a smooth loaf. Place it in a greased 9 × 5-inch loaf pan, making sure the dough sits evenly in the pan.
7. Proof the loaf
Cover the pan and let the dough rise again for 30–45 minutes, until it becomes noticeably puffy and approaches the top of the pan.
8. Bake the bread
Heat the oven to 350°F (175°C). Bake the loaf for 30–35 minutes, until deeply golden brown and cooked through. If the top browns too quickly, loosely cover it with foil during the final 10 minutes.
9. Finish the crust
Brush the hot loaf lightly with melted butter as soon as it comes out of the oven. This gives the crust a soft, tender finish and adds extra richness.
10. Cool before slicing
Allow the bread to cool in the pan for about 10 minutes, then transfer it to a wire rack. Let it cool for at least 30–45 minutes before slicing so the interior can finish setting while remaining soft and pillowy.
Tip
Keep the dough slightly sticky
Resist the temptation to add lots of extra flour while kneading. Coconut milk bread is at its softest when the dough remains slightly tacky but becomes smooth and elastic with kneading.
18. Coconut Milk Marinated Chicken
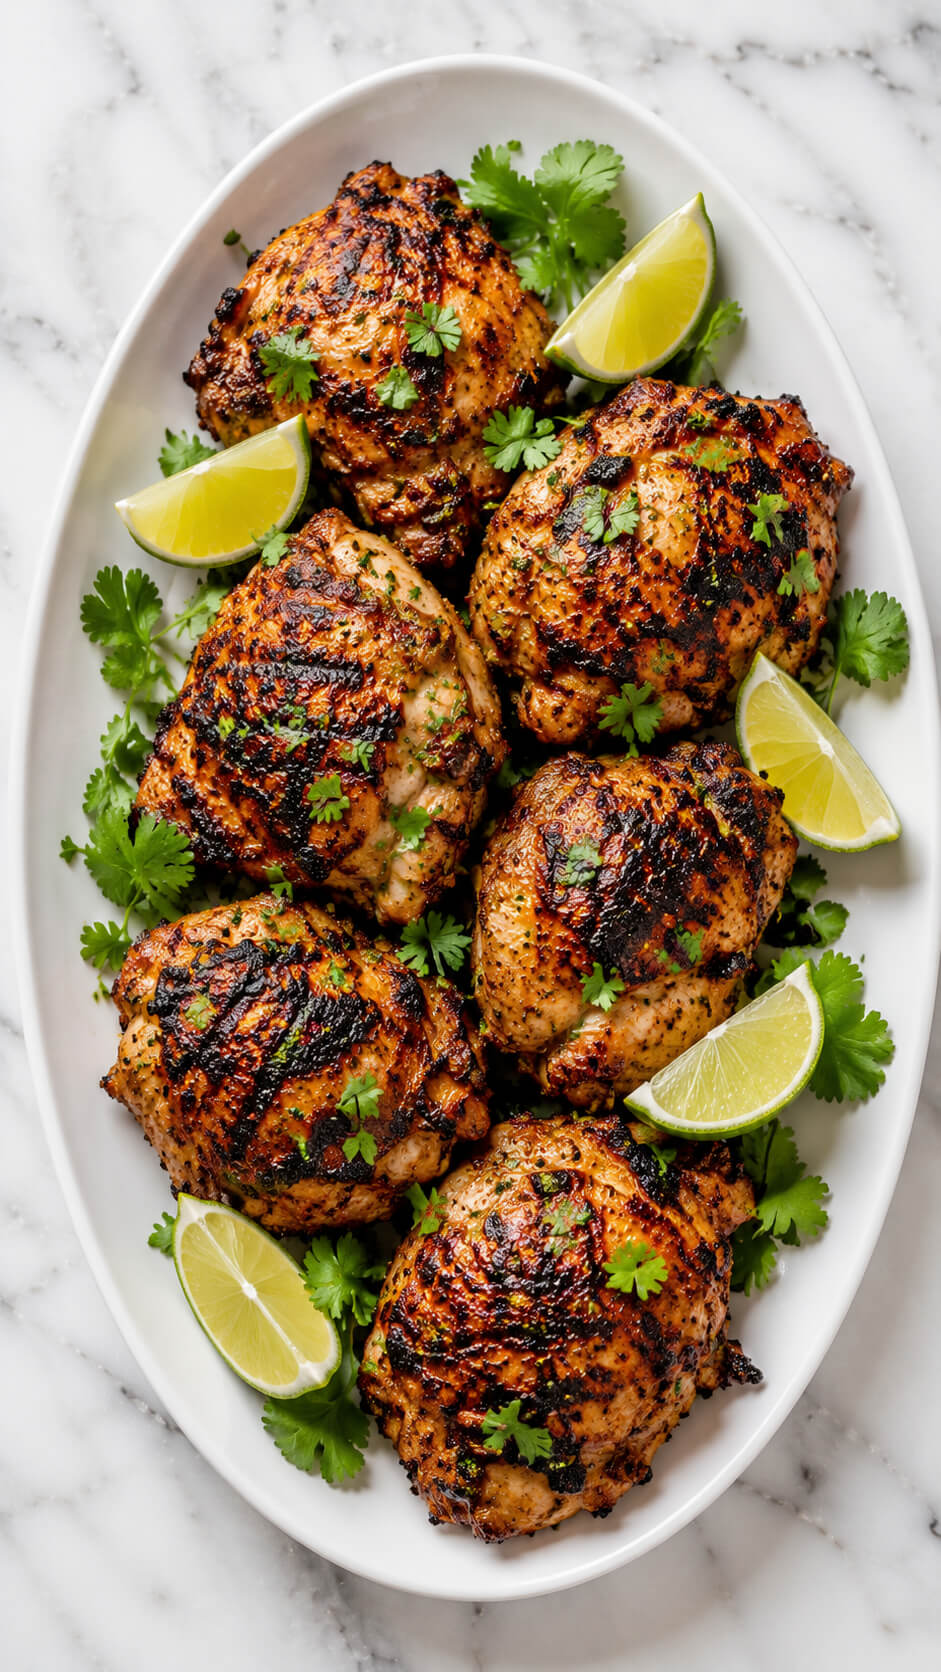
Coconut milk makes a delicious marinade for chicken.
The milk helps tenderize the meat, while the flavors of coconut combine with spices like garlic, ginger, and turmeric.
Let the chicken marinate for a few hours, then grill or bake for a flavorful, juicy dish that pairs wonderfully with rice or salad.
Prep Time: 15 minutes (plus 2 hours marinating)
Cook Time: 20 minutes
Total Time: 2 hours 35 minutes
Servings: 6
Ingredients
- 6 bone-in, skin-on chicken thighs (or boneless if preferred)
- 1 cup full-fat coconut milk
- 2 tablespoons lime juice
- 1 tablespoon lime zest
- 3 cloves garlic, minced
- 1 tablespoon fresh ginger, grated
- 2 tablespoons soy sauce
- 1 tablespoon brown sugar
- 1 tablespoon olive oil
- 1 teaspoon paprika
- 1 teaspoon ground cumin
- ½ teaspoon ground coriander
- ½ teaspoon black pepper
- 1 teaspoon salt
- 2 tablespoons chopped fresh cilantro, plus more for garnish
- 2 limes, cut into wedges, for serving
Instructions
1. Make the coconut marinade
In a large mixing bowl, whisk together the coconut milk, lime juice, lime zest, garlic, ginger, soy sauce, brown sugar, olive oil, paprika, cumin, coriander, salt, pepper, and chopped cilantro until everything is well combined.
2. Marinate the chicken
Add the chicken thighs to the bowl and coat them thoroughly with the marinade. Cover and refrigerate for at least 2 hours, or overnight for the richest flavor and the most tender meat.
3. Preheat the grill
Heat your grill to medium-high heat, around 400°F (200°C). Lightly oil the grill grates to prevent the chicken from sticking during cooking.
4. Grill the chicken
Remove the chicken from the marinade and let any excess drip off. Grill for 6–8 minutes per side, turning occasionally, until the chicken develops dark golden-brown grill marks and reaches an internal temperature of 165°F (74°C).
5. Rest the chicken
Transfer the grilled chicken to a platter and let it rest for about 5 minutes. This allows the juices to redistribute, keeping every bite moist and flavorful.
6. Garnish and serve
Arrange the grilled chicken on a white serving platter, then garnish generously with fresh cilantro and lime wedges. Serve immediately with rice, grilled vegetables, or a crisp salad.
Tip
For even deeper flavor and beautifully caramelized edges, marinate the chicken overnight and lightly brush it with a little reserved fresh coconut marinade (not the marinade used for raw chicken) during the final few minutes of grilling.
19. Coconut Milk Chocolate Mousse
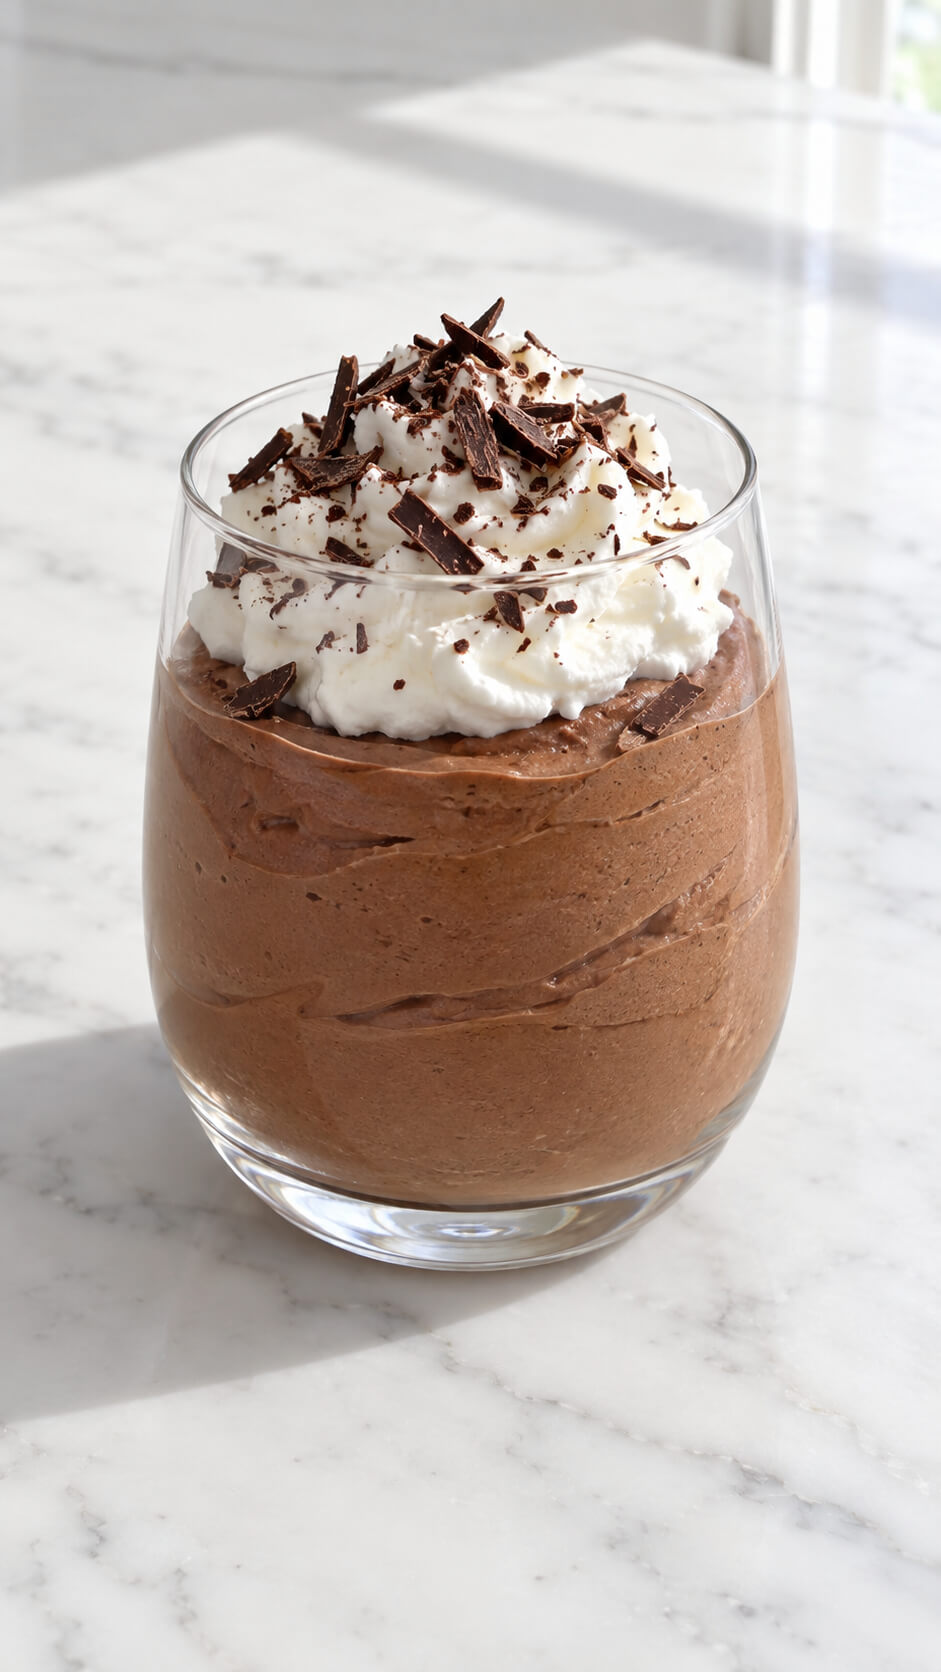
For a rich, creamy dessert that’s dairy-free, try making chocolate mousse with coconut milk.
The coconut milk provides a smooth, velvety base for the chocolate, giving it a luscious texture.
Add a bit of vanilla and a pinch of salt to enhance the flavors, and top with whipped coconut cream and chocolate for an indulgent finish.
Ingredients
For the chocolate mousse
- 200 g dark chocolate, finely chopped
- 400 ml full-fat coconut milk
- 2 tbsp maple syrup or honey
- 1 tsp vanilla extract
- 1 pinch fine sea salt
For the topping
- 200 ml chilled full-fat coconut cream
- 1 tbsp powdered sugar or maple syrup
- ½ tsp vanilla extract
- 30 g dark chocolate, for shaving
Instructions
1. Melt the chocolate
Place the chopped dark chocolate in a heatproof bowl. Melt it gently over a saucepan of barely simmering water, stirring occasionally until completely smooth. Remove from the heat and set aside.
2. Warm the coconut milk
Pour the coconut milk into a small saucepan and warm over medium-low heat until hot but not boiling. Stir in the maple syrup, vanilla extract, and sea salt.
3. Combine the chocolate and coconut milk
Gradually pour the warm coconut milk into the melted chocolate while whisking continuously. Keep whisking until the mixture becomes glossy, smooth, and evenly combined.
4. Chill the mousse
Divide the chocolate mixture between four clean serving glasses. Refrigerate for at least 3 hours, or until the mousse is firm and chilled.
5. Whip the coconut cream
Scoop the solid, chilled coconut cream into a cold mixing bowl. Add the powdered sugar and vanilla, then whip until light and fluffy. Avoid over-whipping, as coconut cream can become grainy.
6. Top the mousse
Spoon or pipe the whipped coconut cream generously over each chilled mousse. Leave the topping slightly rustic for a homemade appearance.
7. Add the chocolate shavings
Use a vegetable peeler or sharp knife to shave the dark chocolate into thin curls. Scatter the shavings generously over the coconut cream just before serving.
Tip
For the creamiest mousse, chill the coconut milk and coconut cream thoroughly beforehand and use full-fat varieties. The higher fat content gives the mousse a richer texture and helps the coconut cream whip properly.
Serving
Serve the mousse cold, straight from the refrigerator. For the cleanest presentation, use clear glasses so the smooth chocolate mousse and fluffy white topping are visible through the sides.
20. Coconut Milk Tofu Stir-Fry
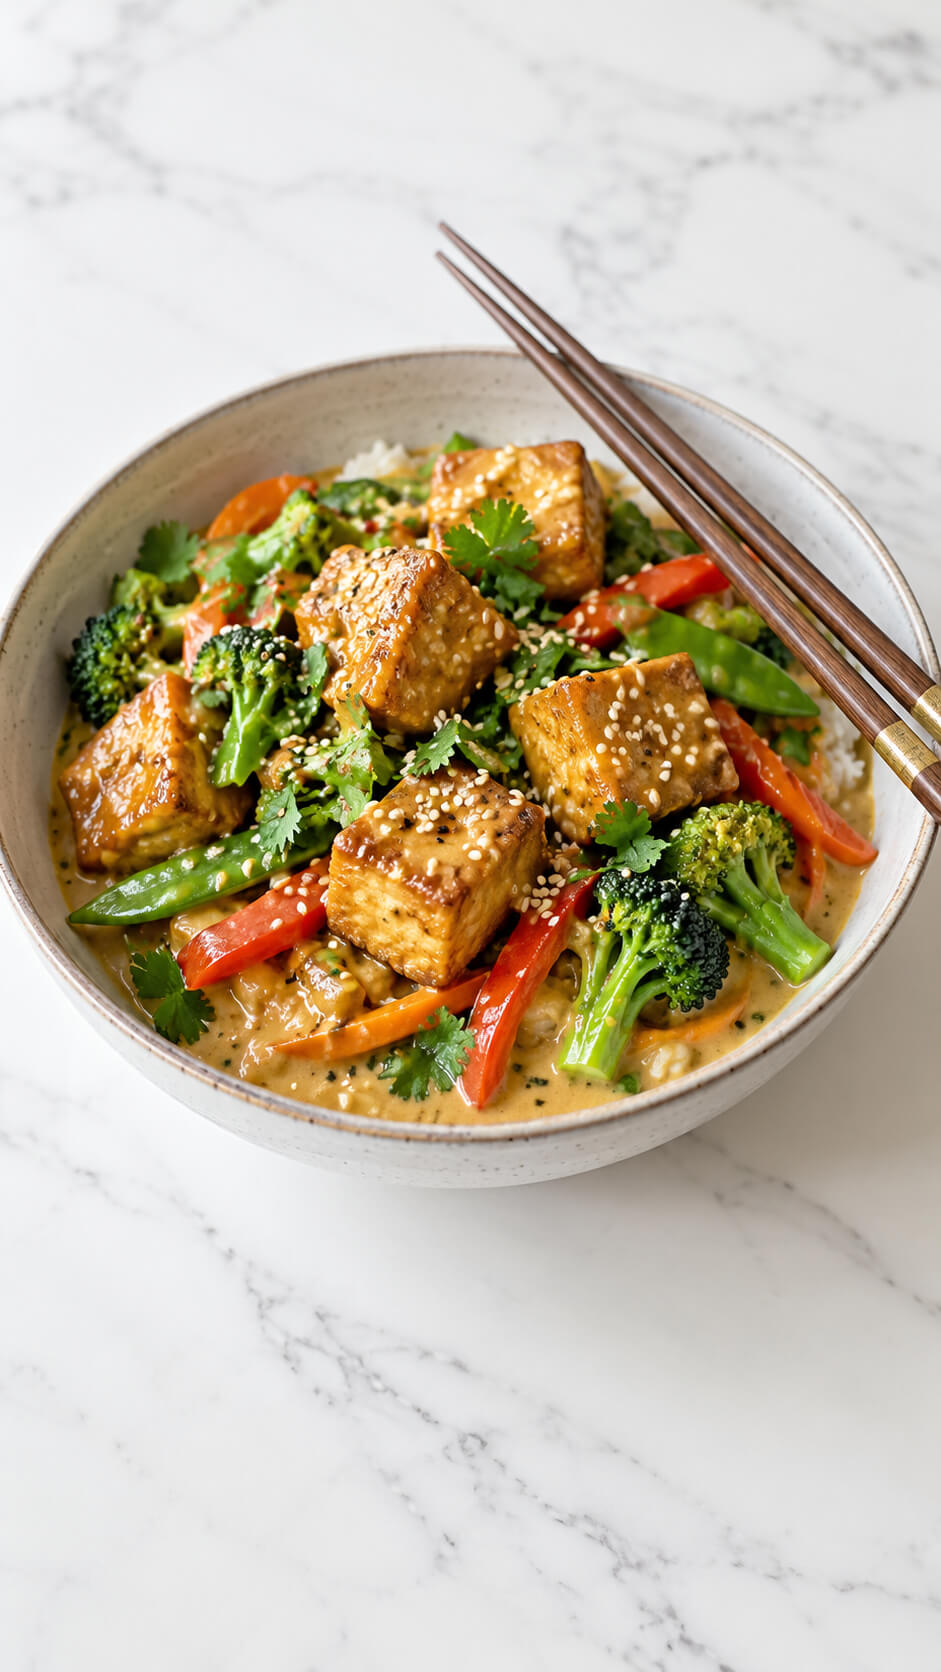
Stir-fried tofu is a healthy and flavorful dish, and coconut milk can take it to the next level.
Add coconut milk to your stir-fry sauce for a creamy, slightly sweet element that perfectly complements the vegetables and tofu.
Spice it up with chili flakes, sesame seeds or a dash of soy sauce, and serve over rice for a quick, satisfying meal.
Ingredients
For the tofu
- 400 g firm or extra-firm tofu, pressed and cut into cubes
- 2 tablespoons cornstarch
- 1 tablespoon soy sauce
- 1 tablespoon vegetable oil
- 1 teaspoon sesame oil
For the stir-fry
- 1 tablespoon vegetable oil
- 1 small broccoli head, cut into florets
- 1 red bell pepper, sliced
- 1 carrot, thinly sliced
- 1 cup sugar snap peas
- 2 cloves garlic, minced
- 1 teaspoon fresh ginger, grated
For the coconut sauce
- 1 cup full-fat coconut milk
- 2 tablespoons soy sauce
- 1 tablespoon lime juice
- 1 tablespoon maple syrup or honey
- 1 tablespoon smooth peanut butter
- 1 teaspoon curry powder
- ½ teaspoon chili flakes, optional
For serving
- 2 cups cooked jasmine or basmati rice
- 1 tablespoon sesame seeds
- Fresh cilantro or coriander
- Lime wedges
Instructions
1. Press and season the tofu
Pat the tofu dry and press it between paper towels for 10–15 minutes to remove excess moisture. Cut it into bite-sized cubes, then toss with soy sauce, sesame oil, and cornstarch until every piece is lightly coated.
2. Crisp the tofu
Heat the vegetable oil in a large skillet or wok over medium-high heat. Add the tofu in a single layer and cook for 8–10 minutes, turning occasionally, until the cubes are golden brown and crisp on several sides. Transfer them to a plate.
3. Cook the vegetables
Add another splash of oil to the same pan if needed. Add the broccoli, bell pepper, carrot, and snap peas. Stir-fry for 4–5 minutes, keeping the vegetables bright and slightly crisp.
4. Add the aromatics
Add the garlic and ginger to the vegetables and stir-fry for about 30–60 seconds, just until fragrant. Avoid cooking the garlic for too long so it doesn’t become bitter.
5. Make the coconut sauce
Whisk the coconut milk, soy sauce, lime juice, maple syrup, peanut butter, curry powder, and chili flakes together in a bowl. Pour the sauce into the pan with the vegetables and simmer for 2–3 minutes, stirring until it becomes creamy and slightly thickened.
6. Combine the tofu and sauce
Return the crispy tofu to the pan and gently toss everything together. Simmer for another 1–2 minutes so the tofu absorbs some of the coconut sauce while retaining its crisp edges.
7. Assemble the bowls
Spoon warm rice into serving bowls and top generously with the tofu and vegetables. Finish with sesame seeds, fresh cilantro, and a squeeze of lime.
Tip
For the crispiest tofu, make sure it is thoroughly pressed and don’t overcrowd the pan. Cook the cubes in batches if necessary so they have enough space to brown rather than steam.
21. Coconut Milk Energy Balls
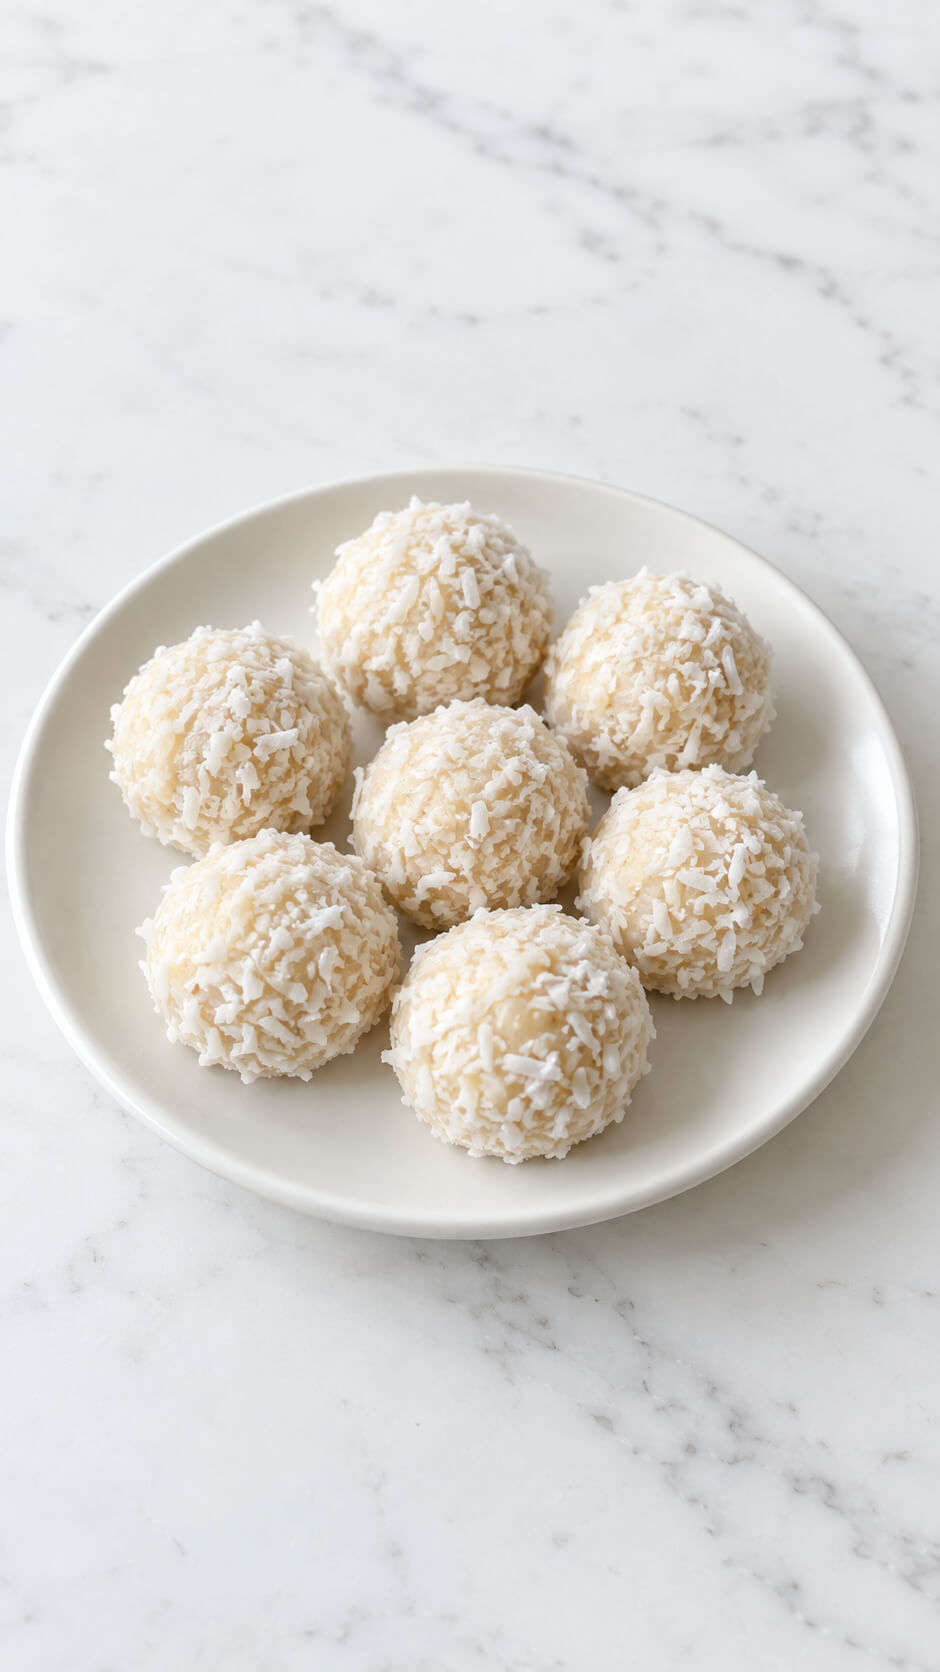
Snack time just got a whole lot more exciting with coconut milk energy balls!
Blend coconut milk with oats, nuts, and a sweetener like honey or maple syrup.
Roll into balls and refrigerate for a healthy, on-the-go snack that’s full of fiber, protein, and coconut goodness.
You can add in dried fruit or chocolate chips for an extra treat.
Prep time: 15 minutes
Chill time: 30 minutes
Total time: 45 minutes
Servings: 10–12 energy bites
Ingredients
- 1 cup desiccated coconut
- ½ cup rolled oats
- ½ cup almond flour
- ¼ cup coconut milk
- 3 tablespoons honey or maple syrup
- 2 tablespoons coconut oil, melted
- 1 teaspoon vanilla extract
- ¼ teaspoon salt
- ½ cup finely shredded coconut, for coating
Instructions
1. Combine the dry ingredients
In a medium bowl, mix the desiccated coconut, rolled oats, almond flour, and salt until evenly combined.
2. Add the wet ingredients
Pour in the coconut milk, honey or maple syrup, melted coconut oil, and vanilla extract. Stir thoroughly until the mixture becomes moist and holds together when pressed.
3. Chill the mixture
Cover the bowl and refrigerate for about 20–30 minutes. Chilling makes the mixture firmer and easier to shape into neat balls.
4. Shape the energy bites
Scoop out about 1 tablespoon of the mixture at a time and roll it between your palms to form smooth, round balls.
5. Coat the bites in coconut
Place the shredded coconut in a shallow bowl and roll each energy bite through it, gently pressing so the coconut sticks to the surface.
6. Chill before serving
Arrange the finished bites on a plate and refrigerate for another 10–15 minutes. Serve chilled or allow them to sit at room temperature for a few minutes before eating.
Tip
If the mixture feels too dry to roll, add coconut milk 1 teaspoon at a time until it holds together. If it feels too wet, mix in a little extra desiccated coconut or almond flour. Store the energy bites in an airtight container in the refrigerator for up to 5 days.
22. Coconut Milk Shrimp
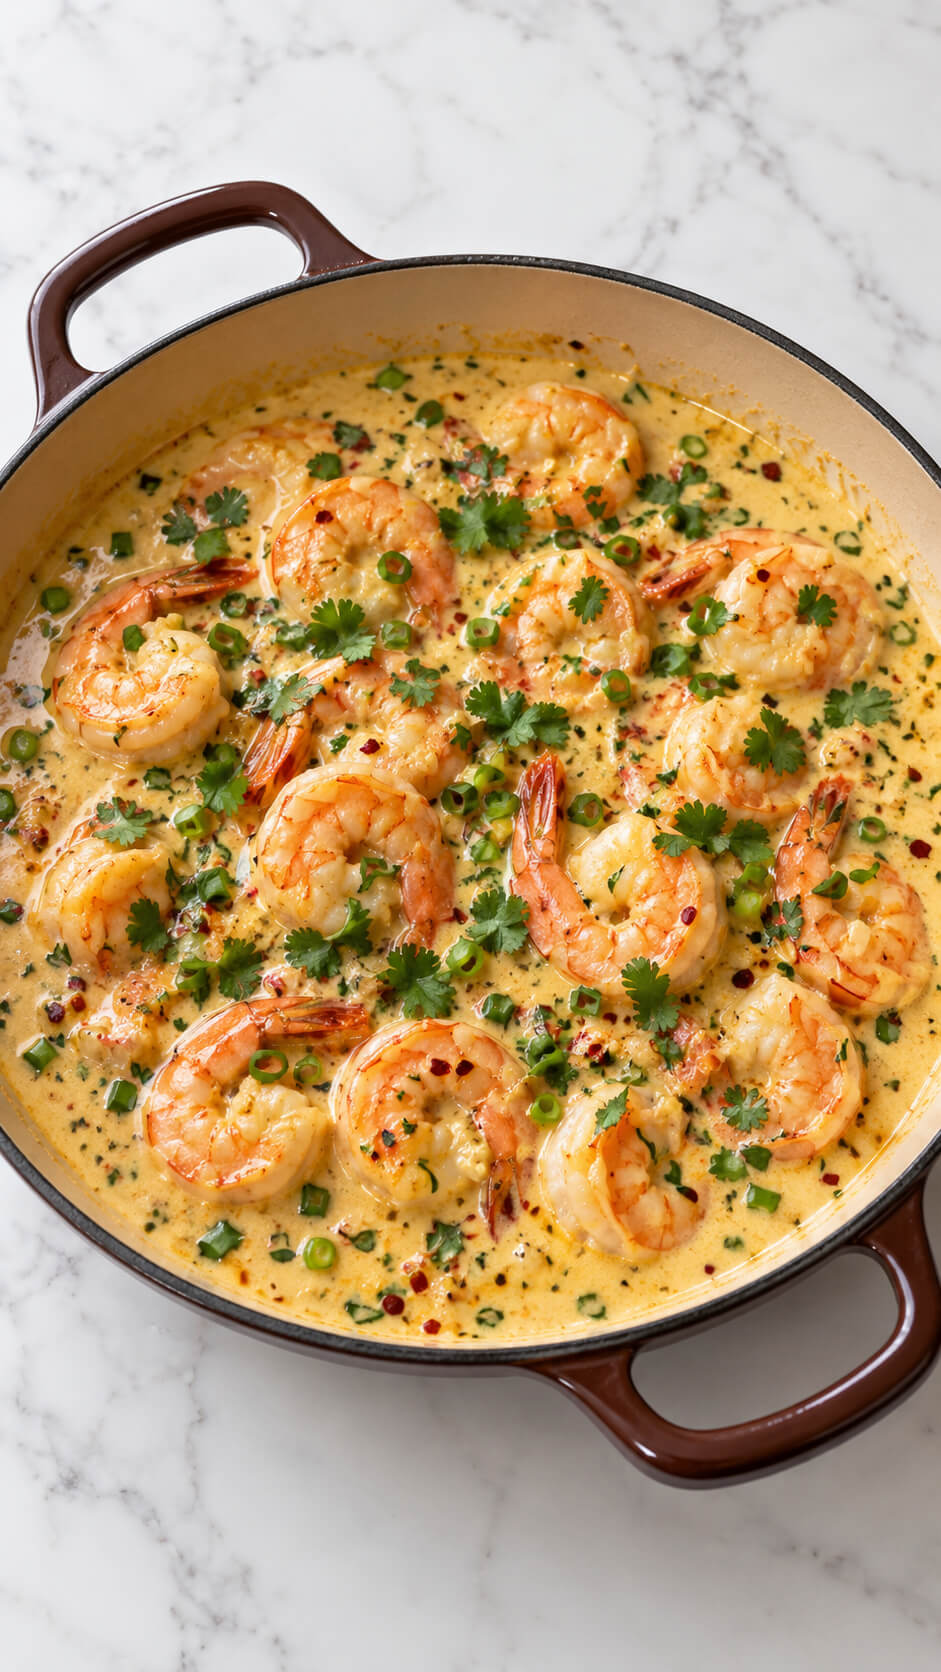
Coconut milk is a wonderful base for seafood dishes, and shrimp is no exception.
Simmer shrimp in coconut milk with garlic, ginger, and a squeeze of lime for a rich, flavorful dish.
Serve it with steamed rice or vegetables for a quick weeknight meal that’s light yet full of tropical flavors.
Ingredients
- 1 ½ pounds (680 g) large shrimp, peeled and deveined
- 1 tablespoon olive oil
- 1 tablespoon butter
- 4 garlic cloves, minced
- 1 tablespoon fresh ginger, grated
- 1 teaspoon paprika
- ½ teaspoon red chili flakes (adjust to taste)
- 1 can (13.5 oz/400 ml) full-fat coconut milk
- ½ cup seafood or chicken broth
- 1 teaspoon salt
- ½ teaspoon black pepper
- 1 tablespoon lime juice
- 2 tablespoons finely chopped cilantro
- 2 tablespoons finely chopped green onions
- Cooked white rice or crusty bread, for serving
Instructions
1. Season the shrimp
Pat the shrimp dry with paper towels, then season them with the salt, black pepper, and paprika. Drying the shrimp first helps them develop better color when they cook.
2. Sear the shrimp
Heat the olive oil and butter in a large brown enamel cast-iron skillet over medium-high heat. Cook the shrimp for about 1 minute per side until they turn pink but are not fully cooked through, then transfer them to a plate.
3. Cook the aromatics
Reduce the heat to medium and add the garlic, ginger, and red chili flakes to the same skillet. Stir for about 1 minute until fragrant, being careful not to let the garlic brown.
4. Simmer the coconut sauce
Pour in the coconut milk and broth, then stir well to combine. Let the sauce simmer gently for 5 to 7 minutes until it thickens slightly and the flavors come together.
5. Return the shrimp to the skillet
Add the shrimp back into the sauce and simmer for another 2 to 3 minutes until they are fully cooked and coated in the creamy coconut mixture.
6. Finish with fresh herbs
Stir in the lime juice, then sprinkle the chopped cilantro and green onions over the top. Serve immediately with steamed rice or crusty bread to soak up the flavorful sauce.
Tip
Use full-fat coconut milk for the creamiest sauce, and avoid boiling it vigorously to keep the sauce smooth and prevent it from separating.
23. Coconut Milk Poached Fish
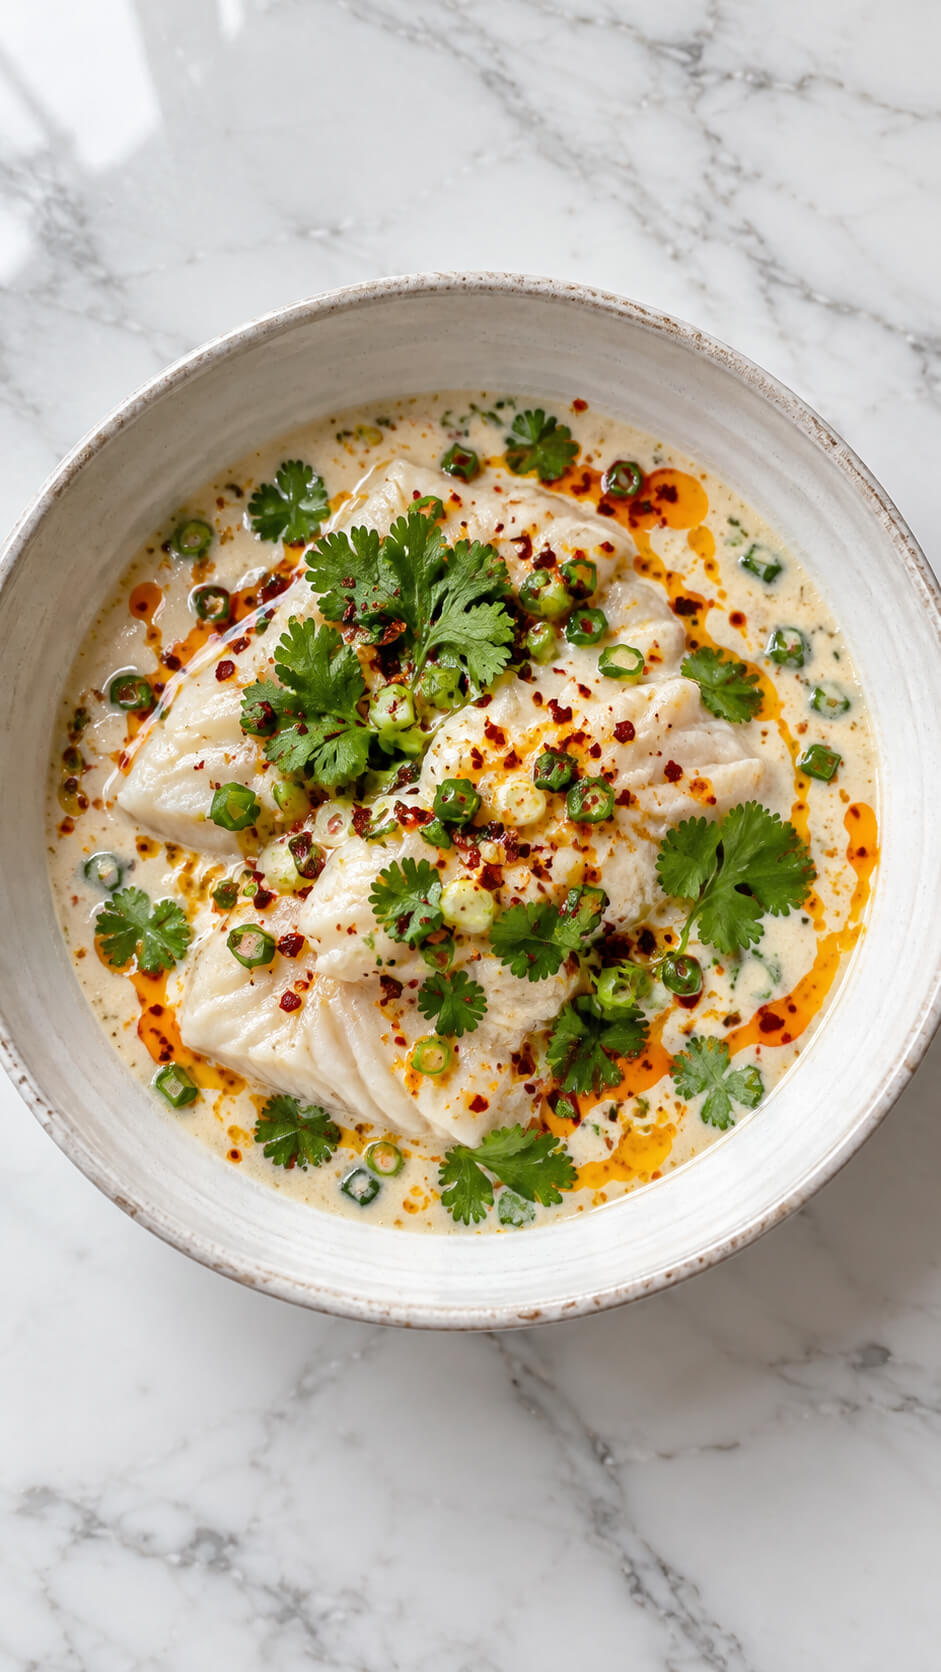
Poaching fish in coconut milk makes for a tender and flavorful dish.
The coconut milk infuses the fish with a delicate sweetness, while the spices like curry powder or turmeric add a warm depth of flavor.
Serve with a side of roasted vegetables or a simple salad for a light, nutritious meal.
Ingredients
- 4 white fish fillets, such as cod, tilapia, haddock, or sea bass
- 1 tablespoon olive oil
- 3 cloves garlic, finely minced
- 1 teaspoon fresh ginger, grated
- 1 can (400 ml) full-fat coconut milk
- ½ cup fish or vegetable stock
- 1 tablespoon lime juice
- 1 teaspoon lime zest
- ½ teaspoon salt, plus more to taste
- ¼ teaspoon black pepper
- ½ teaspoon red chili flakes
- 2 green onions, finely sliced
- ½ cup fresh cilantro leaves
- 1–2 tablespoons chili oil
- 1 small red chili, thinly sliced, optional
Instructions
1. Season the fish
Pat the fish fillets dry with paper towels, then season both sides with salt and black pepper. Set them aside while you prepare the coconut sauce.
2. Sauté the aromatics
Heat the olive oil in a large, deep skillet over medium heat. Add the minced garlic and grated ginger and cook for about 30–45 seconds, stirring constantly, until fragrant without allowing the garlic to brown.
3. Build the coconut sauce
Pour in the coconut milk and stock, then add the lime zest and red chili flakes. Stir gently and bring the sauce to a very gentle simmer. Avoid boiling vigorously, as this can cause the coconut milk to separate.
4. Poach the fish
Carefully place the seasoned fish fillets into the simmering coconut sauce. Spoon some sauce over the tops, cover the skillet, and gently cook for 6–10 minutes, depending on the thickness of the fillets, until the fish is opaque and flakes easily with a fork.
5. Finish with lime
Remove the lid and gently stir the lime juice into the sauce. Taste and adjust the seasoning with additional salt, pepper, or lime juice if needed.
6. Garnish the fish
Transfer the fish and plenty of the creamy coconut sauce into a deep serving bowl. Scatter over the sliced green onions, fresh cilantro leaves, and a light sprinkling of red chili flakes.
7. Add the chili oil
Drizzle golden-orange chili oil over the surface of the coconut sauce in thin streaks. Add a few slices of fresh red chili if you want extra heat and color.
Tip
For the creamiest sauce, use full-fat coconut milk and keep the fish at a gentle simmer rather than allowing the sauce to boil. Serve immediately with steamed rice, coconut rice, or crusty bread for soaking up the sauce.
24. Coconut Milk Sorbet
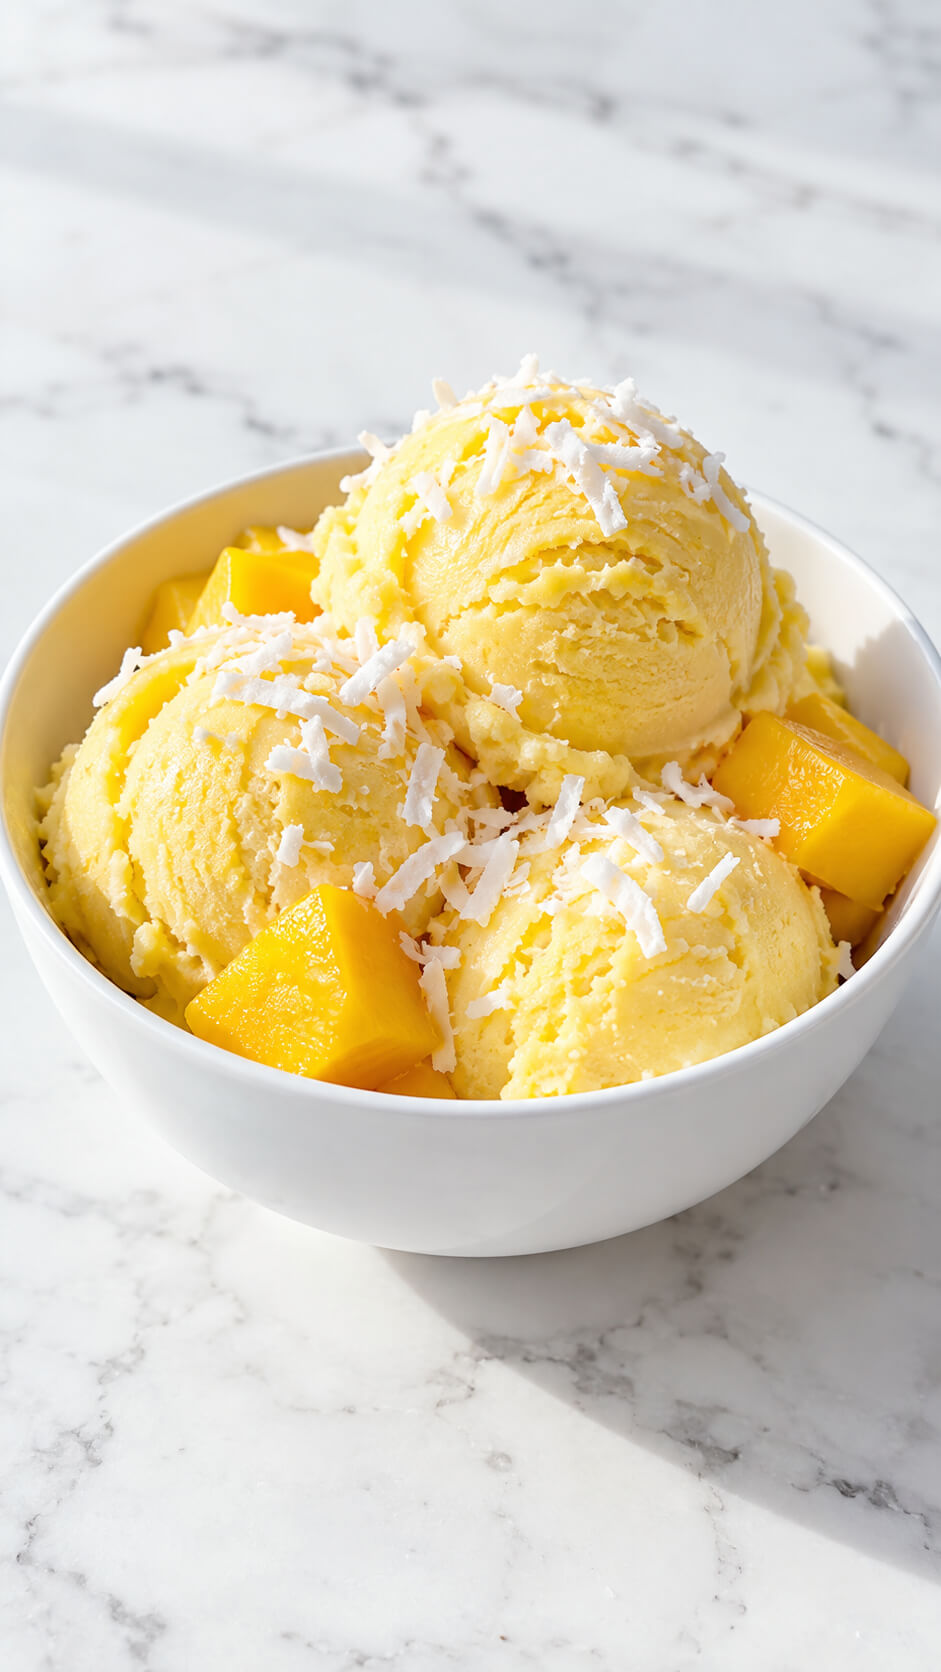
Coconut milk sorbet is a refreshing dessert that’s perfect for hot weather.
The coconut milk provides a smooth texture, while the fruit you choose—like mango, pineapple, or strawberry—adds a burst of natural sweetness.
Simply blend the coconut milk and fruit, freeze, and you’ll have a tropical treat to enjoy any time.
25. Coconut Milk Dipping Sauce
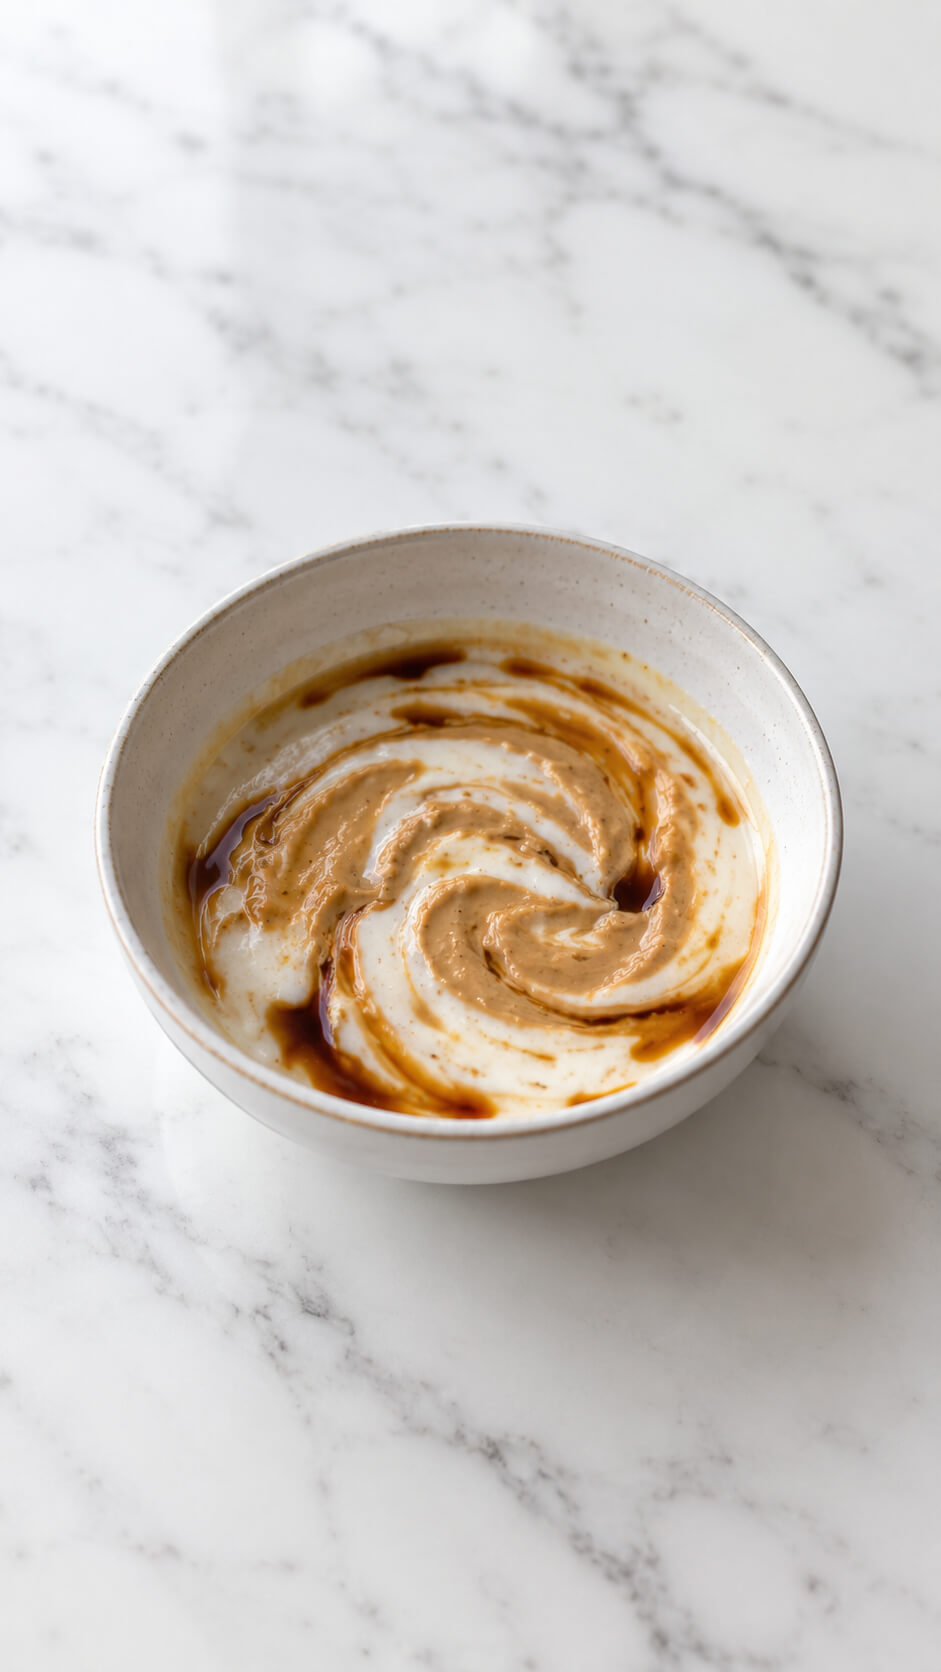
A coconut milk-based dipping sauce is a great accompaniment to spring rolls, chicken skewers, or vegetables.
Mix coconut milk with a bit of peanut butter, soy sauce, garlic, and lime juice to create a creamy, tangy sauce with a bit of spice.
It’s a versatile dip that adds flavor to many dishes.
Ingredients
- ½ cup full-fat coconut milk
- 2 tablespoons smooth peanut butter
- 1 tablespoon soy sauce
- 1 tablespoon fresh lime juice
- 1 teaspoon honey or maple syrup
- ½ teaspoon grated fresh ginger
- 1 small garlic clove, finely grated
- 1–2 tablespoons warm water, as needed
- Optional: ½ teaspoon chili flakes or chili sauce
Instructions
1. Combine the coconut milk and peanut butter
Add the coconut milk and peanut butter to a small bowl. Whisk until the peanut butter begins to dissolve into the coconut milk and the mixture becomes creamy.
2. Add the savory ingredients
Whisk in the soy sauce, lime juice, honey or maple syrup, grated ginger, and garlic until everything is evenly combined.
3. Adjust the consistency
Add warm water one tablespoon at a time, whisking after each addition, until the sauce reaches a smooth, pourable dipping consistency.
4. Create the swirled finish
For a visual finish like the image, spoon the sauce into a small serving bowl. Add a tiny drizzle of peanut butter and a few drops of soy sauce over the surface, then gently swirl them through the sauce with the tip of a spoon.
5. Serve the sauce
Serve immediately alongside fresh vegetables, spring rolls, grilled meat, tofu, or noodles. Garnish with a small squeeze of lime if desired.
Tip
For a richer, thicker sauce, use chilled full-fat coconut milk and reduce the warm water. For a thinner dipping sauce, gradually add more warm water until it reaches your preferred consistency.
26. Coconut Milk Quinoa
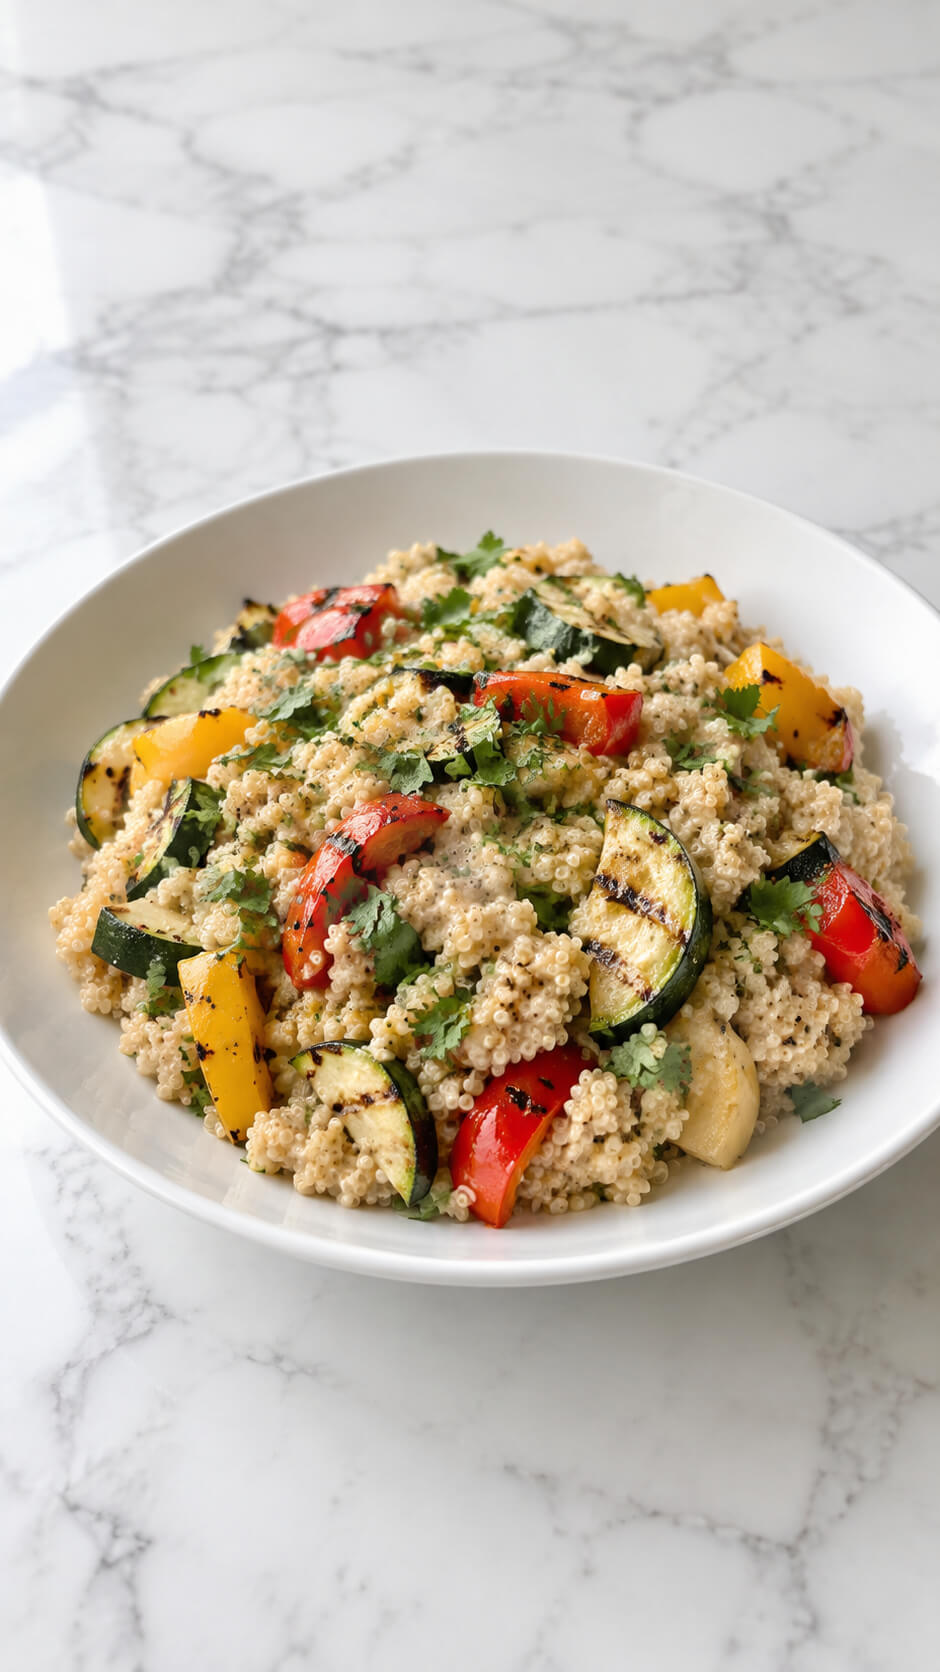
Coconut milk is a perfect base for cooking quinoa, adding richness and flavor to the dish.
Instead of using water or broth, cook your quinoa in coconut milk to give it a subtle coconut flavor.
Pair with grilled vegetables or stir-fried shrimp for a complete, nutritious meal.
Ingredients
- 1 cup quinoa, rinsed
- 1 cup full-fat coconut milk
- 1 cup water or vegetable broth
- 1 red bell pepper, sliced
- 1 yellow bell pepper, sliced
- 1 medium zucchini, sliced
- 1 small onion, sliced
- 1 tablespoon olive oil
- 1 garlic clove, minced
- ½ teaspoon salt
- ¼ teaspoon black pepper
- ½ teaspoon smoked paprika
- ½ teaspoon ground cumin
- 2 tablespoons fresh cilantro or parsley, chopped
- 1 tablespoon lime juice
Instructions
1. Rinse the quinoa
Rinse the quinoa thoroughly under cold running water for about 30 seconds. This removes its natural coating and helps prevent a bitter taste.
2. Cook the coconut quinoa
Add the rinsed quinoa, coconut milk, water or vegetable broth, salt, smoked paprika, and cumin to a saucepan. Bring to a gentle boil, then reduce the heat, cover, and simmer for 15–18 minutes, until the liquid is absorbed and the quinoa is tender.
3. Rest the quinoa
Turn off the heat and leave the quinoa covered for 5 minutes. Remove the lid and gently fluff it with a fork so the grains stay light while retaining their creamy texture.
4. Season the vegetables
Place the sliced bell peppers, zucchini, and onion in a bowl. Toss them with olive oil, minced garlic, a pinch of salt, and black pepper until evenly coated.
5. Grill the vegetables
Heat a grill pan or large skillet over medium-high heat. Cook the vegetables in batches for 3–5 minutes per side, until tender and lightly charred. The caramelized edges add a smoky contrast to the creamy quinoa.
6. Combine the quinoa and vegetables
Fold about half of the grilled vegetables gently into the warm coconut quinoa. Keep the remaining vegetables aside for arranging on top.
7. Finish with fresh flavor
Stir the lime juice into the quinoa and taste for seasoning. Add a little more salt or black pepper if needed, then sprinkle with chopped cilantro or parsley.
8. Serve the quinoa
Spoon the creamy coconut quinoa onto a serving plate or shallow bowl. Arrange the remaining grilled vegetables over the top and finish with a little extra fresh herbs.
Tip
For the creamiest result, use full-fat coconut milk and avoid overcooking the quinoa. If it becomes too thick, stir in a tablespoon or two of warm coconut milk just before serving.
27. Coconut Milk Mac and Cheese
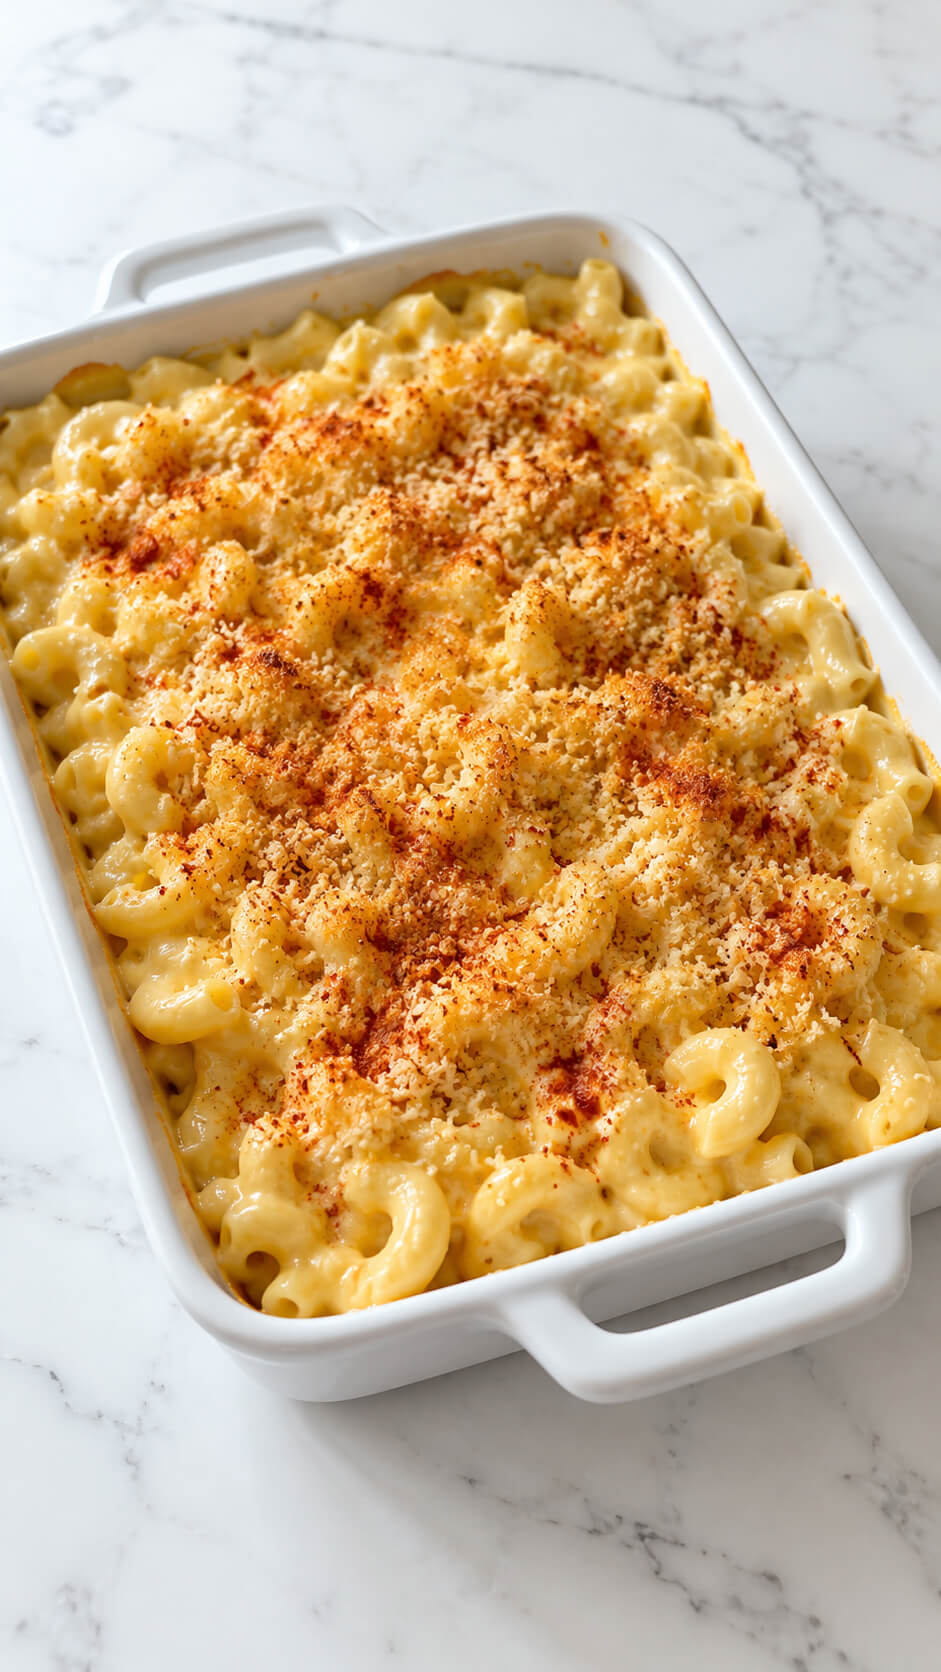
For a dairy-free take on mac and cheese, swap the regular milk and cheese for coconut milk and a dairy-free cheese substitute.
The coconut milk gives the dish a creamy, rich base, while the cheese replacement adds the necessary savory depth.
This comforting dish will leave you craving more, even without the dairy.
Ingredients
- 400 g elbow macaroni
- 2 tablespoons butter
- 2 tablespoons all-purpose flour
- 1½ cups full-fat coconut milk
- 1 cup whole milk
- 2 cups grated cheddar cheese
- ½ cup grated mozzarella cheese
- ½ teaspoon garlic powder
- ½ teaspoon onion powder
- ½ teaspoon salt
- ¼ teaspoon black pepper
- ⅓ cup fine breadcrumbs
- ½ teaspoon paprika
- 1 tablespoon melted butter, for the topping
Instructions
1. Cook the pasta
Bring a large pot of salted water to a boil and cook the elbow macaroni until just shy of tender according to the package directions. Drain well and set aside. Avoid overcooking because the pasta will continue cooking in the oven.
2. Make the creamy sauce
Melt 2 tablespoons of butter in a saucepan over medium heat. Whisk in the flour and cook for about 1 minute. Gradually whisk in the coconut milk and whole milk until smooth. Continue cooking for 3–5 minutes, stirring frequently, until the sauce thickens slightly.
3. Melt in the cheese
Lower the heat and add the cheddar and mozzarella a handful at a time, stirring until completely melted and smooth. Season with garlic powder, onion powder, salt, and black pepper.
4. Combine the pasta and sauce
Add the drained macaroni to the cheese sauce and stir gently until every piece is coated in the creamy mixture. Taste and adjust the seasoning if needed.
5. Prepare the breadcrumb topping
Combine the breadcrumbs, paprika, and 1 tablespoon of melted butter in a small bowl. Mix until the breadcrumbs are evenly coated and lightly golden in appearance.
6. Fill the baking dish
Transfer the macaroni and cheese to a lightly buttered white baking dish and spread it into an even layer. Scatter the breadcrumb mixture lightly over the surface, concentrating it across the top rather than covering it too heavily.
7. Bake until golden
Bake in a preheated oven at 190°C (375°F) for 20–25 minutes, until the edges are bubbling and the breadcrumb topping is lightly golden and crisp. For extra browning, place it under the grill for 1–2 minutes at the end, watching carefully.
8. Let it rest before serving
Remove the mac and cheese from the oven and let it rest for 5 minutes. This allows the sauce to settle while keeping the pasta creamy and easy to serve.
Tip
Use full-fat coconut milk for the richest, creamiest sauce, and choose an unsweetened variety so the mac and cheese stays savory.
Wrap Up
Coconut milk is a magical ingredient that makes every dish creamy, tasty, and exciting.
From breakfasts to desserts, it can do it all!
Try these recipes and enjoy the delicious flavors. Your kitchen will feel like a tropical paradise.
Happy cooking, and enjoy every bite!