21 Irresistible St. Patrick’s Day Desserts to Try This Year

I used to think St. Patrick’s Day desserts had to be messy cupcakes with green food dye everywhere.
There was a time when I just grabbed store-bought cookies and called it festive!
Yes, I’ve made my fair share of bright green frosting disasters that stained everything in sight!
But after a little experimenting, taste-testing, and creative decorating, I found some sweet treats that are both fun and delicious.
These St. Patrick’s Day desserts don’t just look festive! They’ll also wow your guests and make your celebration extra special.
So let’s take a look at some lucky and tasty ideas you can try this year:
1. Shamrock Sugar Cookies

Every St. Patrick’s Day dessert table needs a classic cut-out cookie.
I roll my favorite buttery sugar cookie dough and use shamrock cutters, then let the kids loose with green royal icing and edible glitter.
A little almond extract gives them that bakery-style flavor.
Stack them in cellophane bags for party favors or arrange them on a tiered stand for instant charm.
They’re simple, festive, and always the first thing little hands grab.
Ingredients:
- 2 ¾ cups all-purpose flour
- 1 tsp baking powder
- ½ tsp salt
- 1 cup unsalted butter, softened
- 1 cup granulated sugar
- 1 egg
- 1 tsp vanilla extract
- ½ tsp almond extract (optional)
Instructions:
- Preheat oven to 350°F (175°C).
- Whisk flour, baking powder, and salt together.
- Cream butter and sugar until fluffy. Beat in egg and extracts.
- Gradually mix in dry ingredients until dough forms.
- Roll out to ¼-inch thickness, cut into shamrock shapes.
- Bake 8–10 minutes until edges are lightly golden.
- Cool completely, then decorate with green royal icing.
2. Mint Chocolate Brownies
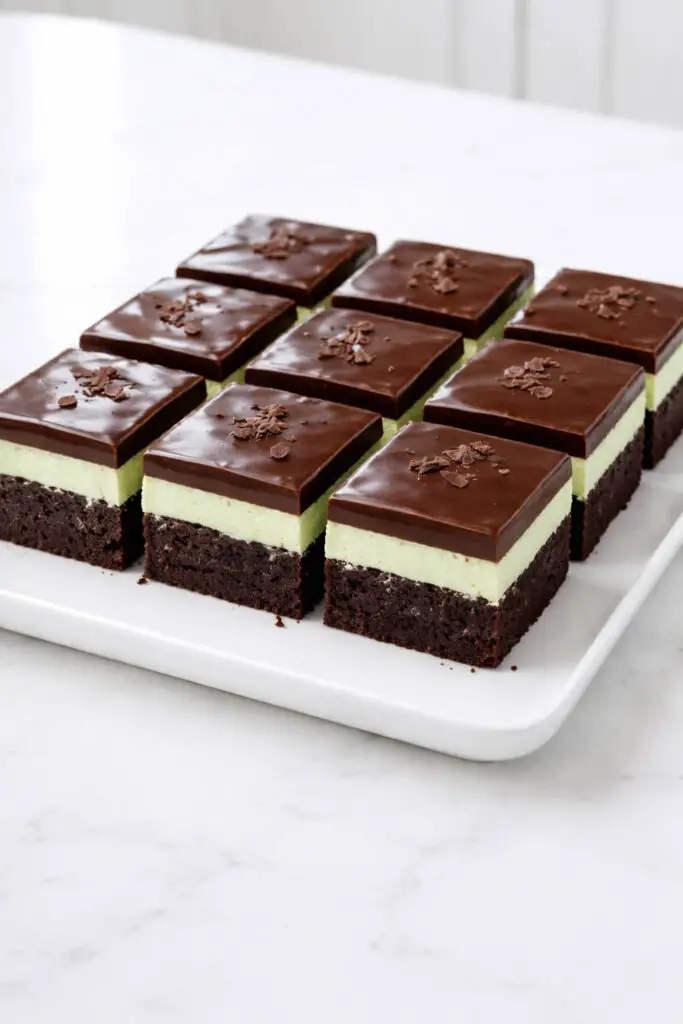
Think of these as your homemade version of a thin mint meets fudgy brownie.
I bake a rich chocolate brownie base, spread a silky mint buttercream layer on top, and finish with a glossy chocolate ganache.
Once chilled, they slice beautifully into neat squares. The mint isn’t overpowering—just fresh enough to feel celebratory.
They’re perfect for potlucks because you can make them a day ahead, and they travel like a dream.
Ingredients
Brownie Layer:
- 1 cup (2 sticks) unsalted butter, melted
- 1 cup granulated sugar
- 1 cup brown sugar
- 4 large eggs
- 1 tsp vanilla extract
- 1 cup all-purpose flour
- ¾ cup unsweetened cocoa powder
- ½ tsp salt
Mint Layer:
- 2 cups powdered sugar
- ½ cup unsalted butter, softened
- 1–2 tbsp milk
- ½ tsp peppermint extract
- Green food coloring (optional)
Chocolate Topping:
- 1 cup semi-sweet chocolate chips
- 2 tbsp butter
Instructions
- Bake the brownies: Preheat oven to 350°F (175°C). Line a 9×13-inch pan with parchment. Mix melted butter and sugars. Beat in eggs and vanilla. Stir in flour, cocoa, and salt. Spread into pan and bake 22–25 minutes. Cool completely.
- Make mint layer: Beat butter and powdered sugar. Add milk and peppermint extract until smooth and spreadable. Tint lightly green if desired. Spread evenly over cooled brownies. Chill 30 minutes.
- Add chocolate topping: Melt chocolate chips and butter together until smooth. Pour over mint layer and spread evenly. Chill until set before slicing into squares.
Let them sit at room temperature 10–15 minutes before cutting for clean, beautiful layers.
3. Rainbow Layer Cake
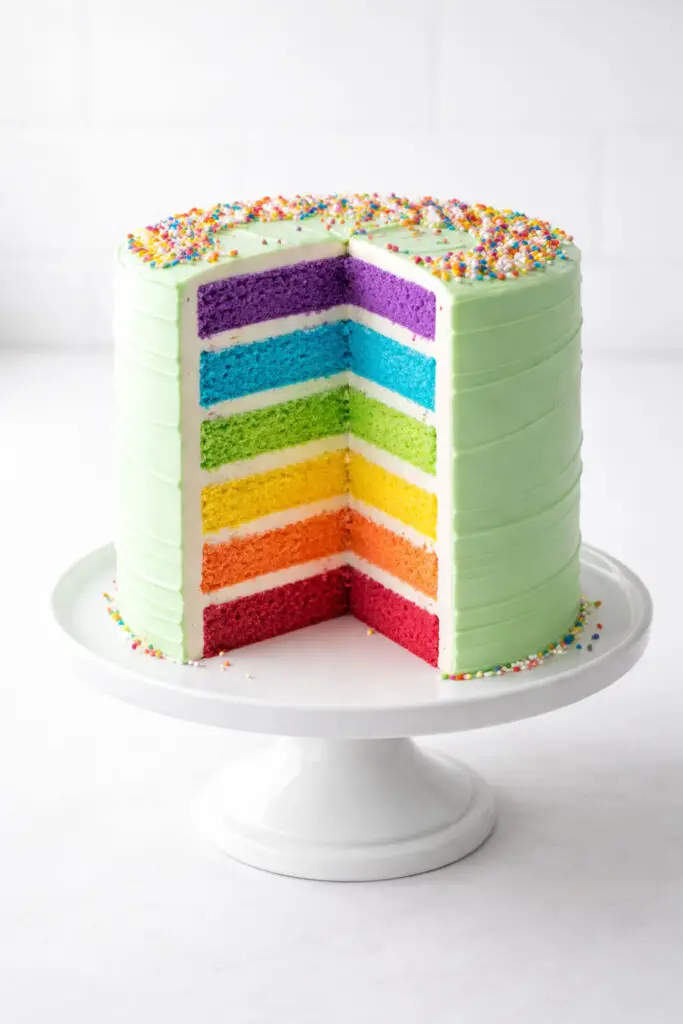
Nothing says Irish magic like a rainbow.
Inspired by the legend of the leprechaun’s treasure, this tall, colorful cake hides vibrant layers inside.
I tint vanilla cake batter in rainbow shades, stack them with fluffy vanilla frosting, and coat the outside in soft green buttercream.
When you cut that first slice, everyone gasps.
It’s a showstopper centerpiece for larger gatherings and birthday parties that fall near March 17th.
Ingredients
Cake Batter:
- 3 cups all-purpose flour
- 1 tbsp baking powder
- ½ tsp salt
- 1 cup unsalted butter, softened
- 2 cups granulated sugar
- 4 large eggs
- 1 tbsp vanilla extract
- 1 cup whole milk
- Gel food coloring (red, orange, yellow, green, blue, purple)
Frosting:
- 1 ½ cups unsalted butter, softened
- 5 cups powdered sugar
- 2–3 tbsp heavy cream or milk
- 2 tsp vanilla extract
- Green food coloring (for outer frosting)
Instructions
- Prep: Preheat oven to 350°F (175°C). Grease and line six 8-inch round cake pans (or bake in batches).
- Make batter: Whisk flour, baking powder, and salt. Cream butter and sugar until fluffy. Add eggs one at a time, then vanilla. Alternate adding dry ingredients and milk, mixing just until combined.
- Color & bake: Divide batter evenly into six bowls. Tint each a different rainbow color. Pour into pans and bake 15–18 minutes, until a toothpick comes out clean. Cool completely.
- Frost: Beat butter until creamy. Gradually add powdered sugar, cream, and vanilla until fluffy. Tint light green if desired. Stack cake layers with frosting between each. Frost outside smoothly.
Chill 30 minutes before slicing for clean rainbow layers.
4. Pistachio Pudding Parfaits
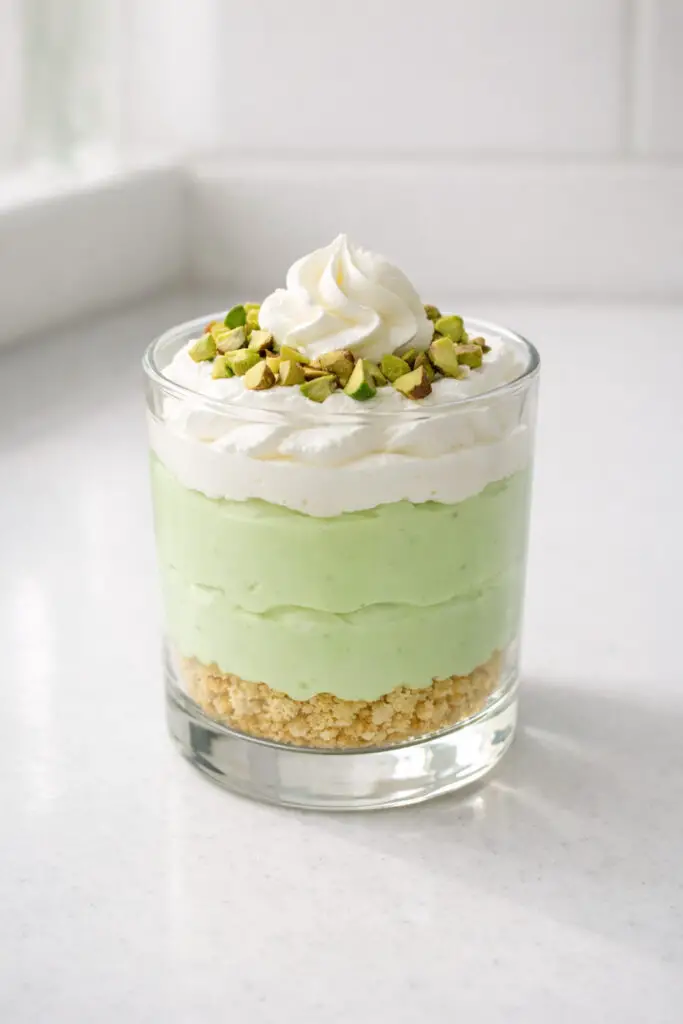
Creamy, cool, and delightfully retro, pistachio pudding parfaits are a no-bake win.
I layer pistachio pudding with whipped cream and crushed vanilla cookies in clear cups so the pale green color shines through.
Add a sprinkle of chopped pistachios on top for crunch.
These are wonderful when you’re hosting and need something you can assemble ahead of time.
They feel elegant without any complicated steps.
Ingredients
- 2 (3.4 oz) boxes instant pistachio pudding mix
- 3 cups cold milk
- 1 ½ cups whipped topping (or freshly whipped cream)
- 1 cup crushed vanilla wafers or shortbread cookies
- 2 tbsp chopped pistachios (optional, for garnish)
Instructions
- Prepare pudding: In a large bowl, whisk pudding mix and cold milk for about 2 minutes until thickened. Let sit 5 minutes to fully set.
- Lighten it up: Gently fold in whipped topping until smooth and fluffy.
- Layer: In clear cups or glasses, add a layer of crushed cookies, then pistachio pudding, and repeat once more.
- Finish: Top with whipped cream and sprinkle chopped pistachios on top.
Chill at least 1 hour before serving for best texture and flavor.
5. Guinness Chocolate Cupcakes
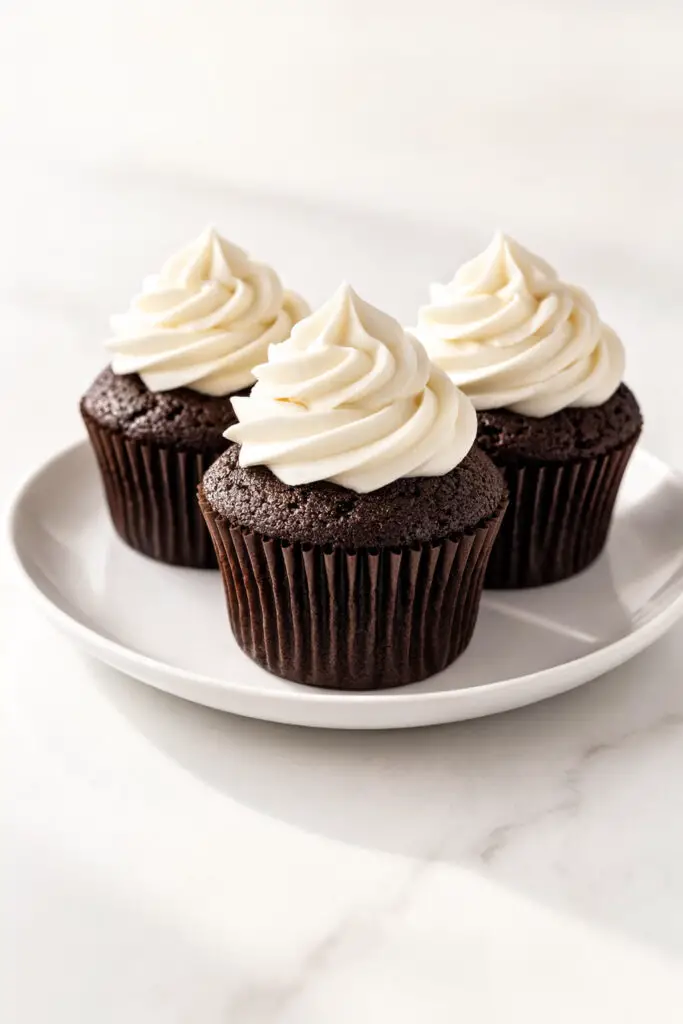
For the grown-up crowd, I love cupcakes made with a splash of Guinness.
The stout deepens the chocolate flavor without making the cupcakes taste like beer.
Top them with a swirl of cream cheese frosting to mimic a foamy pint.
They’re rich, moist, and surprisingly sophisticated.
I’ve served these at countless St. Patrick’s Day parties, and they always spark conversation.
Ingredients
Cupcakes:
- 1 cup Guinness
- ½ cup unsalted butter
- ¾ cup unsweetened cocoa powder
- 2 cups all-purpose flour
- 2 cups granulated sugar
- 1 ½ tsp baking soda
- ½ tsp salt
- 2 large eggs
- ⅔ cup sour cream
Cream Cheese Frosting:
- 8 oz cream cheese, softened
- ½ cup unsalted butter, softened
- 3 cups powdered sugar
- 1 tsp vanilla extract
Instructions
- Preheat oven to 350°F (175°C) and line a muffin tin with cupcake liners.
- Heat stout and butter in a saucepan until butter melts. Whisk in cocoa powder until smooth. Let cool slightly.
- Mix dry ingredients in a bowl: flour, sugar, baking soda, and salt.
- Combine wet ingredients: Beat eggs and sour cream together. Stir in the cooled stout mixture.
- Combine wet and dry until just mixed. Fill liners ¾ full and bake 18–20 minutes. Cool completely.
- Frosting: Beat cream cheese and butter until smooth. Add powdered sugar and vanilla; beat until fluffy. Pipe generously on cooled cupcakes.
They’re even better the next day once the flavors deepen.
6. Lucky Charms Marshmallow Treats
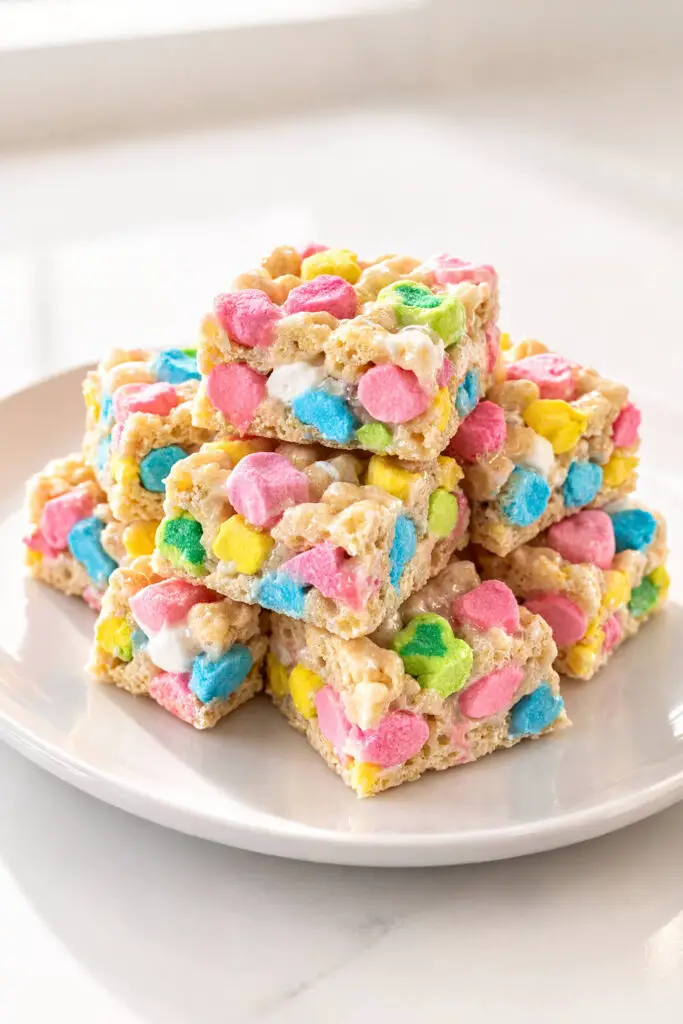
A playful twist on classic cereal treats, these are especially popular with kids.
Melt butter and marshmallows, stir in cereal, and press into a pan.
The colorful marshmallow shapes from Lucky Charms make them instantly festive.
I like cutting them into squares and adding a drizzle of white chocolate for an extra treat.
They’re nostalgic, cheerful, and impossible not to smile at.
Ingredients
- 3 tbsp unsalted butter
- 1 package (10 oz) mini marshmallows
- 5 cups Lucky Charms cereal
- ½ tsp vanilla extract (optional)
- Extra marshmallows for topping (optional)
Instructions
- Prep the pan: Lightly grease a 9×13-inch baking dish or line with parchment paper.
- Melt marshmallows: In a large pot over low heat, melt butter. Add marshmallows and stir constantly until fully melted and smooth. Remove from heat and stir in vanilla.
- Add cereal: Gently fold in cereal until evenly coated.
- Press & set: Transfer mixture to prepared pan. Lightly press down (don’t compact too firmly). Let cool 30–45 minutes, then cut into squares.
7. Irish Cream Cheesecake
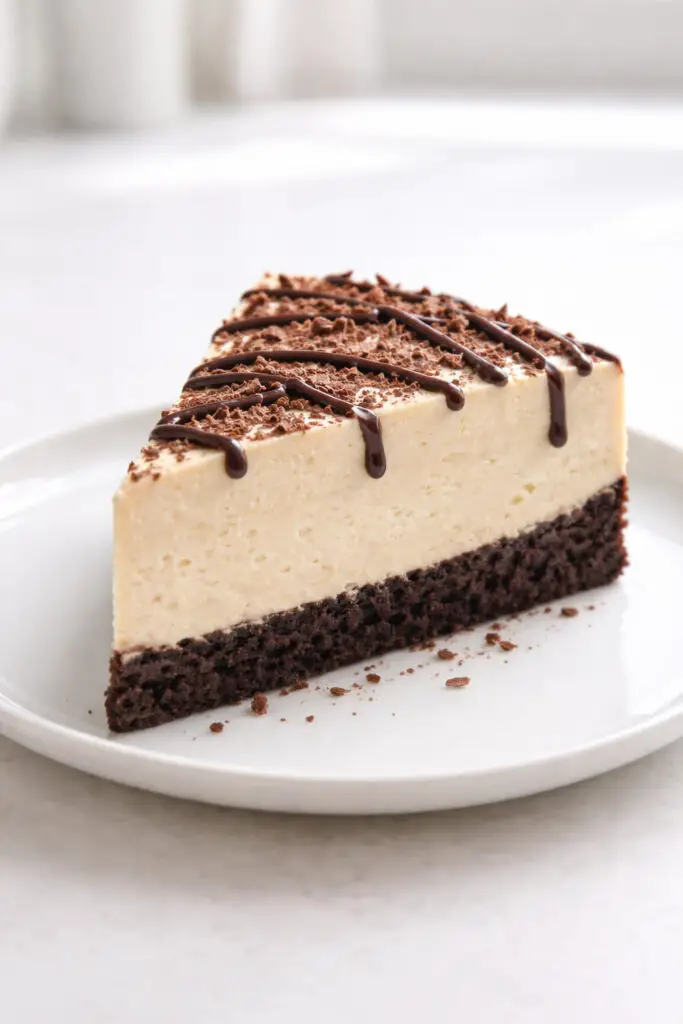
This creamy cheesecake gets a luxurious boost from a splash of Baileys Irish Cream.
The flavor is subtle and velvety, pairing beautifully with a chocolate cookie crust.
I top it with chocolate shavings or a drizzle of ganache for elegance.
It’s the dessert I bring when I want something that feels special and grown-up but still festive.
Ingredients
Crust:
- 2 cups chocolate cookie crumbs
- 5 tbsp unsalted butter, melted
Filling:
- 24 oz (3 blocks) cream cheese, softened
- 1 cup granulated sugar
- 3 large eggs
- ¾ cup Baileys Irish Cream
- 1 tsp vanilla extract
- ½ cup sour cream
Instructions
- Preheat oven to 325°F (163°C). Grease a 9-inch springform pan.
- Make crust: Mix cookie crumbs with melted butter. Press firmly into the bottom of the pan. Bake 8–10 minutes, then cool.
- Prepare filling: Beat cream cheese and sugar until smooth. Add eggs one at a time. Mix in Baileys, vanilla, and sour cream until creamy.
- Bake: Pour over crust. Bake 50–60 minutes, until center is slightly set but still jiggles.
- Cool slowly: Turn off oven, crack the door, and cool 1 hour. Chill at least 4 hours before serving.
Top with chocolate shavings or ganache for a beautiful finish.
8. Shamrock Shake Milkshake
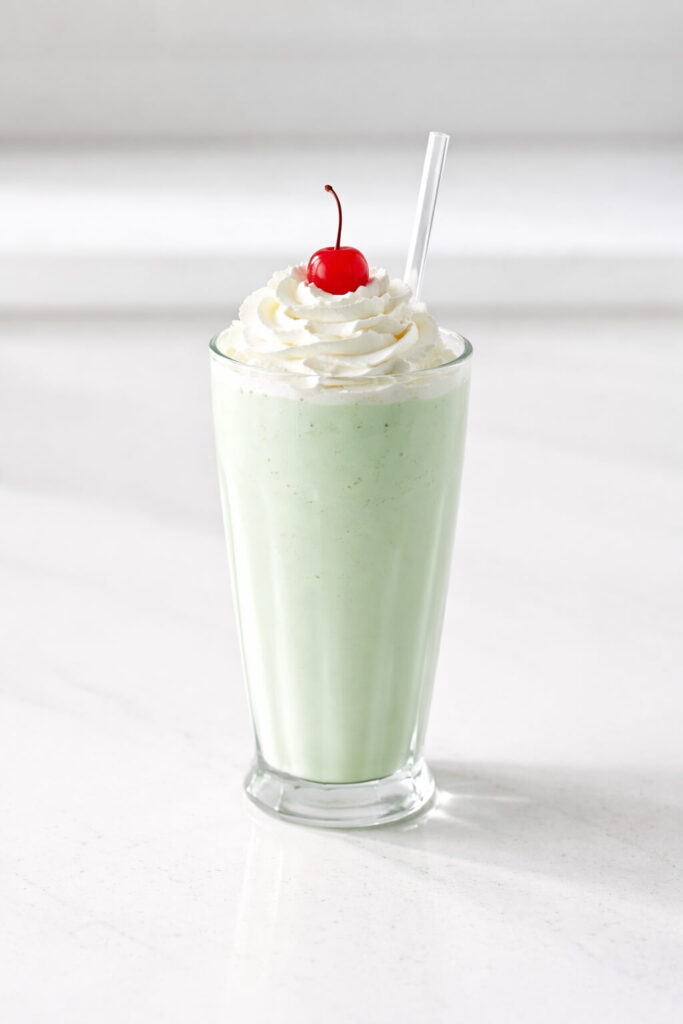
Inspired by the famous green shake from McDonald’s, this homemade version is fresher and creamier.
Blend vanilla ice cream with milk and a hint of peppermint extract, then tint it soft green.
Top with whipped cream and a cherry for that classic look.
It’s quick, nostalgic, and a huge hit after a backyard scavenger hunt for “gold coins.”
Ingredients
- 3 cups vanilla ice cream (good quality makes a difference)
- ¾ cup whole milk (adjust for thickness)
- ¼ tsp peppermint extract (start small!)
- 3–4 drops green food coloring (optional)
- Whipped cream, for topping
- Maraschino cherry, for garnish
Instructions
- Add ice cream, milk, peppermint extract, and food coloring to a blender.
- Blend until smooth and thick. Add a splash more milk if needed.
- Pour into a tall glass.
- Top with whipped cream and a cherry.
9. Chocolate Gold Coin Cookies
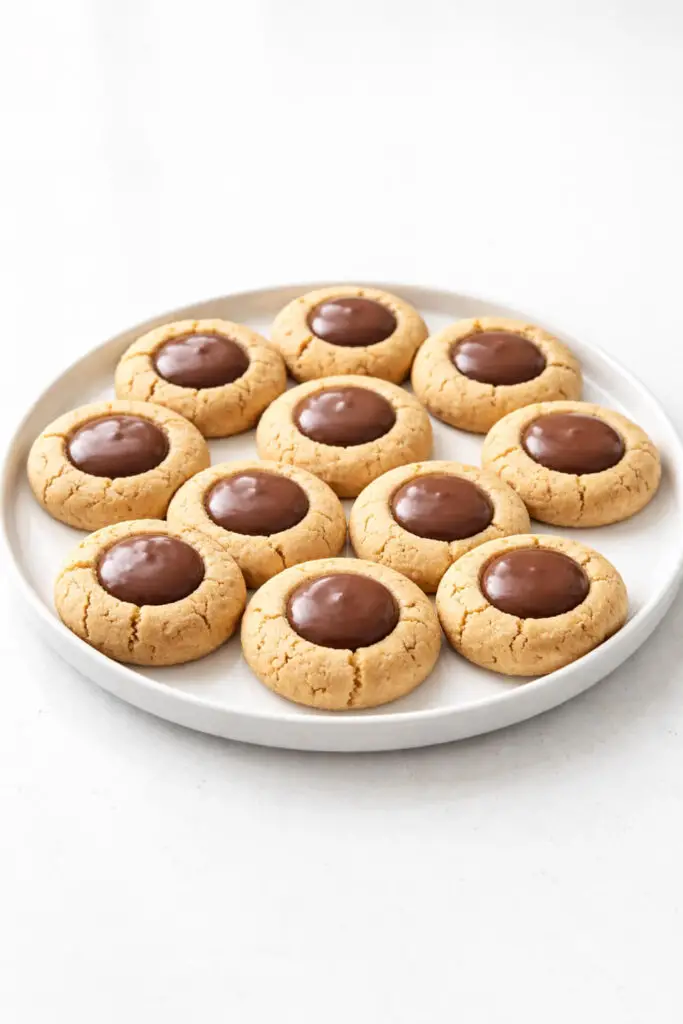
These thumbprint-style cookies have a chocolate center that looks like a pot of gold.
I press my thumb into soft sugar cookie dough, bake, and fill the centers with melted chocolate or caramel.
Once set, you can even place foil-wrapped chocolate coins on top for fun.
They’re interactive, adorable, and perfect for themed dessert tables where presentation really matters.
Ingredients
Cookie Dough:
- 1 cup unsalted butter, softened
- ¾ cup granulated sugar
- 1 large egg yolk
- 1 tsp vanilla extract
- 2 ¼ cups all-purpose flour
- ¼ tsp salt
Chocolate Filling:
- 1 cup semi-sweet chocolate chips
- 2 tbsp heavy cream
Instructions
- Make the dough: Preheat oven to 350°F (175°C). Cream butter and sugar until light and fluffy. Mix in egg yolk and vanilla. Stir in flour and salt until dough forms.
- Shape cookies: Roll dough into 1-inch balls and place on a lined baking sheet. Press your thumb gently into the center of each to create an indentation.
- Bake: Bake 10–12 minutes until edges are lightly golden. If centers puff up, gently press again while warm. Cool completely.
- Fill: Heat cream until just steaming, pour over chocolate chips, and stir until smooth. Spoon or pipe into each cookie center. Let set before serving.
Optional: Place a foil-wrapped chocolate coin on top while the filling is soft for extra festive flair.
10. Green Velvet Cake
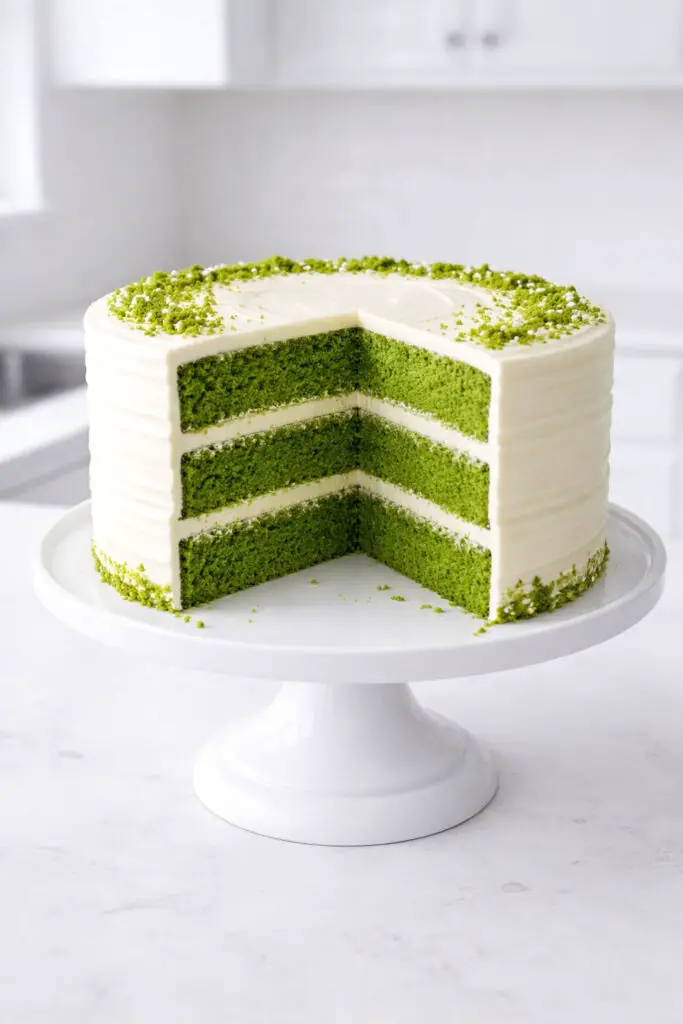
A festive twist on red velvet, green velvet cake has that same tender crumb and subtle cocoa flavor.
I use buttermilk for moisture and a classic cream cheese frosting for tang.
The vibrant green interior makes it perfect for St. Patrick’s Day photos.
It’s familiar enough to please everyone but playful enough to feel like a celebration.
Ingredients
Cake:
- 2 ½ cups all-purpose flour
- 2 tbsp unsweetened cocoa powder
- 1 tsp baking soda
- ½ tsp salt
- 1 cup unsalted butter, softened
- 1 ¾ cups granulated sugar
- 4 large eggs
- 1 tbsp vanilla extract
- 1 cup buttermilk (room temperature)
- 1 tbsp white vinegar
- Green gel food coloring
Cream Cheese Frosting:
- 8 oz cream cheese, softened
- ½ cup unsalted butter, softened
- 3–4 cups powdered sugar
- 1 tsp vanilla extract
Instructions
- Prep: Preheat oven to 350°F (175°C). Grease and line two 9-inch round cake pans.
- Mix dry ingredients: Whisk flour, cocoa powder, baking soda, and salt together.
- Cream butter & sugar: Beat until light and fluffy. Add eggs one at a time, then vanilla.
- Combine: Alternate adding dry ingredients and buttermilk. Mix in vinegar and enough green gel coloring to reach a vibrant shade.
- Bake: Divide batter evenly between pans. Bake 25–30 minutes, or until a toothpick comes out clean. Cool completely.
- Frost: Beat cream cheese and butter until smooth. Gradually add powdered sugar and vanilla. Frost between layers and over the cake.
Chill slightly before slicing for clean, bakery-style cuts.
11. Irish Apple Cake

Traditional and comforting, Irish apple cake is more rustic than flashy.
Popular in Ireland, it features tender chunks of apple in a lightly spiced batter.
I serve it warm with a drizzle of custard sauce or a scoop of vanilla ice cream.
It feels like something a grandmother would bake on a cozy afternoon—simple, hearty, and full of love.
Ingredients
For the cake:
- 2 cups all-purpose flour
- 1 teaspoon baking powder
- ½ teaspoon baking soda
- ½ teaspoon salt
- ½ teaspoon ground cinnamon
- ½ cup (1 stick) cold unsalted butter, cubed
- ¾ cup granulated sugar
- 2 large eggs
- ½ cup whole milk
- 1 teaspoon vanilla extract
- 2 medium baking apples (like Granny Smith or Honeycrisp), peeled, cored, and diced small
For the topping (optional but recommended):
- 2 tablespoons sugar
- ¼ teaspoon cinnamon
Instructions
- Preheat and Prepare
Preheat your oven to 350°F (175°C). Grease and lightly flour an 8-inch round cake pan or line it with parchment paper. - Mix Dry Ingredients
In a large bowl, whisk together flour, baking powder, baking soda, salt, and cinnamon. - Cut in the Butter
Add the cold cubed butter to the flour mixture. Use a pastry cutter or your fingertips to rub the butter into the flour until it resembles coarse crumbs. - Add Sugar and Wet Ingredients
Stir in the sugar. In a separate bowl, whisk together eggs, milk, and vanilla. Gradually add the wet mixture to the dry ingredients, stirring just until combined. The batter will be thick. - Fold in Apples
Gently fold in the diced apples, making sure they’re evenly distributed throughout the batter. - Transfer to Pan
Spread the batter evenly into the prepared pan. Sprinkle the cinnamon-sugar mixture over the top for a lightly crisp finish. - Bake
Bake for 45–55 minutes, or until a toothpick inserted into the center comes out clean and the top is golden brown. - Cool and Serve
Let cool in the pan for 10–15 minutes before transferring to a wire rack. Serve slightly warm or at room temperature.
Optional Custard Sauce (Classic Touch)
Warm slices and drizzle with a simple custard sauce made from egg yolks, sugar, milk, and vanilla for a truly traditional finish.
This cake is tender, lightly spiced, and filled with soft apple pockets—perfect with tea or after a St. Patrick’s Day dinner.
12. Matcha White Chocolate Bark
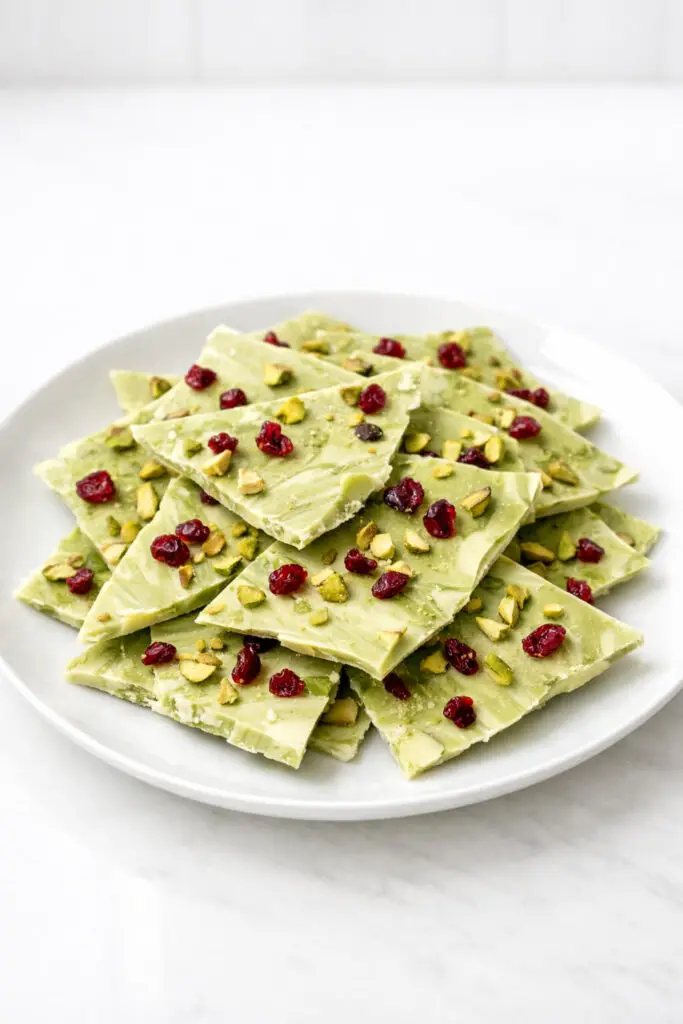
For a modern twist, I swirl vibrant green matcha powder into melted white chocolate.
Once spread thin, I sprinkle on crushed pistachios and dried cranberries for contrast.
After it sets, just break it into rustic shards. It’s beautiful in cellophane bags and makes a lovely edible gift.
The earthy matcha balances the sweetness perfectly.
Ingredients
- 16 ounces high-quality white chocolate (bars chopped or melting wafers)
- 2 teaspoons culinary-grade matcha powder
- 2 tablespoons chopped pistachios
- 2 tablespoons dried cranberries, finely chopped
- Pinch of flaky sea salt (optional but recommended)
Instructions
- Prepare your pan.
Line a medium baking sheet with parchment paper. Set aside. - Melt the white chocolate.
In a heatproof bowl, melt the white chocolate gently over a double boiler or in the microwave in 20-second intervals, stirring between each until smooth. Be careful — white chocolate scorches easily. - Add the matcha.
Sift the matcha powder directly into the melted chocolate to prevent clumps. Stir until fully incorporated. You can mix completely for a uniform pale green or swirl lightly for a marbled look. - Spread and top.
Pour the chocolate onto the prepared sheet and spread to about ¼-inch thickness. Sprinkle chopped pistachios and cranberries evenly over the surface. Lightly press them in so they adhere. - Finish and set.
Add a tiny pinch of flaky sea salt if using. Let the bark set at room temperature for 1–2 hours or refrigerate for 30 minutes until firm. - Break and serve.
Once hardened, break into rustic shards. Store in an airtight container at room temperature for up to one week.
13. Andes Mint Chocolate Cookies
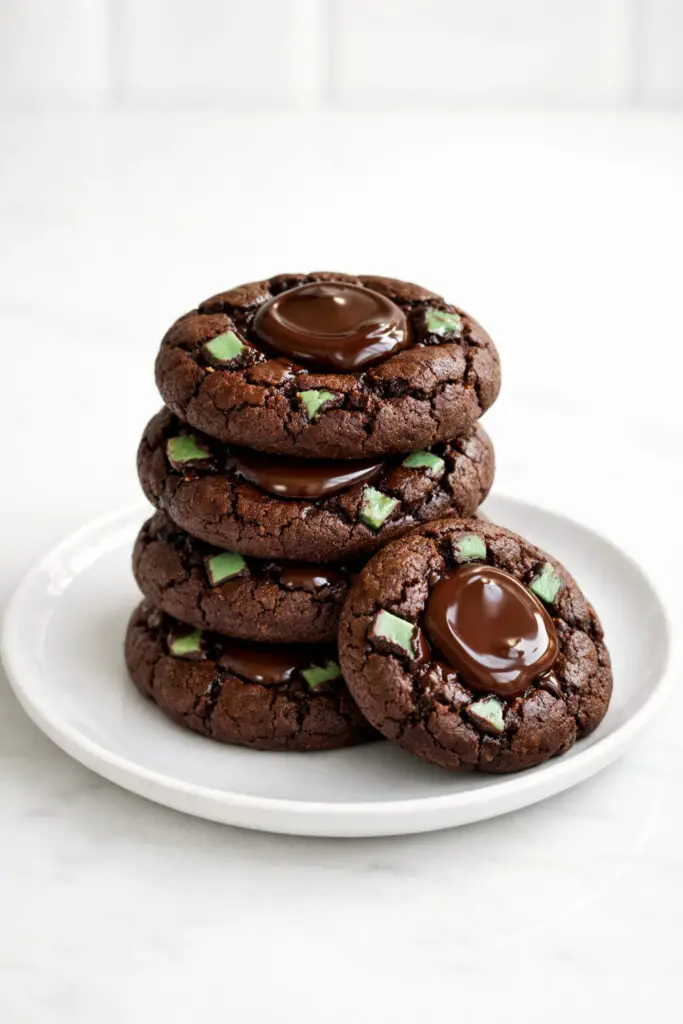
Soft chocolate cookies studded with chopped Andes mints melt into gooey pools as they bake.
I press an extra mint on top right out of the oven so it softens into a glossy finish.
These cookies are rich, minty, and perfect alongside a cup of coffee after dinner.
Ingredients
- 1 cup (2 sticks) unsalted butter, softened
- 1 cup granulated sugar
- ½ cup light brown sugar, packed
- 2 large eggs
- 1 teaspoon vanilla extract
- 1 ¾ cups all-purpose flour
- ¾ cup unsweetened cocoa powder
- 1 teaspoon baking soda
- ½ teaspoon salt
- 1 ½ cups chopped Andes mints (plus 10–12 whole pieces for topping)
Instructions
1. Preheat & Prep
Preheat oven to 350°F (175°C). Line two baking sheets with parchment paper.
2. Cream Butter & Sugars
In a large mixing bowl, beat butter, granulated sugar, and brown sugar until light and fluffy (about 2–3 minutes).
3. Add Wet Ingredients
Mix in eggs one at a time. Add vanilla extract and blend until smooth.
4. Combine Dry Ingredients
In a separate bowl, whisk together flour, cocoa powder, baking soda, and salt.
5. Mix Together
Gradually add dry ingredients to the wet mixture. Mix just until combined. Fold in chopped Andes mints.
6. Scoop & Bake
Scoop medium-sized dough balls (about 2 tablespoons each) onto baking sheets, spacing 2 inches apart. Bake for 9–11 minutes. Cookies will look slightly soft in the center.
7. Add Mint Topping (Optional but Recommended!)
Immediately after removing from the oven, gently press a whole Andes mint on top of each cookie. Let it sit for 1–2 minutes, then lightly spread the melted chocolate with the back of a spoon for a glossy finish.
8. Cool
Allow cookies to cool on the baking sheet for 5 minutes before transferring to a wire rack.
Mom Tip
For extra chewiness, chill the dough for 30 minutes before baking. And if you want a bakery-style look, sprinkle a tiny pinch of flaky salt on top while the chocolate is still soft.
They store beautifully in an airtight container for up to 4 days — if they last that long!
14. Leprechaun Hat Cupcakes
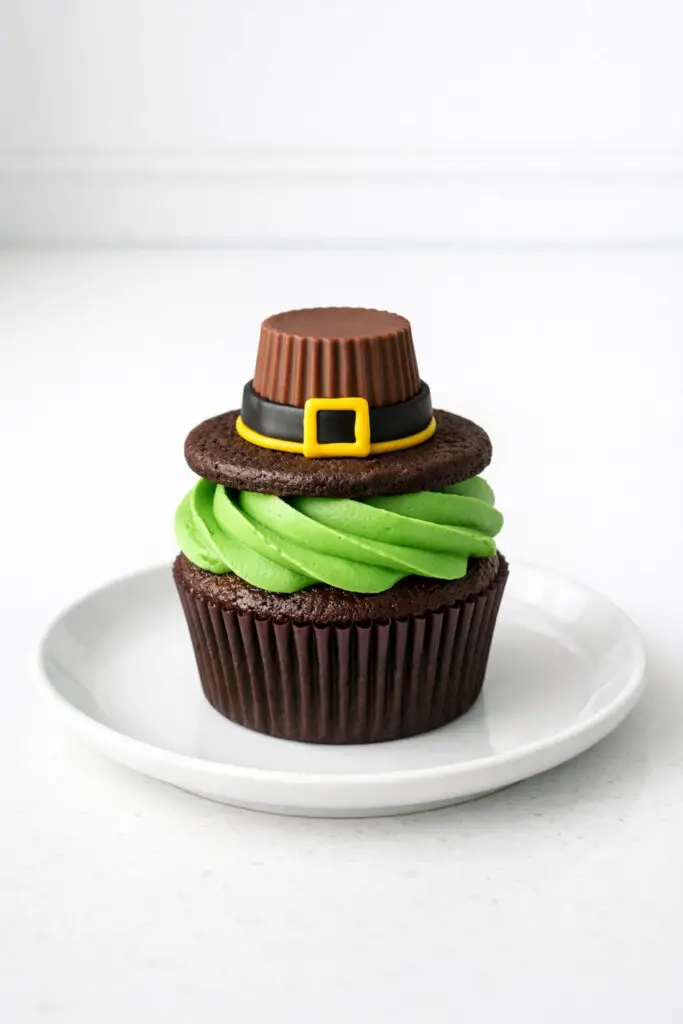
These whimsical cupcakes are always a hit with kids.
Frost chocolate cupcakes with green icing, then top with a chocolate cookie and a mini peanut butter cup to resemble a leprechaun hat.
A small strip of yellow icing becomes the buckle.
They’re adorable and surprisingly simple to assemble, making them ideal for classroom parties.
15. Key Lime Pie Bars
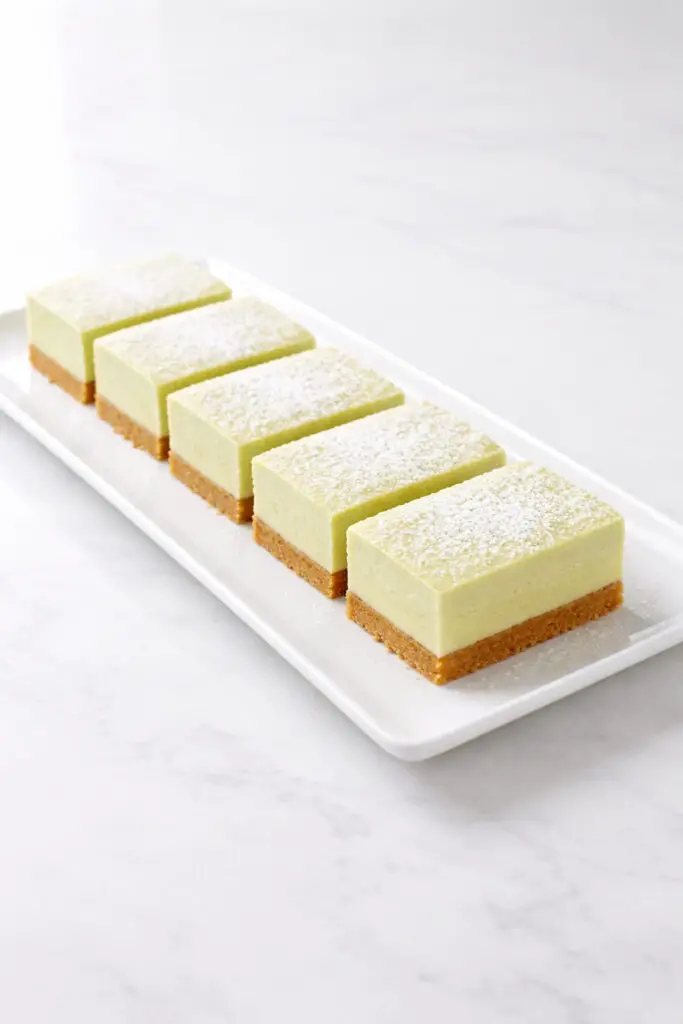
Bright and tangy, these bars add a citrusy pop to your dessert spread.
The creamy lime filling sits on a buttery graham cracker crust and bakes into neat squares.
The pale green hue fits the theme naturally, no food coloring required.
I love dusting the tops with powdered sugar just before serving for a fresh finish.
Ingredients
For the Crust:
- 2 cups graham cracker crumbs
- 1/4 cup granulated sugar
- 1/2 teaspoon salt
- 1/2 cup unsalted butter, melted
For the Filling:
- 4 large egg yolks
- 1 tablespoon lime zest (freshly grated)
- 1/2 cup fresh key lime juice (or regular lime juice if needed)
- 1 can (14 ounces) sweetened condensed milk
- 2–3 drops green food coloring (optional, for a festive touch)
For Garnish (Optional):
- Powdered sugar
- Whipped cream
- Thin lime slices
Instructions
1. Preheat and Prep
Preheat your oven to 350°F (175°C). Line a 9×9-inch baking pan with parchment paper, leaving some overhang for easy lifting later.
2. Make the Crust
In a medium bowl, mix graham cracker crumbs, sugar, salt, and melted butter until evenly combined. Press firmly into the bottom of the prepared pan, making an even layer. Bake for 8–10 minutes until lightly golden. Remove and let cool slightly.
3. Prepare the Filling
In a separate bowl, whisk the egg yolks and lime zest until slightly thickened and pale. Add lime juice and whisk again. Slowly pour in the sweetened condensed milk, whisking until smooth and creamy. Add food coloring if using.
4. Bake
Pour the filling over the warm crust and spread evenly. Bake for 15–18 minutes, just until the center is set but still slightly jiggly.
5. Chill
Let the bars cool at room temperature, then refrigerate for at least 3 hours (overnight is even better). This step is key for clean slices.
6. Slice and Serve
Lift out using the parchment overhang. Cut into neat squares with a sharp knife, wiping the blade between cuts. Dust with powdered sugar or top with whipped cream before serving.
16. Chocolate Mint Whoopie Pies
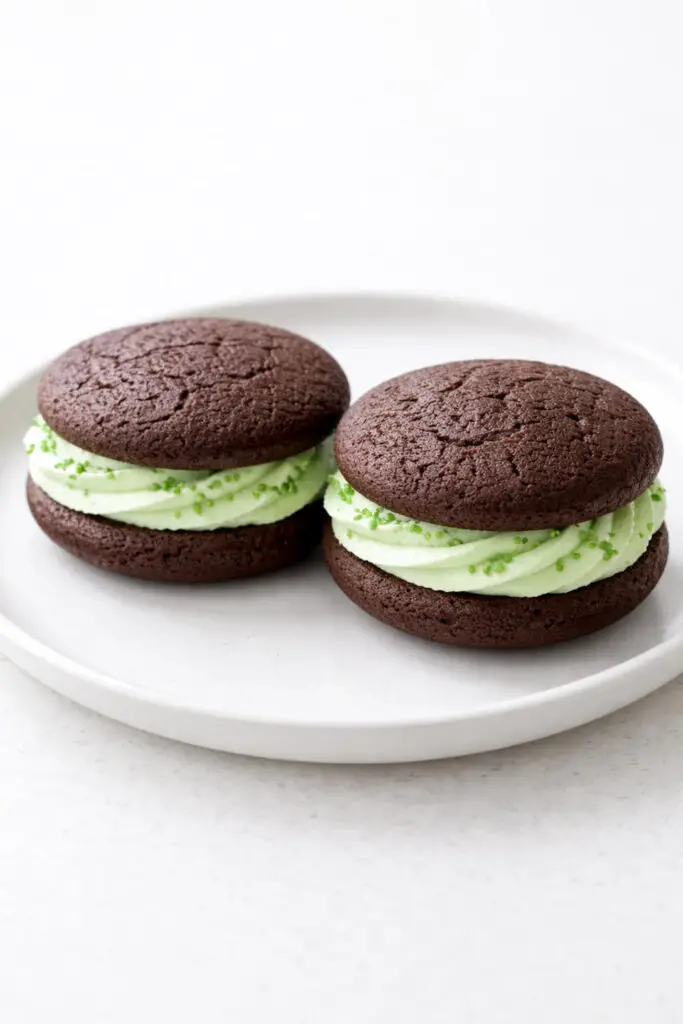
Two soft chocolate cake rounds sandwich a fluffy mint filling.
They’re handheld, slightly messy, and completely irresistible. I roll the edges in green sprinkles for a festive touch.
These are wonderful for outdoor gatherings because they’re easy to pass around and don’t require forks or plates.
Ingredients
For the Chocolate Cakes:
- 2 cups all-purpose flour
- 3/4 cup unsweetened cocoa powder
- 1 1/2 teaspoons baking soda
- 1/2 teaspoon salt
- 1/2 cup unsalted butter, softened
- 1 cup granulated sugar
- 1 large egg
- 1 teaspoon vanilla extract
- 1 cup buttermilk
For the Mint Filling:
- 1/2 cup unsalted butter, softened
- 2 1/2 cups powdered sugar
- 1–2 tablespoons heavy cream or milk
- 1/2 teaspoon peppermint extract (start small—it’s strong!)
- 1–2 drops green food coloring (optional)
- Green sprinkles for rolling edges (optional)
Instructions
1. Preheat and Prepare
Preheat your oven to 350°F (175°C). Line two baking sheets with parchment paper.
2. Mix Dry Ingredients
In a bowl, whisk together flour, cocoa powder, baking soda, and salt.
3. Cream Butter and Sugar
In a large bowl, beat butter and sugar until light and fluffy. Add egg and vanilla, mixing until smooth.
4. Combine and Add Buttermilk
Alternate adding dry ingredients and buttermilk to the butter mixture, beginning and ending with dry ingredients. Mix just until combined—don’t overmix.
5. Scoop and Bake
Drop tablespoon-sized scoops onto prepared baking sheets, spacing them about 2 inches apart. Bake for 9–11 minutes, until tops spring back when lightly touched. Cool completely on wire racks.
6. Make the Filling
Beat butter until smooth. Gradually add powdered sugar. Mix in peppermint extract and enough cream to create a fluffy, pipeable consistency. Add food coloring if desired.
7. Assemble
Pipe or spread filling onto the flat side of one cake and sandwich with another. Gently press together. Roll edges in green sprinkles if using.
Store in an airtight container at room temperature for a day or refrigerate up to 4 days. Let them sit out a bit before serving so they’re soft and tender—just how whoopie pies should be.
17. Pistachio Macarons
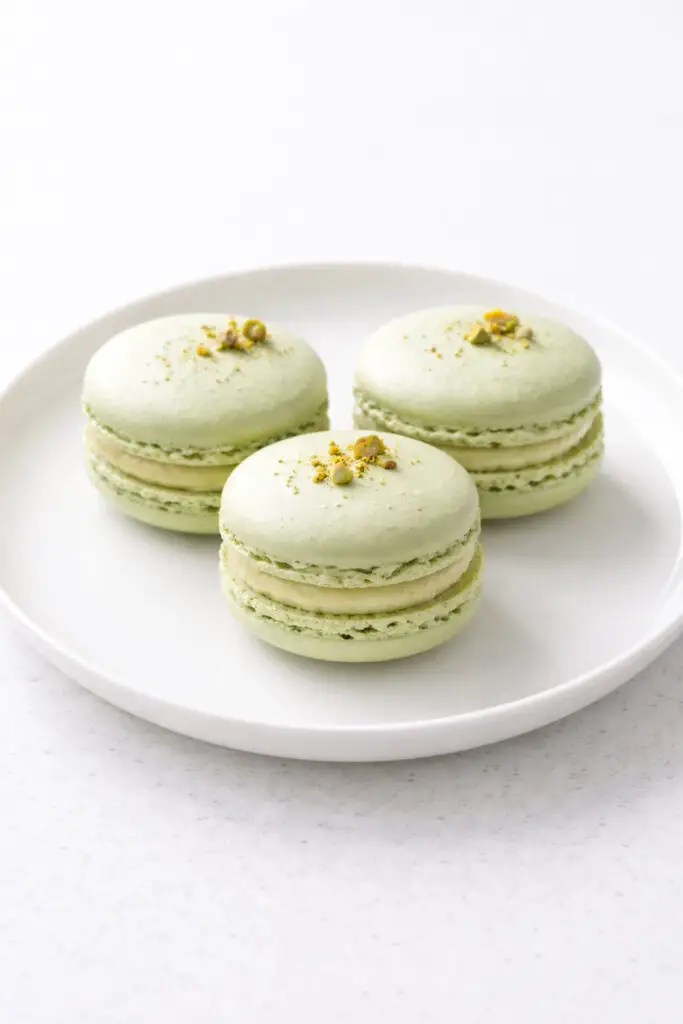
Elegant and delicate, pistachio macarons bring a touch of bakery glamour to your table.
Their pale green shells filled with pistachio buttercream look stunning arranged on a platter.
While they require patience, they’re worth it for special celebrations.
I’ve found they’re especially popular at more formal St. Patrick’s Day dinners.
Ingredients
For the Macaron Shells:
- 1 cup (100g) almond flour, finely sifted
- 1 3/4 cups (200g) powdered sugar
- 3 large egg whites, room temperature
- 1/4 cup (50g) granulated sugar
- 1/4 teaspoon cream of tartar
- 1/2 teaspoon pure vanilla extract
- Green gel food coloring (small amount)
For the Pistachio Buttercream Filling:
- 1/2 cup unsalted butter, softened
- 1 1/2 cups powdered sugar
- 2–3 tablespoons pistachio paste
- 1–2 tablespoons heavy cream
- Pinch of salt
Instructions
1. Prep Your Baking Sheets
Line two baking sheets with parchment paper. If you want uniform shells, trace 1.5-inch circles on the back of the parchment as guides.
2. Mix Dry Ingredients
Sift together almond flour and powdered sugar. Discard any large bits. This step ensures smooth shells.
3. Make the Meringue
In a clean bowl, beat egg whites and cream of tartar until foamy. Gradually add granulated sugar while beating. Continue until stiff, glossy peaks form. Add vanilla and a tiny amount of green gel coloring.
4. Macaronage (The Folding Step)
Gently fold the dry ingredients into the meringue using a spatula. Fold until the batter flows like lava and forms ribbons that slowly disappear into the mixture. Do not overmix.
5. Pipe the Shells
Transfer batter to a piping bag fitted with a round tip. Pipe circles onto prepared sheets. Tap trays firmly on the counter several times to release air bubbles.
6. Rest
Let the piped shells sit at room temperature for 30–60 minutes, until a dry skin forms on top. They should not stick to your finger when lightly touched.
7. Bake
Bake at 300°F (150°C) for 14–16 minutes. The shells should develop “feet” around the base and feel set. Cool completely before removing.
8. Make the Filling
Beat butter until smooth. Add powdered sugar gradually. Mix in pistachio paste, salt, and enough cream to create a smooth, pipeable consistency.
9. Assemble
Pair similar-sized shells. Pipe filling onto one shell and gently sandwich with another.
10. Mature (Important Step!)
Refrigerate in an airtight container for 24 hours before serving. This softens the interior and deepens the flavor.
18. Irish Cream Chocolate Truffles
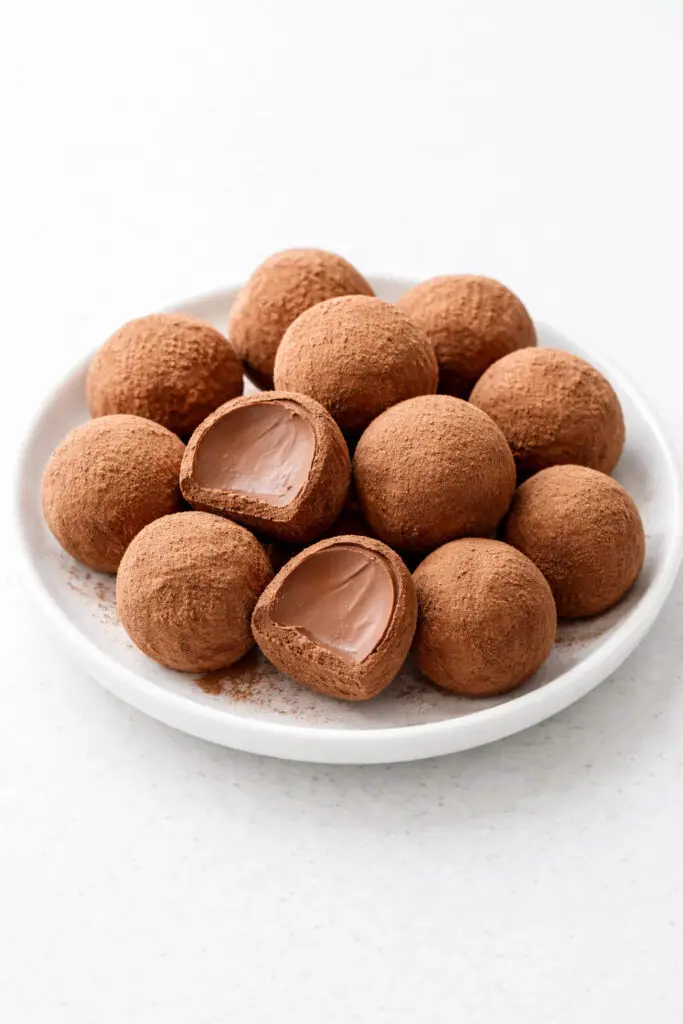
These silky truffles blend melted dark chocolate with a splash of Baileys Irish Cream for richness.
Once chilled and rolled, coat them in cocoa powder or dip them in tempered chocolate.
They’re small but indulgent, perfect for serving after dinner with coffee.
Keep them refrigerated until ready to present.
- 1/4 teaspoon salt
For Coating (choose one or mix):
- Unsweetened cocoa powder
- Melted dark or milk chocolate
- Finely chopped nuts
- Powdered sugar
Instructions
1. Heat the Cream
In a small saucepan, warm the heavy cream over medium heat just until it begins to gently simmer. Do not let it boil.
2. Make the Ganache
Place the chopped chocolate in a heatproof bowl. Pour the hot cream over the chocolate and let it sit undisturbed for 2–3 minutes. Add the butter, then stir slowly from the center outward until smooth and glossy.
3. Add Flavor
Stir in the Baileys, vanilla (if using), and salt. Mix until fully incorporated. The mixture should be silky and slightly thick.
4. Chill
Cover the bowl with plastic wrap and refrigerate for 2–3 hours, or until firm enough to scoop.
5. Shape the Truffles
Using a small cookie scoop or spoon, scoop portions and quickly roll them between your palms into smooth balls. Work fast so they don’t melt.
6. Coat
Roll the truffles in cocoa powder for a classic finish, or dip them in melted chocolate and let them set on parchment paper.
7. Store
Refrigerate in an airtight container for up to one week. Let them sit at room temperature for 10–15 minutes before serving for the creamiest texture.
They’re rich, elegant, and perfect with coffee after dinner — just one feels like a little celebration.
19. Rainbow Fruit Tart
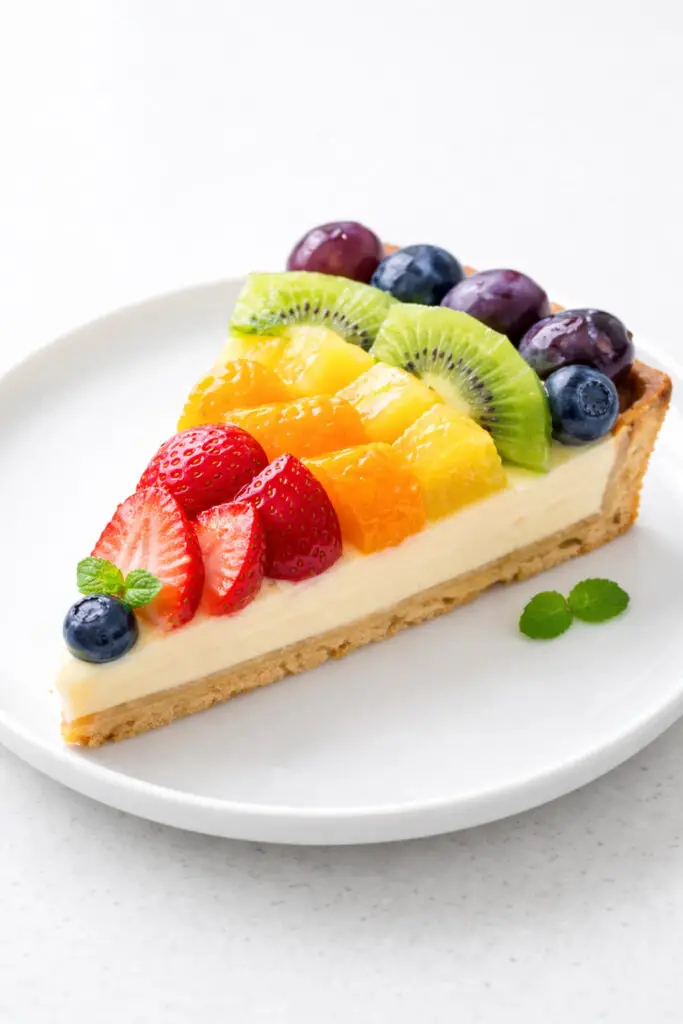
A crisp pastry crust filled with vanilla custard becomes a canvas for colorful fruit arranged in rainbow order.
Strawberries, oranges, pineapple, kiwi, blueberries, and grapes create a vibrant arc.
It’s fresh, bright, and balances heavier chocolate desserts beautifully.
This is my go-to when I want something lighter but still completely on theme.
Ingredients
For the Tart Shell:
- 1 1/4 cups all-purpose flour
- 1/4 cup powdered sugar
- 1/2 cup unsalted butter, cold and cubed
- 1 large egg yolk
- 1–2 tablespoons cold water
For the Custard Filling:
- 1 cup whole milk
- 1/2 cup heavy cream
- 1/3 cup granulated sugar
- 3 large egg yolks
- 2 tablespoons cornstarch
- 1 teaspoon vanilla extract
For the Rainbow Fruit Topping:
- Strawberries, sliced
- Mandarin orange segments
- Pineapple, cut into small pieces
- Kiwi, peeled and sliced
- Blueberries
- Red or purple grapes, halved
Optional Glaze:
- 2 tablespoons apricot jam
- 1 teaspoon water
Instructions
1. Make the Tart Shell
- Preheat oven to 350°F (175°C).
- In a food processor, pulse flour and powdered sugar. Add butter and pulse until mixture resembles coarse crumbs. Add egg yolk and 1 tablespoon water; pulse until dough just comes together.
- Press dough into a 9-inch tart pan with removable bottom. Prick the bottom with a fork.
- Bake 15–18 minutes until lightly golden. Cool completely.
2. Prepare the Custard
- In a medium saucepan, heat milk and cream until just simmering.
- In a bowl, whisk egg yolks, sugar, and cornstarch until smooth.
- Slowly pour hot milk mixture into yolks while whisking constantly. Return to the pan and cook over medium-low heat until thickened, about 3–5 minutes. Remove from heat and stir in vanilla.
- Pour custard into cooled tart shell and smooth the top. Chill for 1 hour.
3. Arrange the Fruit
- Arrange fruit in rainbow order on top of the custard: strawberries, oranges, pineapple, kiwi, blueberries, and grapes. Make sure each slice of tart has visible layers of color.
4. Optional Glaze
- Warm apricot jam with a teaspoon of water until smooth. Brush lightly over the fruit for a shiny finish.
5. Serve
- Keep refrigerated until ready to serve. Slice with a sharp knife for clean edges.
The result is a bright, fresh, and eye-catching dessert. Creamy custard meets juicy, colorful fruit—a perfect centerpiece for a St. Patrick’s Day table!
20. Mint Chocolate Chip Ice Cream Pie
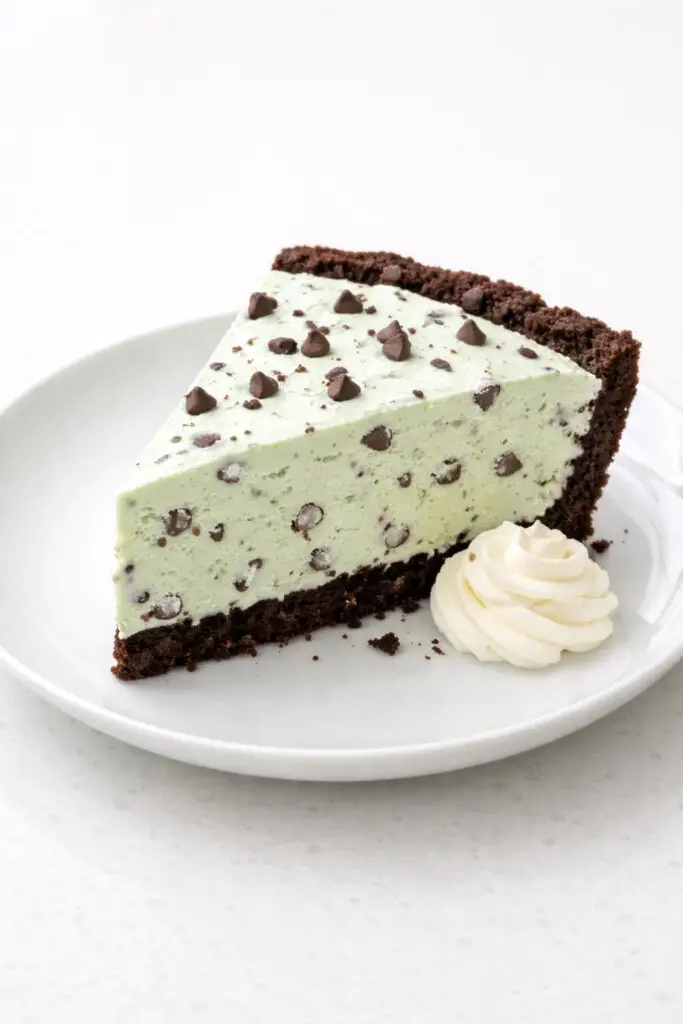
This no-bake pie starts with a chocolate cookie crust pressed into a pan.
I fill it with softened mint chocolate chip ice cream, smooth the top, and freeze until firm.
A drizzle of hot fudge and whipped cream finishes it off.
It’s refreshing, easy, and ideal when you’re short on oven space.
Ingredients
For the Crust:
- 2 cups chocolate cookie crumbs (like Oreos, finely crushed)
- 1/2 cup unsalted butter, melted
For the Filling:
- 1 pint mint chocolate chip ice cream, softened slightly
- 1/2 cup mini chocolate chips (optional, for extra texture)
For the Topping (Optional):
- 1/2 cup whipped cream
- 2 tablespoons chocolate syrup
- Green sprinkles or crushed mint candies for garnish
Instructions
1. Prepare the Crust
- Preheat your oven to 350°F (175°C) if you want a firmer crust (optional; can also chill without baking).
- In a medium bowl, mix the chocolate cookie crumbs and melted butter until combined.
- Press the mixture evenly into the bottom and slightly up the sides of a 9-inch pie pan. Chill in the fridge for 10–15 minutes to firm up, or bake for 8–10 minutes if you prefer a crisp crust.
2. Add the Ice Cream Filling
- Scoop the softened mint chocolate chip ice cream into the crust. Spread evenly with a spatula.
- Sprinkle mini chocolate chips over the top if desired for extra crunch.
3. Freeze
- Cover the pie with plastic wrap and freeze for at least 4 hours or until firm. For best results, freeze overnight.
4. Serve
- Remove from the freezer 5–10 minutes before slicing to make cutting easier.
- Optional: Top with whipped cream, a drizzle of chocolate syrup, and green sprinkles for a festive touch.
- Slice with a sharp knife and serve immediately.
These ice cream pies are creamy, minty, and rich with chocolate, making them a perfect cool treat for St. Patrick’s Day or any celebration.
21. Soda Bread Pudding with Whiskey Sauce
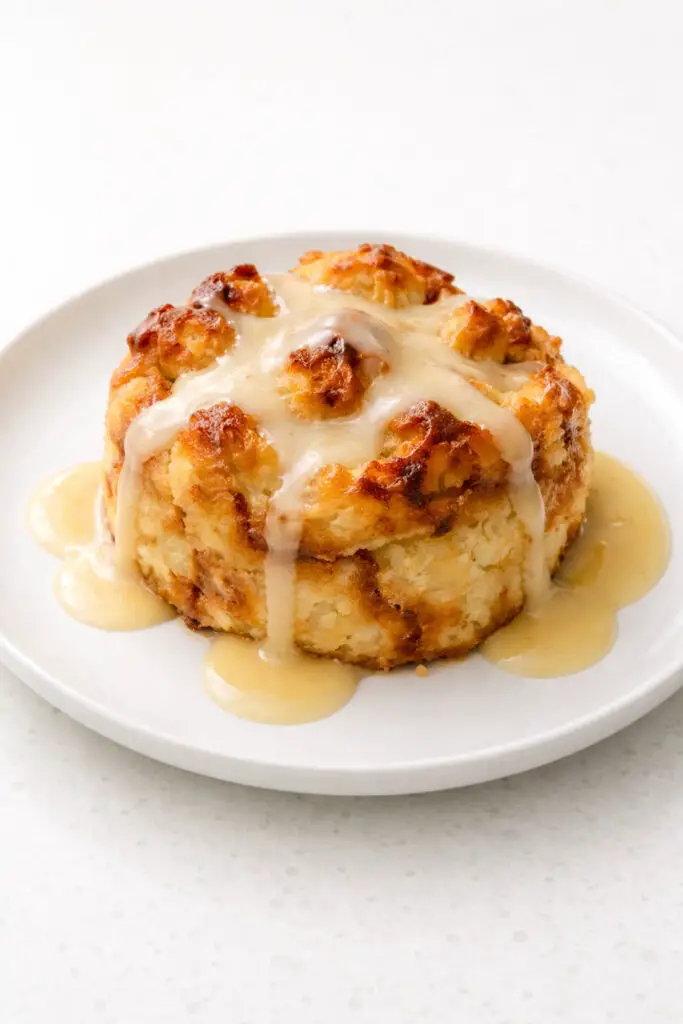
A cozy finale, bread pudding made from traditional Irish soda bread feels comforting and nostalgic.
Cubes of bread soak in a custard mixture before baking into a golden dish.
I serve it warm with a buttery whiskey sauce drizzled on top.
It’s not flashy, but it brings everyone back for seconds—always the sign of a perfect ending.
Ingredients
For the Bread Pudding:
- 6 cups cubed Irish soda bread (stale or day-old works best)
- 2 cups whole milk
- 1/2 cup heavy cream
- 1/2 cup granulated sugar
- 1 teaspoon vanilla extract
- 1/2 teaspoon ground cinnamon
- 1/4 teaspoon ground nutmeg
- 3 large eggs
- 1/2 cup raisins or currants (optional)
- 2 tablespoons unsalted butter, melted
For the Whiskey Sauce:
- 1/2 cup unsalted butter
- 1/2 cup brown sugar, packed
- 1/4 cup heavy cream
- 2 tablespoons Irish whiskey (like Jameson)
- 1/2 teaspoon vanilla extract
Instructions
1. Preheat Oven and Prep Pan
Preheat your oven to 350°F (175°C). Grease a 9×13-inch baking dish with butter or non-stick spray.
2. Make the Custard
In a medium saucepan, heat milk and cream over medium heat until just warm (do not boil). In a large bowl, whisk eggs, sugar, cinnamon, nutmeg, and vanilla. Slowly pour the warm milk mixture into the eggs, whisking constantly to prevent curdling.
3. Assemble the Pudding
Place cubed soda bread and raisins in the prepared baking dish. Pour the custard over the bread, gently pressing down to soak evenly. Drizzle melted butter over the top. Let it sit for 10–15 minutes to absorb.
4. Bake
Bake for 35–40 minutes, until the top is golden brown and a knife inserted in the center comes out clean. Remove from oven and let cool slightly.
5. Prepare the Whiskey Sauce
In a small saucepan, melt butter over medium heat. Stir in brown sugar until dissolved. Add heavy cream, whisk until smooth, then stir in Irish whiskey and vanilla. Simmer gently for 2–3 minutes until slightly thickened.
6. Serve
Cut the bread pudding into squares or scoops. Pour warm whiskey sauce over each serving just before serving. Optional: add a dollop of whipped cream for extra indulgence.