17 Easy Halloween Crafts Perfect for Kids and Adults

I used to think Halloween crafts were just messy glue, glitter everywhere, and decorations that ended up in the trash after one night.
There was a time when I thought it wasn’t even worth the effort—why not just buy everything from the store?
But after a few cozy October weekends, some trial-and-error with scissors and paint, and a lot of laughs with family, I realized homemade Halloween crafts bring so much more joy.
They’re fun to make, budget-friendly, and add that personal spooky touch no store-bought item can match.
So let’s dive into some creative Halloween craft ideas you’ll actually love making:
1. Paper Plate Pumpkins
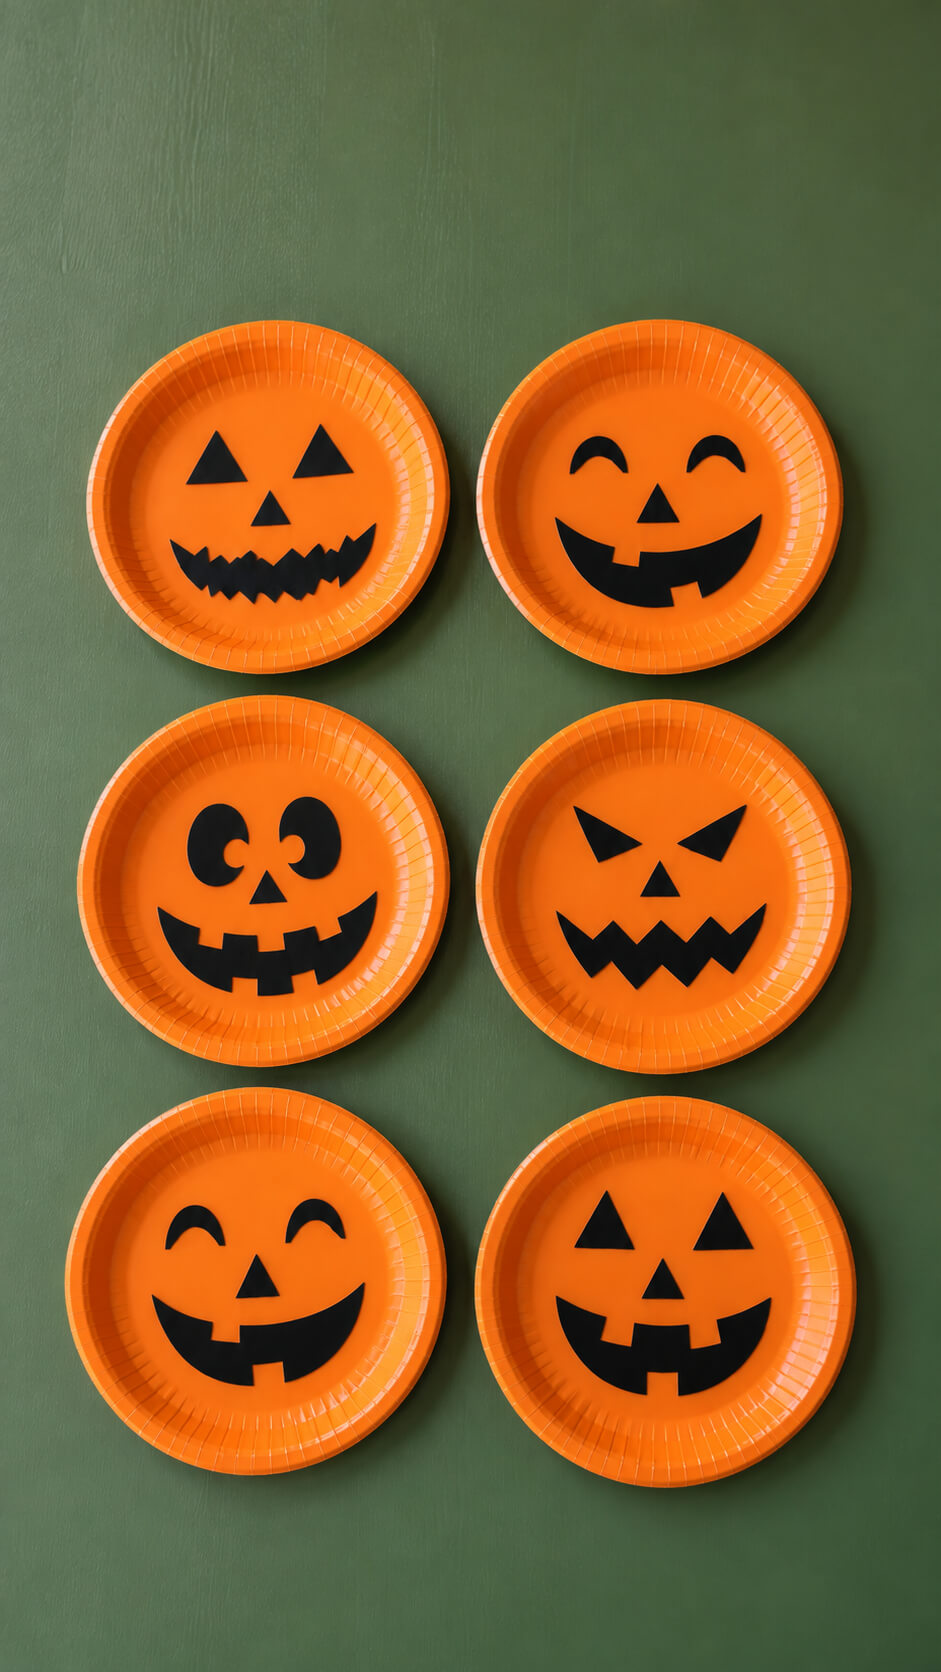
Every mom knows paper plates are magic in disguise, and for Halloween they become the easiest pumpkins ever!
A little orange paint, black paper cutouts for faces, and googly eyes make them come alive.
Let the kids choose silly or scary expressions, then hang them as cheerful jack-o’-lanterns.
Materials
- Orange paper plates
- Black construction paper
- Scissors
- Glue or double-sided tape
- Pencil
- Optional: white paper for highlights
Instructions
1. Choose different pumpkin faces
Plan a variety of Halloween expressions for the plates. Try triangle eyes with jagged mouths, surprised eyes, sleepy expressions, or big goofy grins so each jack-o’-lantern looks unique.
2. Draw the facial shapes
Use a pencil to sketch the eyes, nose, and mouth onto black construction paper. Keep the shapes bold and simple so they are easy to cut and clearly visible against the orange plates.
3. Cut out the features
Carefully cut out each pumpkin feature with scissors. Make several triangle eyes, curved eyes, toothy mouths, and jagged shapes to create different expressions.
4. Arrange the features on each plate
Place the cut-out eyes, noses, and mouths on the orange plates before gluing them down. Experiment with their positions until each face has the expression you want.
5. Attach the pumpkin faces
Glue or tape each facial feature securely onto its plate. Press the pieces down gently and allow the adhesive to set before moving the plates.
6. Arrange the finished plates
Place the completed jack-o’-lantern plates neatly on a table or display surface. Arrange them in rows or a simple grid to create a clean, colorful Halloween presentation.
Tip
Use different eye shapes and mouth styles on every plate to make the collection feel playful and handmade.
2. Ghostly Handprint Art
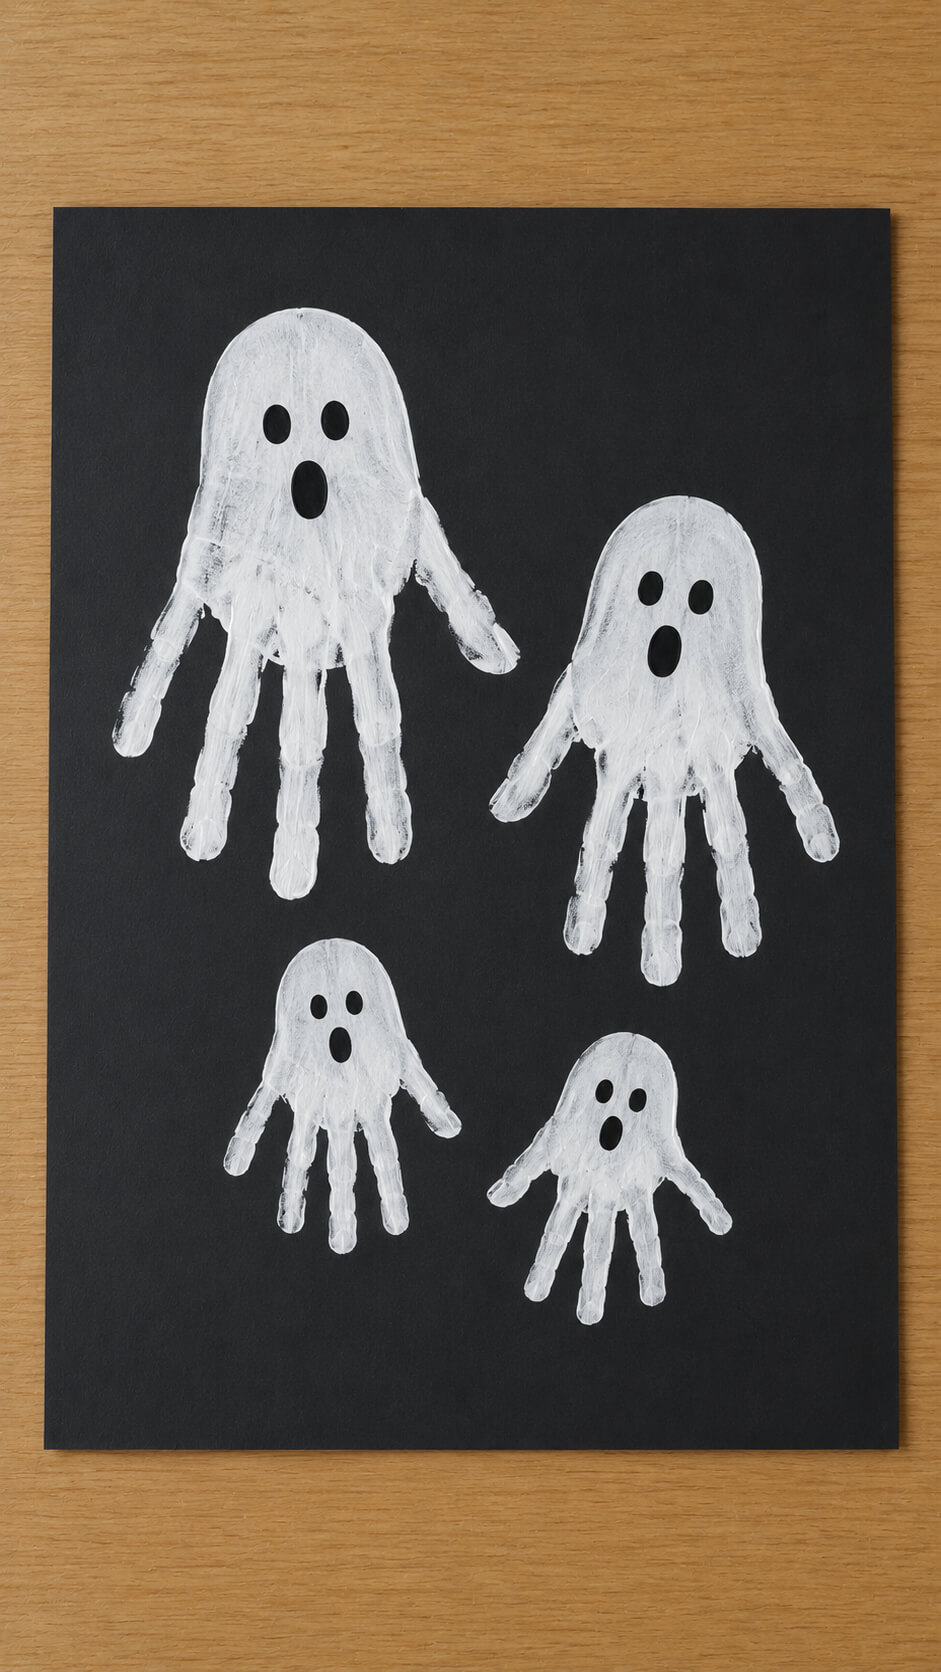
Messy hands can make adorable ghosts.
Simply paint your child’s palm with white washable paint, press it on black paper, and let it dry.
Add eyes and a spooky mouth to finish.
Each ghost turns out unique, just like the kids who made them—sweet, spooky, and a keepsake forever.
Materials
- Black construction paper
- White washable paint
- Paintbrush or sponge
- Black marker
- Pencil
- Paper towel or newspaper to protect the work surface
Instructions
1. Place the black paper flat
Lay a sheet of solid black construction paper on a clean, flat surface. Make sure the paper is smooth and free from dust before painting.
2. Paint the hand with white paint
Cover the palm and fingers of a hand evenly with white paint. Use a thin, consistent layer so the handprint has a recognizable shape without becoming too runny.
3. Press the hand onto the paper
Carefully press the painted hand onto the black construction paper with the fingers stretched apart. Press the palm and each finger gently, then lift the hand straight up to reveal the ghost shape.
4. Create several different ghosts
Repeat the handprint process with different hand sizes or slightly different positions. Arrange the ghosts neatly across the page to create a playful family of floating spirits.
5. Add spooky eyes and mouths
Once the white paint is completely dry, use a black marker or black paint to add two small dots for the eyes and a small oval for the mouth. Give each ghost a slightly different expression.
6. Let the artwork dry completely
Leave the finished handprints flat until the white paint is fully dry. Avoid touching the painted areas while they are drying to keep the ghost shapes crisp.
Tip
For a more polished minimalist look, keep the ghosts white and use only simple black eyes and mouths.
3. Toilet Paper Roll Bats
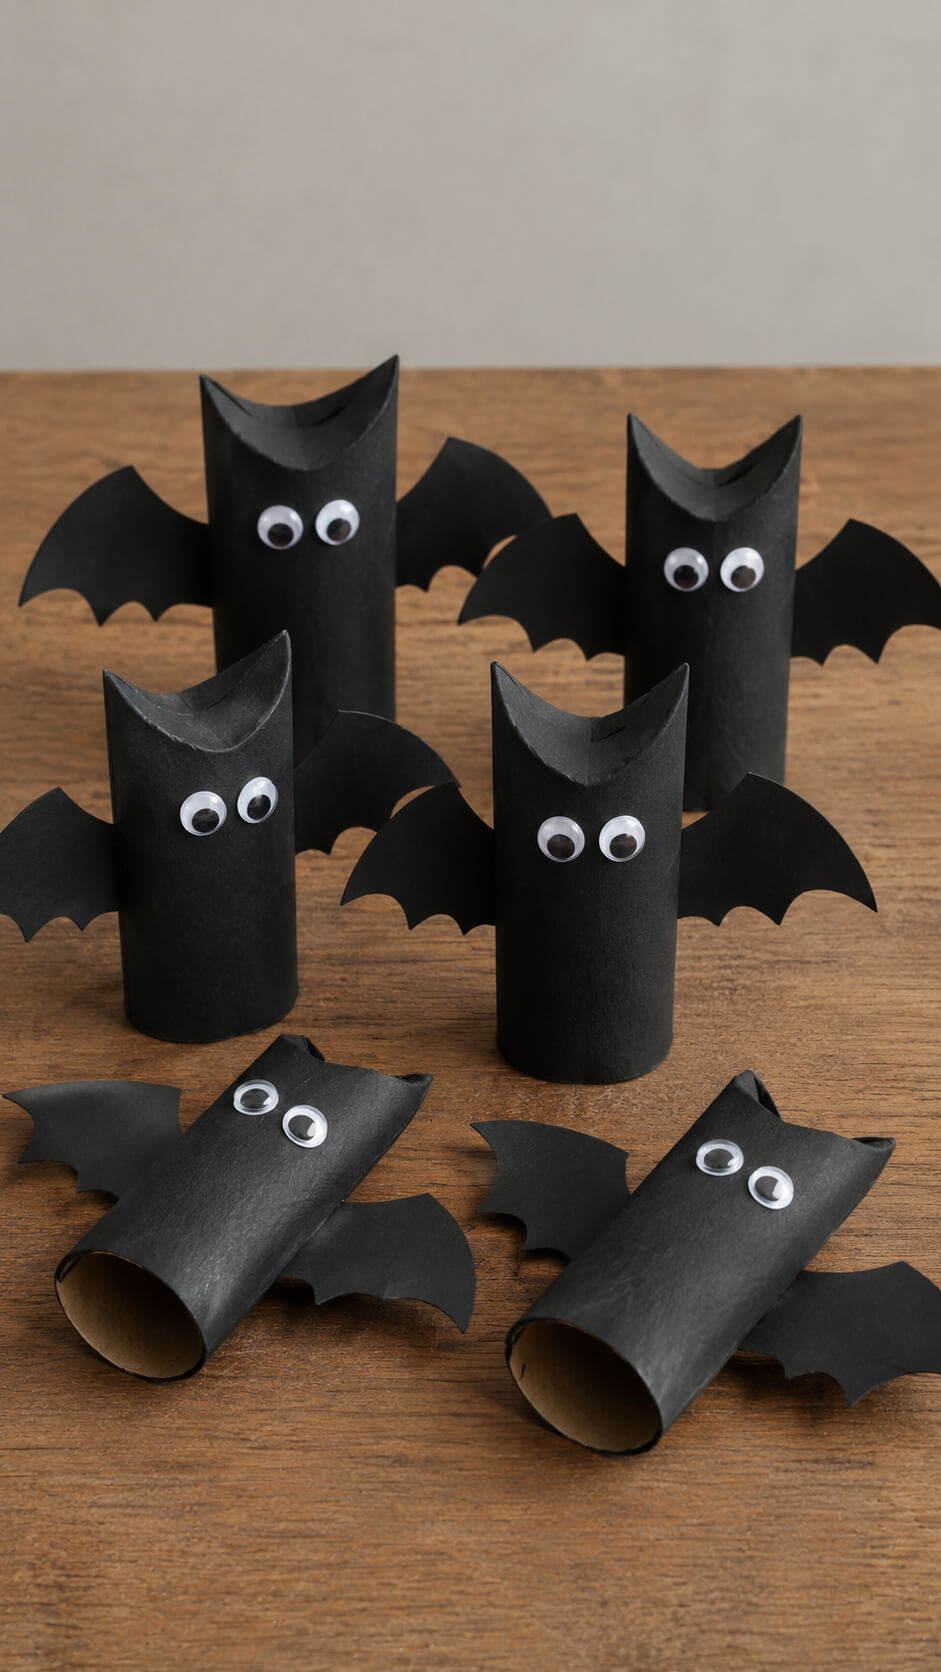
Never underestimate the humble cardboard tube—it transforms into a bat with just a coat of black paint and paper wings.
Fold in the top for ears, stick on googly eyes, and hang upside down.
Suddenly, your living room is a playful bat cave, no vampire invasion required!
Materials
- Empty toilet paper rolls
- Black acrylic or craft paint
- Black cardstock
- Googly eyes
- Craft glue
- Paintbrush
- Plain table or display surface
Instructions
1. Paint the toilet paper rolls
Paint each toilet paper roll completely black, covering the outside evenly. Allow the rolls to dry fully before continuing.
2. Fold the tops into bat ears
Press the top edge of each dry roll inward to create two pointed corners that resemble bat ears. Gently shape the cardboard so the ears remain upright.
3. Cut out the bat wings
Cut pairs of bat wings from black cardstock. Give each wing a curved outer edge with small scallops or points to create a recognizable bat-wing shape.
4. Attach the cardstock wings
Apply a small amount of glue to the center section of each wing pair. Press the wings onto the sides or back of the painted roll and hold them briefly until secure.
5. Add the googly eyes
Glue two googly eyes onto the front of each bat. Position them at slightly different angles on some bats to create playful expressions.
6. Arrange the finished bats
Place several bats upright in a small group on the table. Add a few bats lying on their sides in front to create a relaxed, playful Halloween display.
Tip
For extra character, use googly eyes of different sizes and vary the wing positions and ear shapes on each bat.
4. Popsicle Stick Spider Webs
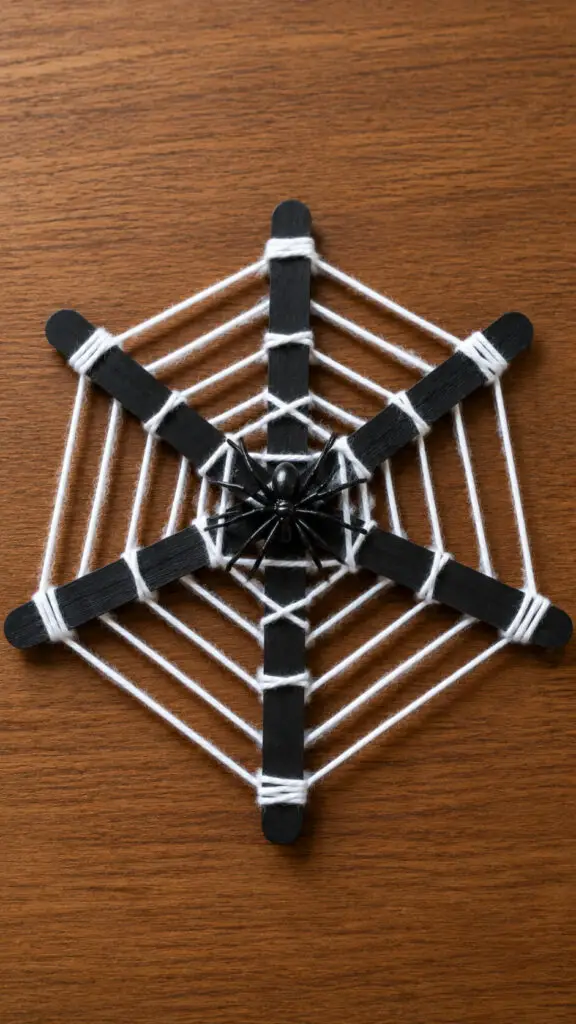
Popsicle sticks and yarn are a classic duo.
Crisscross a few sticks, wrap with white yarn, and you’ll see a web appear like magic.
Top it off with a plastic spider.
Kids love making these because they’re simple yet creepy, and they look fantastic hanging in a window.
Materials
- 6 popsicle sticks
- Black paint
- White yarn
- Small plastic spider
- Craft glue
- Paintbrush
Instructions
1. Paint the popsicle sticks black
Paint all six popsicle sticks with black craft paint, making sure the surfaces are evenly covered. Leave them aside until completely dry.
2. Arrange the popsicle sticks
Arrange the sticks in a radial pattern so they cross through the center and create the basic structure of a spiderweb. Keep the sticks evenly spaced for a balanced shape.
3. Secure the center
Apply a small amount of glue where the popsicle sticks overlap in the middle. Allow the glue to dry so the frame stays firmly in place while you wrap the yarn.
4. Wrap the yarn around the sticks
Tie the end of the white yarn near the center of one stick. Wrap the yarn around each stick in sequence, gradually moving outward to create connected rings that resemble a spiderweb.
5. Continue forming the web
Keep wrapping the yarn around the sticks, spacing each section evenly as you work toward the outer ends. Add several layers to make the web clearly visible.
6. Attach the plastic spider
Place a small plastic spider in the center of the finished web. Secure it with a tiny amount of craft glue if you want it to remain permanently attached.
7. Display the finished spiderweb
Once everything is dry, hang the spiderweb in a window, on a wall, or from a Halloween display area. The white yarn contrasts nicely with the black sticks.
Tip
Keep the yarn slightly taut while wrapping, but avoid pulling too tightly because it can bend the popsicle-stick frame.
5. Mason Jar Lanterns
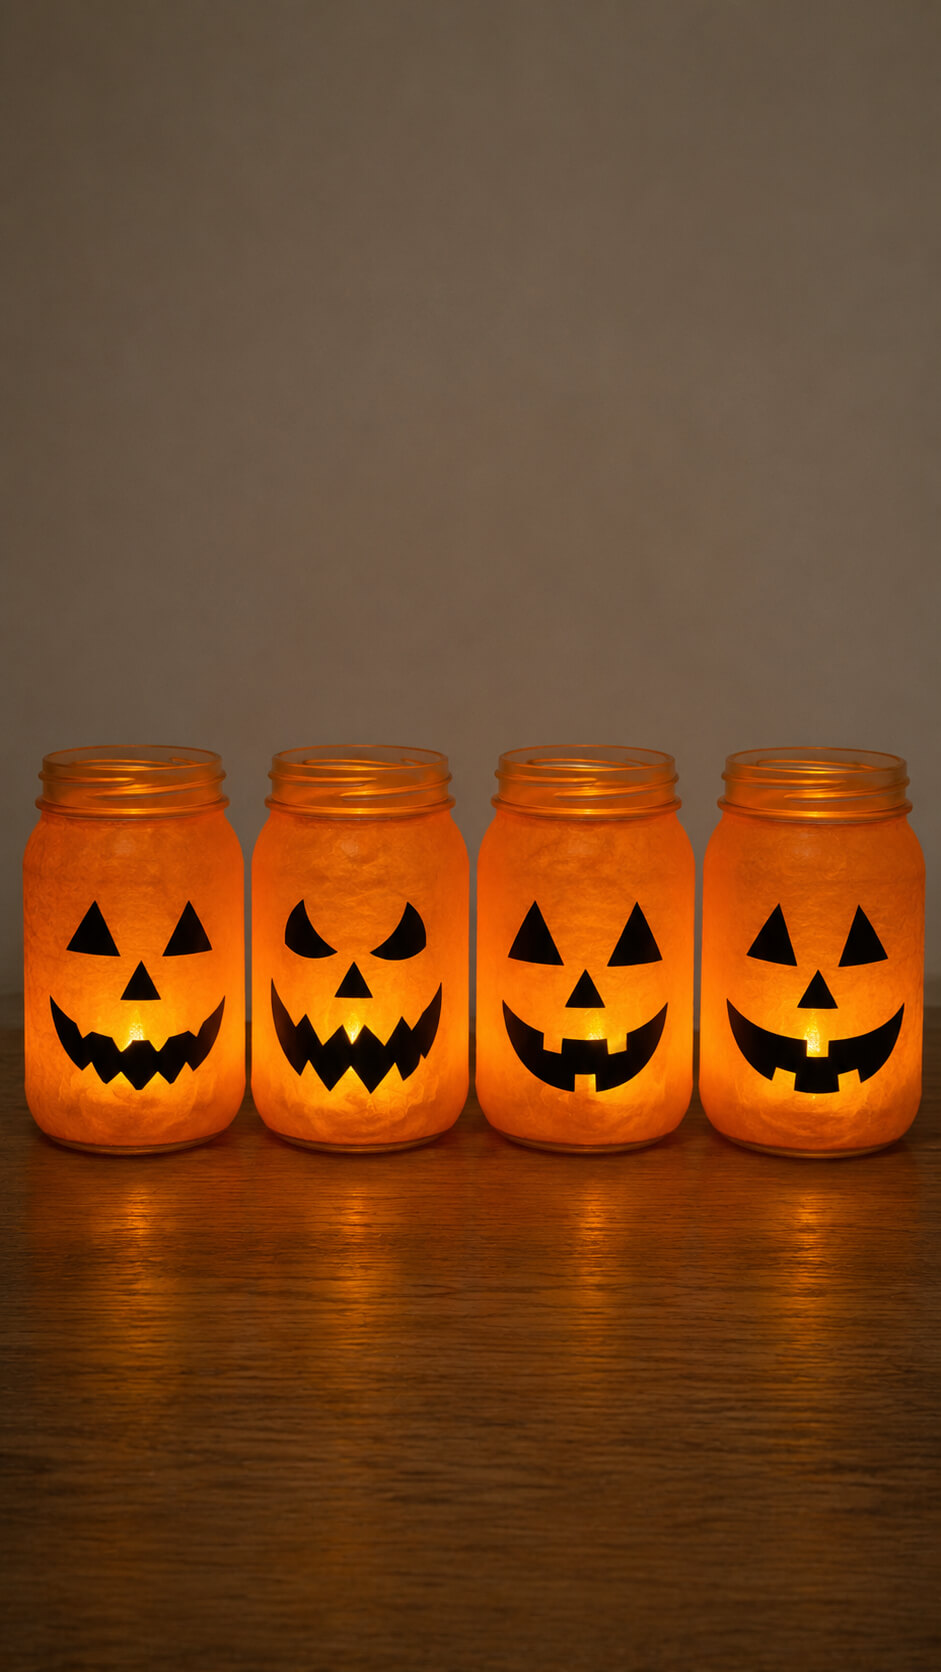
Nothing beats the cozy glow of a lantern, especially when kids make it themselves.
Cover an empty jar with orange tissue paper, add a spooky paper face, and pop in a battery tea light.
Safe, festive, and absolutely charming on a porch or windowsill during trick-or-treating night.
Materials
- Small mason jars
- Orange tissue paper
- Black paper or cardstock
- Battery-operated tea lights
- Craft glue
- Scissors
- Pencil
Instructions
1. Prepare the orange tissue paper
Cut pieces of orange tissue paper large enough to wrap around each mason jar, leaving the opening and base uncovered.
2. Cover each mason jar
Apply a thin, even layer of glue to the outside of a jar, then carefully wrap the orange tissue paper around it. Smooth the paper gently so the surface stays even and wrinkle-free.
3. Let the tissue paper dry
Allow the glued tissue paper to dry completely before adding the jack-o’-lantern faces. This helps prevent the paper from shifting or tearing.
4. Cut the jack-o’-lantern faces
Cut triangle eyes, small triangle noses, and wide smiling mouths from black paper. Add sharp teeth and vary the expressions so each lantern looks different.
5. Attach the black faces
Glue the black paper cutouts onto the dried tissue-covered jars. Press the edges down gently so each piece sticks securely.
6. Add the tea lights
Place one battery-operated tea light inside each jar. Avoid using real candles, since the tissue paper is flammable.
7. Arrange the glowing lanterns
Switch on the tea lights and arrange the finished jars in a row on a plain table. Dim the surrounding lighting to emphasize their warm pumpkin-like glow.
Tip
For the smoothest finish, apply the tissue paper in one continuous piece and gently smooth it from the center outward while the glue is still wet.
6. Coffee Filter Ghosts
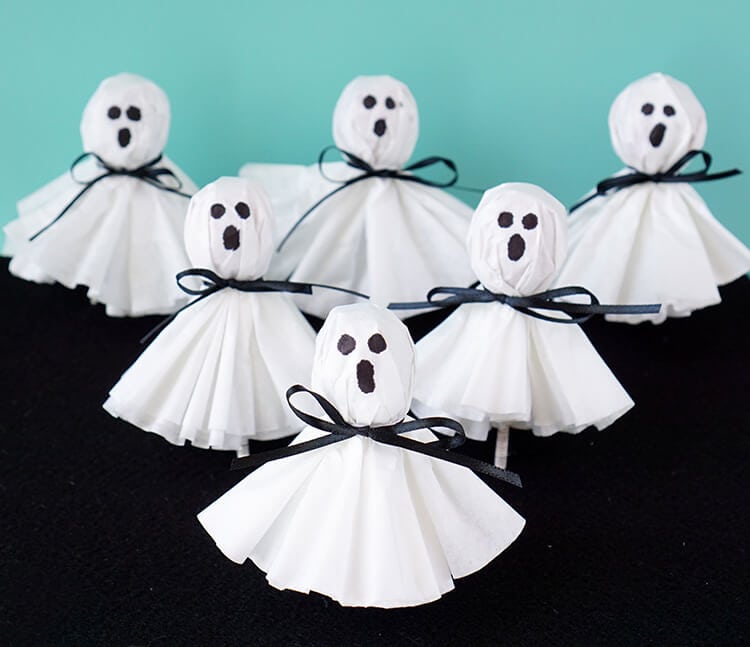
These floaty little ghosts are as fun as they are easy.
Just wrap a tissue around a cotton ball, cover it with a coffee filter, and tie with string.
Draw on a goofy or scary face.
Hang them up and watch them sway, spooking unsuspecting visitors with every breeze.
7. Paper Bag Monsters
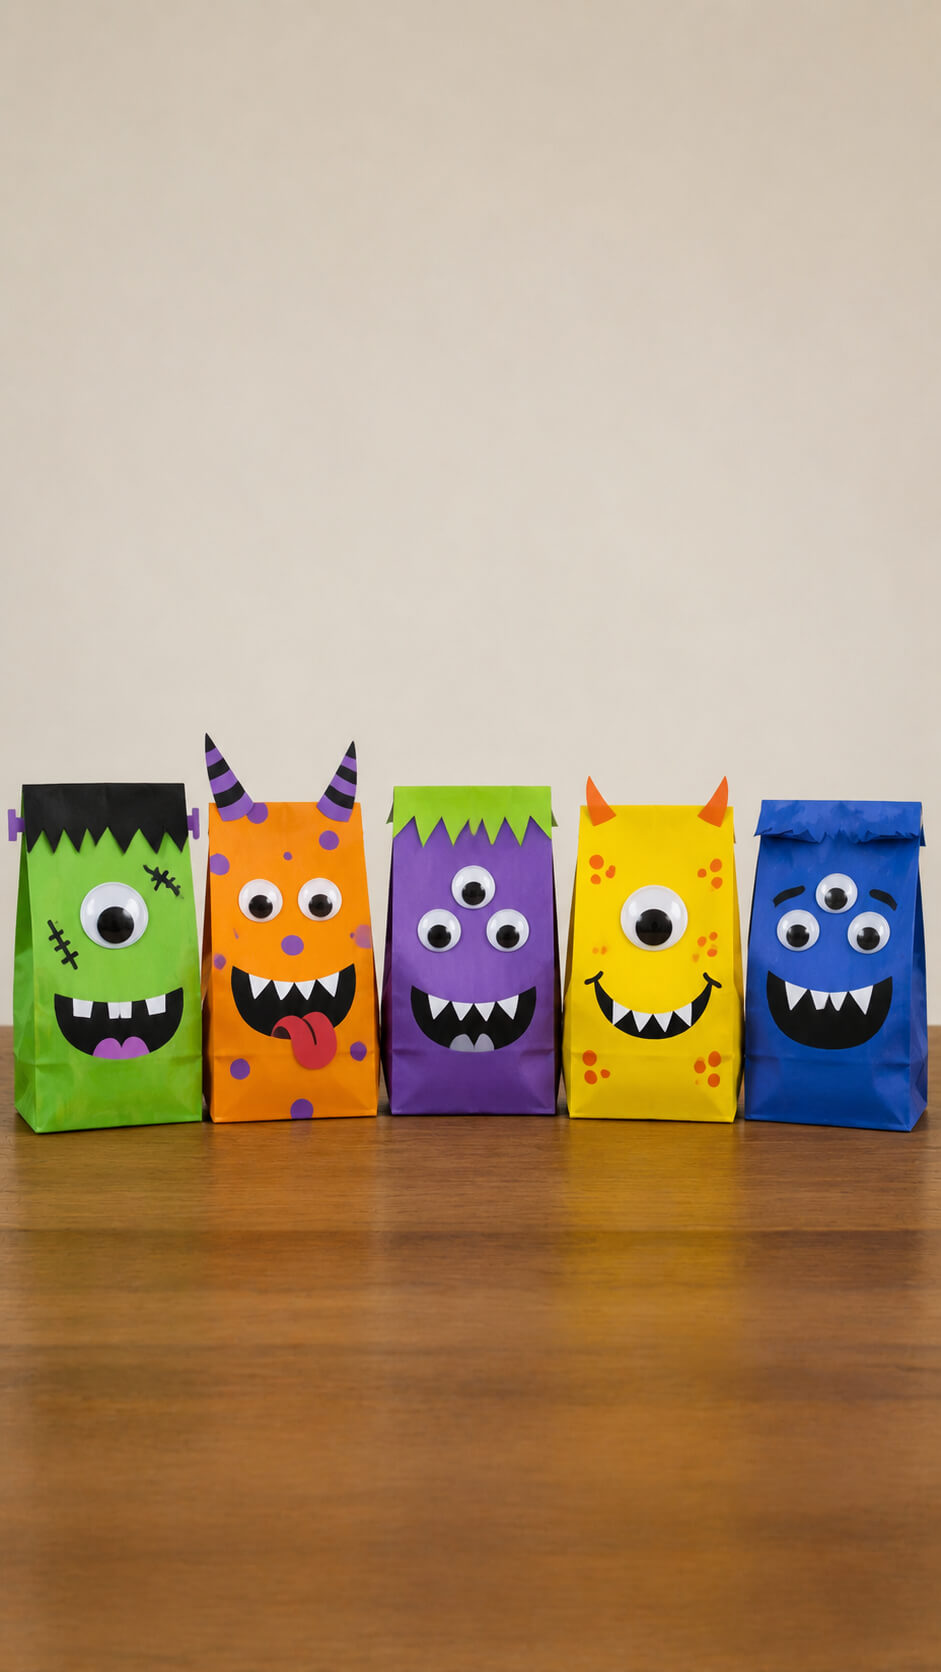
Lunch bags aren’t just for sandwiches—they’re monster material!
Paint them bright colors, glue on googly eyes, and add sharp paper teeth.
They double as puppets for silly monster shows.
Trust me, the giggles that follow will be louder than any growl your “monster” can muster.
Materials
- Brown paper lunch bags
- Acrylic or tempera paint
- Paintbrushes
- Large googly eyes
- White paper
- Black paper or marker
- Colored construction paper
- Scissors
- Glue
- Pencil
- Optional: paper straws, pom-poms, or craft foam for extra details
Instructions
1. Paint each paper bag a bright color
Place the brown paper bags upright and paint each one with a solid, vibrant color such as green, orange, purple, yellow, or blue. Apply an even coat and allow the paint to dry completely before adding the decorations.
2. Create unique monster faces
Give every bag its own personality by planning different facial features. You can make one monster silly, another friendly, another spooky, and another surprised by changing the number and placement of the eyes, eyebrows, and mouth.
3. Add large googly eyes
Glue oversized googly eyes onto the front of each painted bag. Use one, two, or three eyes to create different monster designs, and position them slightly differently so each character looks unique.
4. Make funny monster mouths
Cut large mouths from black paper and glue them onto the bags. Add jagged white paper teeth, silly tongues, or small fangs to make the expressions funny rather than frightening.
5. Add horns, ears, and hair
Cut horns, spikes, ears, or shaggy hair from construction paper or craft foam. Glue the pieces around the top of each bag to create distinctive Halloween monster silhouettes.
6. Include colorful personality details
Decorate the monsters with spots, scars, freckles, eyebrows, stitches, or other playful details. Use contrasting paint or paper pieces so the decorations remain bold and easy to see.
7. Let all the decorations dry
Set the finished bags aside on a flat surface until the paint and glue are completely dry. Keep the bags standing upright while they dry so their shape is maintained.
8. Puff the bags slightly before displaying
Gently open each lunch bag and add a small amount of crumpled tissue paper inside if needed. This gives the bags a fuller shape while keeping them lightweight and upright.
Tip
For the cleanest results, use thick, even layers of paint and let each layer dry before adding the next detail. Mix different colors, eye arrangements, teeth, tongues, and horns so no two Halloween monsters look alike.
Creative Uses
These monster bags can be used as Halloween treat bags, classroom crafts, party favors, table decorations, or a fun DIY activity for children.
8. Egg Carton Spiders
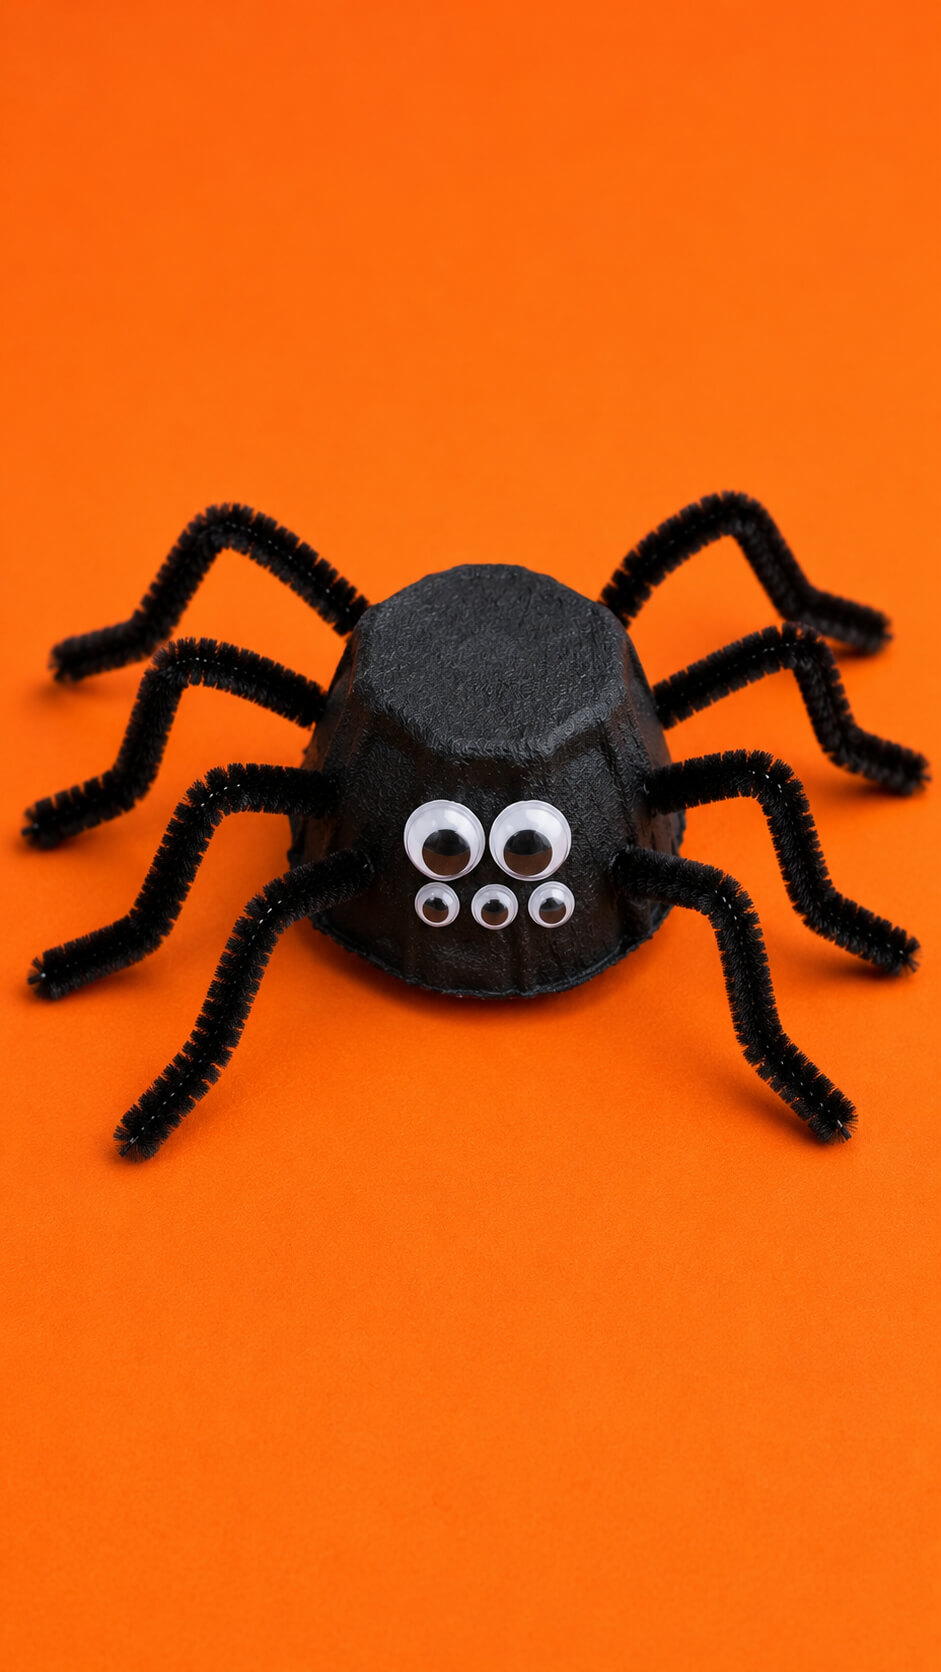
Those cardboard egg cartons? They’re practically tiny spider bodies waiting to happen.
Snip them apart, paint them black, and stick on pipe cleaner legs.
A few googly eyes later, you’ve got an entire spider army.
They’re so fun to scatter across a Halloween table—it looks creepy but not crawly.
Materials
- Cardboard egg carton
- Black acrylic or craft paint
- Paintbrush
- Black pipe cleaners
- Googly eyes
- Scissors
- Craft glue or hot glue
- Newspaper or scrap paper for the work surface
Instructions
1. Cut the egg carton into individual cups
Separate the cardboard egg carton into individual cups using scissors. Trim away any uneven edges so each piece has a neat, rounded shape that can serve as the spider’s body.
2. Paint the carton cup black
Cover the outside of each carton cup with an even layer of black paint. Make sure the cardboard is fully covered, then leave it on a flat surface until the paint has dried completely.
3. Cut the pipe cleaners for the legs
Cut black pipe cleaners into pieces long enough to create spider legs. Each spider needs eight legs, so prepare enough pieces before attaching them.
4. Attach eight spider legs
Glue four pipe-cleaner pieces to each side of the painted carton cup. Bend each piece into a few gentle angles so the legs extend outward and give the spider a playful, three-dimensional shape.
5. Add the googly eyes
Glue several googly eyes onto the front of the spider. Use different sizes or an unusual number of eyes to give each spider its own funny personality.
6. Shape the finished spider
Once everything is securely attached, gently bend and spread the pipe-cleaner legs until the spider stands evenly. Adjust the legs so the body sits comfortably on the table.
7. Create a whole spider army
Repeat the process with additional egg-carton cups to make several spiders. Experiment with different numbers and sizes of googly eyes to make every spider look slightly different.
Tip
For a cleaner finish, paint the carton cups before adding the legs and eyes, and allow the paint to dry completely. For extra personality, use colorful googly eyes or add tiny paper fangs.
Display Idea
Scatter the finished spiders across an orange, purple, or black tablecloth for a simple Halloween decoration. Grouping spiders of different sizes and expressions creates a fun creepy-crawly effect without making the table look too scary.
9. Witch Hat Headbands
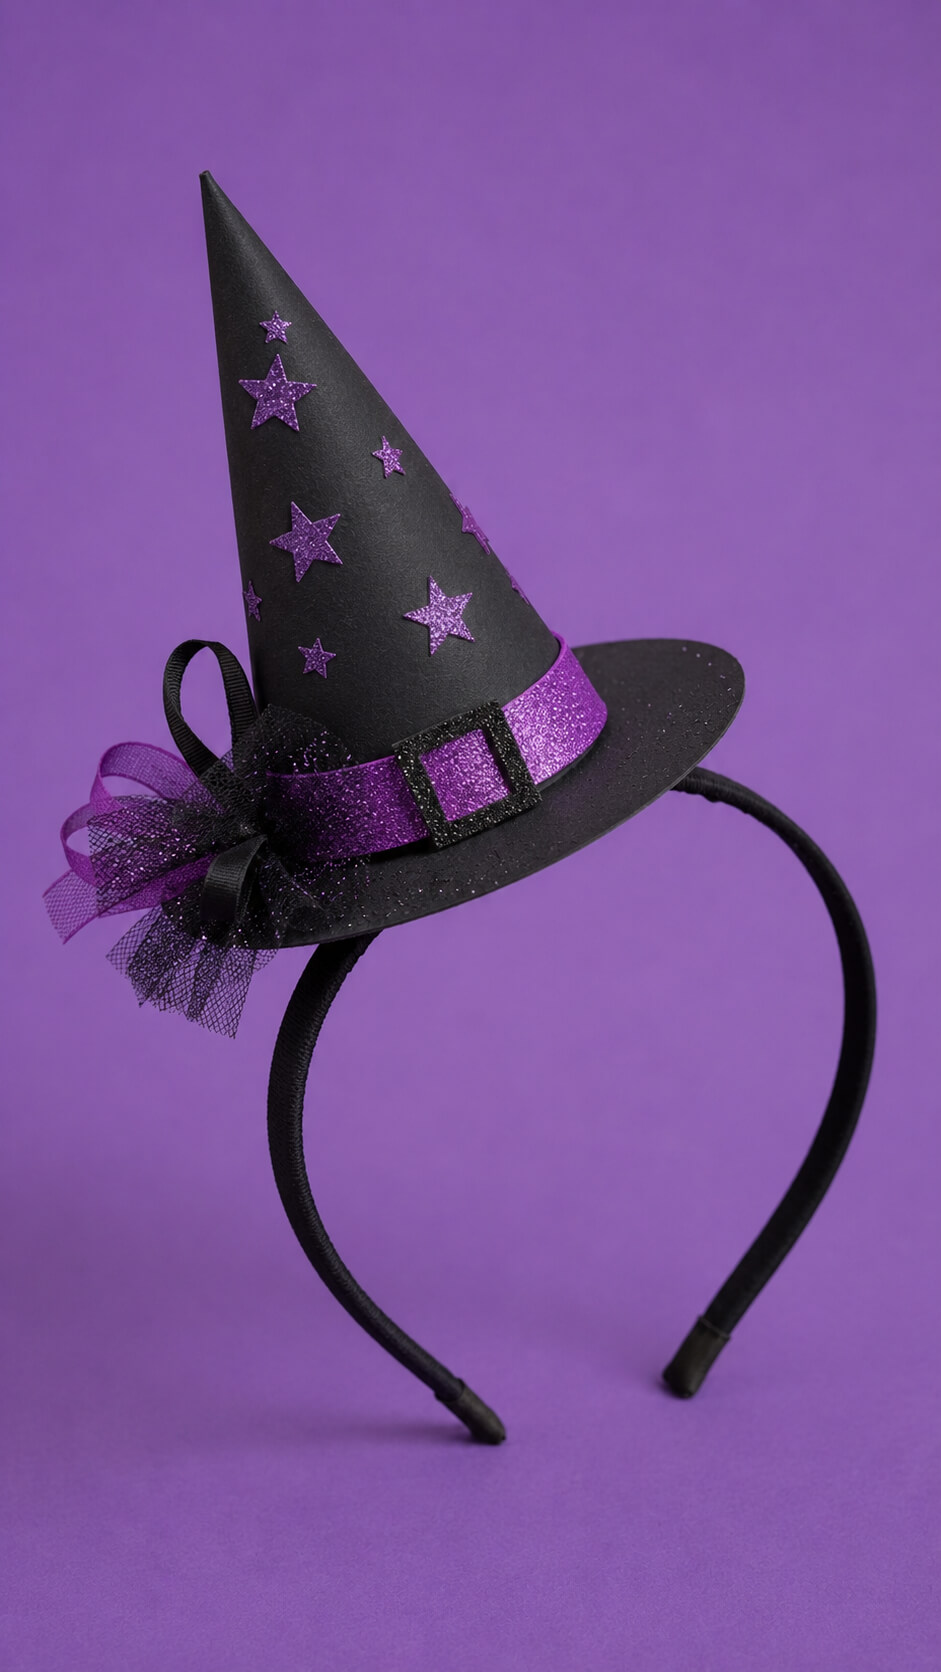
Kids love dressing up, even if it’s just a little touch.
Cut black cardstock into cones, decorate with glitter and ribbon, then glue onto headbands.
Mini witch hats are born!
They’re light, comfy, and give instant costume vibes without the fuss of a full outfit. Witchy magic, simplified.
Materials
- Black cardstock
- Black headbands
- Purple or orange ribbon
- Glitter or glitter cardstock
- Scissors
- Craft glue or hot glue
- Pencil
- Ruler
- Optional: craft foam, sequins, stickers, or small bows
Instructions
1. Cut the cardstock into a cone shape
Draw a large curved wedge on black cardstock and cut it out carefully. The wider edge will become the bottom of the witch hat, while the pointed end forms the top.
2. Roll the cardstock into a hat cone
Bring the straight edges of the cardstock together and overlap them slightly to create a cone. Adjust the opening until it is wide enough to sit comfortably above the headband.
3. Secure the cone with glue
Apply craft glue along the overlapping edge and hold the cardstock in place until it is secure. Allow the glue to dry before decorating the hat.
4. Create a circular hat brim
Trace a circle on black cardstock that is larger than the bottom of the cone. Cut out the circle, then make a small opening in the center where the cone can be attached.
5. Attach the cone to the brim
Place the bottom of the cone through the center opening and glue it firmly to the brim. Press around the base so the cone stays upright while the glue sets.
6. Decorate the witch hat
Wrap colorful ribbon around the base of the cone and secure it with glue. Add glittery stars, small bows, sequins, or other Halloween decorations to give the hat a magical finish.
7. Attach the hat to the headband
Position the finished hat slightly to one side of the headband and attach it securely with craft glue or hot glue. Hold it in place until the adhesive has completely set.
8. Let the headband dry completely
Leave the finished headband undisturbed until all glue and decorations are fully secure. Gently check the hat and ribbon before wearing it.
Tip
Use lightweight cardstock and keep the decorations small so the mini hat stays comfortable and balanced on the headband.
Creative Ideas
Make several versions using different ribbon colors, glitter shapes, and decorations. Purple, orange, silver, and green accents can give each witch hat its own Halloween personality.
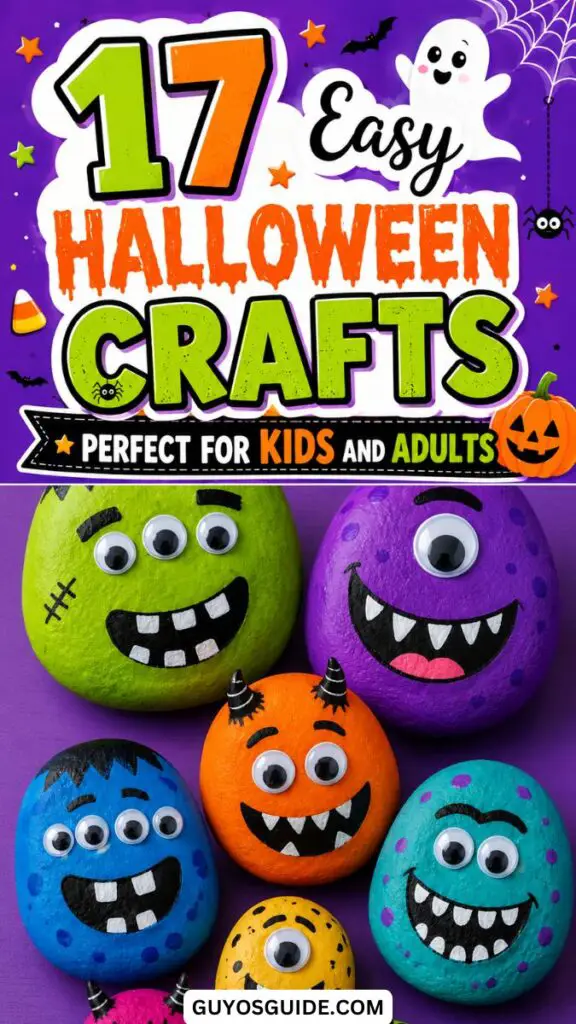
10. Painted Rock Monsters
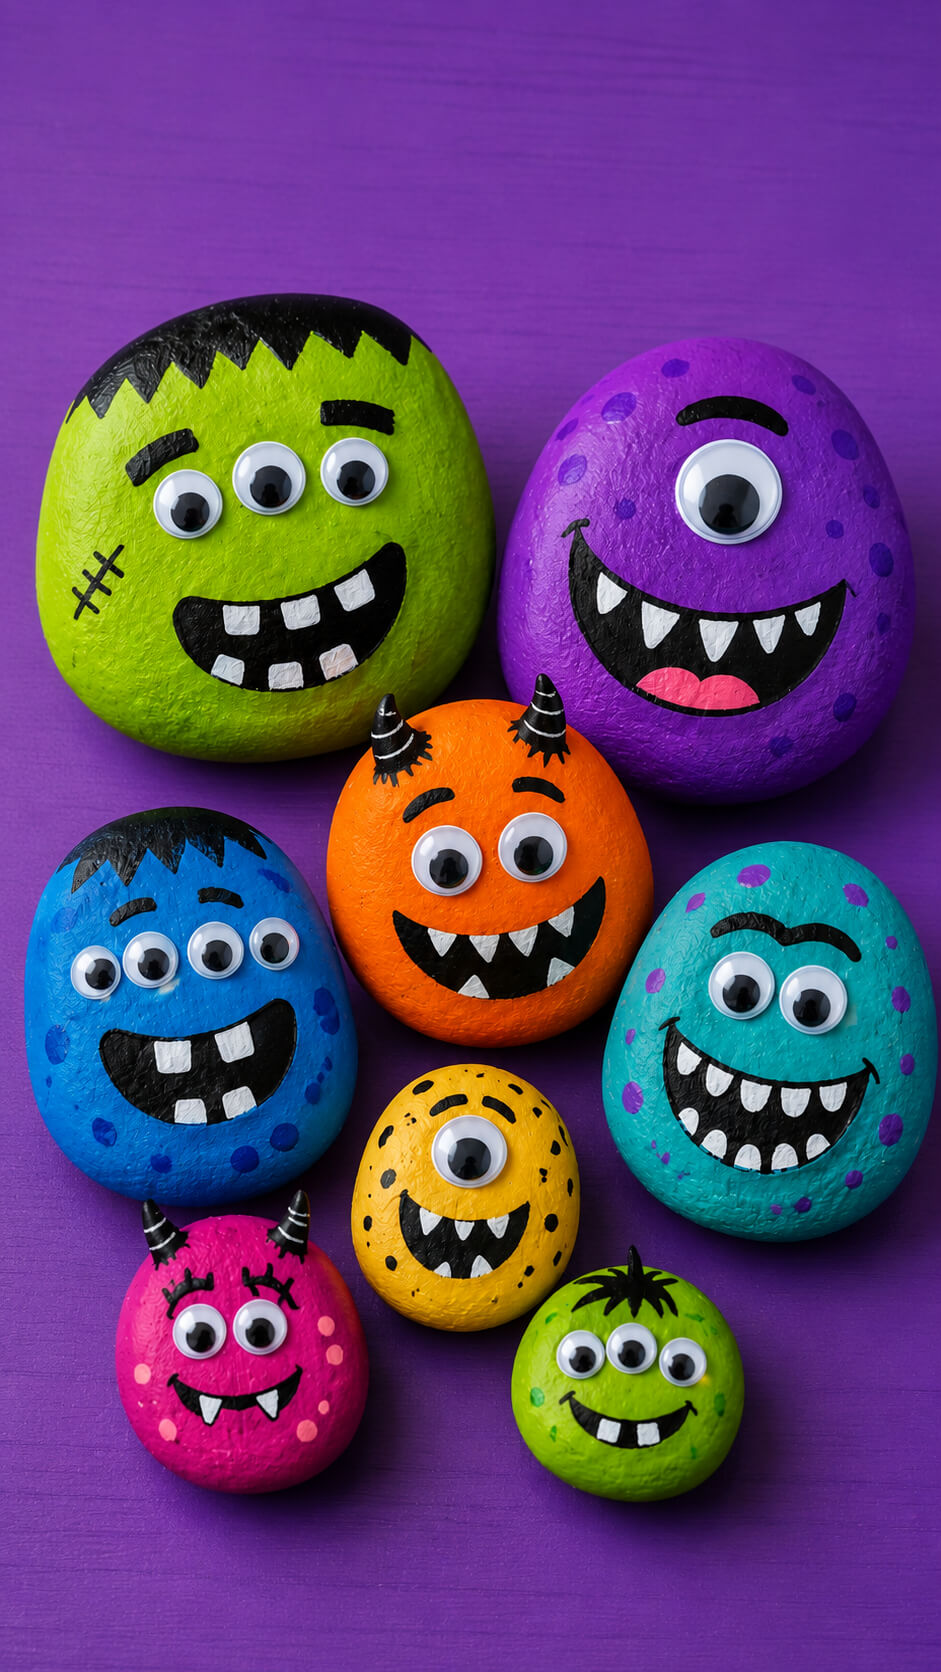
Take a walk, gather some smooth rocks, and let the kids paint them into silly little monsters.
Bright colors, big eyes, jagged teeth—anything goes!
These monsters are tough enough for outdoor display and cute enough to sit on a shelf.
Plus, they make fun little “pets” for kids.
Materials
- Smooth rocks or pebbles in different sizes
- Acrylic paint in bright colors
- Black and white acrylic paint
- Paintbrushes in several sizes
- Googly eyes
- Permanent black marker or fine paint pen
- Craft glue
- Clear acrylic sealer
- Water and a small container
- Paper towels
Instructions
1. Choose and clean the rocks
Select smooth rocks ranging from small pebble-sized pieces to larger palm-sized stones. Wash them with soap and water to remove dirt and dust, then allow them to dry completely before painting.
2. Paint each rock a bright color
Cover each rock with a bold base color such as purple, orange, green, blue, pink, yellow, or turquoise. Apply a second coat after the first coat dries to create a bright, even finish.
3. Add the monster eyes
Glue one, two, three, or even four googly eyes onto each rock. Vary their size and placement to give every monster its own funny personality.
4. Paint wide monster grins
Use black paint to create a large curved mouth on each rock. Make some smiles wide and goofy while giving others smaller or crooked grins.
5. Add jagged monster teeth
Paint small white triangles inside each black mouth to create sharp, uneven teeth. Arrange the teeth differently on every monster for a playful handmade appearance.
6. Create quirky eyebrows and expressions
Use black paint or a fine paint pen to add thick eyebrows above the eyes. Angle the eyebrows upward, downward, or unevenly to make the monsters look surprised, mischievous, silly, or grumpy.
7. Decorate the monster bodies
Add colorful spots, stripes, scars, hair, horns, freckles, or other simple details. Mix different patterns and decorations so no two monster rocks look exactly alike.
8. Let the painted rocks dry
Place the finished rocks on a clean surface and allow the paint and glue to dry completely. Avoid moving the rocks while the details are still wet.
9. Protect the finished designs
Apply a clear acrylic sealer once everything is completely dry. This gives the painted rocks a smoother finish and helps protect the colorful artwork from scratches and moisture.
10. Arrange the monster rock group
Arrange the rocks together on a colorful table, keeping every monster clearly visible. Place larger rocks toward the back and smaller ones toward the front to create an attractive group display.
Tip
Use different numbers and sizes of googly eyes on each rock. The mismatched expressions make the Halloween monsters look more amusing and unique.
11. Q-Tip Skeletons
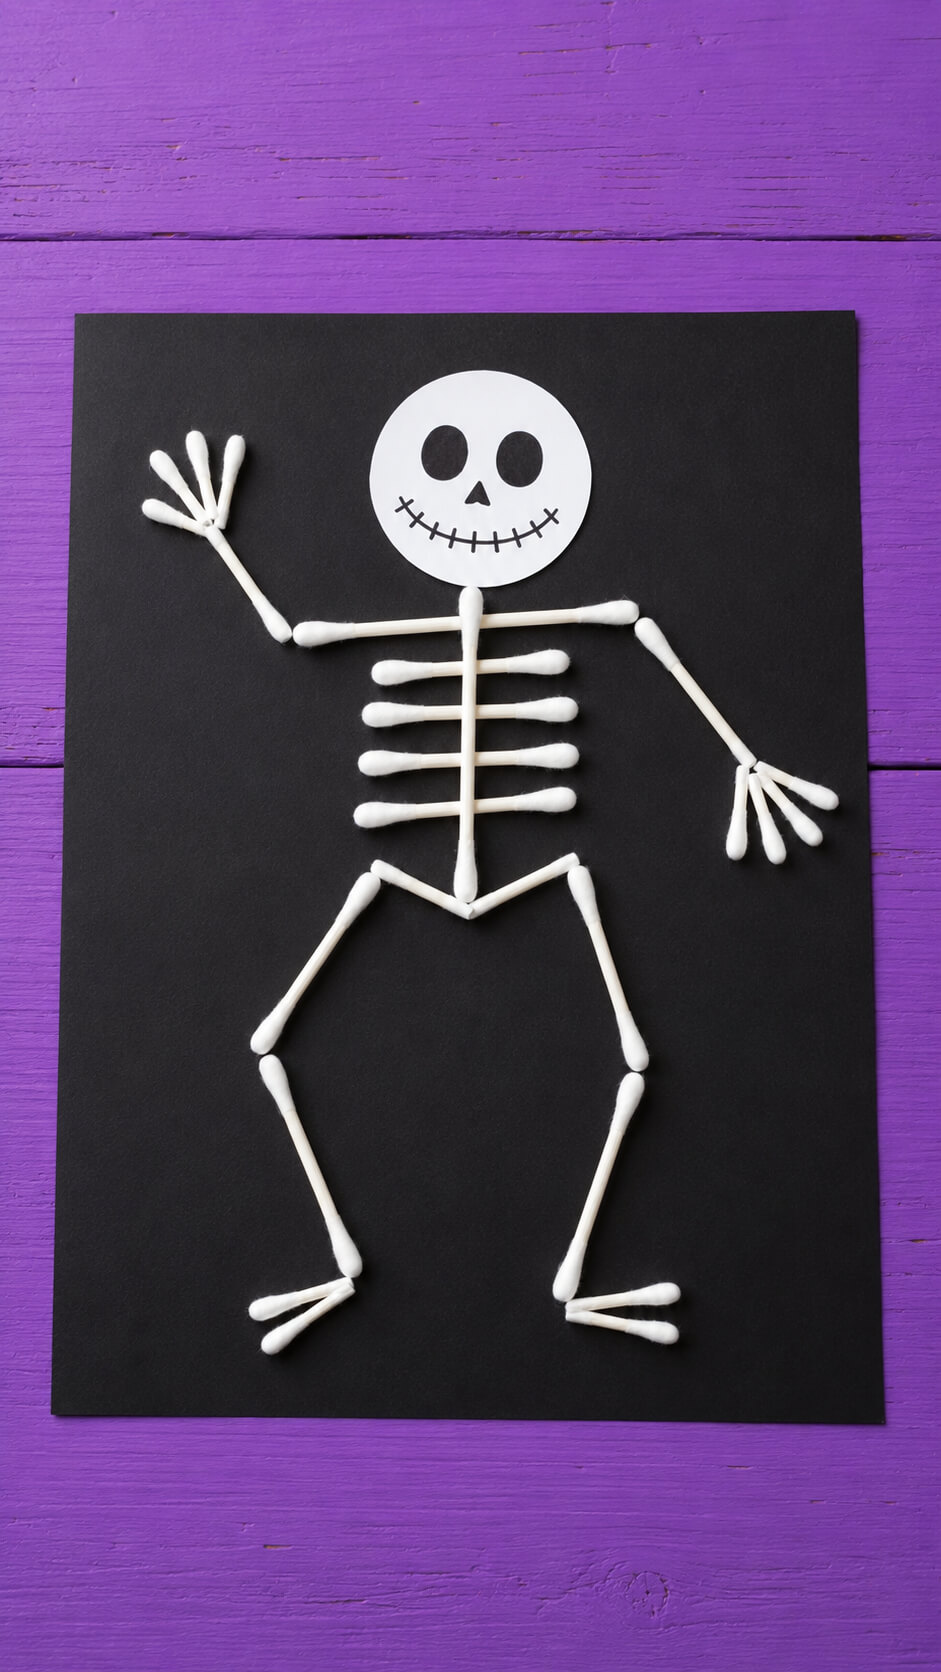
Here’s a skeleton that won’t rattle your nerves.
On black paper, glue Q-tips into a skeleton shape—long bones, arms, legs.
Cut a paper circle for the head, and add a smile or spooky grin.
Kids love arranging the bones however they want—most skeletons end up dancing instead of haunting!
Materials
- Black construction paper
- White Q-tips or cotton swabs
- White paper
- Scissors
- Craft glue
- Black marker
- Pencil
- Optional: googly eyes
Instructions
1. Cut out the skeleton’s head
Trace a small circle onto white paper and cut it out. Draw two dark eye sockets, a small nose, and a wide spooky grin to create the skeleton’s face.
2. Create the skeleton’s spine
Place several Q-tips vertically down the center of the black paper. Glue them in place with small spaces between them to form the skeleton’s backbone.
3. Build the rib cage
Cut or break Q-tips into shorter pieces and arrange them horizontally across the spine. Use several pieces on each side to create a simple rib cage, then glue them down.
4. Add the skeleton’s arms
Arrange Q-tips on both sides of the shoulders to create upper and lower arms. Bend the arms into different positions so the skeleton looks like it is waving or dancing.
5. Make the skeleton’s hands
Use several short Q-tip pieces at the ends of the arms to create finger shapes. Spread them apart slightly for playful, spooky-looking hands.
6. Add the skeleton’s legs
Place Q-tips below the spine to form the hip and upper legs. Add more Q-tips for the lower legs, angling them outward to give your skeleton a fun dancing pose.
7. Create the skeleton’s feet
Arrange two or three short Q-tip pieces at the bottom of each leg to make simple feet. Point the feet in different directions for an extra silly appearance.
8. Attach the skeleton’s head
Glue the paper head above the spine, making sure it overlaps the top bone slightly. Press it gently against the paper so it stays securely attached.
9. Add the finishing details
Use a black marker to add extra lines, cracks, or details to the skull. You can also add googly eyes for a friendlier Halloween character.
10. Let the skeleton dry completely
Leave the finished skeleton flat until all the glue has dried. Once dry, display it as a Halloween decoration or use it as a fun children’s craft project.
Tip
Let kids choose the skeleton’s pose before gluing anything down. Dancing, waving, jumping, and silly poses make this craft much more entertaining.
12. Candy Corn Garland
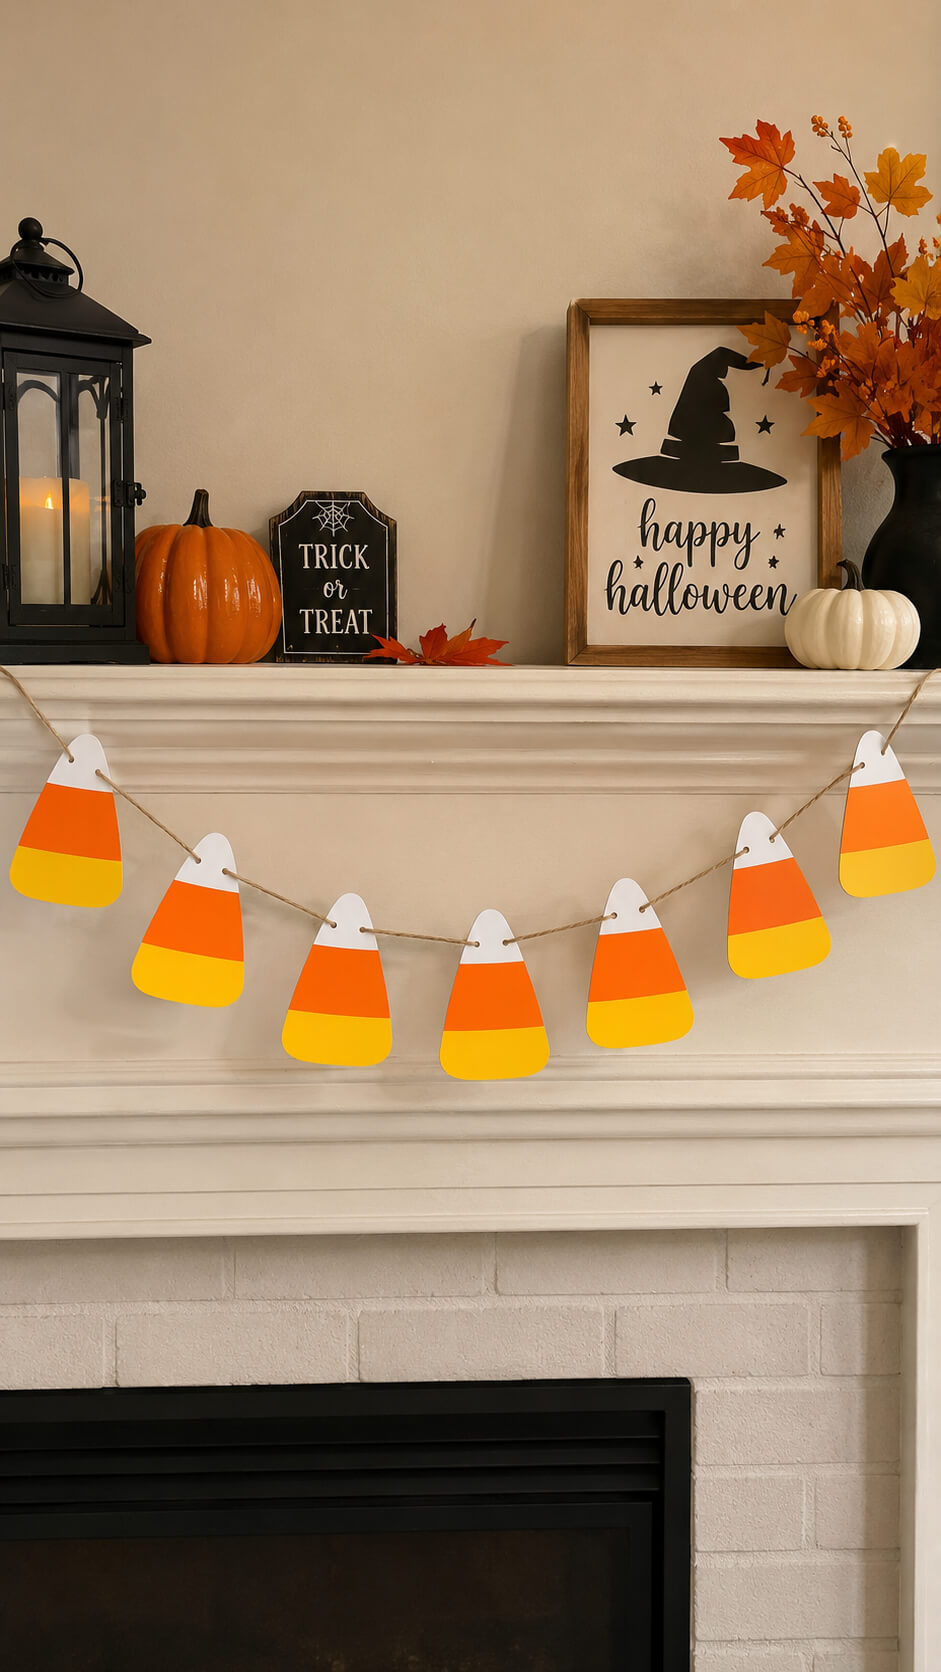
Even if you’re not a candy corn fan, this craft will sweeten your décor.
Cut paper triangles, color them yellow, orange, and white, then string them together.
Hang across the mantel or doorway. Bright, cheerful, and calorie-free—finally a candy corn everyone agrees on!
Materials
- White or cream cardstock
- Yellow acrylic or craft paint
- Orange acrylic or craft paint
- Paintbrushes
- Pencil
- Scissors
- Hole punch
- Thin twine or natural jute cord
- Ruler
- Newspaper or scrap paper for protecting your workspace
Instructions
1. Draw the candy corn shapes
Use a pencil to draw several candy-corn shapes on cardstock. Make them roughly the same size, with a rounded bottom and slightly curved sides.
2. Cut out each candy corn
Carefully cut along the pencil outlines with scissors. Prepare enough pieces to span the length of your mantel, leaving a little space between each one.
3. Divide each piece into three sections
Lightly mark horizontal lines across each candy corn to create three sections. Keep the sections neat and evenly proportioned for a polished finished look.
4. Paint the bottom section yellow
Paint the widest bottom section of every candy corn bright yellow. Apply an even coat and allow it to dry completely before adding the next color.
5. Paint the middle section orange
Paint the middle section orange, keeping the edge between the orange and yellow areas as straight as possible. Let the paint dry thoroughly.
6. Leave the tips white
Keep the narrow top section of each candy corn white. If your cardstock is already white, simply leave this area unpainted.
7. Punch holes near the tops
Use a hole punch to make one small hole near the upper edge of each candy corn. Position the holes consistently so the pieces hang evenly.
8. Thread the candy corns onto twine
Cut a length of thin twine slightly longer than your mantel. Thread it through the holes, spacing the candy corns evenly along the cord.
9. Arrange the garland in a gentle curve
Place the finished garland across the front of the mantel and let the center dip slightly lower than the ends. Adjust the spacing until the chain looks balanced and cheerful.
10. Secure the garland in place
Attach the ends of the twine to the mantel using removable hooks or another suitable method. Make sure the candy corns remain fully visible.
Tip
For a more polished homemade look, use cardstock in different warm shades of white and vary the candy-corn sizes slightly while keeping the three painted stripes consistent.
13. Monster Bookmark Corners
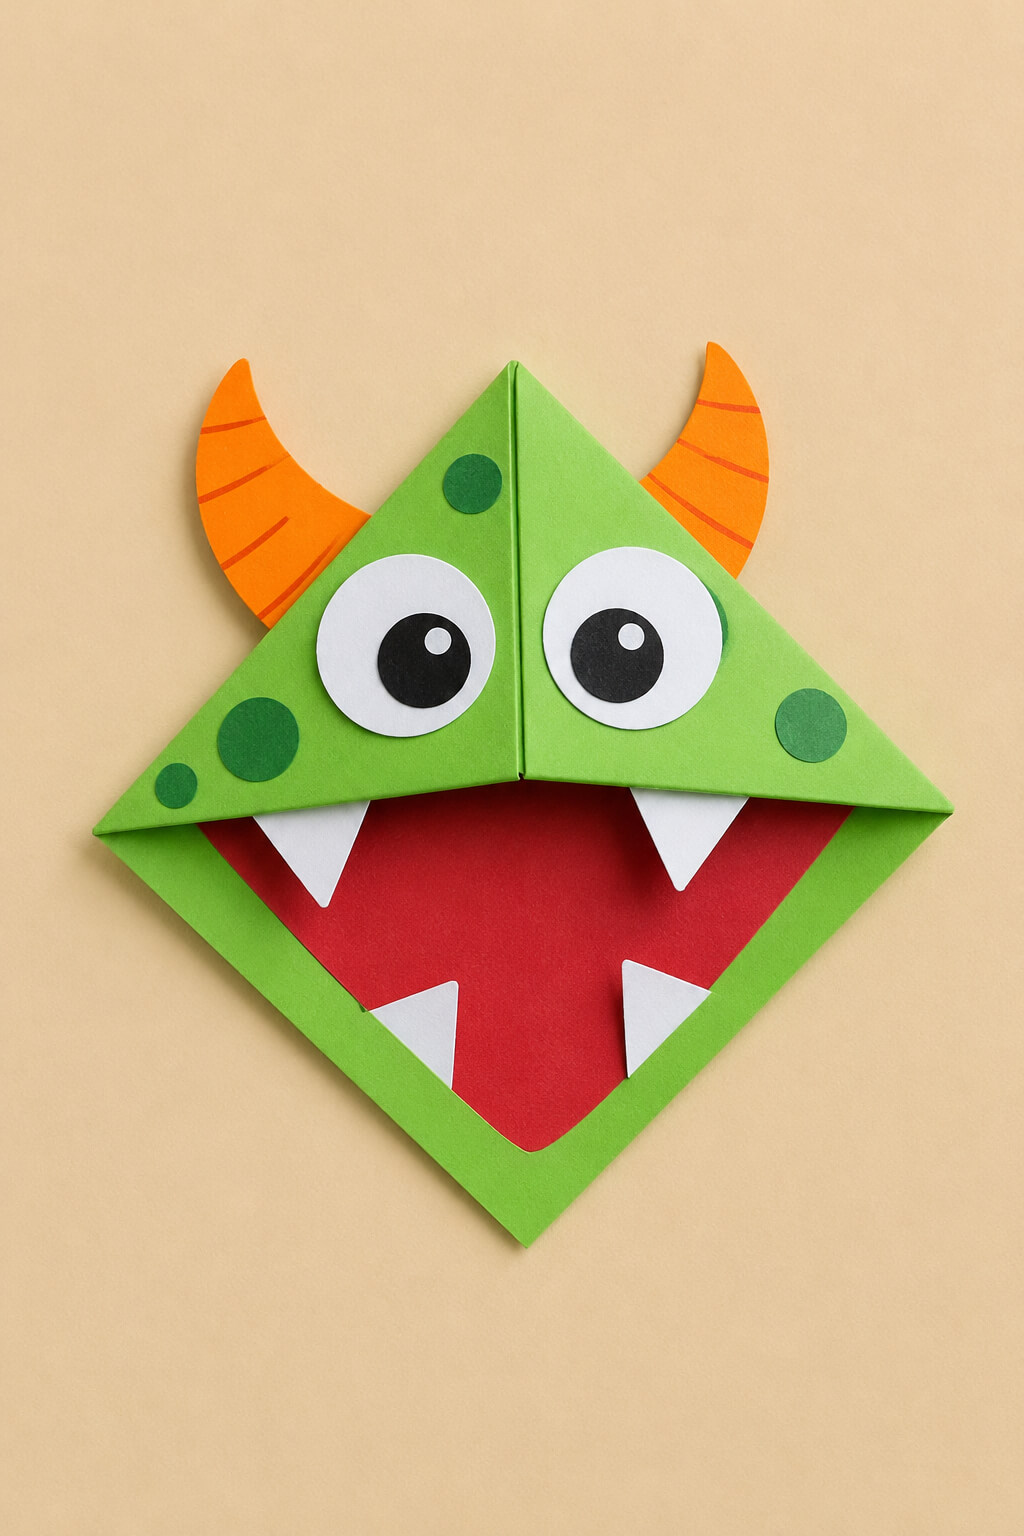
Halloween is the perfect excuse to sneak in some reading fun.
Fold colorful paper into corner bookmarks, then add big eyes, horns, and paper teeth.
Slip one on a page, and suddenly your book looks like it’s being gobbled up by a monster.
Kids love the silliness!
Materials
- Green cardstock or construction paper
- Red paper
- White paper
- Black paper
- Orange paper
- Scissors
- Glue stick
- Pencil
- Ruler
- Black marker
Instructions
1. Cut a square of green paper
Cut a piece of green cardstock into a square, approximately 6 × 6 inches. A larger square makes a more noticeable bookmark, while a smaller one works well for children’s books.
2. Fold the square into a triangle
Fold the square diagonally from one corner to the opposite corner, creating a triangle. Press the fold firmly so the bookmark holds its shape.
3. Fold the side corners upward
With the triangle pointing downward, fold the left and right corners upward toward the top corner. Crease both folds neatly, then unfold them.
4. Fold the top corner downward
Fold the top corner down toward the bottom point of the triangle. This creates the flap that will eventually slide over the corner of a book page.
5. Fold the side corners inward again
Bring the left and right corners back upward and tuck their points underneath the folded top flap. Glue the overlapping areas together to create the corner-bookmark pocket.
6. Add the monster mouth
Cut a large mouth shape from red paper and glue it onto the front of the green bookmark. Position it so the mouth looks wide open and ready to gobble a book page.
7. Add sharp white teeth
Cut several small triangles from white paper. Glue them around the edge of the red mouth, alternating their direction to create playful monster teeth.
8. Create the monster eyes
Cut two large white circles and smaller black circles for the pupils. Glue the black pupils onto the white circles, then attach the finished eyes near the top of the bookmark.
9. Add horns and monster details
Cut two curved horns from orange paper and glue them behind the top corners. Add green paper spots or other small details to give your monster its own personality.
10. Let the bookmark dry completely
Leave the finished monster flat until all the glue has dried. Once dry, slide the bookmark over the corner of a book page so the monster looks like it is biting the page.
Tip
Use different colors, eye sizes, horns, and teeth to create a whole family of silly monsters. For younger children, prepare the paper shapes ahead of time so they can focus on folding and decorating.
14. Pumpkin Seed Art
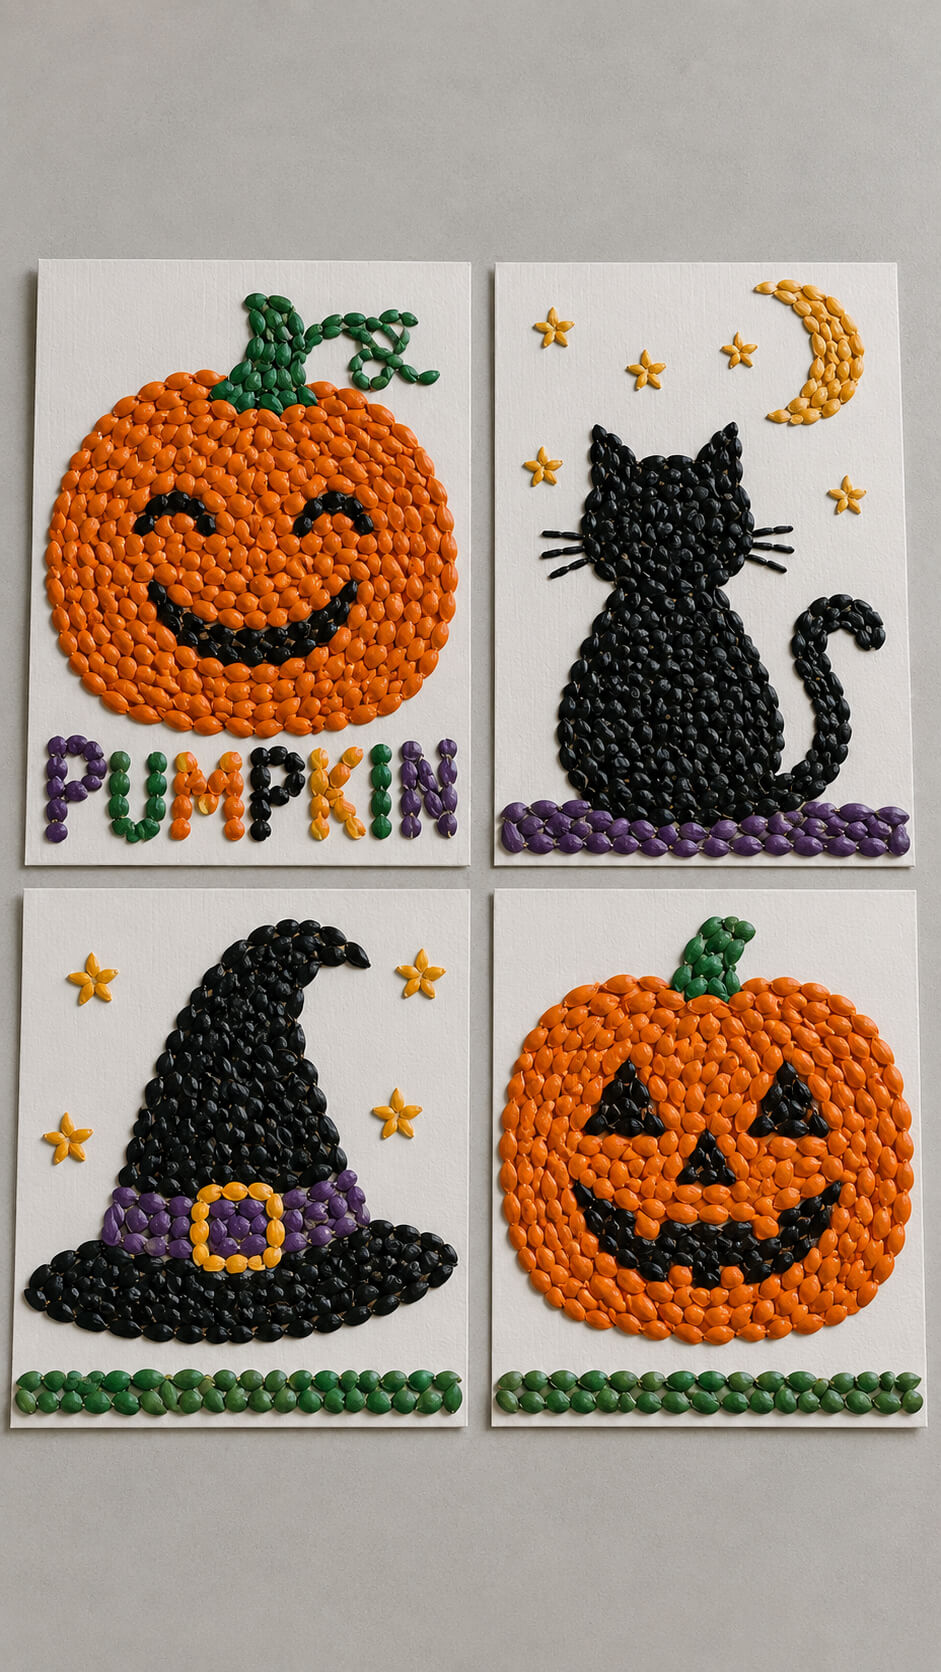
Don’t toss those pumpkin seeds after carving—wash, dry, and paint them instead.
Kids can glue them onto paper to create mosaics: pumpkins, cats, or abstract designs.
It’s a clever way to turn kitchen mess into art. Plus, it teaches kids that crafting and sustainability go hand in hand.
Materials
- White sturdy paper or cardstock
- Clean, dry pumpkin seeds
- Acrylic or poster paints
- Small paintbrushes
- Glue
- Pencil and eraser
- Small bowls or containers
- Black marker or fine-tip pen
- Newspaper or scrap paper for painting
Instructions
1. Paint the pumpkin seeds
Choose vibrant colors such as orange, emerald green, amethyst purple, and jet black. Paint the pumpkin seeds individually, coating them evenly. Allow them to dry completely before arranging your artwork.
2. Sketch your design
Lightly draw your chosen design on sturdy white paper using a pencil. A smiling pumpkin, black cat, witch’s hat, or another simple Halloween shape works especially well.
3. Sort the colored seeds
Separate the completely dry seeds by color and keep each color in its own small container. This makes it easier to create clean patterns and work efficiently.
4. Fill the main shapes
Apply small dots of glue to the sketched areas, then carefully place the painted seeds close together. Arrange them with minimal gaps so the finished artwork has a richly textured mosaic appearance.
5. Create the detailed features
Use black seeds for eyes, smiles, outlines, whiskers, or other details. Place each seed deliberately to keep the shapes recognizable and give the designs a polished handmade appearance.
6. Add contrasting decorative elements
Use purple, green, orange, or black seeds to create borders, stems, stars, leaves, or other small accents. Contrasting colors help individual elements stand out against the white paper.
7. Let the finished mosaic dry
Leave the completed artwork flat and undisturbed until the glue has fully dried. Avoid moving the paper too soon because loose seeds can shift before the adhesive sets.
8. Arrange the crafts for display
Place the finished seed mosaics neatly on a clean light gray table or another simple background. Leave plenty of space around the artwork so the colorful textures remain the main focus.
Tip
For a cleaner mosaic, use tweezers to position individual seeds and keep the spacing consistent.
15. Paper Cup Mummies
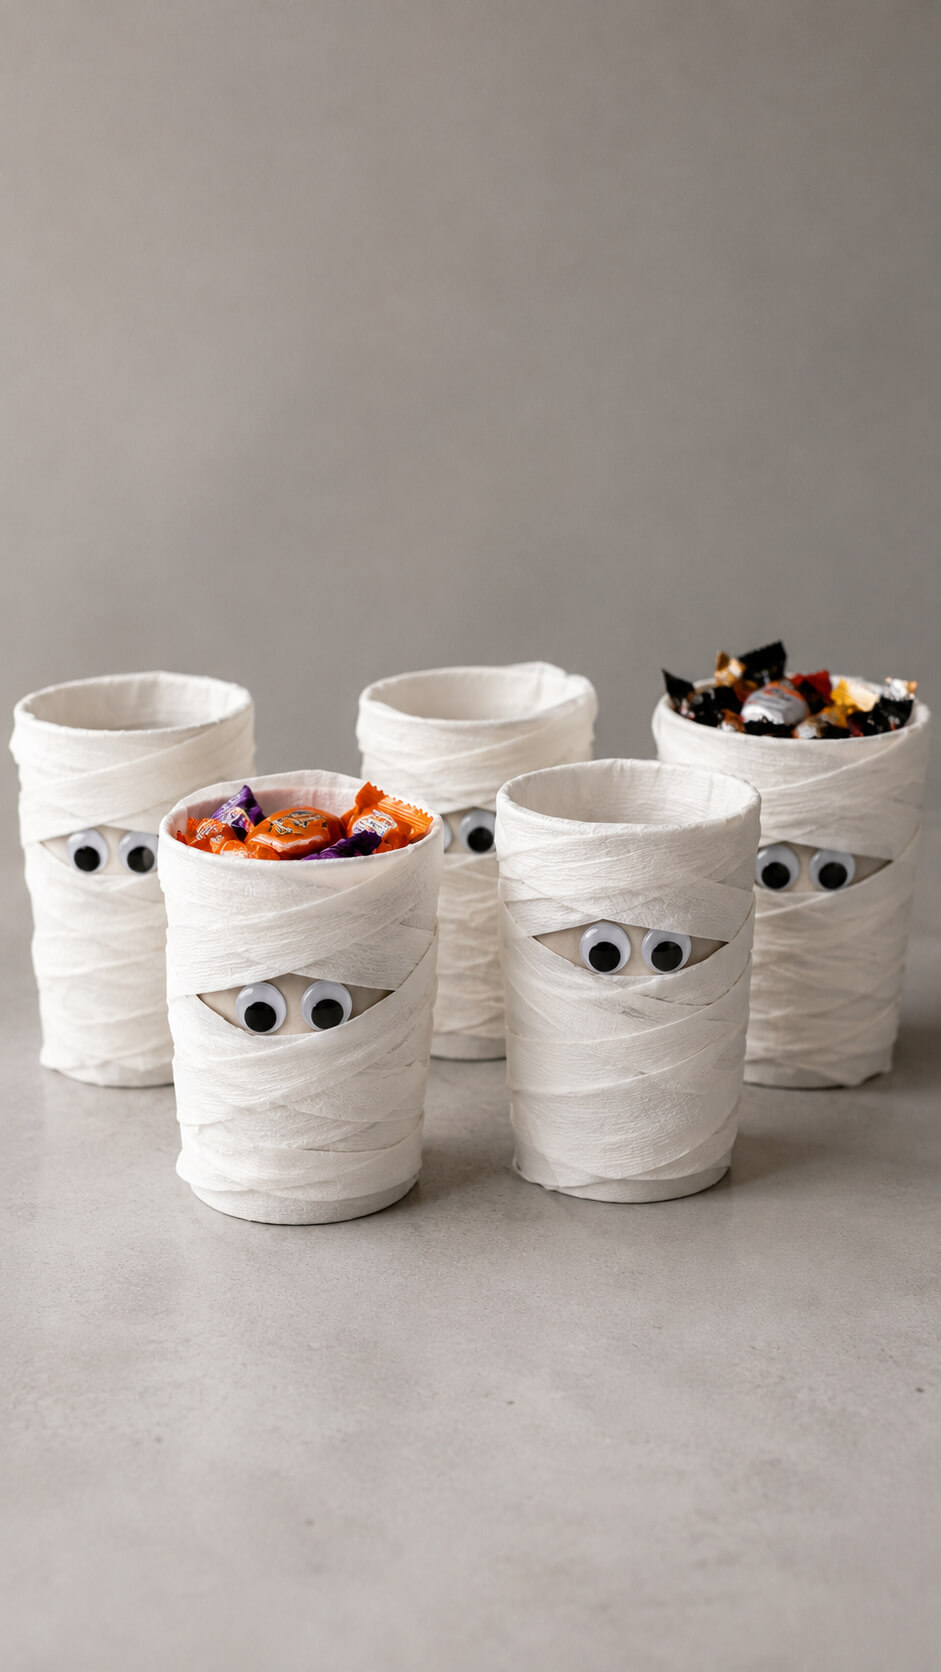
Take a plain paper cup and wrap it in strips of toilet paper or crepe paper.
Leave space for googly eyes to peek out, and you’ve got an instant mummy.
These are perfect for holding treats at a party, or just as goofy decorations on the table.
What You’ll Need
- White paper cups
- White toilet paper or white crepe paper
- Googly eyes
- Glue or double-sided tape
- Halloween candy
Instructions
1. Prepare the paper cups
Start with clean, dry white paper cups. Place them upright on a flat table so they are ready to be wrapped.
2. Cut the wrapping strips
Tear or cut white toilet paper or crepe paper into long, narrow strips. Vary the lengths slightly to create a more natural, layered mummy effect.
3. Wrap the cup with white strips
Beginning near the bottom of the cup, wrap the paper strips around the surface, slightly overlapping each layer. Continue upward while leaving a small opening where the eyes will be visible.
4. Secure the bandage layers
Use small pieces of glue or double-sided tape to secure the ends of the strips neatly against the cup. Smooth down loose edges so the finished mummy looks tidy.
5. Add the googly eyes
Glue two googly eyes into the opening between the paper strips. Position them slightly unevenly for a playful, curious mummy expression.
6. Fill the mummy cups with treats
Once the glue is secure, fill some of the cups with colorful Halloween candy. Leave others empty if you want to use them purely as decorations.
7. Arrange the mummy cups
Place the finished mummy cups together on a plain table. Vary their positions and candy levels to create an attractive Halloween display.
Tip
For a more realistic mummy effect, overlap the strips at slightly different angles while keeping the edges neatly secured.
16. Foam Plate Black Cats
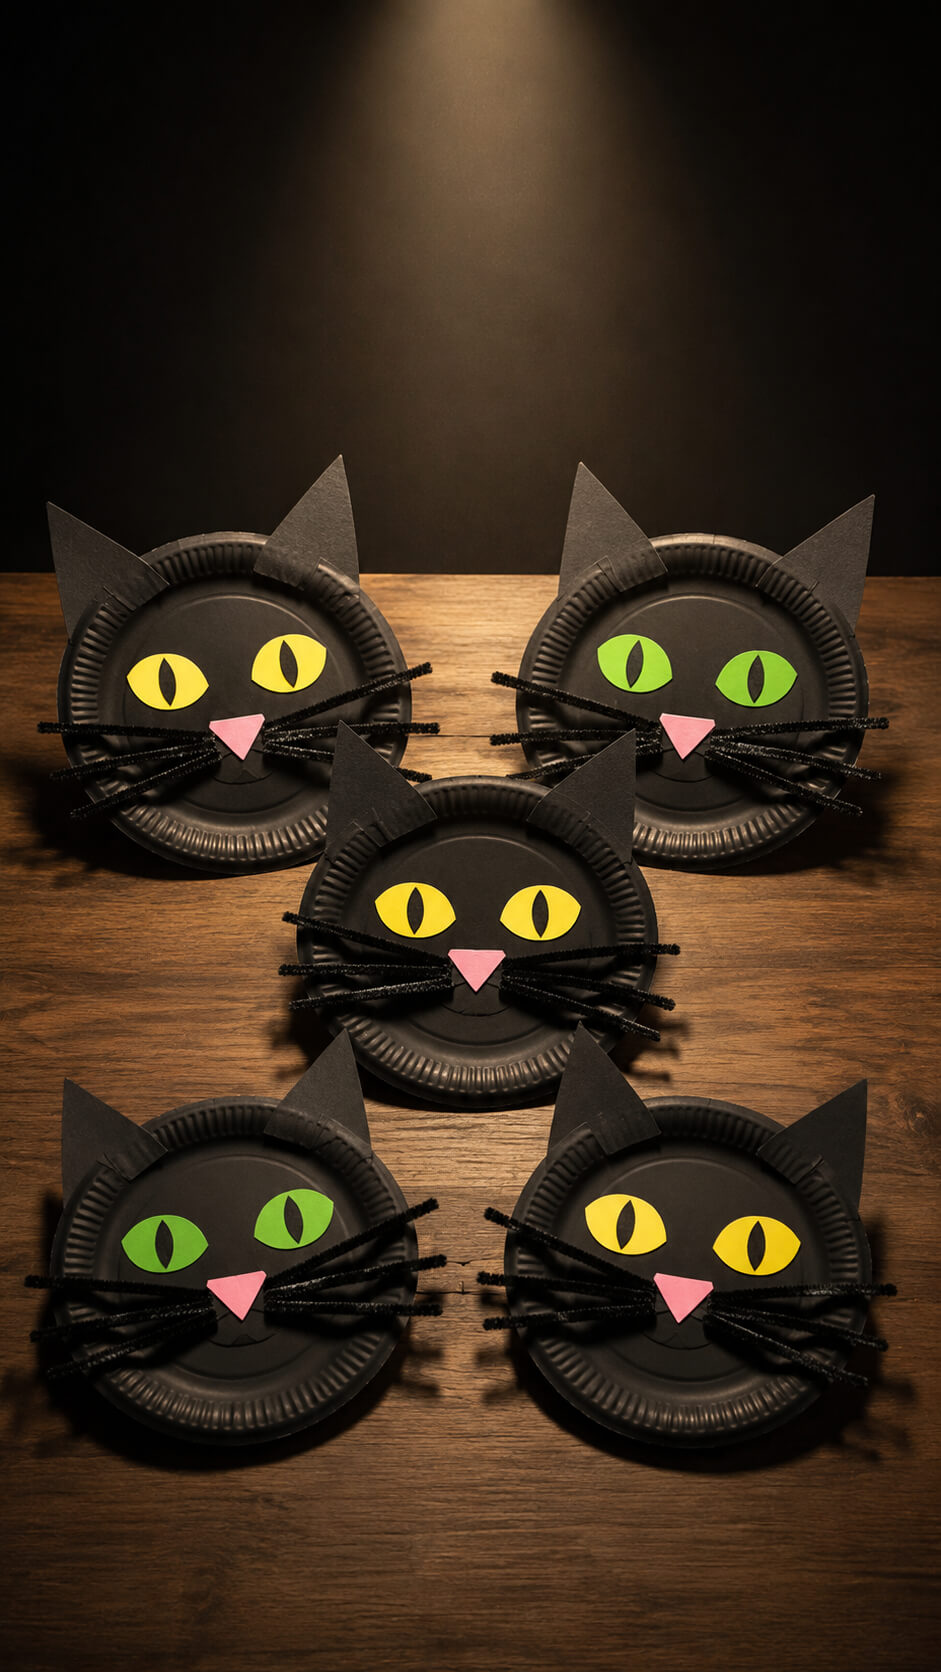
Turn simple foam plates into adorable black cats.
Paint them black, cut out triangle ears, and glue them on top.
Pipe cleaners make the perfect whiskers, while bright paper eyes give them personality.
These cats are more charming than cursed, and kids love giving each one a silly face.
Materials
- Black foam or paper plates
- Black construction paper
- Yellow and green paper
- Pink paper
- Black pipe cleaners
- Scissors
- Glue or double-sided tape
- Black paint, if using plain foam plates
- Wooden table or flat surface for display
Instructions
1. Paint the plates black
Paint each foam plate with an even coat of black paint if the plates are not already black. Allow them to dry completely before adding the decorations.
2. Cut out the cat ears
Cut two triangular ears from black construction paper for each cat. Make the triangles slightly wider at the bottom so they can be attached securely to the back of the plate.
3. Attach the ears
Glue one ear to each upper side of the plate, positioning them at a slight outward angle to create a playful cat silhouette.
4. Create the colorful eyes
Cut pairs of oval or almond-shaped eyes from yellow and green paper. Add smaller black paper pupils and glue the finished eyes near the center of each plate.
5. Add the pink noses
Cut small triangles from pink paper and attach one beneath the eyes on each cat face to create the nose.
6. Make the pipe cleaner whiskers
Cut black pipe cleaners into several shorter pieces. Bend them slightly and glue three or four whiskers to each side of the nose, fanning them outward.
7. Arrange the cat faces
Place the finished cat faces neatly on a plain wooden table. Overlap or stagger them slightly to create a charming handmade Halloween display.
8. Add dramatic lighting
Position a single spotlight above the arrangement so the cats are brightly illuminated while subtle shadows fall across the wooden table and dark background.
Tip
For a more playful Halloween display, alternate yellow and green eyes between the cats and vary the angles of their ears and whiskers.
17. Halloween Slime Jars
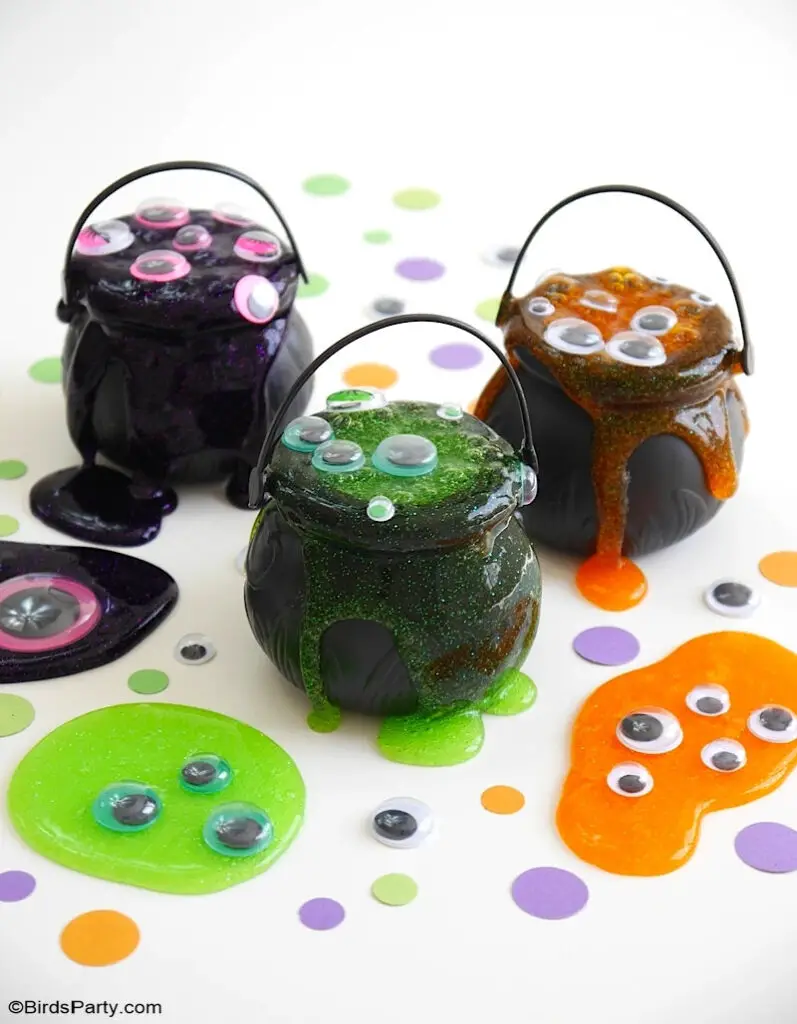
Slime never goes out of style, especially when it’s spooked up for Halloween.
Mix glue, baking soda, and contact solution, then add glitter or tiny toy spiders.
Store in small jars decorated with monster faces or pumpkin stickers.
It’s a craft, a sensory play activity, and a party favor in one!