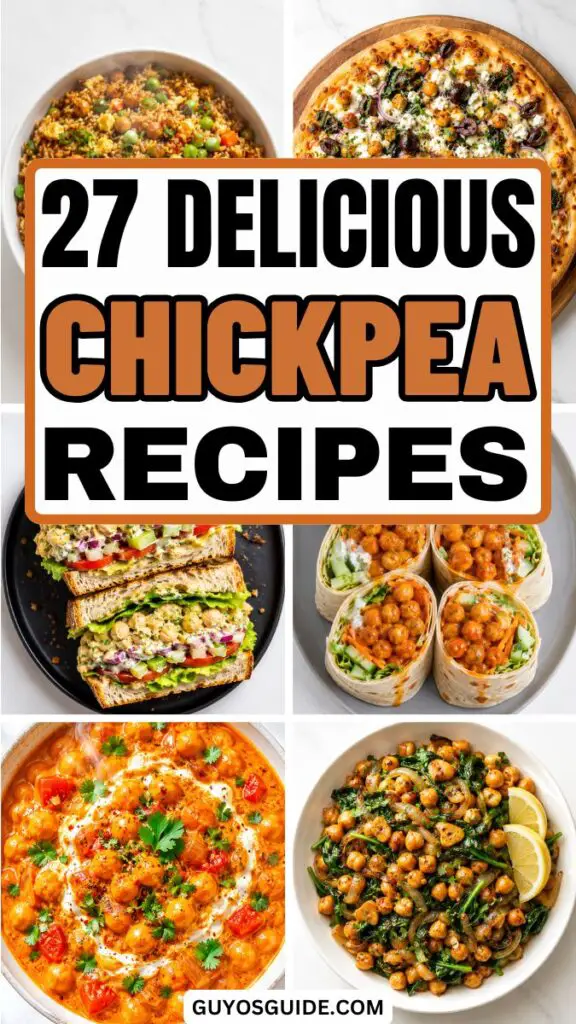
27 Delicious Chickpea Recipes Packed With Flavor

I used to think chickpeas were plain, boring, and only good for salad bars.
Most of the time, they just sat in my pantry while I reached for pasta or rice instead.
But after trying a few simple recipes, I realized chickpeas can be crispy, creamy, spicy, and seriously filling.
Now they’ve become one of my favorite easy ingredients for quick lunches, snacks, and dinners.
These chickpea recipes aren’t just tasty! They’re also budget-friendly and super easy to make.
So let’s check out some delicious ways to turn a simple can of chickpeas into something amazing:
1. Crispy Roasted Chickpeas
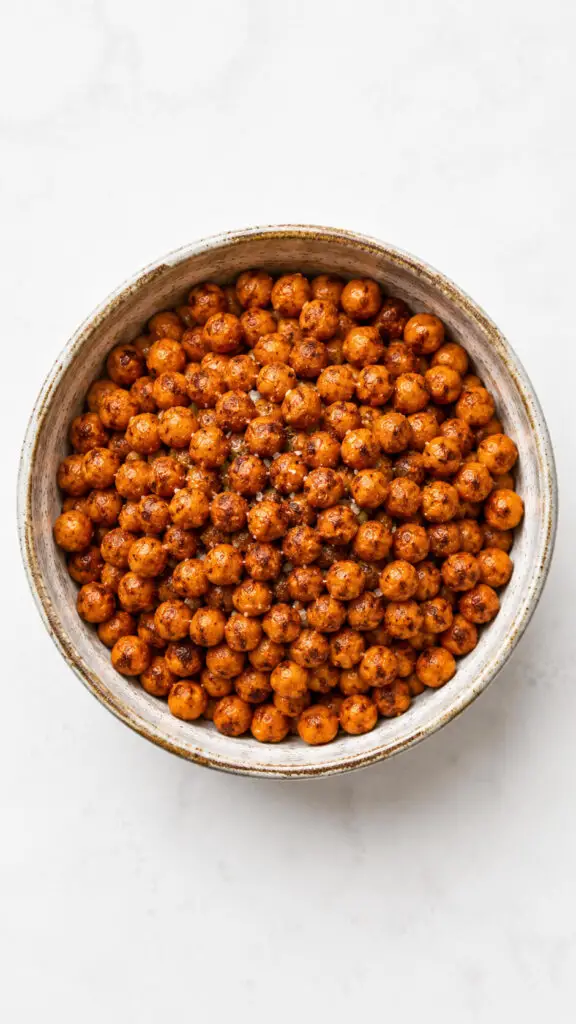
There’s something dangerously snackable about crispy roasted chickpeas.
Toss them with olive oil, smoked paprika, garlic powder, and a pinch of sea salt, then roast until crunchy and golden.
I used to serve these in little paper cones at food events, and guests hovered around them like seagulls at the beach.
They’re perfect for movie nights, lunchboxes, or nibbling while pretending to cook dinner.
Bonus: your kitchen smells absolutely incredible while they roast.
Ingredients
- 2 cups cooked chickpea, drained and rinsed
- 1 tablespoon olive oil
- 1 teaspoon smoked paprika
- 1 teaspoon garlic powder
- ½ teaspoon onion powder
- ½ teaspoon sea salt
- ¼ teaspoon black pepper
- Optional: pinch of cayenne pepper for heat
Instructions
- Dry the chickpea thoroughly
Pat the chickpea completely dry using paper towels or a clean kitchen towel. Removing excess moisture is the secret to getting that irresistible crunchy texture instead of soft chickpea. - Preheat the oven
Set your oven to 425°F (220°C) and allow it to fully heat before roasting. A properly hot oven helps the chickpea crisp up beautifully and develop deep golden color. - Season the chickpea
Place the chickpea in a large bowl and toss with olive oil, smoked paprika, garlic powder, onion powder, sea salt, black pepper, and cayenne if using. Make sure every chickpea is evenly coated with seasoning. - Spread the chickpea evenly
Arrange the seasoned chickpea in a single layer on a baking sheet lined with parchment paper. Giving them space helps them roast instead of steam. - Roast until crispy
Bake the chickpea for 30 to 40 minutes, shaking the pan halfway through cooking. They should become deep golden brown and crunchy on the outside. - Cool before serving
Allow the roasted chickpea to cool for about 10 minutes after removing them from the oven. They continue to crisp up as they cool.
Tip
For extra crispy chickpea, remove any loose skins before roasting and avoid overcrowding the baking tray. A little patience gives you maximum crunch.
2. Creamy Chickpea Curry
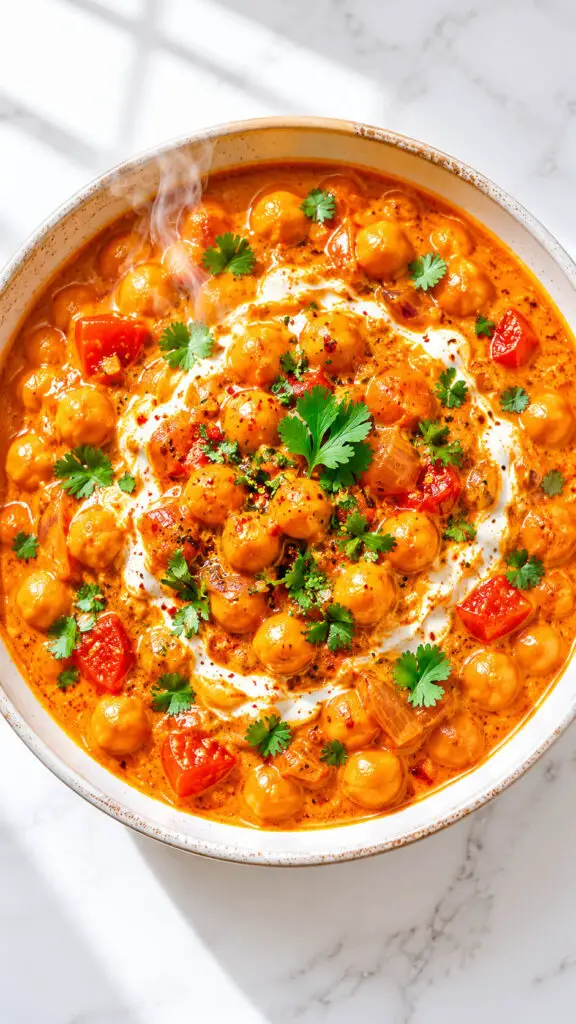
A warm bowl of chickpea curry feels like the culinary equivalent of a cozy blanket.
Simmer chickpeas with onions, garlic, ginger, coconut milk, tomatoes, and fragrant spices until everything becomes rich and velvety.
This recipe is especially wonderful on hectic evenings because it tastes like you spent hours cooking, even if dinner came together in under forty minutes.
Serve it over fluffy rice with warm naan, and suddenly everyone at the table becomes suspiciously quiet.
Ingredients
- 2 cups cooked chickpea, drained and rinsed
- 1 tablespoon olive oil
- 1 small onion, finely diced
- 3 garlic cloves, minced
- 1 tablespoon fresh ginger, grated
- 1 tablespoon curry powder
- 1 teaspoon ground cumin
- ½ teaspoon turmeric
- ¼ teaspoon chili flakes (optional)
- 1 can diced tomatoes
- 1 can coconut milk
- 1 cup vegetable broth
- Salt and black pepper to taste
- Fresh cilantro for garnish
- Cooked rice or naan for serving
Instructions
- Sauté the onions until soft
Heat olive oil in a large skillet or pot over medium heat. Add the diced onion and cook for about 5 minutes until soft, translucent, and lightly golden. - Add the garlic and ginger
Stir in the minced garlic and grated ginger, cooking for about 1 minute until fragrant. This builds the rich flavor base for the curry. - Toast the spices
Add curry powder, cumin, turmeric, and chili flakes to the pan. Stir constantly for 30 seconds so the spices become aromatic and release their full flavor. - Pour in the tomatoes and coconut milk
Add the diced tomatoes, coconut milk, and vegetable broth. Stir everything together until the sauce becomes smooth and evenly combined. - Simmer the chickpea in the sauce
Add the chickpea to the curry mixture and let everything simmer gently for 15 to 20 minutes. The sauce will thicken slightly while the chickpea absorb the warm spices. - Season and garnish the curry
Taste the curry and add salt and black pepper as needed. Sprinkle fresh cilantro over the top before serving with warm rice or naan bread.
Tip
For even deeper flavor, make the curry a few hours ahead of time. The spices intensify beautifully as the curry sits, making leftovers taste even better the next day.
3. Chickpea Salad Sandwiches
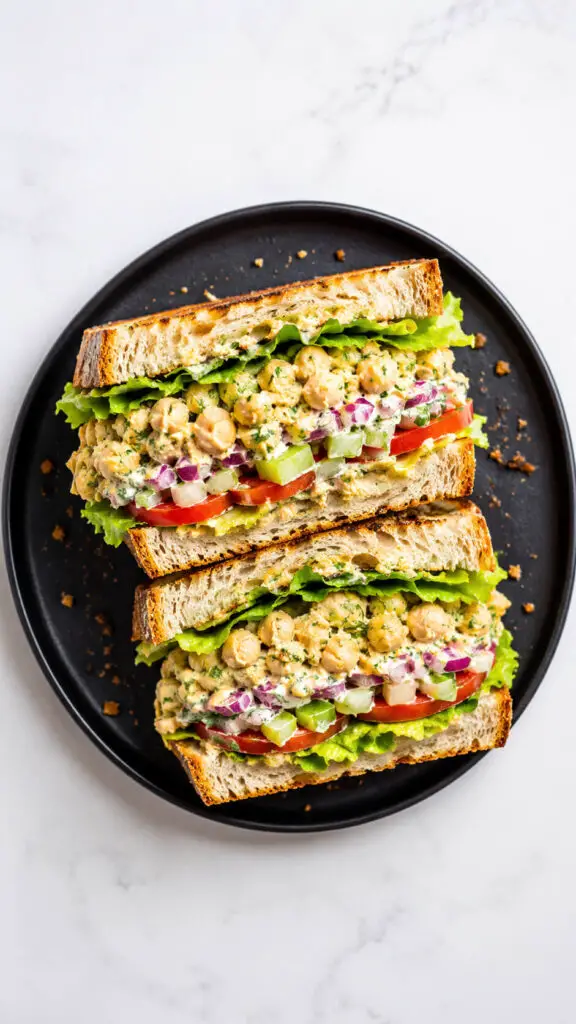
Think of this as the plant-based cousin of classic chicken salad.
Mashed chickpeas mixed with celery, red onion, dill, mayo, and a squeeze of lemon create a creamy filling with satisfying texture.
Pile it onto toasted bread with lettuce and juicy tomatoes for a lunch that feels hearty without being heavy.
I’ve packed these for road trips, picnics, and busy catering days because they hold up beautifully and taste even better after chilling.
Ingredients
- 2 cups cooked chickpea, drained and rinsed
- ¼ cup mayonnaise
- 1 teaspoon Dijon mustard
- 1 tablespoon lemon juice
- 2 celery stalks, finely chopped
- ¼ cup red onion, finely diced
- 1 tablespoon fresh dill, chopped
- ½ teaspoon garlic powder
- Salt and black pepper to taste
- Bread slices, toasted
- Lettuce leaves
- Tomato slices
Instructions
- Mash the chickpea
Place the chickpea in a large mixing bowl and mash them with a fork or potato masher until mostly broken down but still slightly chunky for texture. - Prepare the creamy dressing
Add mayonnaise, Dijon mustard, lemon juice, garlic powder, salt, and black pepper to the mashed chickpea. Stir until everything becomes creamy and evenly combined. - Mix in the vegetables and herbs
Fold in the chopped celery, diced red onion, and fresh dill. These ingredients add crunch, freshness, and a bright flavor that balances the creamy filling beautifully. - Toast the bread
Lightly toast the bread slices until golden brown. Toasted bread helps hold the chickpea salad filling without becoming soggy. - Assemble the sandwiches
Spread a generous amount of chickpea salad onto one slice of bread, then top with lettuce and tomato slices before adding the second slice of bread. - Serve immediately
Cut the sandwiches in half and serve fresh while the bread is still crisp and the filling is cool and flavorful.
Tip
For even better flavor, chill the chickpea salad mixture in the refrigerator for 20 minutes before assembling the sandwiches. The flavors blend together beautifully as it rests.
4. Hummus with Roasted Garlic
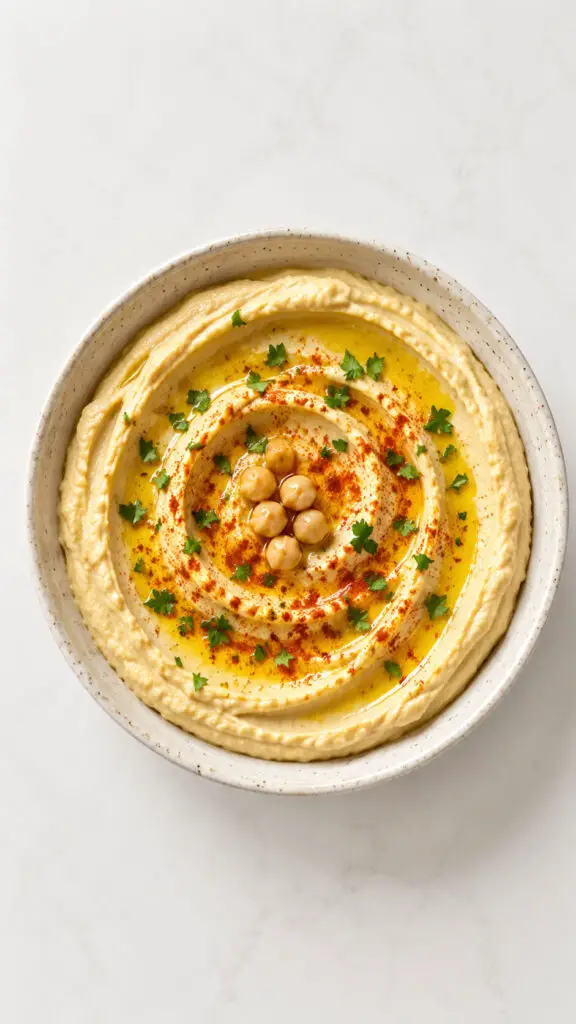
Homemade hummus has ruined store-bought versions for me forever.
Blend chickpeas with tahini, roasted garlic, olive oil, lemon juice, and a splash of cold water for extra silkiness.
The roasted garlic adds sweetness and depth that makes people keep asking, “What’s in this?”
Serve it with warm pita, crunchy vegetables, or spread generously inside wraps.
At family gatherings, I always make extra because someone inevitably scrapes the bowl cleaner than a dishwasher could.
Ingredients
- 2 cups cooked chickpea, drained and rinsed
- 1 whole garlic bulb
- 3 tablespoons tahini
- 3 tablespoons olive oil, plus extra for drizzling
- 2 tablespoons fresh lemon juice
- ½ teaspoon sea salt
- ¼ teaspoon ground cumin
- 3 to 5 tablespoons cold water
- Smoked paprika for garnish
- Fresh parsley for garnish
Instructions
- Roast the garlic
Cut the top off the garlic bulb to expose the cloves slightly, drizzle with olive oil, wrap in foil, and roast at 400°F (200°C) for about 35 to 40 minutes until soft and caramelized. - Prepare the chickpea
Drain and rinse the chickpea thoroughly, then remove a few loose skins if desired for extra smooth hummus. This small step creates a creamier texture. - Blend the ingredients
Add the chickpea, roasted garlic cloves, tahini, olive oil, lemon juice, sea salt, and cumin into a food processor. Blend until the mixture begins to turn smooth. - Add cold water gradually
Pour in cold water one tablespoon at a time while blending. The hummus will become lighter, fluffier, and silkier as the water incorporates. - Adjust the flavor
Taste the hummus and add more lemon juice, salt, or olive oil if needed. Blend again briefly until perfectly creamy and balanced. - Serve the hummus beautifully
Spread the hummus into a shallow bowl using the back of a spoon to create soft swirls. Drizzle with olive oil and sprinkle smoked paprika and chopped parsley on top before serving.
Tip
For restaurant-style smooth hummus, blend the tahini and lemon juice together first for about one minute before adding the chickpea. This creates an ultra-creamy texture that feels incredibly luxurious.
5. Chickpea Tacos
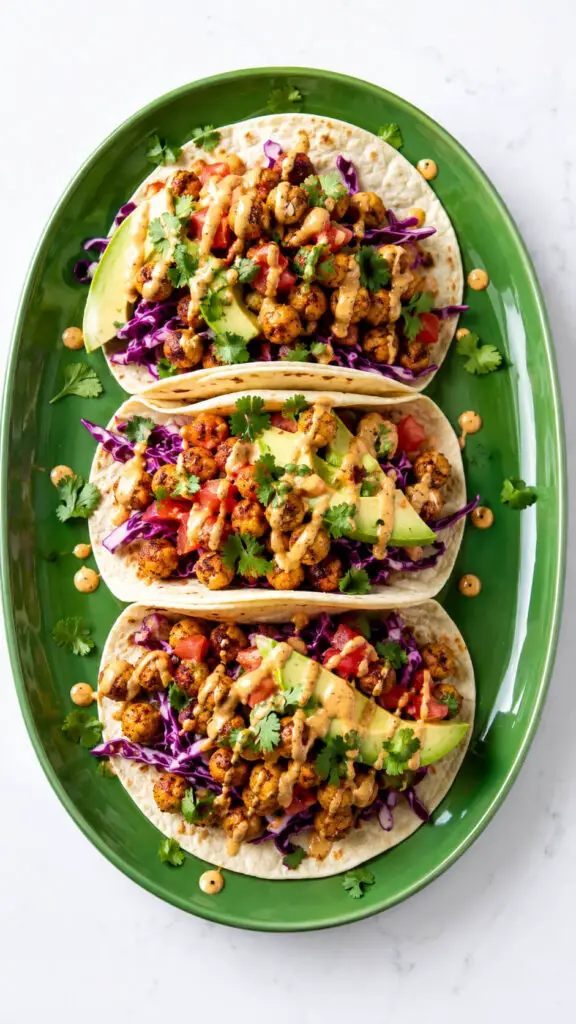
Chickpeas may not be the first thing you think of for taco night, but trust me, they absolutely deserve an invitation.
Season them with cumin, chili powder, garlic, and lime, then sauté until slightly crisp.
Tuck them into tortillas with avocado, crunchy cabbage, salsa, and a drizzle of chipotle sauce.
These tacos have the perfect balance of smoky, creamy, and fresh flavors.
Even dedicated meat lovers tend to grab seconds without complaint.
Ingredients
- 2 cups cooked chickpea, drained and rinsed
- 1 tablespoon olive oil
- 1 teaspoon chili powder
- 1 teaspoon cumin
- ½ teaspoon smoked paprika
- ½ teaspoon garlic powder
- ½ teaspoon salt
- ¼ teaspoon black pepper
- Juice of 1 lime
- 8 small tortillas
- 1 cup shredded purple cabbage
- 1 avocado, sliced
- 1 cup diced tomatoes
- Fresh cilantro for garnish
- Chipotle sauce or sour cream for serving
Instructions
- Season the chickpea
Place the chickpea in a bowl and toss them with olive oil, chili powder, cumin, smoked paprika, garlic powder, salt, black pepper, and fresh lime juice until evenly coated. - Cook the chickpea filling
Heat a skillet over medium heat and cook the seasoned chickpea for about 8 to 10 minutes, stirring occasionally. The chickpea should become slightly crispy on the edges while staying tender inside. - Warm the tortillas
Heat the tortillas in a dry skillet or directly over a gas flame for a few seconds on each side until soft and lightly charred. - Prepare the taco toppings
Slice the avocado, shred the cabbage, dice the tomatoes, and chop fresh cilantro so everything is ready for quick assembly. - Assemble the tacos
Fill each tortilla with the warm chickpea mixture, then top with cabbage, avocado slices, tomatoes, cilantro, and a drizzle of chipotle sauce or sour cream. - Serve immediately
Arrange the tacos on a serving platter and enjoy them while warm for the best texture and flavor.
Tip
For extra flavor, roast the chickpea in the oven for 15 minutes before adding them to the tacos. This gives them a delicious crispy texture that pairs perfectly with the fresh toppings.
6. Mediterranean Chickpea Bowls
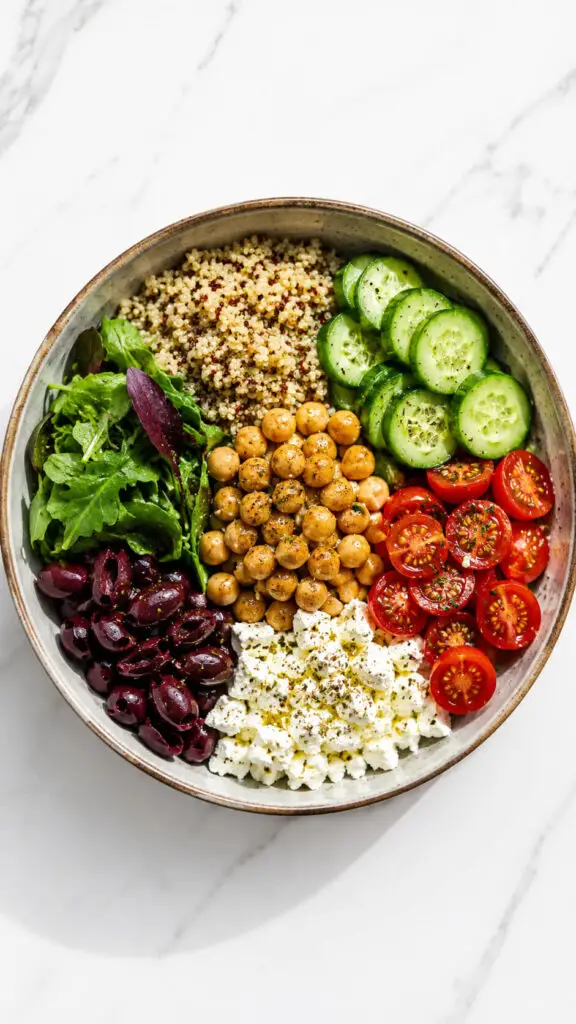
These colorful bowls practically scream “healthy lunch” in the happiest way possible.
Start with rice or quinoa, then layer chickpeas, cucumbers, tomatoes, olives, feta, and crisp greens.
Finish with lemony vinaigrette or creamy tzatziki.
As a former event planner, I loved serving bowl-style meals because everyone could customize their own combination.
They’re vibrant, filling, and ideal for meal prep.
Plus, they look fancy enough to make you feel surprisingly organized and put together.
Ingredients
- 2 cups cooked chickpea, drained and rinsed
- 2 cups cooked quinoa or rice
- 1 cup cherry tomatoes, halved
- 1 cucumber, diced
- ½ red onion, thinly sliced
- ½ cup kalamata olives
- ½ cup crumbled feta cheese
- 2 cups chopped romaine lettuce or mixed greens
- 2 tablespoons olive oil
- Juice of 1 lemon
- 1 teaspoon dried oregano
- ½ teaspoon garlic powder
- Salt and black pepper to taste
- Optional: hummus or tzatziki for serving
Instructions
- Cook the quinoa or rice
Prepare the quinoa or rice according to package instructions and let it cool slightly. Warm grains work beautifully, but chilled grains also make these bowls refreshing and meal-prep friendly. - Season the chickpea
Place the chickpea in a bowl and toss with olive oil, oregano, garlic powder, salt, and black pepper. This simple seasoning gives them a bright Mediterranean flavor. - Prepare the fresh vegetables
Slice the cucumber, tomatoes, red onion, and lettuce into bite-sized pieces. Keeping everything fresh and colorful makes the bowls feel vibrant and satisfying. - Assemble the bowls
Divide the quinoa or rice among serving bowls, then arrange the chickpea, vegetables, olives, feta cheese, and greens in sections over the top for a beautiful presentation. - Add the dressing
Drizzle fresh lemon juice and a little extra olive oil over each bowl. If desired, add a scoop of hummus or a spoonful of tzatziki for extra creaminess. - Serve immediately
Enjoy the bowls fresh while the vegetables are crisp and the flavors are bright. They also store well for easy lunches during the week.
Tip
For even more flavor, roast the chickpea in the oven at 400°F for about 20 minutes before adding them to the bowls. The crispy texture adds incredible contrast to the fresh vegetables.
7. Chickpea Soup with Lemon and Herbs
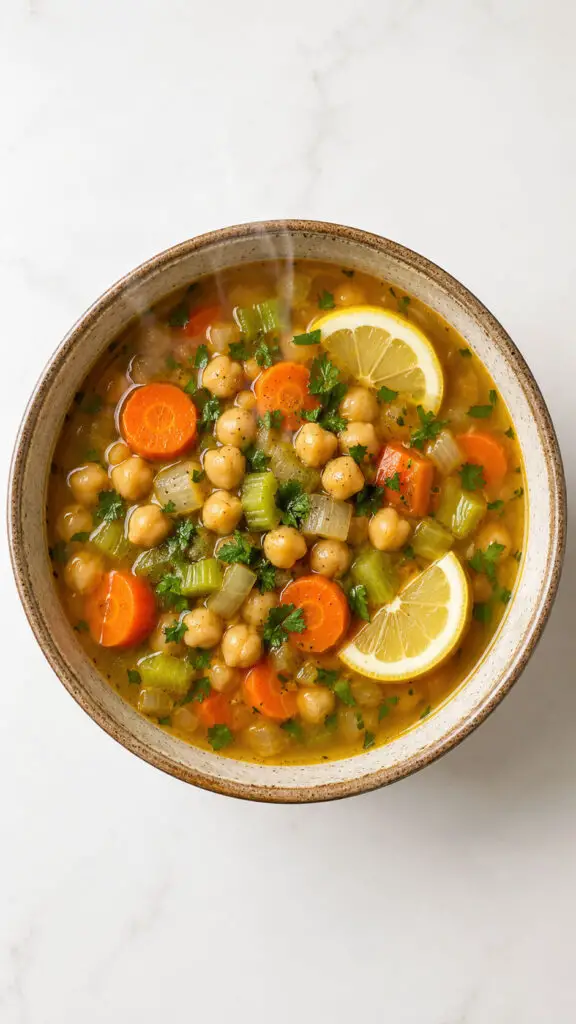
This soup is bright, comforting, and exactly what you want on chilly evenings or stressful Mondays.
Chickpeas simmer alongside onions, carrots, garlic, and broth until tender, then fresh herbs and lemon juice wake everything up beautifully.
The lemon gives the soup a fresh, almost sunny flavor that keeps it from feeling too heavy.
Pair it with crusty bread, and suddenly dinner feels like something a charming little café would proudly serve.
Ingredients
- 2 cups cooked chickpea, drained and rinsed
- 1 tablespoon olive oil
- 1 small onion, diced
- 2 carrots, sliced
- 2 celery stalks, chopped
- 3 garlic cloves, minced
- 6 cups vegetable broth
- 1 teaspoon dried oregano
- ½ teaspoon cumin
- 1 teaspoon sea salt
- ½ teaspoon black pepper
- Juice of 1 lemon
- 2 tablespoons fresh parsley, chopped
- 1 tablespoon fresh dill, chopped
- Optional: lemon slices for serving
Instructions
- Sauté the vegetables
Heat olive oil in a large soup pot over medium heat. Add the onion, carrots, and celery, then cook for about 5 to 7 minutes until softened and fragrant. - Add the garlic and spices
Stir in the minced garlic, oregano, cumin, sea salt, and black pepper. Cook for another minute to allow the spices to release their flavor. - Pour in the broth
Add the vegetable broth and bring the soup to a gentle boil. The broth will begin developing rich flavor as the vegetables continue cooking. - Add the chickpea
Stir the chickpea into the pot and reduce the heat to a simmer. Let the soup cook for 20 to 25 minutes so the flavors blend together beautifully. - Finish with lemon and herbs
Add the fresh lemon juice, parsley, and dill right before serving. The lemon brightens the soup while the herbs add freshness and aroma. - Serve while warm
Ladle the soup into bowls and garnish with extra herbs or lemon slices if desired. Serve with crusty bread for a cozy meal.
Tip
For a thicker and creamier soup, blend one cup of the chickpea with a little broth before adding it back into the pot. It creates a velvety texture without adding cream.
8. Buffalo Chickpea Wraps
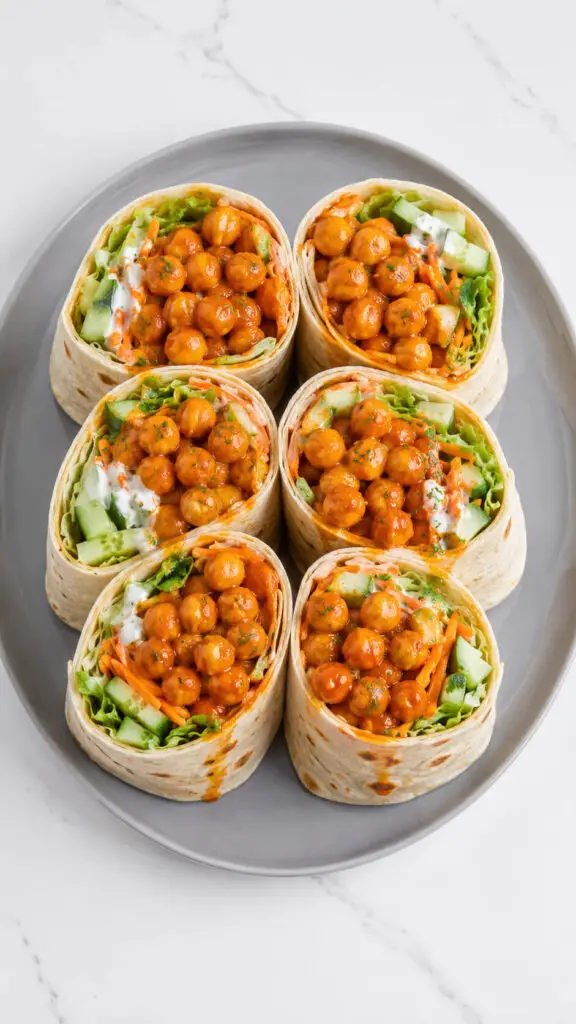
If buffalo wings and lunch wraps had a delicious vegetarian baby, this would be it.
Toss chickpeas in buffalo sauce and roast or sauté them until flavorful and slightly crisp.
Wrap them in tortillas with lettuce, cucumbers, shredded carrots, and ranch dressing.
The spicy, creamy combination is ridiculously satisfying.
I once made these for a casual brunch spread, and people kept circling back for “just half another one” until the platter mysteriously disappeared.
Ingredients
- 2 cups cooked chickpea, drained and rinsed
- 2 tablespoons olive oil
- ⅓ cup buffalo sauce
- 1 teaspoon garlic powder
- ½ teaspoon smoked paprika
- ¼ teaspoon black pepper
- 4 large tortillas or wraps
- 1 cup shredded lettuce
- 1 cup shredded carrots
- 1 cucumber, thinly sliced
- ½ cup ranch dressing or blue cheese dressing
- Optional: sliced avocado or chopped green onions
Instructions
- Dry the chickpea well
Pat the chickpea dry with paper towels to remove excess moisture. This helps them crisp up nicely instead of becoming soggy during cooking. - Season the chickpea
Place the chickpea in a bowl and toss with olive oil, garlic powder, smoked paprika, and black pepper until evenly coated with seasoning. - Cook the chickpea
Heat a skillet over medium-high heat and cook the chickpea for 8 to 10 minutes, stirring occasionally, until slightly crispy and golden around the edges. - Add the buffalo sauce
Pour the buffalo sauce over the hot chickpea and stir until every piece is fully coated. Let the sauce cook for another 2 minutes so the flavor soaks in beautifully. - Warm the tortillas
Heat the tortillas briefly in a dry skillet or microwave until soft and flexible. Warm wraps roll more easily and taste better too. - Fill the wraps
Layer shredded lettuce, carrots, cucumber slices, and buffalo chickpea down the center of each tortilla. Drizzle generously with ranch or blue cheese dressing. - Roll the wraps tightly
Fold in the sides of each tortilla and roll tightly into wraps. Slice in half if desired for easier serving and prettier presentation.
Tip
For extra texture and flavor, add crunchy celery slices or crispy fried onions inside the wraps. The cool crunch balances the spicy buffalo chickpea perfectly.
9. Chickpea Pasta Salad
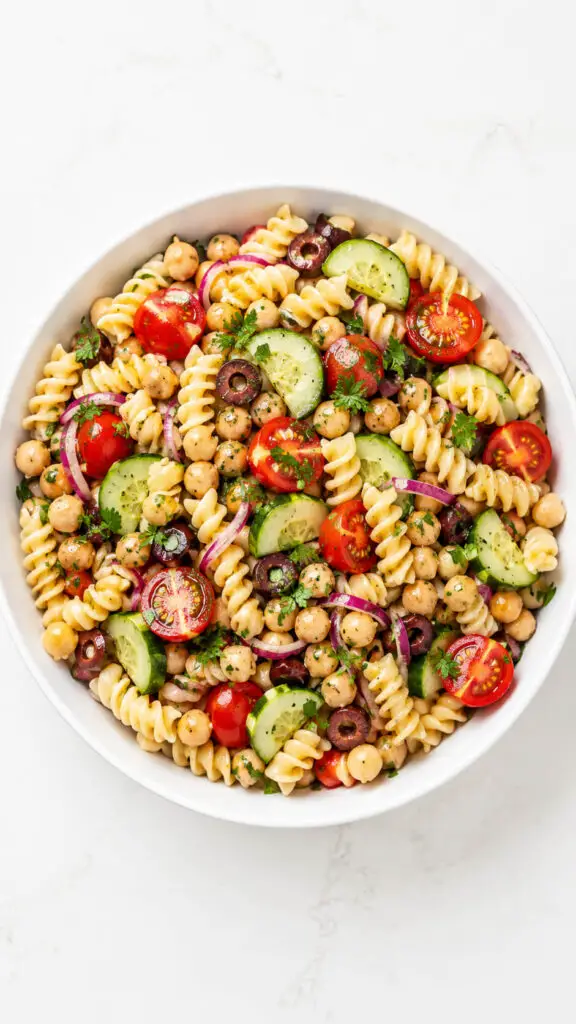
Every cook needs a reliable pasta salad recipe, and this one absolutely earns a permanent spot in your collection.
Combine chickpeas with pasta, cherry tomatoes, cucumbers, olives, red onion, and Italian dressing for a dish that’s refreshing yet hearty.
It’s ideal for potlucks because it can sit out comfortably without losing flavor.
I especially love how the chickpeas soak up the dressing overnight, making leftovers somehow even tastier the next day.
Ingredients
- 3 cups cooked pasta, cooled
- 1½ cups chickpea, drained and rinsed
- 1 cup cherry tomatoes, halved
- 1 cucumber, diced
- ¼ red onion, thinly sliced
- ½ cup black olives, sliced
- ½ cup crumbled feta cheese
- 2 tablespoons chopped parsley
Dressing
- ¼ cup olive oil
- 2 tablespoons lemon juice
- 1 tablespoon red wine vinegar
- 1 teaspoon Dijon mustard
- 1 teaspoon Italian seasoning
- ½ teaspoon garlic powder
- Salt and black pepper to taste
Instructions
- Cook the pasta
Boil the pasta according to package instructions until tender. Drain and rinse under cold water to stop the cooking process and help the pasta cool quickly. - Prepare the vegetables
Slice the cherry tomatoes, dice the cucumber, thinly slice the red onion, and chop the parsley. Preparing everything before mixing keeps the salad fresh and evenly balanced. - Make the dressing
Whisk together olive oil, lemon juice, red wine vinegar, Dijon mustard, Italian seasoning, garlic powder, salt, and black pepper in a small bowl until smooth and well combined. - Combine the salad ingredients
Place the cooled pasta, chickpea, tomatoes, cucumber, olives, red onion, feta cheese, and parsley into a large mixing bowl. - Toss everything together
Pour the dressing over the pasta mixture and gently toss until every ingredient is lightly coated and evenly distributed. - Chill before serving
Refrigerate the chickpea pasta salad for at least 20 minutes before serving so the flavors can blend together beautifully.
Tip
For the best flavor, make the chickpea pasta salad a few hours ahead of time. The chickpea soak up the dressing wonderfully, making the salad even more delicious later.
10. Chickpea Burgers
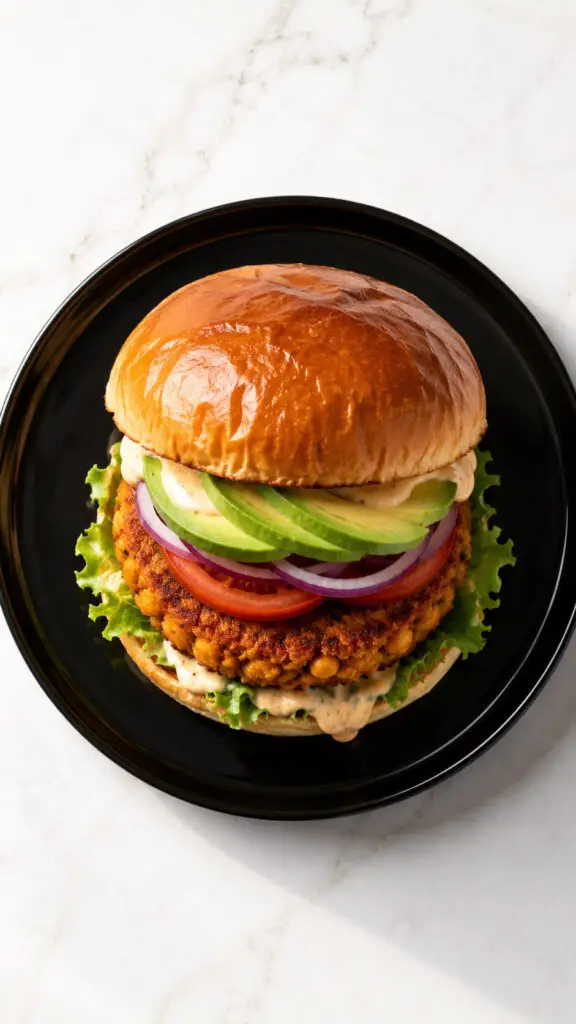
A good chickpea burger should hold together beautifully while still tasting tender inside, and this version does exactly that.
Mash chickpeas with breadcrumbs, herbs, garlic, and spices, then pan-fry until crisp and golden.
Add avocado, pickles, or spicy mayo if you’re feeling extra fancy.
These burgers became my secret weapon during backyard parties because they satisfied vegetarians and meat eaters alike.
Nobody wants to feel like they got the “boring” burger option.
Ingredients
- 2 cups cooked chickpea, drained and rinsed
- ½ cup breadcrumbs
- 1 egg
- ¼ cup finely diced red onion
- 2 garlic cloves, minced
- 1 tablespoon chopped parsley
- 1 teaspoon ground cumin
- ½ teaspoon smoked paprika
- ½ teaspoon salt
- ¼ teaspoon black pepper
- 1 tablespoon olive oil
- Burger buns
- Lettuce, tomato, avocado, or preferred toppings
Instructions
- Mash the chickpea
Place the chickpea in a large bowl and mash them with a fork or potato masher until mostly broken down but still slightly chunky. The mixture should hold together while keeping a bit of texture. - Mix the burger ingredients
Add breadcrumbs, egg, red onion, garlic, parsley, cumin, smoked paprika, salt, and black pepper to the mashed chickpea. Stir everything together until a thick mixture forms. - Shape the patties
Divide the mixture evenly and form it into burger patties using your hands. Press gently so the patties stay firm and cook evenly without falling apart. - Heat the skillet
Warm olive oil in a large skillet over medium heat. Allow the pan to heat properly before adding the patties so they develop a crispy golden crust. - Cook the chickpea burgers
Place the patties in the skillet and cook for about 4 to 5 minutes per side until deeply golden and slightly crisp on the outside. - Toast the burger buns
Lightly toast the burger buns in a dry skillet or oven for extra flavor and texture. Warm buns make the burgers taste even better. - Assemble the burgers
Place each chickpea patty onto a toasted bun and add lettuce, tomato, avocado, or your favorite toppings and sauces before serving.
Tip
If the burger mixture feels too wet, add a little extra breadcrumbs. If it feels too dry, mix in a teaspoon of olive oil or a splash of water to help the patties hold together perfectly.
11. Moroccan Chickpea Stew
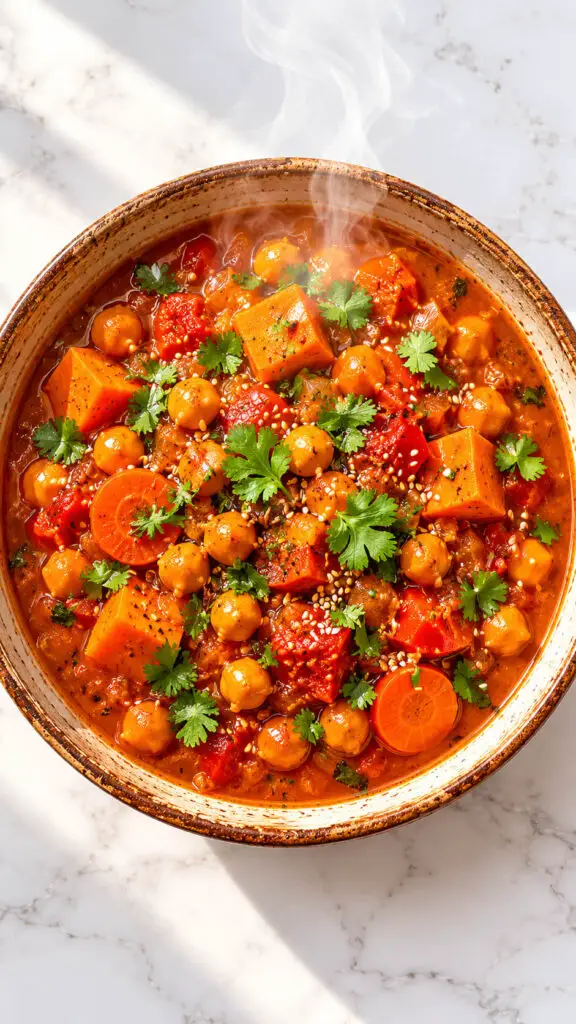
This stew is rich with warming spices like cinnamon, cumin, coriander, and paprika, giving it incredible depth and comfort.
Chickpeas simmer with tomatoes, carrots, sweet potatoes, and broth until every spoonful tastes hearty and fragrant.
I love serving it with couscous and fresh herbs for a dinner that feels wonderfully cozy without requiring complicated techniques.
The leftovers are fantastic too, which is lucky because this recipe tends to make a generously large pot.
Ingredients
- 2 tablespoons olive oil
- 1 medium onion, diced
- 3 cloves garlic, minced
- 1 teaspoon fresh ginger, grated
- 2 cups cooked chickpea, drained and rinsed
- 2 carrots, sliced
- 1 medium sweet potato, peeled and cubed
- 1 can diced tomatoes
- 3 cups vegetable broth
- 1 teaspoon ground cumin
- 1 teaspoon smoked paprika
- ½ teaspoon cinnamon
- ½ teaspoon turmeric
- ¼ teaspoon cayenne pepper (optional)
- Salt and black pepper to taste
- Fresh cilantro for garnish
Instructions
- Sauté the onion and garlic
Heat olive oil in a large pot over medium heat. Add the diced onion and cook until soft and translucent, then stir in the garlic and ginger until fragrant. - Add the spices
Sprinkle in the cumin, smoked paprika, cinnamon, turmeric, and cayenne pepper. Stir constantly for about one minute to toast the spices and deepen their flavor. - Cook the vegetables
Add the sliced carrots and cubed sweet potato to the pot. Stir everything together so the vegetables become coated in the warm spice mixture. - Pour in the broth and tomatoes
Add the diced tomatoes and vegetable broth, then bring the mixture to a gentle simmer. The broth should begin to take on a rich golden-red color. - Add the chickpea
Stir in the chickpea and let the stew simmer uncovered for 25 to 30 minutes until the vegetables are tender and the flavors blend together beautifully. - Season the stew
Taste the stew and adjust with salt and black pepper as needed. If you like a thicker consistency, let it simmer for a few extra minutes. - Garnish and serve
Ladle the Moroccan chickpea stew into bowls and top with fresh cilantro before serving. It pairs wonderfully with couscous, rice, or warm crusty bread.
Tip
This stew tastes even better the next day because the spices continue to develop overnight. Make a big batch and enjoy flavorful leftovers for lunch or dinner.
12. Chickpea Stuffed Sweet Potatoes
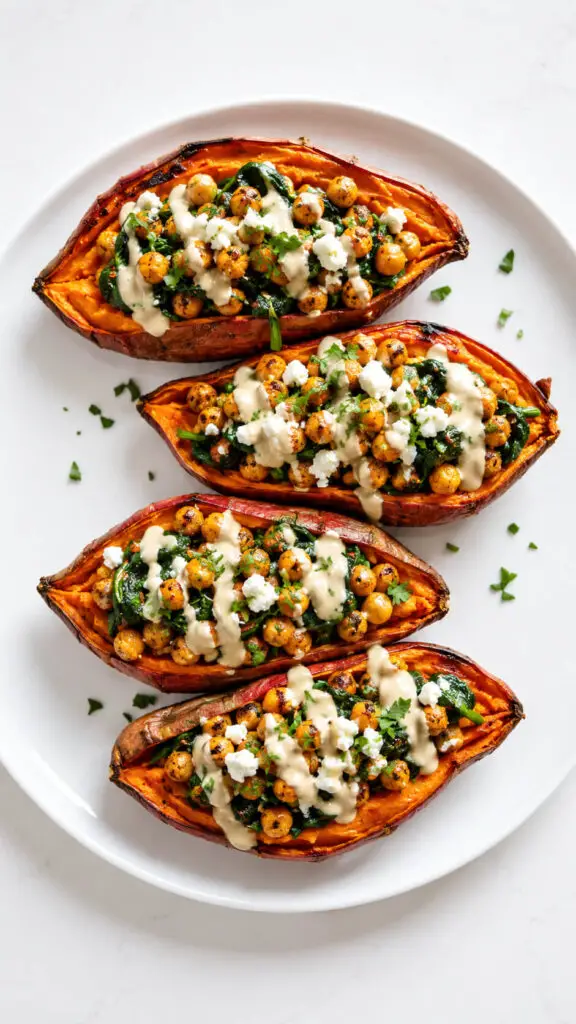
Baked sweet potatoes become a complete meal when stuffed with seasoned chickpeas and flavorful toppings.
Fill them with sautéed chickpeas, spinach, garlic, and feta, then drizzle with tahini sauce for extra richness.
The sweet potato’s natural sweetness pairs beautifully with savory spices.
This recipe feels nourishing without tasting overly “healthy,” which is honestly the dream.
It’s the kind of dinner that makes you feel productive, even if you spent half the day avoiding laundry.
Ingredients
- 4 medium sweet potatoes
- 2 cups cooked chickpea, drained and rinsed
- 1 tablespoon olive oil
- 2 cloves garlic, minced
- 2 cups fresh spinach
- 1 teaspoon paprika
- ½ teaspoon cumin
- ½ teaspoon sea salt
- ¼ teaspoon black pepper
- ½ cup crumbled feta cheese
Tahini Sauce
- 3 tablespoons tahini
- 1 tablespoon lemon juice
- 2 to 3 tablespoons warm water
- Pinch of salt
Instructions
- Bake the sweet potatoes
Preheat the oven to 400°F (200°C). Place the sweet potatoes on a baking sheet and bake for 45 to 55 minutes until soft and tender when pierced with a fork. - Prepare the chickpea filling
Heat olive oil in a skillet over medium heat. Add garlic and cook for about 30 seconds until fragrant before adding the chickpea, paprika, cumin, sea salt, and black pepper. - Cook the spinach
Stir the spinach into the skillet and cook until wilted and fully combined with the seasoned chickpea mixture. The filling should smell warm, savory, and slightly smoky. - Make the tahini sauce
Whisk together tahini, lemon juice, warm water, and salt in a small bowl until smooth and creamy. Add more water if needed to thin the sauce slightly. - Stuff the sweet potatoes
Slice each baked sweet potato down the center and gently fluff the inside with a fork. Spoon the chickpea filling generously into each potato. - Add the toppings
Sprinkle feta cheese over the stuffed sweet potatoes and drizzle generously with the tahini sauce before serving warm.
Tip
For extra flavor, roast the chickpea separately for 15 minutes before adding them to the filling. This gives them a slightly crispy texture that pairs perfectly with the soft sweet potatoes.
13. Chickpea Shakshuka
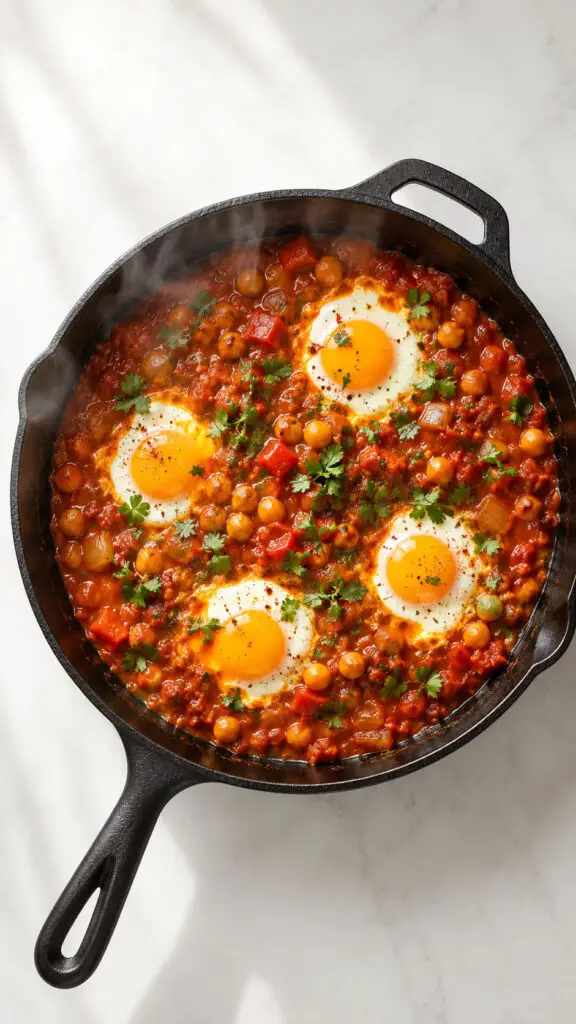
Classic shakshuka gets even heartier with the addition of chickpeas.
Eggs poach gently in a spicy tomato sauce filled with onions, garlic, peppers, and chickpeas until everything becomes deeply flavorful.
Serve it with crusty bread for scooping because nobody wants to waste even a drop of that sauce.
I adore making this for brunch gatherings because it looks impressive, bubbling away in the skillet while secretly being very easy to prepare.
Ingredients
- 2 cups cooked chickpea, drained and rinsed
- 4 large eggs
- 2 tablespoons olive oil
- 1 small onion, diced
- 1 red bell pepper, chopped
- 3 garlic cloves, minced
- 1 can crushed tomatoes
- 1 teaspoon smoked paprika
- 1 teaspoon cumin
- ½ teaspoon chili flakes
- ½ teaspoon salt
- ¼ teaspoon black pepper
- Fresh parsley or cilantro for garnish
- Crusty bread for serving
Instructions
- Sauté the vegetables
Heat olive oil in a large skillet over medium heat. Add the onion and bell pepper, then cook until softened and slightly caramelized, about 5 to 7 minutes. - Add the garlic and spices
Stir in the garlic, smoked paprika, cumin, chili flakes, salt, and black pepper. Cook for about 1 minute until fragrant and the spices bloom beautifully. - Pour in the tomatoes
Add the crushed tomatoes and stir everything together until well combined. Let the sauce simmer gently for 10 minutes until slightly thickened. - Stir in the chickpea
Add the chickpea to the tomato sauce and cook for another 5 minutes so they absorb all the smoky, rich flavors. - Create spaces for the eggs
Use a spoon to make small wells in the sauce, then carefully crack the eggs into each space. - Cook the eggs gently
Cover the skillet with a lid and cook for 5 to 8 minutes, depending on how runny or firm you like the egg yolks. - Garnish and serve
Sprinkle fresh parsley or cilantro over the top and serve the chickpea shakshuka hot with crusty bread for dipping into the flavorful sauce.
Tip
For even deeper flavor, let the tomato sauce simmer a few extra minutes before adding the eggs. The richer the sauce becomes, the more delicious the entire dish tastes.
14. Chickpea and Spinach Stir-Fry
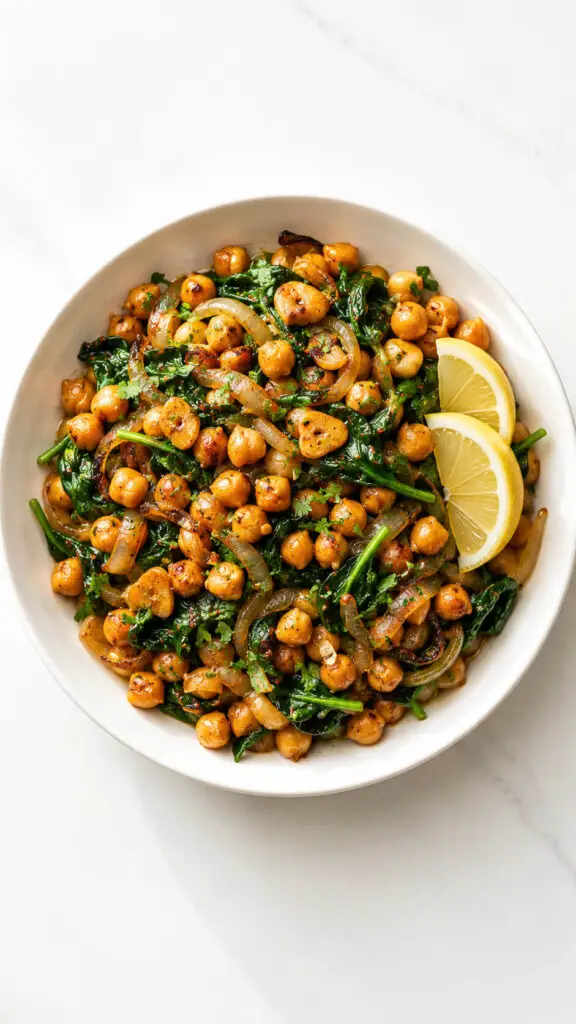
Quick, colorful, and packed with flavor, this stir-fry is a lifesaver on busy nights.
Chickpeas cook alongside spinach, garlic, onions, and warm spices until everything becomes fragrant and satisfying.
A squeeze of lemon at the end brightens the entire dish beautifully.
Serve it with rice, couscous, or flatbread for a simple meal that somehow tastes far more elaborate than the minimal effort required.
It’s weeknight cooking at its absolute best.
Ingredients
- 2 cups cooked chickpea, drained and rinsed
- 4 cups fresh spinach
- 1 small onion, thinly sliced
- 3 garlic cloves, minced
- 2 tablespoons olive oil
- 1 teaspoon ground cumin
- ½ teaspoon smoked paprika
- ¼ teaspoon chili flakes (optional)
- Salt and black pepper to taste
- Juice of ½ lemon
- Fresh parsley for garnish
Instructions
- Heat the olive oil
Place a large skillet over medium heat and add the olive oil. Allow the oil to warm for about a minute so the vegetables cook evenly and develop flavor quickly. - Cook the onions until soft
Add the sliced onion to the skillet and sauté for 4 to 5 minutes until softened and lightly golden. The onions create a sweet and savory base for the chickpea stir-fry. - Add the garlic and spices
Stir in the minced garlic, cumin, smoked paprika, chili flakes, salt, and black pepper. Cook for about 30 seconds until fragrant, making sure the garlic does not burn. - Sauté the chickpea
Add the chickpea to the skillet and stir well to coat them in the spices. Cook for 5 to 7 minutes, allowing the chickpea to become slightly crisp and golden around the edges. - Wilt the spinach
Add the fresh spinach in batches and stir gently until wilted. The spinach will reduce quickly while adding freshness and vibrant color to the dish. - Finish with lemon juice
Squeeze fresh lemon juice over the stir-fry and toss everything together. The lemon brightens the flavors and balances the warm spices beautifully. - Serve while warm
Transfer the chickpea and spinach stir-fry to a serving plate and garnish with fresh parsley before serving.
Tip
For extra texture and flavor, sprinkle toasted sesame seeds or crumbled feta cheese over the stir-fry just before serving.
15. Chickpea Fritters
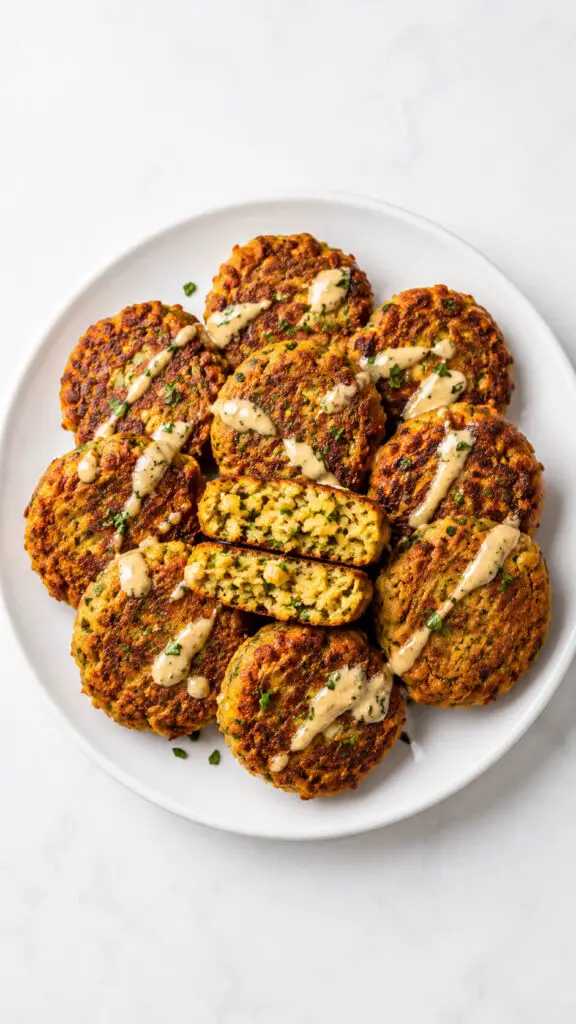
Golden chickpea fritters are crispy on the outside, tender in the middle, and nearly impossible to stop eating.
Blend chickpeas with herbs, garlic, onions, and spices before frying into little savory patties.
They’re fantastic tucked into pita bread or served with yogurt sauce.
I used to make giant trays of these for cocktail events because guests adored grabbing them while mingling.
Fair warning: people will absolutely ask you for the recipe afterward.
Ingredients
- 2 cups cooked chickpea, drained and rinsed
- ½ small onion, finely chopped
- 2 garlic cloves, minced
- ¼ cup chopped parsley
- ¼ cup chopped cilantro
- 1 teaspoon cumin
- ½ teaspoon paprika
- ½ teaspoon salt
- ¼ teaspoon black pepper
- 2 tablespoons flour
- 1 egg
- 2 tablespoons olive oil for frying
Instructions
- Mash the chickpea
Place the chickpea in a large bowl and mash them with a fork or potato masher until mostly broken down but still slightly chunky for texture. - Mix the ingredients together
Add the onion, garlic, parsley, cilantro, cumin, paprika, salt, black pepper, flour, and egg to the mashed chickpea. Stir everything until a thick mixture forms that holds together easily. - Shape the fritters
Scoop small portions of the mixture and gently form them into round patties using your hands. Keep them evenly sized so they cook at the same speed. - Heat the oil
Warm olive oil in a large skillet over medium heat until hot but not smoking. Properly heated oil helps create a crispy golden crust. - Cook the fritters
Place the chickpea fritters into the skillet and cook for about 3 to 4 minutes per side until deeply golden brown and crisp on the outside. - Drain and serve
Transfer the cooked fritters onto a plate lined with paper towels to remove excess oil. Serve warm with yogurt sauce, tahini, or fresh lemon wedges.
Tip
If the mixture feels too wet, add a little more flour before shaping the fritters. Chilling the mixture for 15 minutes also helps the chickpea fritters hold together better while frying.
16. Chickpea Coconut Soup
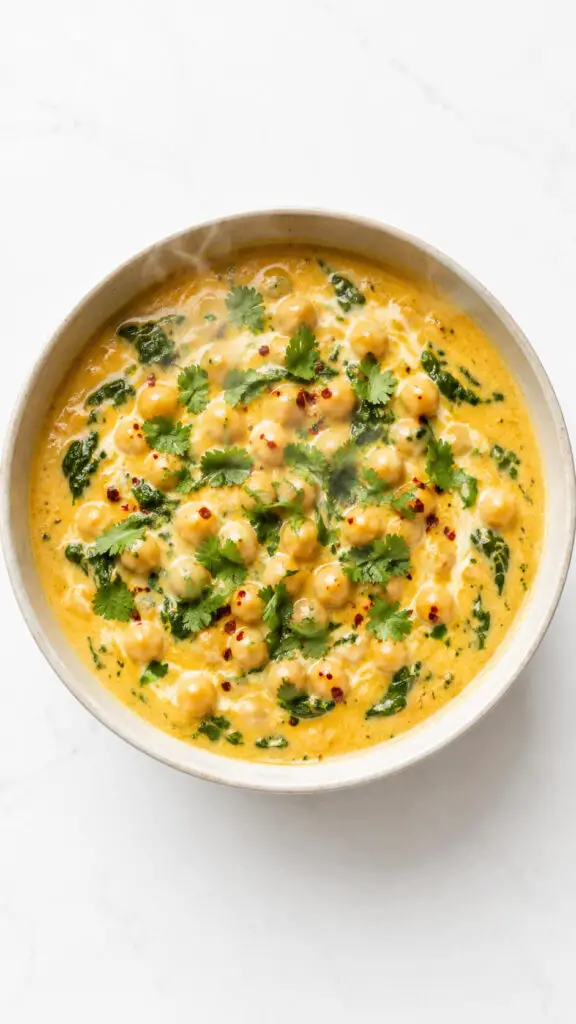
This soup combines creamy coconut milk with chickpeas, ginger, garlic, and curry spices for a bowl that feels both comforting and exciting.
It’s rich without being too heavy and comes together surprisingly quickly. I like adding spinach or kale near the end for color and texture.
The flavors deepen beautifully as it sits, making leftovers especially delicious.
Honestly, this is one of those soups that makes rainy weather feel less annoying and more intentional.
Ingredients
- 2 cups cooked chickpea, drained and rinsed
- 1 tablespoon olive oil
- 1 small onion, diced
- 3 garlic cloves, minced
- 1 tablespoon fresh ginger, grated
- 1 teaspoon curry powder
- ½ teaspoon turmeric
- ¼ teaspoon red chili flakes
- 4 cups vegetable broth
- 1 can coconut milk
- 2 cups fresh spinach
- Juice of 1 lime
- Salt and black pepper to taste
- Fresh cilantro for garnish
Instructions
- Sauté the aromatics
Heat olive oil in a large pot over medium heat. Add the diced onion and cook until soft and translucent, then stir in the garlic and fresh ginger until fragrant. - Toast the spices
Add the curry powder, turmeric, and chili flakes to the pot. Stir continuously for about one minute to release the rich flavors and aromas of the spices. - Add the chickpea and broth
Pour in the vegetable broth and add the chickpea. Stir well and bring the soup to a gentle simmer so the flavors can begin blending together beautifully. - Pour in the coconut milk
Add the coconut milk and stir until the soup becomes creamy and smooth. Let it simmer for another 10 to 15 minutes to deepen the flavor. - Wilt the spinach
Stir the fresh spinach into the soup and cook for a few minutes until the leaves soften and blend naturally into the broth. - Finish with lime juice
Add fresh lime juice, then season the soup with salt and black pepper to taste. The lime brightens the creamy coconut flavor perfectly. - Serve while warm
Ladle the soup into bowls and garnish with fresh cilantro before serving. Enjoy it with warm bread or rice for a comforting meal.
Tip
For an even richer texture, blend one cup of the soup before serving and stir it back into the pot. It creates a thicker, restaurant-style creamy consistency without adding extra cream.
17. Chickpea Caesar Salad
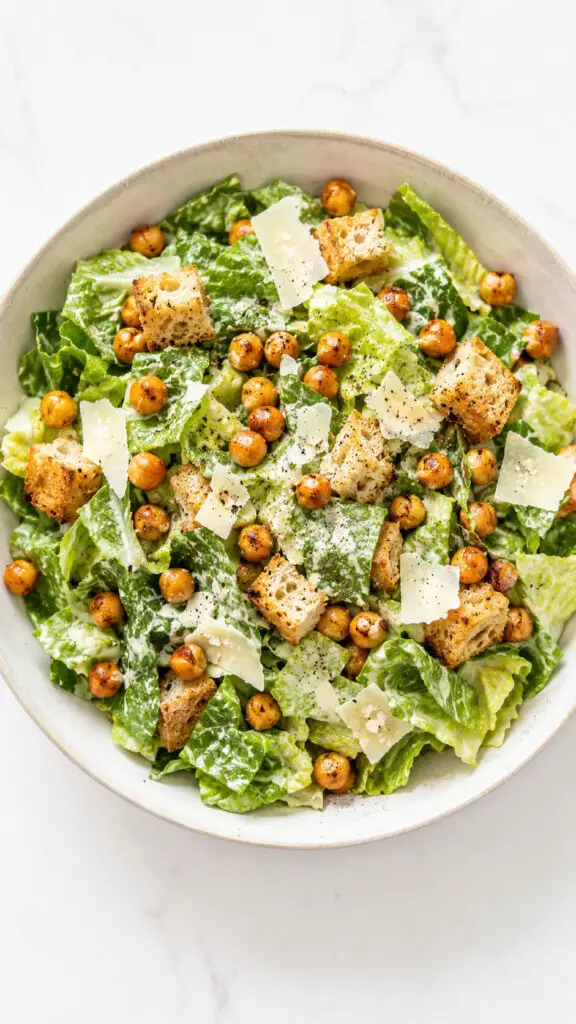
Adding crispy chickpeas to Caesar salad gives it a hearty twist that turns a side dish into an actual meal.
Roast the chickpeas with garlic and pepper until crunchy, then scatter them over romaine with parmesan and creamy Caesar dressing.
They add satisfying texture while soaking up all those bold flavors.
I’ve served this at summer lunches where everyone insisted they were “just having salad,” then somehow cleaned every single bowl completely.
Ingredients
- 2 cups cooked chickpea, drained and rinsed
- 1 tablespoon olive oil
- ½ teaspoon garlic powder
- ½ teaspoon smoked paprika
- Salt and black pepper to taste
- 1 large head romaine lettuce, chopped
- ½ cup shaved parmesan cheese
- 1 cup croutons
Caesar Dressing
- ½ cup mayonnaise
- 2 tablespoons lemon juice
- 1 teaspoon Dijon mustard
- 1 garlic clove, minced
- 2 tablespoons grated parmesan cheese
- 1 teaspoon Worcestershire sauce
- Black pepper to taste
Instructions
- Preheat the oven
Set the oven to 425°F (220°C) so it becomes fully heated before roasting the chickpea. A hot oven helps create crisp edges and deep flavor. - Season the chickpea
Pat the chickpea dry thoroughly, then toss them with olive oil, garlic powder, smoked paprika, salt, and black pepper until evenly coated. - Roast the chickpea
Spread the chickpea onto a baking sheet in a single layer and roast for 30 to 35 minutes, shaking the tray halfway through cooking until crispy and golden. - Prepare the Caesar dressing
In a small bowl, whisk together mayonnaise, lemon juice, Dijon mustard, minced garlic, parmesan cheese, Worcestershire sauce, and black pepper until smooth and creamy. - Chop the lettuce
Wash and dry the romaine lettuce thoroughly, then chop it into bite-sized pieces. Crisp, dry lettuce helps the dressing cling properly without becoming watery. - Assemble the salad
Place the romaine lettuce in a large serving bowl and toss with the Caesar dressing until evenly coated. - Add the toppings
Scatter the roasted chickpea, shaved parmesan cheese, and croutons over the salad for extra crunch and flavor. - Serve immediately
Serve the salad right away while the chickpea are still warm and crispy for the best texture and taste.
Tip
For restaurant-style Caesar salad, chill the serving bowl in the refrigerator for 10 minutes before assembling the salad. It keeps the lettuce extra crisp and refreshing.
18. Chickpea Fried Rice
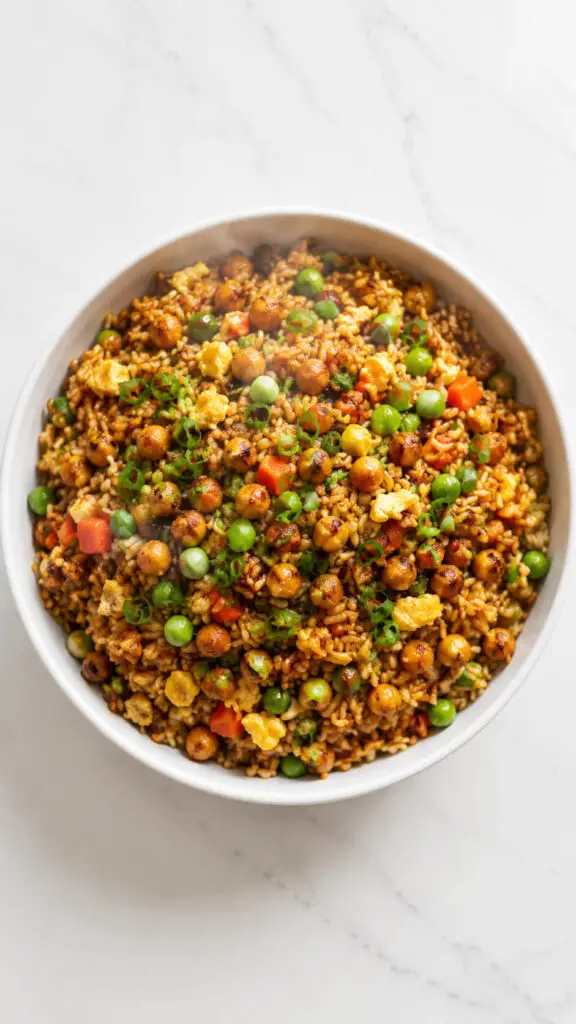
Chickpeas work shockingly well in fried rice, adding protein and texture without overpowering the dish.
Toss them into a hot skillet with rice, vegetables, soy sauce, garlic, and sesame oil until everything becomes slightly crisp and deeply savory.
This recipe is perfect for cleaning out the refrigerator while still producing something genuinely delicious.
Plus, it cooks quickly enough that nobody has time to ask, “What’s for dinner?” every five minutes.
Ingredients
- 3 cups cooked and chilled rice
- 1 ½ cups cooked chickpea, drained and rinsed
- 2 tablespoons sesame oil or vegetable oil
- 2 eggs, lightly beaten
- 1 small carrot, diced
- ½ cup frozen peas
- 3 green onions, sliced
- 3 garlic cloves, minced
- 2 tablespoons soy sauce
- 1 tablespoon oyster sauce or extra soy sauce
- ½ teaspoon black pepper
- Optional: red pepper flakes or sesame seeds for garnish
Instructions
- Cook the eggs first
Heat 1 tablespoon of oil in a large skillet or wok over medium-high heat. Pour in the beaten eggs and scramble them gently until fully cooked. Transfer the eggs to a plate and set aside. - Sauté the vegetables
Add the remaining oil to the skillet, then cook the diced carrot, peas, and green onions for about 3 to 4 minutes until slightly softened and fragrant. - Add the garlic and chickpea
Stir in the minced garlic and chickpea, cooking for another 2 to 3 minutes until the chickpea become lightly golden and slightly crisp around the edges. - Stir in the rice
Add the chilled rice to the skillet and break up any clumps using a spatula. Toss everything together so the rice heats evenly and absorbs the flavors. - Season the fried rice
Pour in the soy sauce, oyster sauce, and black pepper. Stir thoroughly until every grain of rice and each chickpea is coated with the savory sauce mixture. - Return the eggs to the skillet
Add the scrambled eggs back into the pan and gently mix them into the fried rice. Cook for another minute until everything is hot and combined. - Serve while hot
Remove from heat and garnish with extra green onions, sesame seeds, or red pepper flakes if desired. Serve immediately for the best flavor and texture.
Tip
Cold leftover rice works best for fried rice because it stays firm and prevents the dish from becoming mushy. Freshly cooked rice tends to clump together during cooking.
19. Chickpea Pot Pie
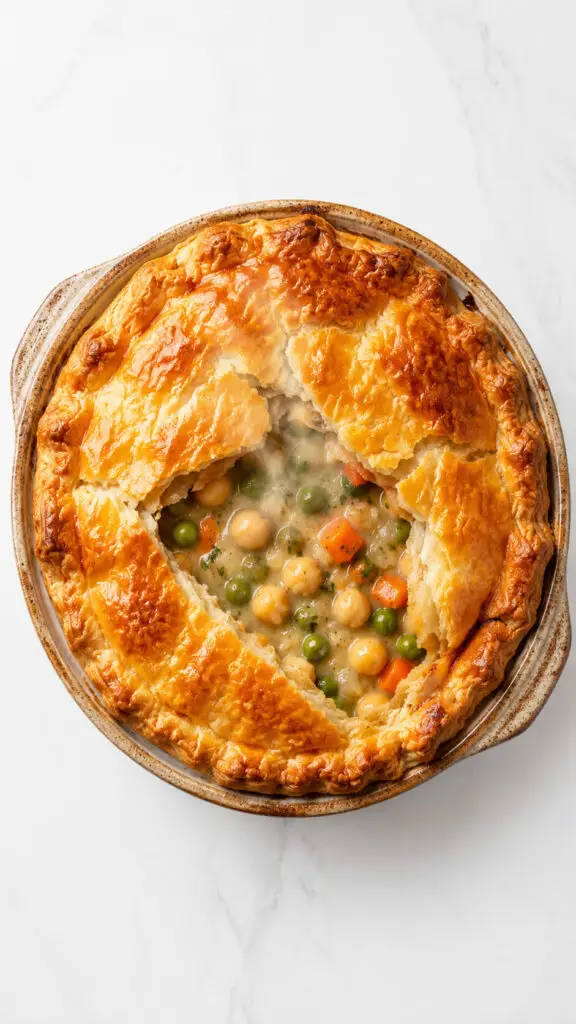
Comfort food lovers, this one’s for you.
Chickpeas replace chicken beautifully in this creamy pot pie filled with vegetables and herbs beneath a flaky golden crust.
The filling becomes rich and cozy without feeling overly heavy.
I always think pot pies look like edible hugs, especially when they come bubbling out of the oven.
Serve this on cold evenings when everyone needs a little extra comfort and absolutely no complicated conversations.
Ingredients
For the Filling
- 2 cups cooked chickpea, drained and rinsed
- 1 tablespoon olive oil
- 1 small onion, diced
- 2 garlic cloves, minced
- 2 carrots, diced
- 1 cup frozen peas
- 2 celery stalks, chopped
- 3 tablespoons butter
- 3 tablespoons all-purpose flour
- 2 cups vegetable broth
- ½ cup milk or heavy cream
- 1 teaspoon dried thyme
- ½ teaspoon rosemary
- Salt and black pepper to taste
For the Crust
- 1 sheet puff pastry or pie crust
- 1 egg, beaten for egg wash
Instructions
- Preheat the oven
Set the oven to 400°F (200°C) so it is fully heated and ready once the filling is prepared. - Cook the vegetables
Heat olive oil in a large skillet over medium heat. Add onion, carrots, celery, and garlic, then sauté until softened and fragrant, about 5 to 7 minutes. - Make the creamy sauce
Add butter to the skillet and let it melt completely. Stir in the flour and cook for about 1 minute to remove the raw flour taste. Slowly whisk in vegetable broth and milk until the mixture becomes thick and creamy. - Add the chickpea and seasonings
Stir the chickpea, peas, thyme, rosemary, salt, and black pepper into the sauce. Let everything simmer for a few minutes so the flavors blend together beautifully. - Fill the baking dish
Transfer the creamy chickpea mixture into a pie dish or oven-safe baking dish, spreading it evenly. - Cover with the crust
Place the puff pastry or pie crust over the filling and trim any excess around the edges. Press lightly to seal, then cut small slits in the top to allow steam to escape. - Brush the crust with egg wash
Lightly brush the top crust with beaten egg to help it bake into a shiny golden brown finish. - Bake until golden
Bake for 30 to 35 minutes or until the crust is deeply golden and the filling is bubbling around the edges. - Cool slightly before serving
Allow the chickpea pot pie to rest for about 10 minutes before serving so the filling can thicken slightly.
Tip
Place the baking dish on a sheet pan before baking to catch any bubbling filling and keep your oven clean. It saves cleanup later and prevents burnt spills.
20. Chickpea Pancakes
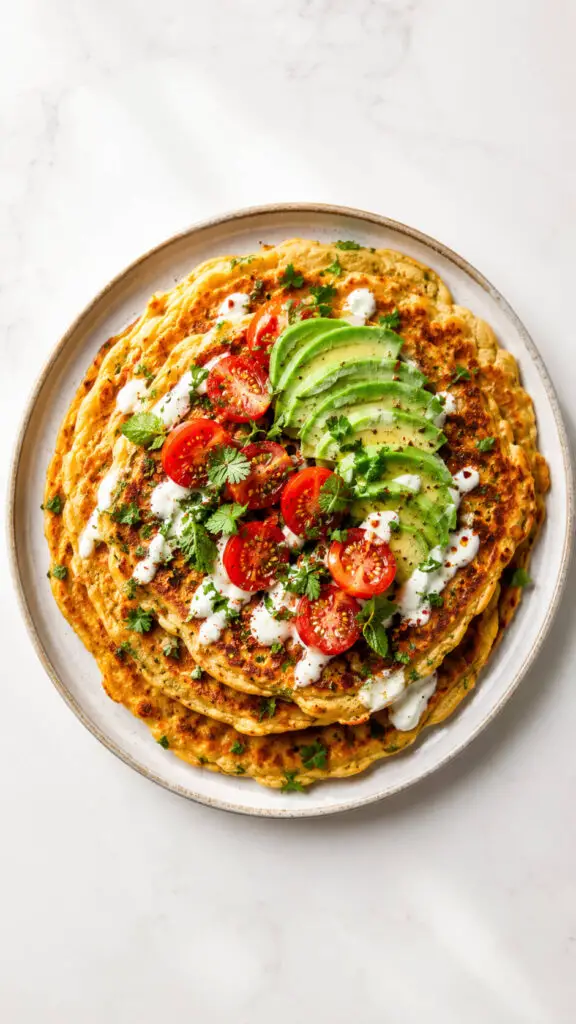
Savory chickpea pancakes are wildly underrated and surprisingly versatile.
Made with chickpea flour, water, herbs, and spices, they cook into thin pancakes with crisp edges and tender centers.
Fill them with vegetables, cheese, or leftover roasted veggies for an easy meal.
I first learned about these during a catering event with international street-food stations, and they instantly became a favorite.
They’re simple, filling, and delightfully different from the usual breakfast routine.
Ingredients
- 1 cup chickpea flour
- 1 cup water
- 2 tablespoons olive oil
- ½ teaspoon salt
- ½ teaspoon black pepper
- ½ teaspoon garlic powder
- ¼ teaspoon cumin
- 2 tablespoons chopped fresh parsley
- ¼ cup diced onions
- ¼ cup chopped spinach
- Olive oil for cooking
Instructions
- Mix the pancake batter
In a large bowl, whisk together the chickpea flour, water, olive oil, salt, black pepper, garlic powder, and cumin until smooth. The batter should be slightly thick but still pourable. - Add the vegetables and herbs
Stir in the chopped parsley, diced onions, and spinach. Mixing the vegetables directly into the batter gives every pancake extra flavor and texture. - Let the batter rest
Allow the batter to sit for about 10 minutes. This helps the chickpea flour absorb the liquid properly and creates a better pancake texture. - Heat the skillet
Place a nonstick skillet or frying pan over medium heat and lightly coat it with olive oil. A properly heated pan helps create crispy golden edges. - Cook the pancakes
Pour small portions of batter into the skillet and gently spread into thin circles. Cook for about 3 to 4 minutes per side until the pancakes are golden brown and firm. - Serve while warm
Transfer the chickpea pancakes to a plate and serve warm with yogurt sauce, avocado, fresh salad, or roasted vegetables for a complete meal.
Tip
For extra crispy edges, spread the batter thinner in the pan and avoid flipping the pancakes too early. Once the edges look firm and golden, they’ll turn easily without breaking.
21. BBQ Chickpea Sliders
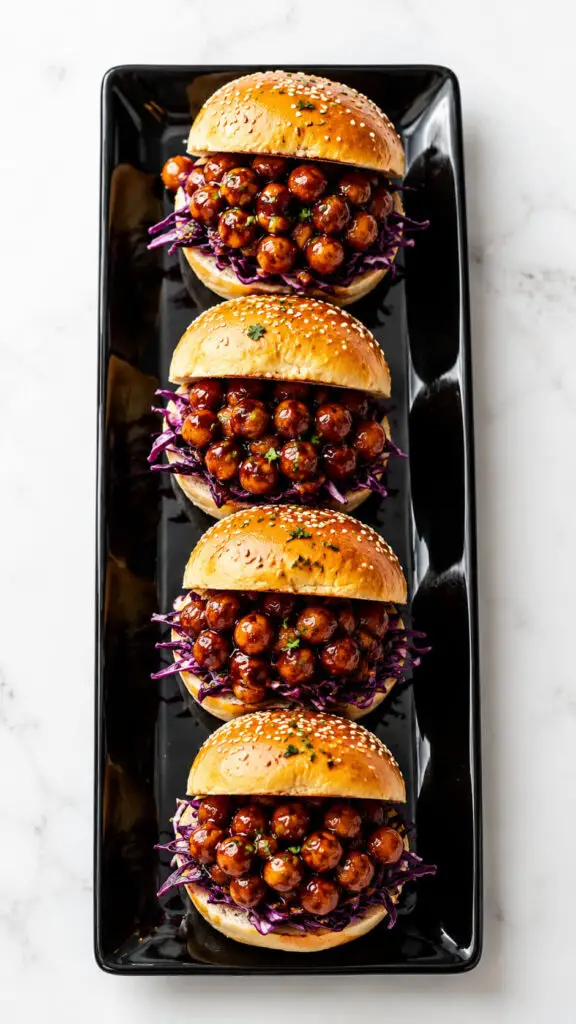
Sticky barbecue chickpeas piled onto mini buns create the kind of messy, satisfying sandwich everyone secretly loves.
Simmer chickpeas in smoky barbecue sauce until thick and flavorful, then top with crunchy slaw for balance.
These sliders are excellent for game nights, casual parties, or easy family dinners.
The sweet-and-smoky flavor combination feels indulgent while still being budget-friendly.
Also, tiny sandwiches somehow make people disproportionately happy, and honestly, I completely understand why.
Ingredients
- 2 cups cooked chickpea, drained and rinsed
- 1 tablespoon olive oil
- ½ teaspoon smoked paprika
- ½ teaspoon garlic powder
- ½ teaspoon onion powder
- 1 cup barbecue sauce
- 6 slider buns
- 1 cup shredded purple cabbage
- ½ cup shredded carrots
- 2 tablespoons mayonnaise
- 1 teaspoon apple cider vinegar
- Salt and black pepper to taste
- Fresh parsley for garnish (optional)
Instructions
- Prepare the slaw
In a medium bowl, combine shredded cabbage, carrots, mayonnaise, apple cider vinegar, salt, and black pepper. Toss everything together until evenly coated, then place the slaw in the refrigerator to stay crisp and fresh. - Season the chickpea
Add the chickpea to a large bowl and toss them with olive oil, smoked paprika, garlic powder, and onion powder until well coated with seasoning. - Cook the chickpea
Heat a skillet over medium heat and cook the seasoned chickpea for about 6 to 8 minutes, stirring occasionally. The chickpea should become slightly crisp and golden on the outside. - Add the barbecue sauce
Pour the barbecue sauce into the skillet and stir well to coat every chickpea. Let the mixture simmer for 3 to 5 minutes until the sauce thickens and becomes sticky and flavorful. - Toast the slider buns
Lightly toast the slider buns in a skillet or oven until warm and slightly golden. This helps keep the buns from becoming soggy once filled. - Assemble the sliders
Spoon the BBQ chickpea mixture onto the bottom half of each bun, then top generously with crunchy slaw. Add fresh parsley if desired and place the top buns over the filling.
Tip
For even more flavor, brush a little melted butter or olive oil on the slider buns before toasting. It gives the sliders a delicious bakery-style finish and extra richness.
22. Chickpea Alfredo Pasta
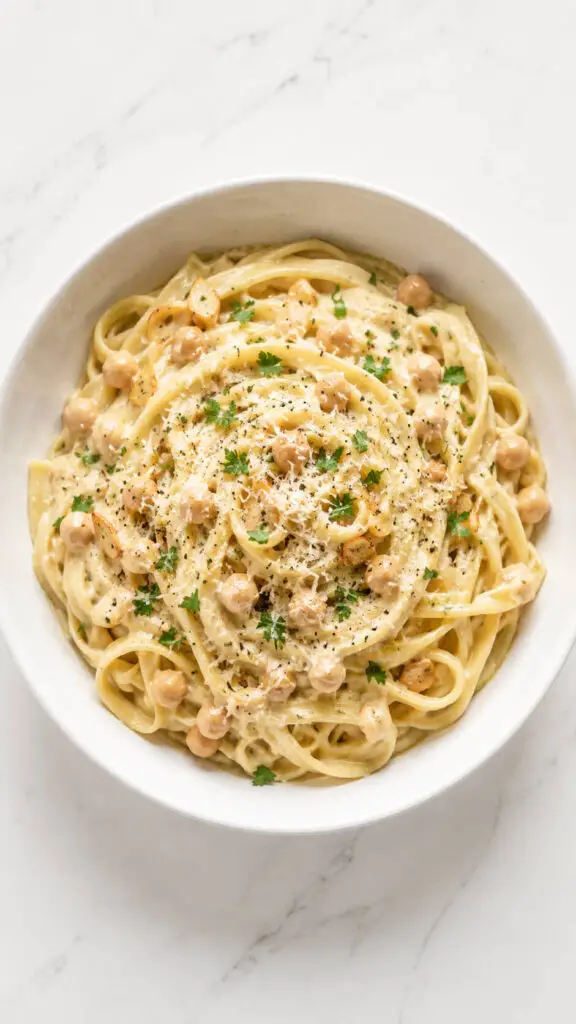
Creamy Alfredo sauce made with blended chickpeas creates a velvety pasta dish that feels wonderfully rich without relying entirely on heavy cream.
Toss the sauce with fettuccine, garlic, parmesan, and black pepper for a comforting dinner everyone will devour.
The chickpeas add subtle nuttiness while boosting the protein factor considerably.
It’s one of those sneaky recipes where people rave about the flavor before realizing chickpeas are quietly doing half the work behind the scenes.
Ingredients
- 12 ounces fettuccine pasta
- 1 can chickpea, drained and rinsed
- 3 cloves garlic, minced
- 2 tablespoons olive oil
- 1 cup vegetable broth
- ¾ cup milk or unsweetened almond milk
- ½ cup grated parmesan cheese
- 1 tablespoon lemon juice
- ½ teaspoon sea salt
- ¼ teaspoon black pepper
- Fresh parsley for garnish
- Extra parmesan for serving
Instructions
- Cook the pasta
Bring a large pot of salted water to a boil and cook the fettuccine according to package directions until tender. Reserve about ½ cup of pasta water before draining the pasta. - Sauté the garlic
Heat olive oil in a skillet over medium heat and cook the minced garlic for about 1 minute until fragrant and lightly golden. Be careful not to burn it. - Blend the chickpea sauce
Add the chickpea, sautéed garlic, vegetable broth, milk, parmesan cheese, lemon juice, salt, and black pepper to a blender. Blend until completely smooth and creamy. - Warm the Alfredo sauce
Pour the blended chickpea sauce into the skillet and cook over low heat for 3 to 5 minutes, stirring gently until the sauce becomes warm and silky. - Combine the pasta and sauce
Add the cooked fettuccine to the skillet and toss until every strand is coated in the creamy chickpea Alfredo sauce. Add a splash of reserved pasta water if the sauce needs thinning. - Finish with garnish
Sprinkle fresh parsley and extra parmesan cheese over the pasta before serving. Serve immediately while warm and creamy.
Tip
For an even richer flavor, add a small spoonful of cream cheese or a drizzle of heavy cream to the chickpea Alfredo sauce while warming it in the skillet.
23. Chickpea Lettuce Wraps
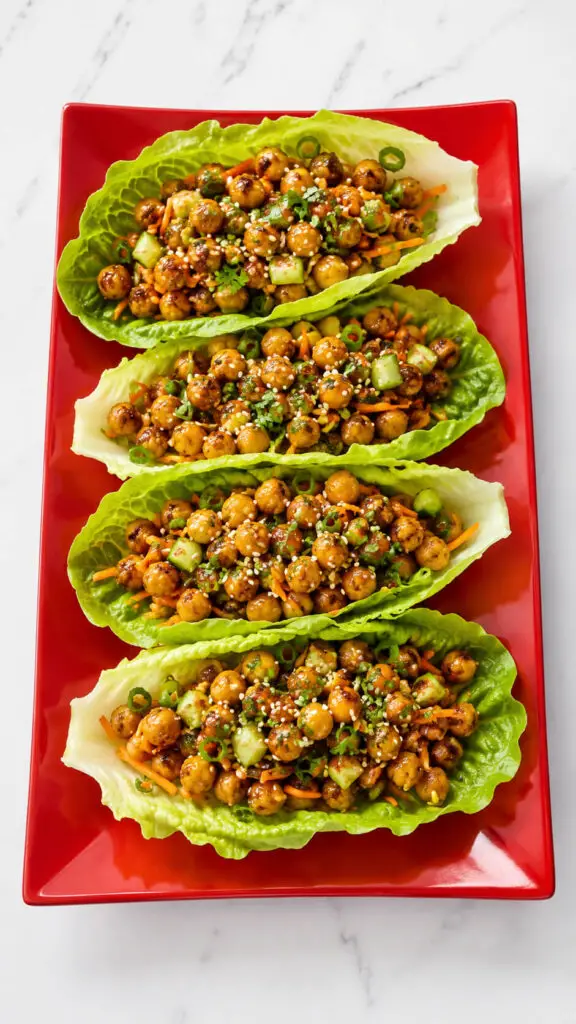
Fresh lettuce wraps filled with seasoned chickpeas are light, crunchy, and packed with flavor.
Sauté chickpeas with garlic, ginger, soy sauce, and vegetables, then spoon them into crisp lettuce leaves.
Top with peanuts or sesame seeds for extra texture.
These wraps are especially wonderful during warmer months when heavy meals feel exhausting.
I love serving them family-style because everyone gets delightfully competitive about building the perfect wrap combination.
Ingredients
- 2 cups cooked chickpea, drained and rinsed
- 1 tablespoon sesame oil
- 2 cloves garlic, minced
- 1 teaspoon fresh ginger, minced
- ¼ cup diced carrots
- ¼ cup diced cucumber
- 2 green onions, sliced
- 2 tablespoons soy sauce
- 1 tablespoon hoisin sauce
- 1 teaspoon rice vinegar
- 1 teaspoon honey or maple syrup
- Butter lettuce or romaine leaves for wrapping
- Sesame seeds for garnish
- Fresh cilantro or parsley for garnish
Instructions
- Prepare the lettuce leaves
Carefully wash and dry the lettuce leaves, keeping them whole to create sturdy wraps. Place them in the refrigerator while preparing the filling so they stay crisp and refreshing. - Cook the garlic and ginger
Heat sesame oil in a large skillet over medium heat. Add the garlic and ginger, stirring for about one minute until fragrant and lightly golden. - Sauté the chickpea
Add the chickpea to the skillet and cook for 5 to 7 minutes, stirring occasionally. The chickpea should become slightly crisp on the outside while staying soft inside. - Add the sauces and vegetables
Stir in the soy sauce, hoisin sauce, rice vinegar, honey, diced carrots, and green onions. Cook everything together for another 2 to 3 minutes until the sauce lightly coats the chickpea. - Fill the lettuce wraps
Spoon the warm chickpea mixture into each lettuce leaf, making sure every wrap gets plenty of filling and colorful vegetables. - Add the finishing toppings
Top the wraps with diced cucumber, sesame seeds, and fresh cilantro or parsley for extra crunch and freshness before serving.
Tip
For even more flavor, chill the lettuce leaves before serving and add a drizzle of spicy sriracha mayo or peanut sauce right before eating.
24. Chickpea Shepherd’s Pie
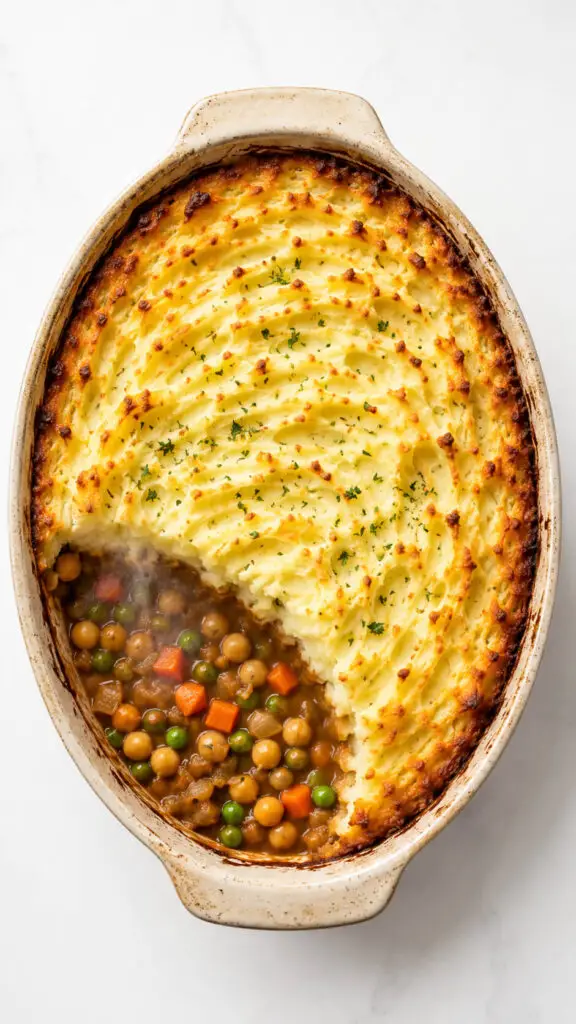
This cozy vegetarian shepherd’s pie swaps traditional meat filling for savory chickpeas and vegetables simmered in rich gravy.
Topped with creamy mashed potatoes and baked until golden, it’s pure comfort food magic.
I’ve made this for large gatherings where even skeptical guests went back for seconds.
The chickpeas absorb all those delicious flavors beautifully while keeping the dish hearty and satisfying.
Honestly, it tastes even better the next day straight from the fridge.
Ingredients
For the Filling
- 2 cups cooked chickpea, drained and rinsed
- 1 tablespoon olive oil
- 1 small onion, diced
- 2 cloves garlic, minced
- 2 carrots, diced
- 1 cup frozen peas
- 2 tablespoons tomato paste
- 1 tablespoon flour
- 1 cup vegetable broth
- 1 teaspoon thyme
- ½ teaspoon rosemary
- ½ teaspoon smoked paprika
- Salt and black pepper to taste
For the Mashed Potato Topping
- 4 large potatoes, peeled and chopped
- 4 tablespoons butter
- ⅓ cup milk
- Salt and black pepper to taste
Instructions
- Boil the potatoes
Place the chopped potatoes into a large pot of salted water and boil until fork tender, about 15 to 20 minutes. Drain the potatoes well before mashing. - Prepare the mashed potato topping
Mash the cooked potatoes with butter, milk, salt, and black pepper until smooth and creamy. Set aside while preparing the filling. - Cook the vegetables
Heat olive oil in a large skillet over medium heat. Add onion and carrots, then cook until softened and fragrant. Stir in the garlic and cook for another minute. - Build the chickpea filling
Add the chickpea, tomato paste, thyme, rosemary, smoked paprika, salt, and black pepper to the skillet. Stir well so the chickpea become coated in the rich seasoning mixture. - Create the savory sauce
Sprinkle the flour over the filling and stir thoroughly. Slowly pour in the vegetable broth while stirring continuously until the mixture thickens into a hearty gravy. - Add the peas
Stir the frozen peas into the filling and cook for a few minutes until heated through. The mixture should look thick, rich, and comforting. - Assemble the shepherd’s pie
Transfer the chickpea filling into a baking dish and spread it evenly. Spoon the mashed potatoes over the top and smooth gently with a spoon or fork. - Bake until golden
Bake the shepherd’s pie at 400°F (200°C) for 20 to 25 minutes until the top becomes lightly golden and the filling bubbles around the edges. - Let the pie rest before serving
Allow the shepherd’s pie to cool for about 10 minutes before serving so the filling can settle properly.
Tip
Use a fork to create little ridges across the mashed potatoes before baking. Those peaks turn beautifully golden and slightly crispy in the oven, adding incredible texture to every bite.
25. Chickpea Chocolate Blondies
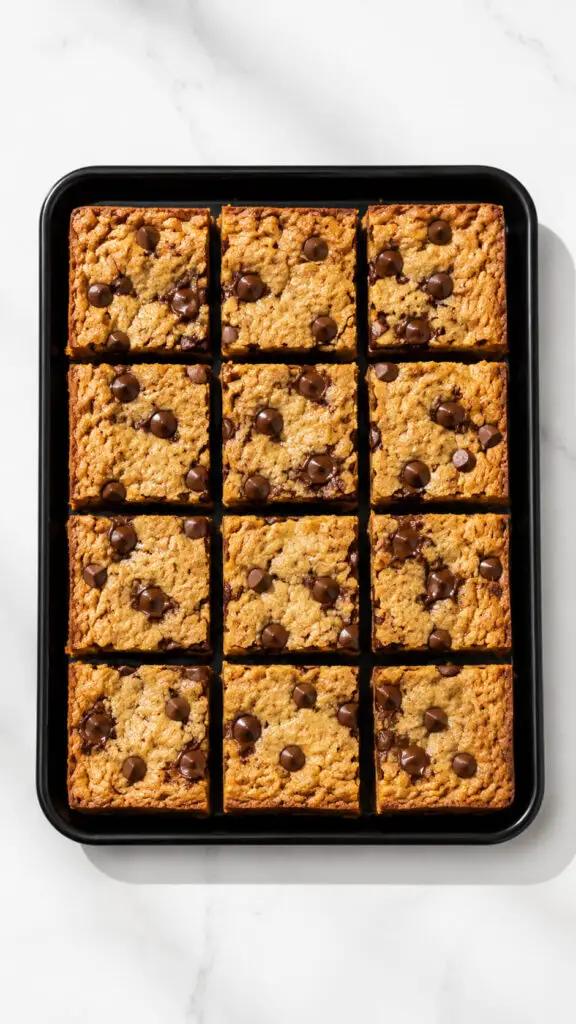
Yes, chickpeas belong in dessert, and these blondies prove it brilliantly.
Blended chickpeas create a soft, fudgy texture while disappearing completely into the batter.
Add brown sugar, vanilla, and chocolate chips, then bake until golden and irresistible.
Nobody ever guesses the secret ingredient, which makes serving them especially entertaining.
I once watched a room full of adults confidently insist they were made with cookie dough alone.
The reveal was priceless.
Ingredients
- 1 can chickpea, drained and rinsed
- ½ cup creamy peanut butter
- ⅓ cup maple syrup or honey
- ¼ cup brown sugar
- 2 teaspoons vanilla extract
- ½ teaspoon baking powder
- ¼ teaspoon salt
- ½ cup chocolate chips
- 2 tablespoons oat flour or all-purpose flour
Instructions
- Preheat the oven
Set your oven to 350°F (175°C) and lightly grease or line an 8-inch baking pan with parchment paper for easy removal. - Blend the chickpea mixture
Add the chickpea, peanut butter, maple syrup, brown sugar, vanilla extract, baking powder, salt, and flour to a food processor. Blend until the mixture becomes completely smooth and creamy with no visible chickpea pieces remaining. - Fold in the chocolate chips
Transfer the batter to a bowl and gently stir in most of the chocolate chips, saving a small handful for the top. - Spread the batter into the pan
Pour the blondie batter into the prepared baking pan and smooth the surface evenly using a spatula. Sprinkle the remaining chocolate chips over the top. - Bake the blondies
Bake for 22 to 28 minutes until the edges turn lightly golden and the center is just set. The blondies should still feel slightly soft in the middle for a fudgy texture. - Cool before slicing
Allow the blondies to cool completely in the pan before cutting them into squares. This helps them firm up and develop their rich chewy texture.
Tip
For extra gooey blondies, slightly underbake them by a minute or two and let them finish setting while cooling. The texture becomes incredibly soft and brownie-like.
26. Chickpea Pizza Topping
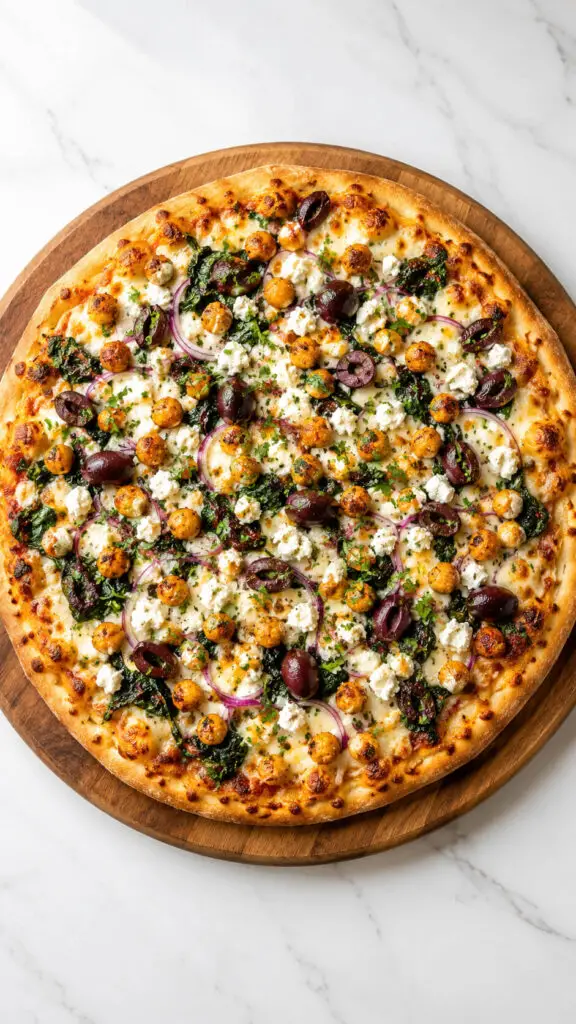
Chickpeas might sound unusual on pizza, but they add wonderful texture and flavor when paired with the right ingredients.
Scatter them over pizza dough with spinach, red onion, feta, olives, and mozzarella for a Mediterranean-inspired pie.
They crisp slightly in the oven while soaking up all that cheesy goodness.
This recipe became a family favorite after one experimental Friday pizza night accidentally turned into a monthly tradition everyone now fiercely protects.
Ingredients
For the Pizza
- 1 pizza dough
- 1 cup cooked chickpea, drained and patted dry
- 1 tablespoon olive oil
- 1 teaspoon Italian seasoning
- ½ teaspoon garlic powder
- 1 cup shredded mozzarella cheese
- ½ cup crumbled feta cheese
- ½ small red onion, thinly sliced
- 1 cup fresh spinach leaves
- ¼ cup sliced kalamata olives
- ½ cup pizza sauce
- Fresh parsley or basil for garnish
Instructions
- Preheat the oven
Heat your oven to 475°F (245°C). If using a pizza stone, place it inside the oven while preheating so the crust becomes extra crisp and golden. - Season the chickpea
Place the chickpea in a bowl and toss with olive oil, Italian seasoning, and garlic powder. This gives them a flavorful roasted taste that works perfectly on pizza. - Prepare the pizza dough
Roll or stretch the pizza dough into your desired shape and thickness. Transfer it onto a parchment-lined baking sheet or pizza peel. - Spread the pizza sauce
Evenly spread the pizza sauce over the dough, leaving a small border around the edges for the crust. - Add the toppings
Sprinkle mozzarella cheese over the sauce, then add the seasoned chickpea, red onion slices, spinach, olives, and crumbled feta evenly across the pizza. - Bake the pizza
Bake for 12 to 15 minutes or until the crust is golden brown and the cheese is melted and bubbling beautifully. - Finish with fresh herbs
Remove the pizza from the oven and sprinkle with chopped parsley or basil for a fresh burst of flavor before slicing and serving.
Tip
For extra crispy chickpea, roast them separately for 10 minutes before adding them to the pizza. This helps them stay slightly crunchy even after baking with the toppings.
27. Chickpea Energy Bites
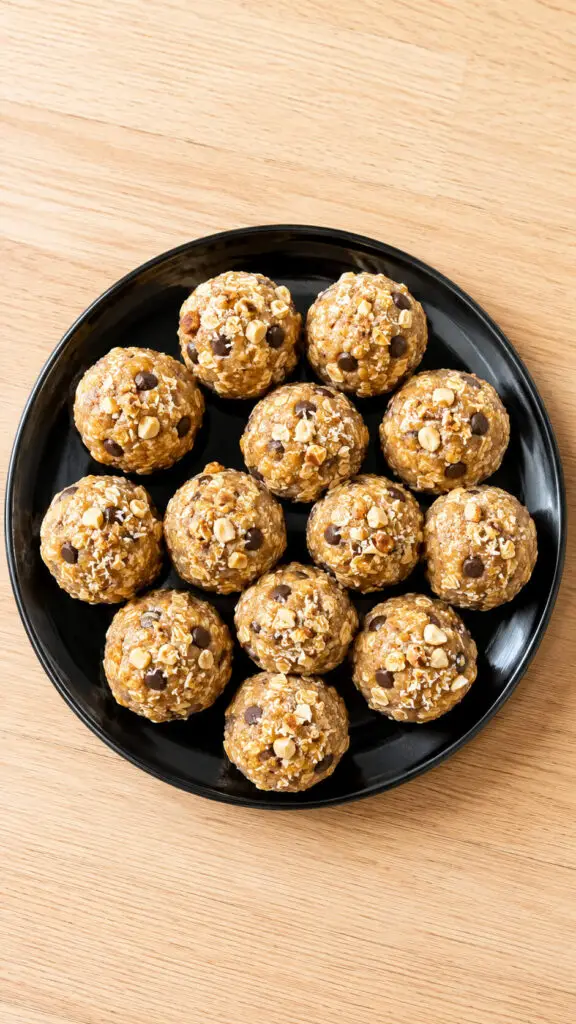
These little no-bake bites are perfect for busy mornings, afternoon slumps, or sneaky late-night snacking.
Blend chickpeas with peanut butter, oats, honey, and chocolate chips until a soft dough forms, then roll into bite-sized balls.
They’re sweet, filling, and surprisingly satisfying.
I started making these during chaotic event-planning seasons when proper meals became questionable decisions.
Keeping a batch in the fridge felt like having tiny edible life preservers ready whenever hunger struck.
Ingredients
- 1 ½ cups cooked chickpea, drained and rinsed
- 1 cup rolled oats
- ½ cup peanut butter
- ⅓ cup honey or maple syrup
- 1 teaspoon vanilla extract
- ½ teaspoon cinnamon
- ¼ teaspoon sea salt
- ½ cup mini chocolate chips
- 2 tablespoons chia seeds or flaxseeds (optional)
Instructions
- Blend the chickpea mixture
Add the chickpea, peanut butter, honey, vanilla extract, cinnamon, and sea salt to a food processor. Blend until the mixture becomes mostly smooth and creamy with no large chickpea pieces remaining. - Mix in the dry ingredients
Transfer the blended mixture to a bowl and stir in the rolled oats, chocolate chips, and chia seeds if using. Mix thoroughly until everything is evenly combined and the texture becomes thick enough to roll. - Chill the mixture
Place the bowl in the refrigerator for about 20 minutes. Chilling helps the mixture firm up, making the energy bites easier to shape. - Roll into bite-sized balls
Scoop small portions of the mixture and roll them between your palms to create evenly sized energy bites. Aim for about one tablespoon per bite. - Arrange and refrigerate
Place the chickpea energy bites onto a tray or airtight container and refrigerate for at least 30 minutes before serving. This helps them hold their shape and improves the texture. - Store for easy snacking
Keep the energy bites refrigerated in a sealed container for up to one week, making them perfect for quick breakfasts, lunchbox treats, or afternoon snacks.
Tip
If the mixture feels too sticky to roll, add a few extra oats. If it feels too dry, mix in a small spoonful of peanut butter or honey until the texture becomes soft and workable.