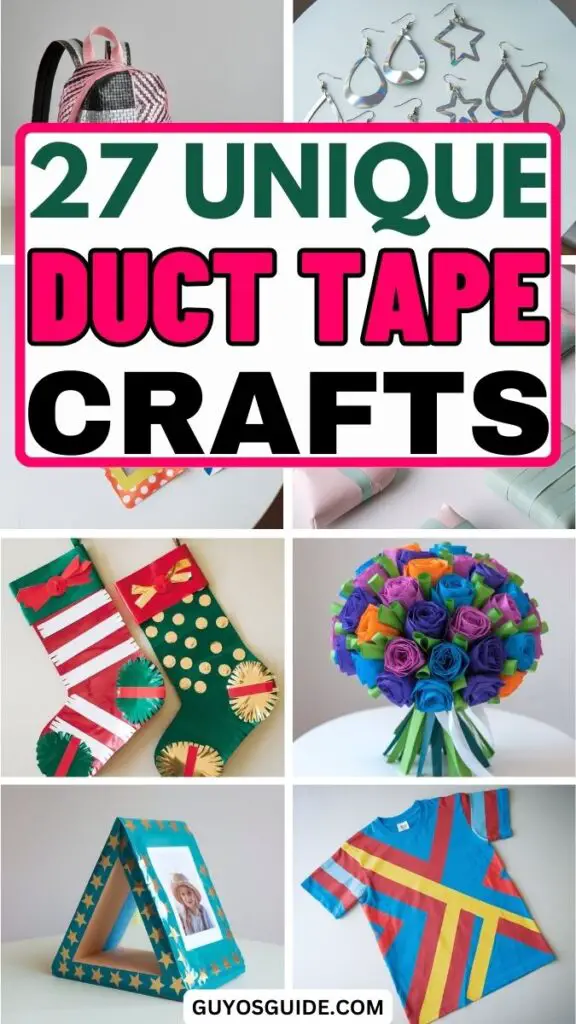
27 Unique Duct Tape Crafts to Spark Your Creativity
Did you know you can make amazing crafts with just duct tape?
From wallets to decorations, the possibilities are endless!
In this article, we’ll show you some fun and easy duct tape craft ideas to try at home.
Grab your tape, and let’s get started!
1. Duct Tape Wallet
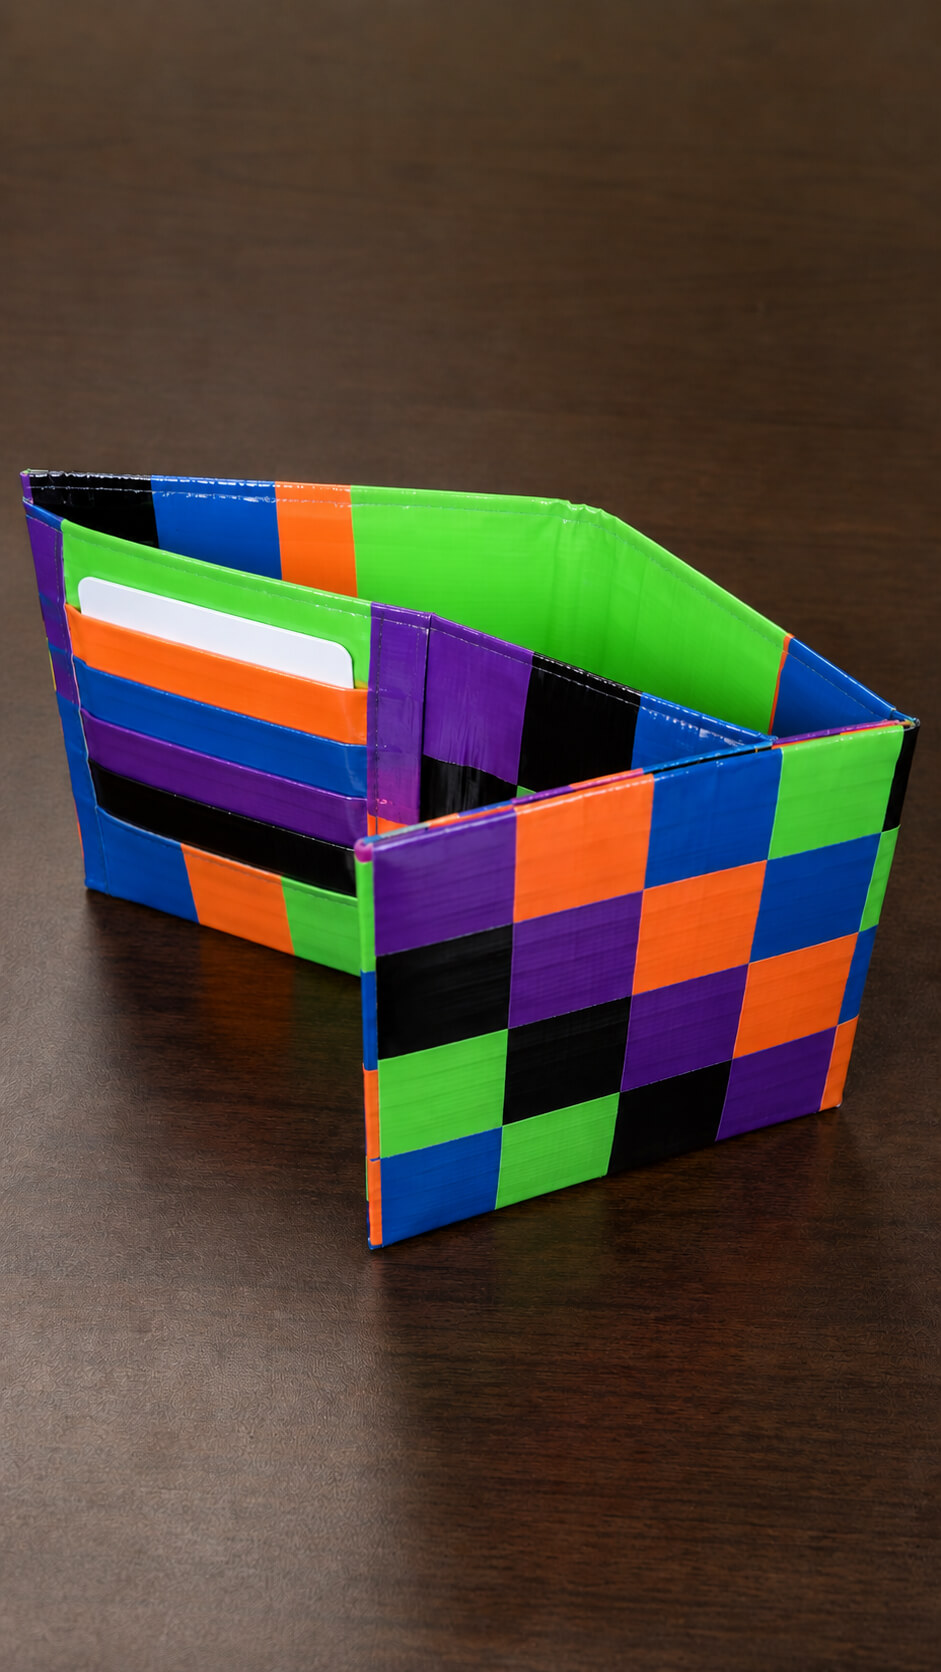
Creating a stylish duct tape wallet is not only functional but also an excellent way to express your personality.
You can mix and match colors, patterns, and even add a few embellishments like stickers or glitter.
These durable wallets are perfect for storing cash, cards, and even a little change.
The best part?
You get to create a personalized accessory that will stand out from the crowd.
Materials Needed
- Colorful patterned duct tape
- Solid color duct tape for the inside
- Scissors
- Ruler
- Cutting mat or flat work surface
- Craft knife (optional)
- Plastic cards for sizing the card slots
1. Create the Base Panels
Cut two large strips of duct tape and place them sticky side up on your table. Overlap another strip on top to create a larger sheet. Fold the edges inward to remove any sticky surfaces. Repeat this process until you have two sturdy rectangular panels for the wallet exterior and interior. Make sure the edges are smooth and evenly aligned for a clean homemade finish.
2. Make the Checkered Design
Cut small equal-sized strips of colorful duct tape and arrange them in a checkered pattern. Carefully place each piece side by side to create vibrant stripes and squares. Press the tape down firmly to avoid air bubbles and wrinkles. Trim the edges neatly so the pattern looks organized and polished.
3. Form the Wallet Shape
Fold the large panel in half horizontally to create the classic wallet shape. Use a ruler to press down the center fold for a crisp edge. This fold becomes the wallet spine and helps the wallet open and close smoothly.
4. Create the Card Slots
Cut several smaller rectangular strips for the card holders. Layer the pieces slightly on top of each other to form pockets. Attach them neatly to one side of the wallet interior. Leave enough space so cards can slide in and out easily while still staying secure.
5. Add the Bill Compartment
Attach another large strip of duct tape across the inside top and bottom edges to form the cash pocket. Seal the sides carefully while keeping the top open. Smooth out the tape to maintain the glossy finish and clean appearance.
6. Reinforce the Edges
Wrap thin strips of duct tape around all outer edges of the wallet. This strengthens the structure and gives the wallet a smooth professional look. Press down firmly along every corner to keep the tape secure and prevent peeling.
7. Final Touches
Inspect the wallet for uneven edges or loose tape pieces. Trim any extra material with scissors for a clean finish. Gently polish the surface with your hand to enhance the glossy reflection and make the colors stand out beautifully.
2. Duct Tape Phone Case
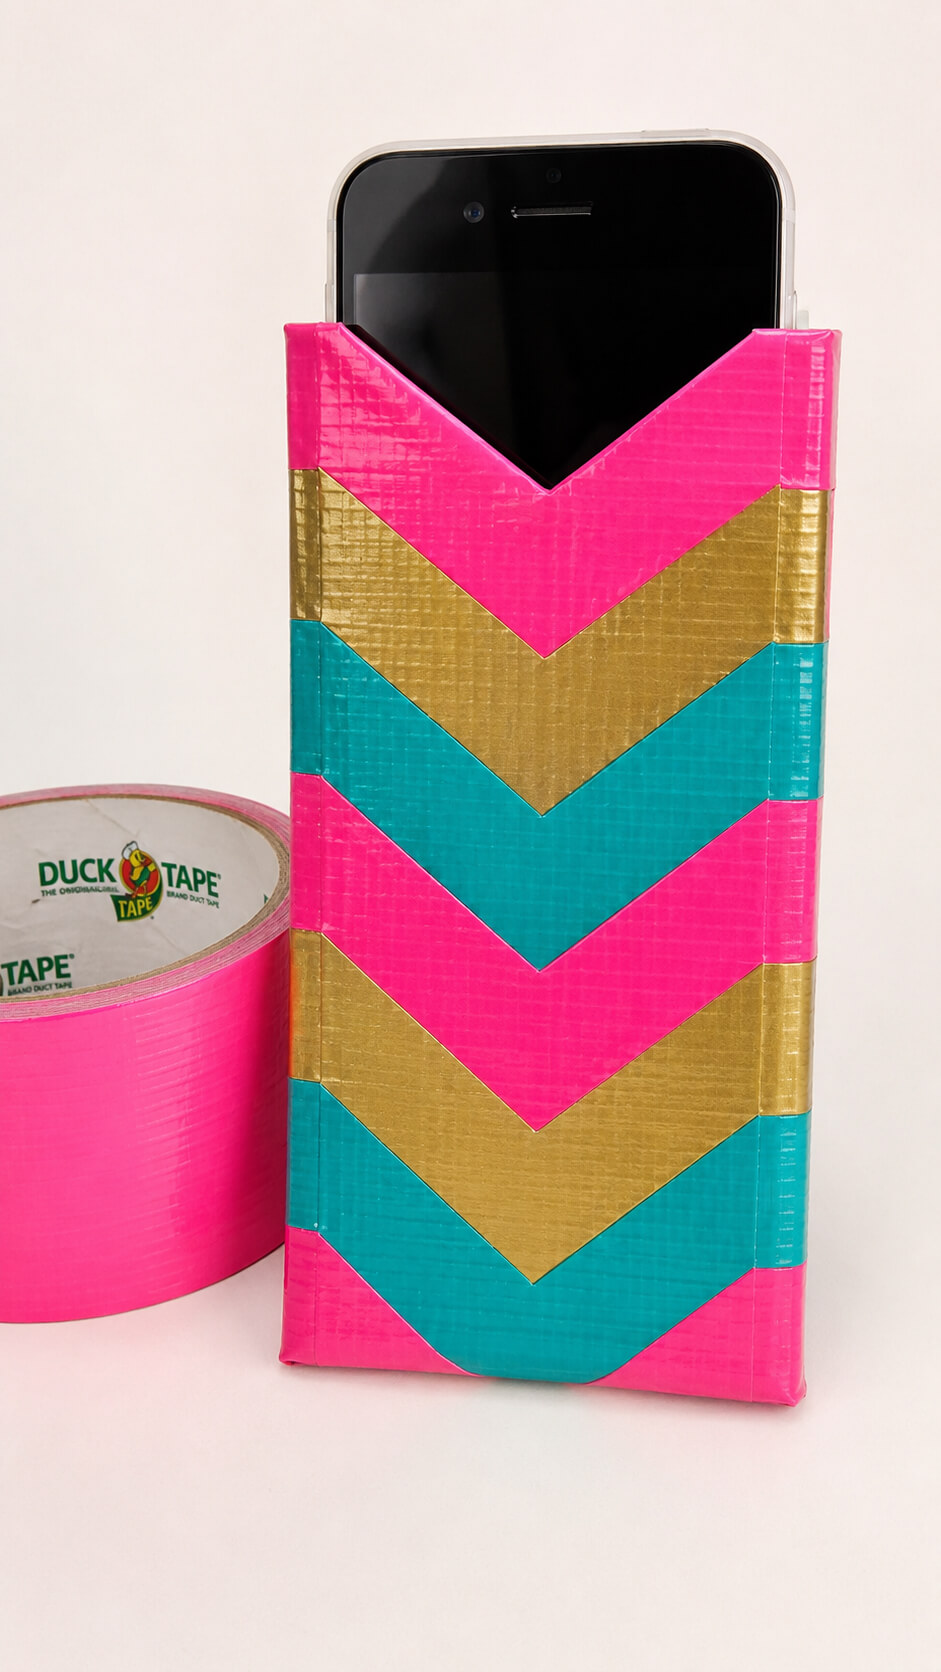
Protect your phone with a customized duct tape case that fits your style.
This project is an easy and fun way to add a personal touch to your device.
You can choose from various colors and designs, like floral patterns or geometric shapes.
Plus, it’s lightweight yet sturdy, keeping your phone safe from drops and scratches.
Materials Needed
- Pink duct tape
- Teal duct tape
- Gold duct tape
- Scissors or craft knife
- Cutting mat or flat work surface
- Ruler
- Smartphone for sizing
1. Measure Your Phone
Measure the height, width, and thickness of your smartphone using a ruler. Add about half an inch of extra space to the height and width so the phone can slide in comfortably without being too tight.
2. Create the Base Layer
Cut several strips of duct tape slightly longer than the height of your phone. Lay the strips side by side with the sticky sides overlapping slightly until you create one large sheet. Repeat the process to make a second sheet for the inside lining of the case.
3. Design the Chevron Pattern
Cut strips of pink, teal, and gold duct tape into angled pieces to create the chevron design. Arrange the colors in a repeating zigzag pattern across the outer sheet. Press each piece down firmly to remove air bubbles and keep the pattern smooth and aligned.
4. Seal the Decorative Layer
Place the second plain duct tape sheet behind the patterned sheet with the sticky sides facing inward. Smooth the layers together carefully to create a strong and durable fabric-like material for the phone case.
5. Trim the Shape
Place your smartphone on top of the duct tape sheet and mark the correct size for the pouch. Leave enough extra room on the sides for folding and sealing. Cut the material into a neat rectangle.
6. Fold and Seal the Edges
Fold the bottom portion upward to create a pocket that fits your phone snugly. Seal the left and right edges using matching strips of duct tape. Press firmly along the seams to create clean, polished edges.
7. Reinforce the Top Opening
Add thin strips of duct tape around the top opening of the case to strengthen the edge and prevent peeling over time. Smooth the tape carefully for a professional finish.
8. Test the Fit
Slide your smartphone partially into the case to make sure it fits securely. Adjust the edges if needed by trimming excess tape or resealing loose sections.
3. Duct Tape Bracelets
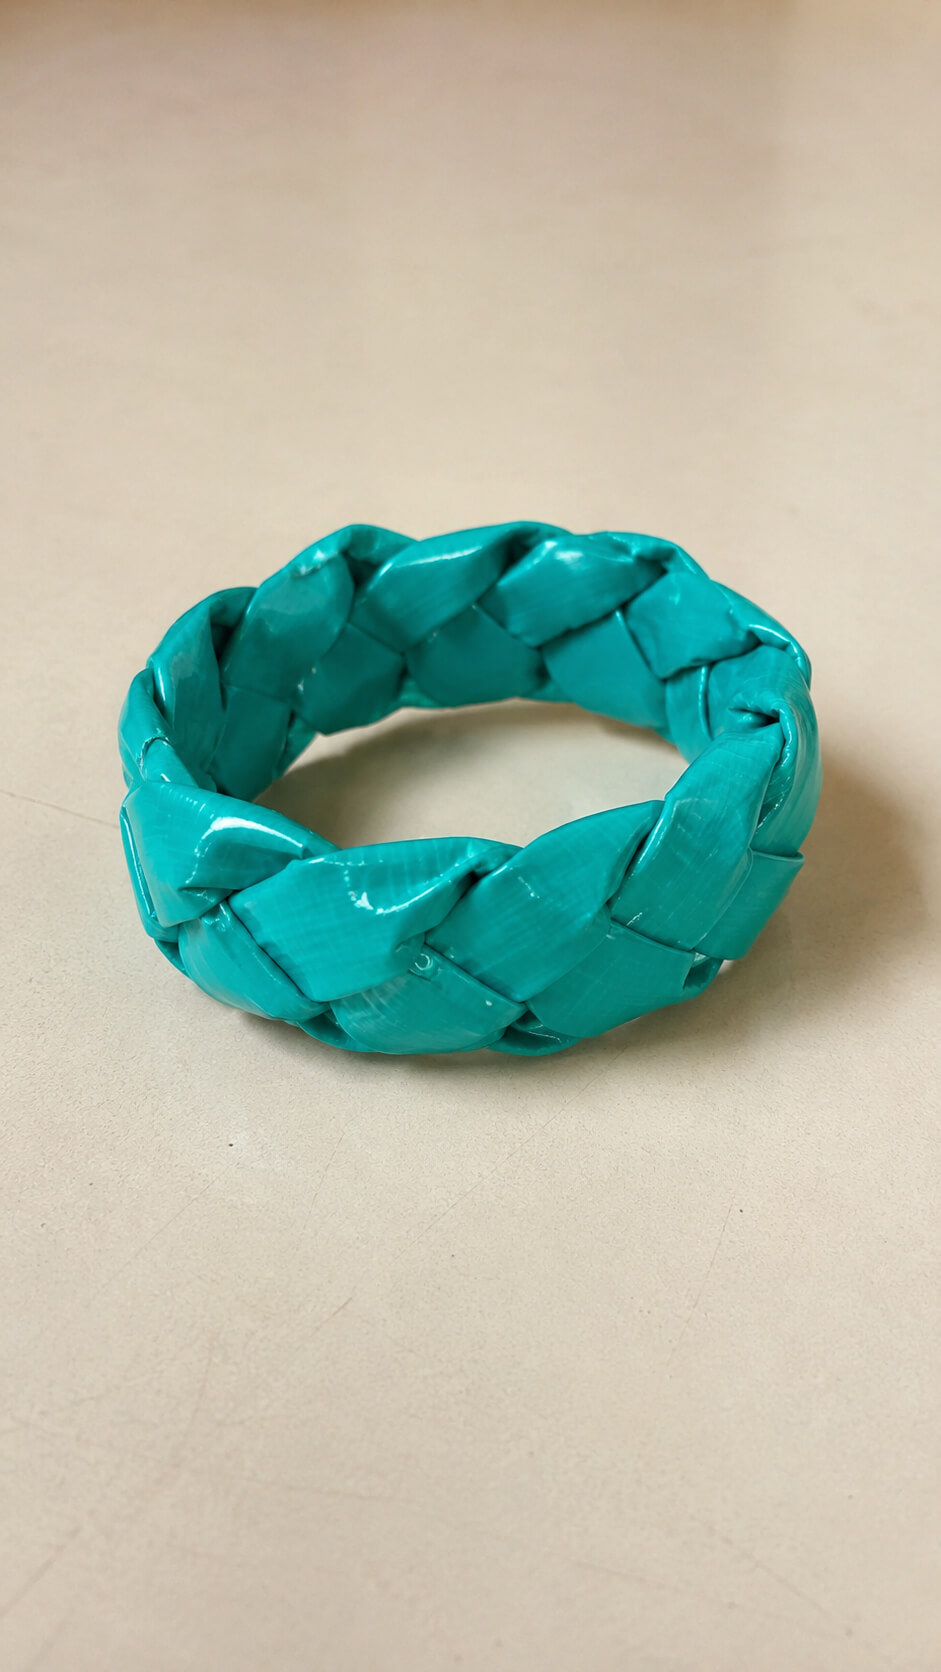
Show off your creativity with some colorful duct tape bracelets!
Whether you’re making simple single-color bands or fun layered designs, these bracelets are an easy way to add some flair to your accessories.
You can even experiment with different widths or combine metallics with neon shades for a bold statement piece.
Materials Needed
- Teal-colored duct tape or flexible craft tape
- Scissors
- Cutting mat or flat work surface
- Ruler or measuring tape
- Clear adhesive or glue (optional)
- Clips or tape to hold pieces in place
1. Prepare the Tape Strips
Cut several long strips of teal duct tape. Fold each strip lengthwise to create strong, smooth bands that will be used for braiding. Make sure all strips are similar in width so the bracelet looks neat and even when finished.
2. Arrange the Strips for Braiding
Lay the strips flat on a table and secure one end using tape or clips. Arrange the strips side by side so they are easy to weave together. Keeping the strips organized will help maintain a clean braided pattern.
3. Start the Braided Weave
Begin crossing the strips over one another in a simple braid pattern. Pull each strip tightly but carefully to keep the bracelet firm and evenly shaped. Continue weaving until the braid reaches the desired bracelet length.
4. Shape the Bracelet
Once the braid is complete, gently curve it into a circular bracelet shape. Check the size by wrapping it around your wrist to make sure it fits comfortably without being too loose or tight.
5. Secure the Ends
Attach the two ends together by folding and pressing the tape firmly. You can also add a small amount of glue or extra tape for stronger support. Smooth out any loose edges to keep the bracelet looking polished.
6. Finish and Display
Place the finished bracelet on a plain table surface to highlight its bright teal color and woven texture. The shiny material will reflect light slightly, giving the bracelet a clean and handmade decorative appearance.
4. Duct Tape Roses
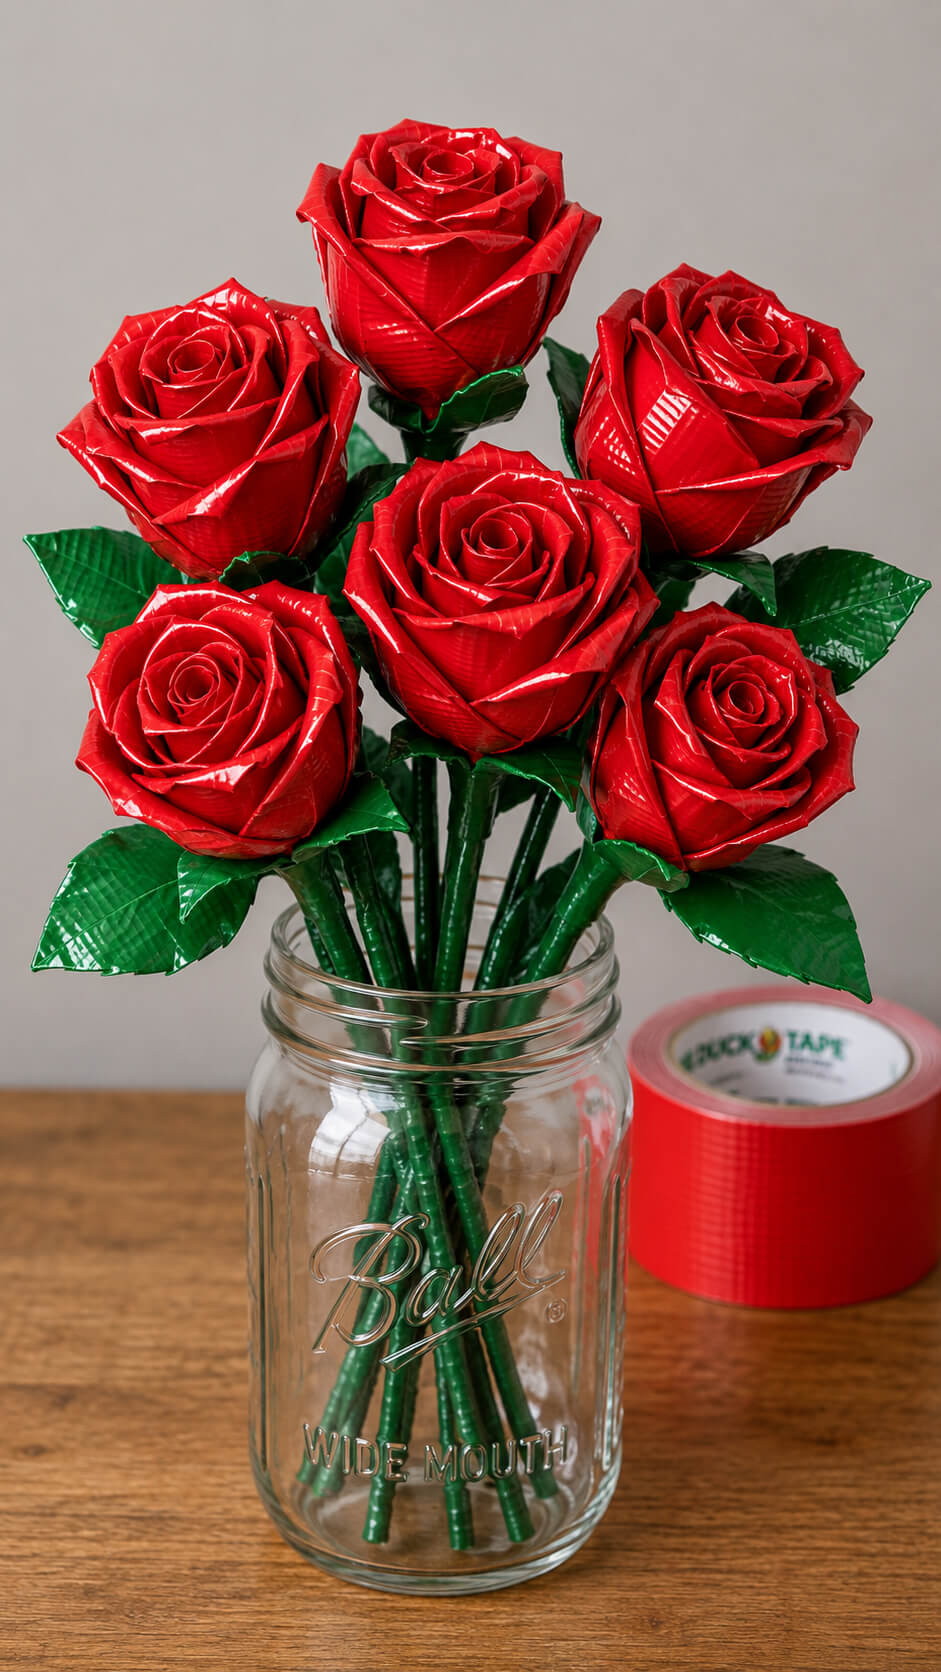
Transform your duct tape into beautiful roses that can be used in bouquets, as decorations, or even in a unique corsage.
This craft requires a bit of patience, but the end result is absolutely worth it.
You can choose vibrant colors or go for a more sophisticated look with metallic or pastel hues.
These flowers are the perfect DIY gift.
Materials Needed
- Red duct tape
- Green duct tape
- Scissors
- Floral wire or wooden skewers for stems
- Mason jar vase
- Ruler or measuring tape
- Plain table or workspace
1. Prepare the Petals
Cut several strips of red duct tape about 4 to 6 inches long. Fold and shape each strip carefully to create realistic rose petals. Make the petals slightly curved at the edges to give the flower a natural appearance. Prepare multiple petals for each rose so the flower looks full and detailed.
2. Create the Rose Center
Take one red duct tape petal and roll it tightly to form the center bud of the rose. This piece will act as the base of the flower. Press gently to keep the shape secure and neat before adding more petals around it.
3. Build the Rose Flower
Attach additional petals one at a time around the center bud. Overlap the petals slightly to create a layered rose effect. Continue adding petals until the flower reaches your preferred size and looks realistic from every angle.
4. Make the Stems
Wrap green duct tape around floral wire or wooden skewers to create sturdy stems. Smooth the tape as you wrap so the stems look clean and polished. Attach each completed flower securely to the top of a stem.
5. Add Leaves
Cut leaf shapes from the green duct tape and attach them beneath the flower heads and along the stems. Position the leaves naturally to make the bouquet look balanced and decorative.
6. Arrange the Bouquet
Place all the finished duct tape roses into a simple mason jar vase. Adjust the stems and flowers until the bouquet looks evenly spread and visually appealing from the front.
5. Duct Tape Keychains
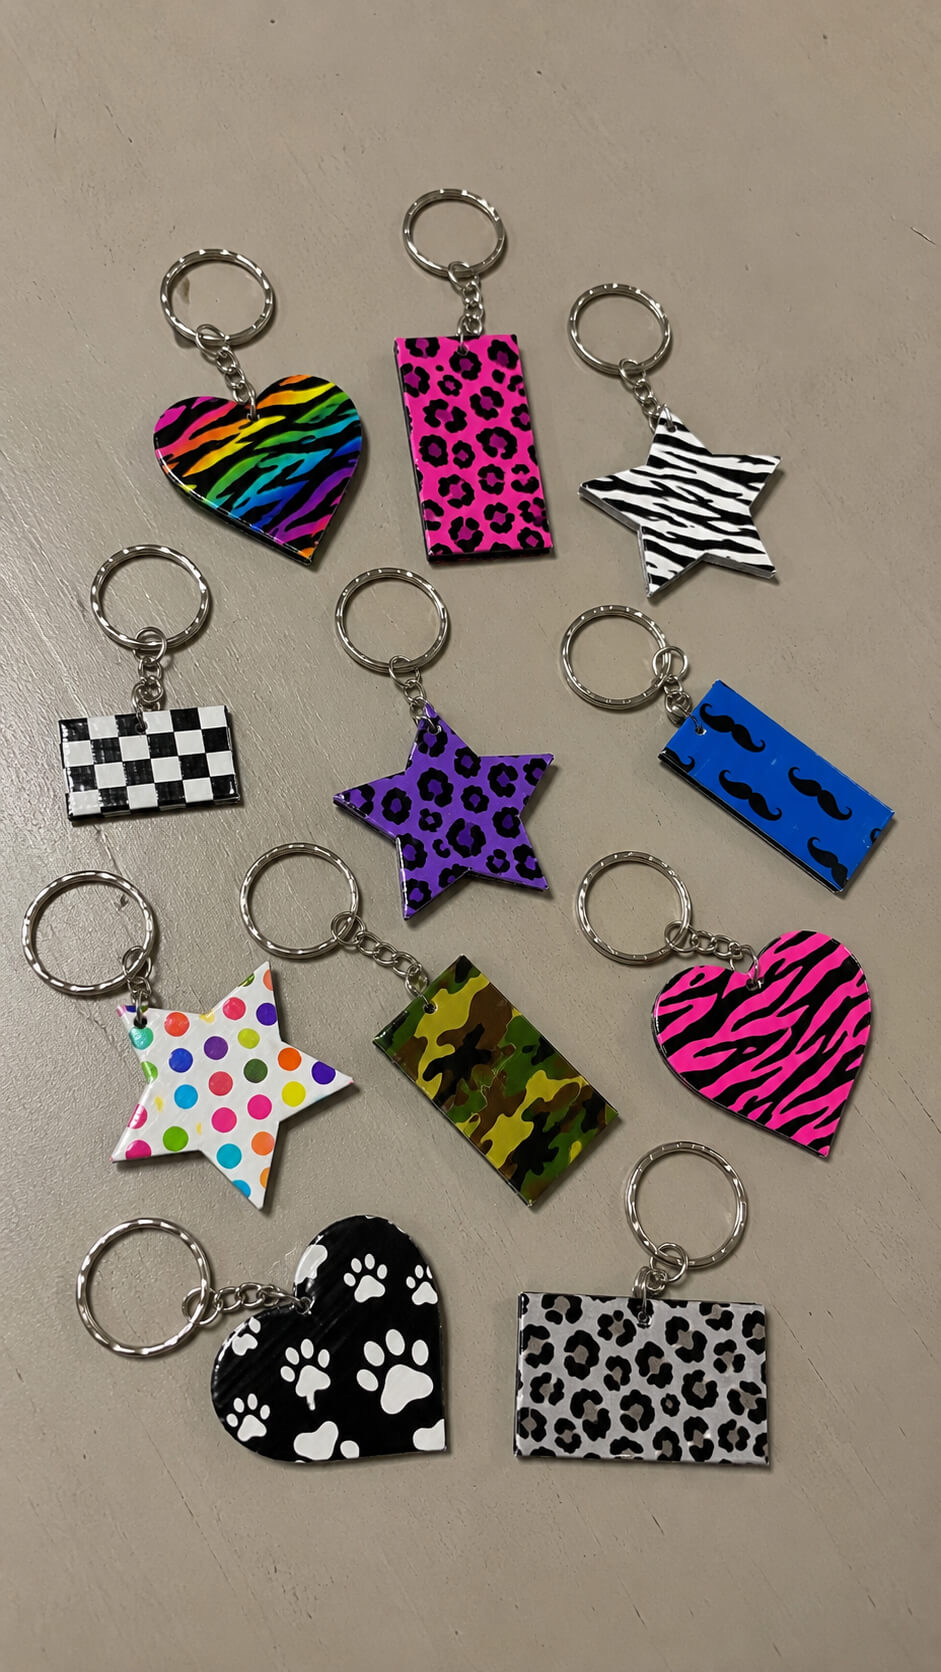
Create fun and functional keychains with duct tape!
This craft is perfect for beginners and can be customized to fit any theme.
You can make simple loops or add charms and embellishments to your design.
These make great gifts for friends or a cute way to keep your keys organized.
Materials Needed
- Patterned duct tape (animal prints, polka dots, stripes, or solid colors)
- Key rings with small chains
- Scissors
- Cardboard or thick paper
- Pencil
- Ruler
- Hole punch
- Clear tape (optional for extra shine)
1. Choose Your Shapes
Pick the shapes you want for your keychains. Hearts, stars, and rectangles work great because they are easy to cut and decorate. Draw your shapes onto cardboard or thick paper to make sturdy templates that can be reused later.
2. Cut the Base Pieces
Place your templates onto the cardboard and trace around them with a pencil. Carefully cut out each shape using scissors. Make sure the edges are smooth so the duct tape will stick neatly without wrinkles.
3. Cover the Shapes with Duct Tape
Choose your favorite patterned duct tape and place it over the cardboard shapes. Press the tape down firmly to remove air bubbles. Fold the extra tape around the edges to cover the back and give the keychain a clean finish. You can mix different patterns for a fun look.
4. Trim the Edges
Use scissors to carefully trim away any uneven tape around the shapes. This helps the keychains look neat and professional. If needed, add another layer of tape for extra durability.
5. Punch a Hole
Use a hole punch near the top of each shape. Make sure the hole is not too close to the edge so it will not tear when attached to the key ring.
6. Attach the Key Ring
Open the small chain or jump ring attached to the silver key ring and slide it through the hole in the keychain. Secure it tightly so the shape hangs properly.
7. Add Finishing Touches
Check each keychain for loose edges or wrinkles. You can add clear tape over the design for extra shine and protection. Your duct tape keychains are now ready to use or give as gifts.
6. Duct Tape Headbands
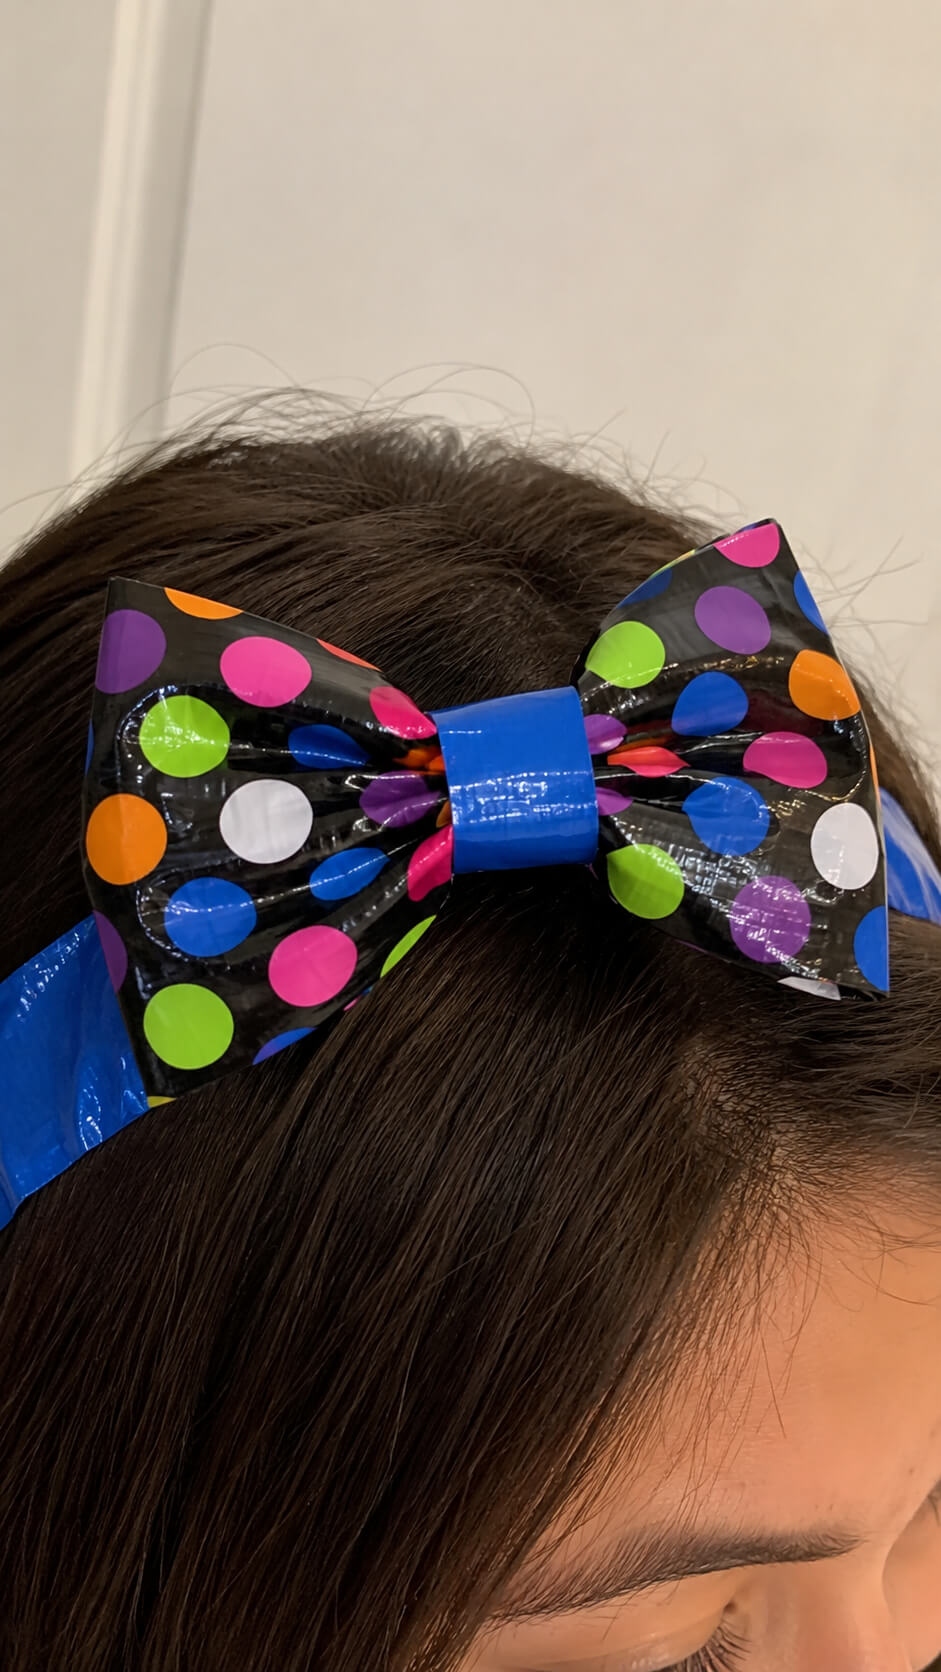
A duct tape headband is a fun accessory that can be worn every day or for special occasions.
Choose your favorite color and style it with bows, flowers, or even glitter for a custom touch.
Whether you’re rocking it at the gym or on a casual day out, these headbands are both practical and trendy.
Materials
- Black duct tape with a colorful polka dot pattern
- Solid blue duct tape
- Scissors
- Ruler or measuring tape
- Hairband or enough blue duct tape to create a headband
Instructions
1. Cut the duct tape pieces
Measure and cut one rectangle of colorful polka dot duct tape for the bow, one narrow strip of solid blue duct tape for the center wrap, and one longer strip of blue duct tape that will serve as the headband.
2. Form the bow loops
Fold the colorful duct tape rectangle inward from both ends until they meet in the middle. Press the folds gently to create two even, symmetrical loops.
3. Shape the center of the bow
Pinch the middle of the folded bow to create the classic bow shape with neat pleats. Hold the center firmly while preparing the wrap.
4. Secure the bow with blue duct tape
Wrap the narrow blue duct tape strip tightly around the pinched center of the bow. Press the ends together on the back to keep the bow securely in place.
5. Create the headband
Cut a longer strip of blue duct tape and fold it lengthwise so the sticky sides are enclosed. This creates a stronger, more comfortable band to wear.
6. Attach the bow to the headband
Position the finished bow in the center of the blue headband and firmly secure it using additional blue duct tape on the back. Make sure the bow sits evenly before pressing everything together.
7. Wear and adjust the bow
Place the headband over your hair and adjust the bow until it is centered. Smooth any wrinkles and gently reshape the loops if needed for a polished look.
Tip
For the best results, use glossy duct tape and press every seam firmly as you work. This helps the bow keep its shape and gives the finished accessory a clean, professional appearance.
7. Duct Tape Pencil Holder

Organize your workspace in style by creating a duct tape pencil holder.
You can personalize this craft to match your office decor or even make a few in different sizes to hold all your pens, markers, and highlighters.
The beauty of this project lies in the endless color combinations and patterns you can experiment with.
Materials
- Black duct tape
- Silver duct tape
- Cardboard tube or empty tin can
- Scissors
- Ruler (optional)
- Pencil or marker (optional for measuring)
Instructions
1. Wrap the holder with black duct tape
Cover the entire outside of the cardboard tube or tin can with black duct tape. Smooth out any wrinkles as you work to create a clean, even surface.
2. Cut silver duct tape into zigzag strips
Cut strips of silver duct tape and trim them into a zigzag pattern. Make the zigzags as even as possible for a neat decorative design.
3. Attach the silver zigzag design
Carefully stick the silver zigzag strips around the black-covered holder. Press the tape firmly so it adheres smoothly without bubbles.
4. Trim the edges for a polished finish
Use scissors to trim away any excess tape around the top and bottom edges. Fold any overhanging tape inside the holder for a tidy appearance.
5. Fill the holder with pencils and pens
Place your colorful pencils, pens, or markers inside the finished holder. Arrange them neatly so they are easy to reach and add a bright decorative touch to your desk.
Tip
For the best results, apply the duct tape slowly while smoothing it with your fingers to prevent air bubbles and wrinkles, giving your pencil holder a clean, professional-looking finish.
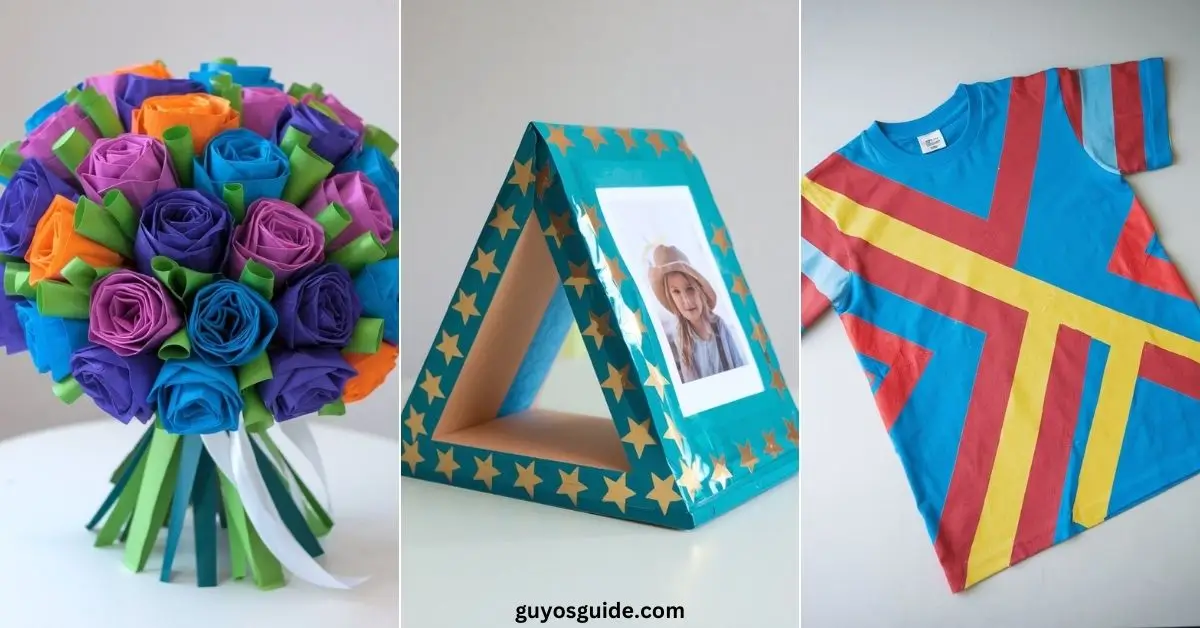
8. Duct Tape Flower Bouquet

Bring a little nature indoors with a duct tape flower bouquet.
You can craft colorful flowers that last forever—no need for water or sunlight!
These flowers are perfect for gifting or simply brightening up your space.
With a variety of duct tape colors, the possibilities are endless for creating your dream bouquet.
Materials
- Blue duct tape
- Pink duct tape
- Purple duct tape
- Green duct tape (for stems and leaves)
- Floral wire or wooden skewers
- Scissors
- Craft knife (optional)
- Ruler
- White ribbon
- Cutting mat or smooth work surface
Instructions
1. Cut the duct tape petals
Measure and cut several equal-sized pieces of blue, pink, and purple duct tape. Fold each piece over itself with the sticky sides together, leaving a small adhesive edge. Trim the folded pieces into petal shapes with rounded or pointed tips. Make 5–8 petals for each flower, depending on how full you want the bloom to look.
2. Create the flower center
Cut a narrow strip of duct tape in a contrasting color and make small, even fringe cuts along one edge. Roll the strip tightly from one end to form the flower’s center, then secure it with a small piece of tape.
3. Attach the petals around the center
Arrange the petals evenly around the flower center, slightly overlapping each one to create a natural bloom. Secure each petal firmly with a small strip of duct tape, making sure the flower keeps its shape.
4. Make the green stem
Wrap a wooden skewer or floral wire completely with green duct tape, smoothing out any wrinkles as you go. Leave the top slightly exposed so the flower can be attached securely.
5. Connect the flower to the stem
Attach the completed flower head to the top of the wrapped stem using green duct tape. Reinforce the connection by wrapping additional tape around the base of the flower for extra stability.
6. Add green leaves
Cut leaf shapes from green duct tape, fold them so only a small adhesive section remains, and attach them along the stem. Position the leaves at different heights to give the flower a more realistic appearance.
7. Repeat for additional flowers
Create several flowers using different combinations of blue, pink, and purple petals. Vary the size and arrangement slightly so the bouquet looks fuller and more natural.
8. Arrange the bouquet
Gather all the finished flowers together and adjust the stems until the blooms are evenly spaced. Wrap the stems tightly with green duct tape near the base to keep the bouquet secure.
9. Tie the bouquet with a white ribbon
Wrap a white ribbon around the bundled stems and tie it into a neat bow. Trim the ribbon ends evenly for a clean, decorative finish.
10. Display the finished bouquet
Place the completed duct tape flower bouquet upright on a plain white table. Adjust the flowers and ribbon one final time so the arrangement looks balanced and polished.
Tip
Use sharp scissors when cutting the petals to create smooth, clean edges. Slightly curve each petal before attaching it to the flower center to give the finished bouquet a more realistic and dimensional appearance.
9. Duct Tape Bookmarks
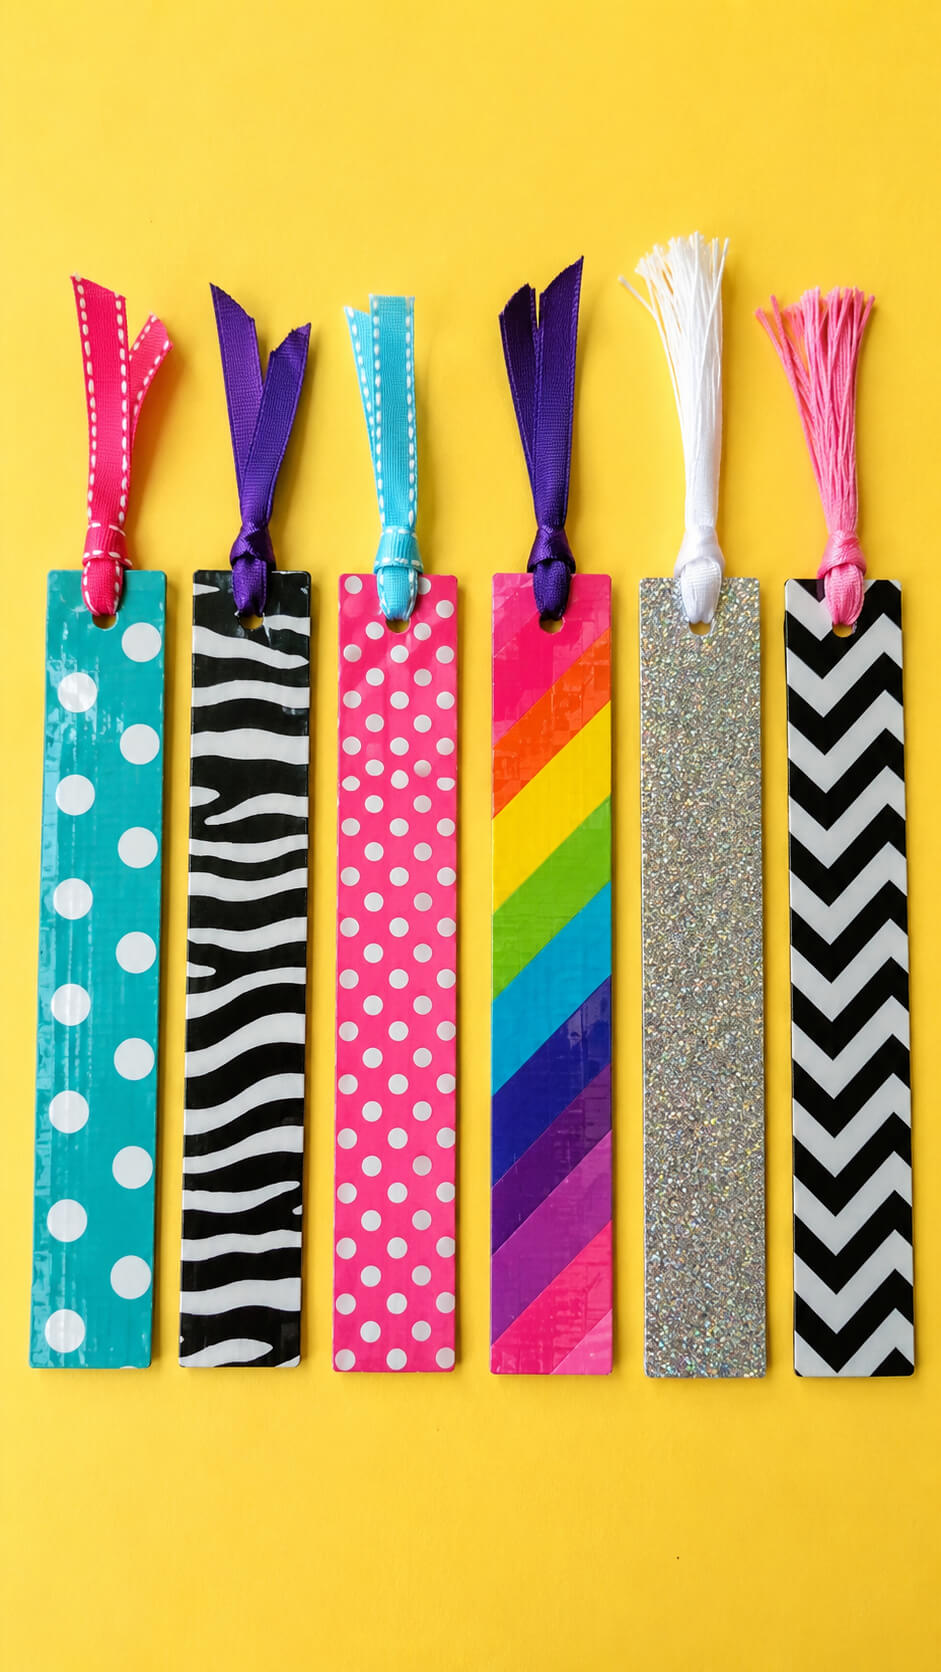
Need a fun, personalized way to mark your page?
Duct tape bookmarks are the answer!
These easy-to-make bookmarks are both durable and stylish.
You can design them in any color or pattern, from minimalistic to bold designs.
Add some embellishments like buttons or charms for extra flair.
Materials Needed
- Patterned duct tape (polka dots, stripes, glitter, or any design you like)
- Plain cardstock or thin cardboard
- Scissors or a craft knife
- Hole punch
- Ribbon or tassel
- Ruler
- Pencil (optional)
Instructions
1. Cut the cardstock into bookmark strips
Measure and cut the cardstock into long rectangles, about 2 x 6 inches (5 x 15 cm). These will serve as the sturdy base for your bookmarks.
2. Cover one side with patterned duct tape
Carefully apply a strip of duct tape over one side of the cardstock. Smooth it from top to bottom to remove any air bubbles or wrinkles.
3. Wrap the tape around the edges
Fold the excess duct tape neatly over the edges to the back of the bookmark. This creates a clean finish and helps protect the cardstock.
4. Add duct tape to the back if needed
If the back is still exposed, cover it with another piece of duct tape. Trim away any excess tape so the edges remain neat.
5. Trim the bookmark to create even edges
Use scissors or a craft knife and ruler to remove uneven edges. Straight, clean edges give the bookmark a polished appearance.
6. Punch a hole at the top
Use a hole punch to make a centered hole near the top of the bookmark. Leave enough space from the edge so it won’t tear with use.
7. Attach a ribbon or tassel
Thread a ribbon or tassel through the hole and tie it securely. This decorative touch also makes the bookmark easier to find in a book.
8. Create additional designs
Repeat the process using different duct tape patterns such as glitter, polka dots, stripes, or geometric prints to make a colorful collection.
Tips
- Choose high-quality duct tape for a smoother finish and stronger adhesion.
- Press the tape firmly to prevent peeling over time.
- Use contrasting ribbon colors to complement each bookmark design.
- Round the bottom corners with scissors for a softer, professional look.
- Laminate the finished bookmark with clear tape for extra durability if it will be used frequently.
10. Duct Tape Backpack

Upgrade your school bag or everyday backpack with duct tape!
This DIY project allows you to customize your bag with a variety of colors, textures, and patterns.
You can create a sleek, modern design or add quirky elements like animal faces or geometric shapes.
It’s a fantastic way to express your creativity.
Materials
To make this duct tape backpack, gather the following materials:
- Pink duct tape
- Silver duct tape
- Black duct tape
- Fabric or heavy-duty zipper (for the main compartment)
- Small zipper (for the front pocket)
- Scissors or a craft knife
- Cutting mat
- Ruler or measuring tape
- Pencil or washable marker
- Cardboard or thick paper (for creating templates)
- Hook-and-loop tape or additional duct tape for reinforcement (optional)
Tips Before You Start
- Work on a clean, flat surface to keep the tape free from dust.
- Use a ruler to keep your tape strips straight and your measurements accurate.
- Press every tape seam firmly to improve durability.
- Reinforce areas that will hold weight, such as the straps and bottom panel.
Instructions
1. Create the duct tape fabric
Cut long strips of pink, silver, and black duct tape and overlap them slightly to form large sheets. Make a second layer with the sticky sides facing each other to create a strong, non-sticky fabric. Prepare enough material for all backpack pieces.
2. Cut out the backpack panels
Using your template, cut the front, back, side panels, bottom, flap (if desired), front pocket pieces, and strap pieces from the duct tape fabric. Arrange the colors into a patchwork pattern before cutting to achieve the finished design.
3. Assemble the main body
Attach the side panels to the front panel using overlapping strips of duct tape on both the inside and outside seams. Add the bottom panel, then connect the back panel to complete the backpack body.
4. Install the main zipper
Secure the zipper along the top opening with narrow strips of duct tape. Press firmly along the zipper edges to keep it straight and ensure it opens and closes smoothly.
5. Make the front pocket
Create a smaller pocket using the prepared pocket pieces and attach the small zipper along its top edge. Tape the completed pocket securely to the front of the backpack, reinforcing all edges for extra strength.
6. Build the shoulder straps
Create two long, reinforced straps by layering multiple strips of duct tape together. Attach one end of each strap near the top of the back panel and the other ends near the bottom corners. Add extra tape over the attachment points for durability.
7. Add the carrying loop
Form a short loop from folded duct tape and secure it to the top center of the backpack between the shoulder straps. Reinforce both ends so it can support the backpack’s weight.
8. Reinforce and finish the backpack
Cover any exposed seams with matching duct tape, smooth out wrinkles, and check that all corners are securely sealed. Test the straps, pocket, and zipper to ensure everything is firmly attached and functional.
Tip
For the cleanest patchwork appearance, plan your pink, silver, and black pattern before assembling the panels. Keeping the color blocks aligned gives the backpack a neat, professional-looking finish while minimizing waste.
11. Duct Tape Sunglasses Case
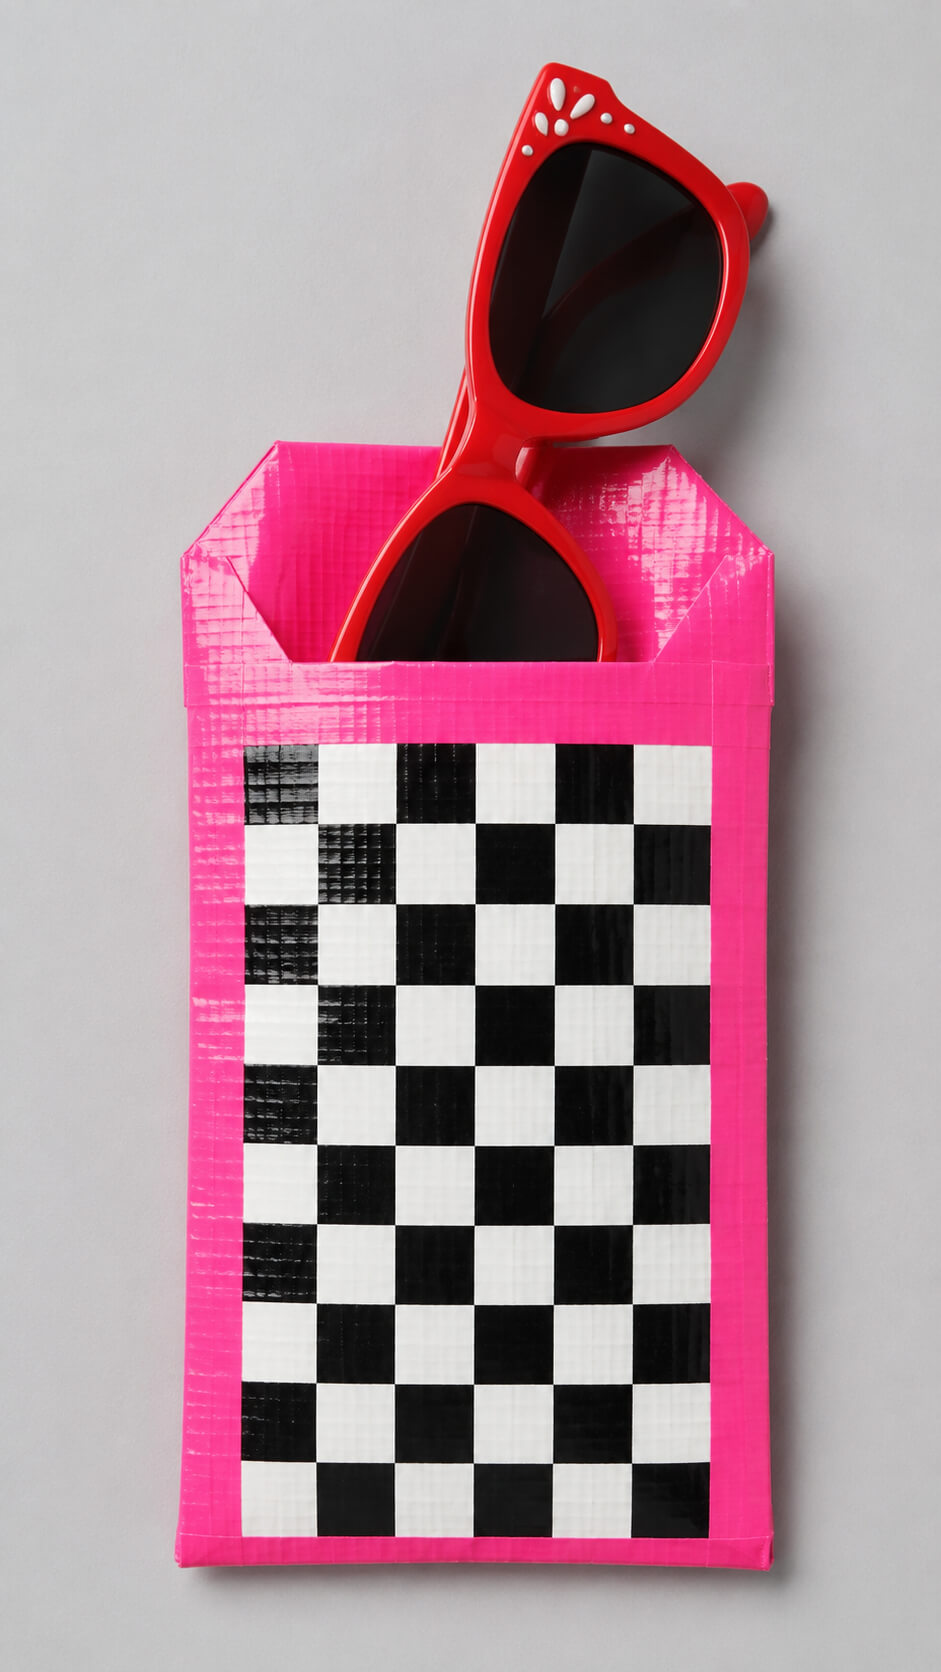
Protect your sunglasses in a fun and durable way with a duct tape case.
Not only is it a great project to show off your crafting skills, but it also ensures your shades stay scratch-free.
You can make it as simple or as elaborate as you like, adding patterns or even pockets for extra storage.
Materials
- Bright pink duct tape
- Black duct tape
- White duct tape
- Cutting mat or smooth work surface
- Craft knife or scissors
- Ruler
- Pencil or washable marker
- Self-healing cutting mat (optional)
Instructions
1. Create the bright pink base panel
Cut several strips of bright pink duct tape and overlap them slightly to create a sturdy sheet. Trim it into a rectangle large enough to fold into a sunglasses pouch, leaving extra length for the bottom and side seams.
2. Make the checkerboard pattern
Cut equal-sized squares from the black and white duct tape. Arrange them in alternating rows to form a checkerboard design, then attach the completed pattern to the center front of the pink base.
3. Fold the pouch into shape
Fold the bottom portion of the pink sheet upward until it reaches the desired pouch height. Make sure both sides align evenly so the pouch has a clean rectangular shape.
4. Seal the side edges
Use strips of pink duct tape to seal both side edges securely. Press the tape firmly along the seams to strengthen the pouch while keeping the edges neat.
5. Shape the angled opening
Trim the top corners of the pouch at matching angles to create the slightly slanted opening. Cover the cut edges with thin strips of pink duct tape for a polished finish.
6. Reinforce the top edge
Apply a folded strip of pink duct tape around the entire opening. This reinforces the rim, helps the pouch maintain its shape, and gives it a clean professional look.
7. Test the fit with your sunglasses
Slide your sunglasses into the finished pouch to ensure they fit comfortably without being too loose or too tight. Adjust the pouch height if needed before sealing any final edges.
Tip
For the cleanest results, use a ruler when cutting the checkerboard squares so every square is the same size, and press each strip of duct tape firmly to eliminate wrinkles and air bubbles.
12. Duct Tape Hair Clips

Add some pizzazz to your hair accessories by creating your own duct tape hair clips.
Whether you choose vibrant neon colors or soft pastels, these clips can be tailored to any occasion.
Make them simple for everyday wear, or go all out with bows, flowers, or even fun shapes like hearts or stars.
Materials
- Thin metal snap hair clips
- Colored shiny duct tape (pink, blue, yellow, floral patterns)
- Thin cardstock or sturdy paper
- Pencil
- Scissors
- Craft knife (optional)
- Strong craft glue or double-sided tape
- Ruler
- Cutting mat (optional)
Instructions
1. Trace and cut the paper shapes
Draw small hearts, flowers, or any simple decorative shapes onto thin cardstock. Carefully cut them out with scissors so they are clean and even, as these will form the base of your decorations.
2. Cover the paper with duct tape
Apply pieces of shiny duct tape over both sides of each paper shape, smoothing out any wrinkles or air bubbles. Trim away the excess tape so the edges follow the shape neatly.
3. Create decorative designs
Mix solid colors with patterned duct tape to make colorful hearts and floral designs. Layer smaller shapes on top of larger ones if you’d like to create a dimensional look.
4. Prepare the hair clips
Wipe the surface of each hair clip to remove dust or oils. A clean surface helps the adhesive bond more securely and keeps the decorations in place.
5. Attach the decorations
Apply a thin layer of strong craft glue or secure double-sided tape to the back of each decorated paper piece. Press it firmly onto the top of the hair clip and hold it in place for several seconds.
6. Let the glue dry completely
Place the finished hair clips on a flat surface and allow the adhesive to cure according to the glue manufacturer’s instructions before handling or wearing them.
7. Check the finished clips
Inspect each clip to make sure the decoration is firmly attached and the edges are smooth. Trim any uneven tape if needed for a polished, handmade finish.
Tip
For longer-lasting hair clips, seal the edges of the duct tape by pressing them firmly with your fingers or the back of a spoon before attaching the decorations. This helps prevent the tape from lifting over time and gives your clips a cleaner finish.
13. Duct Tape Coasters
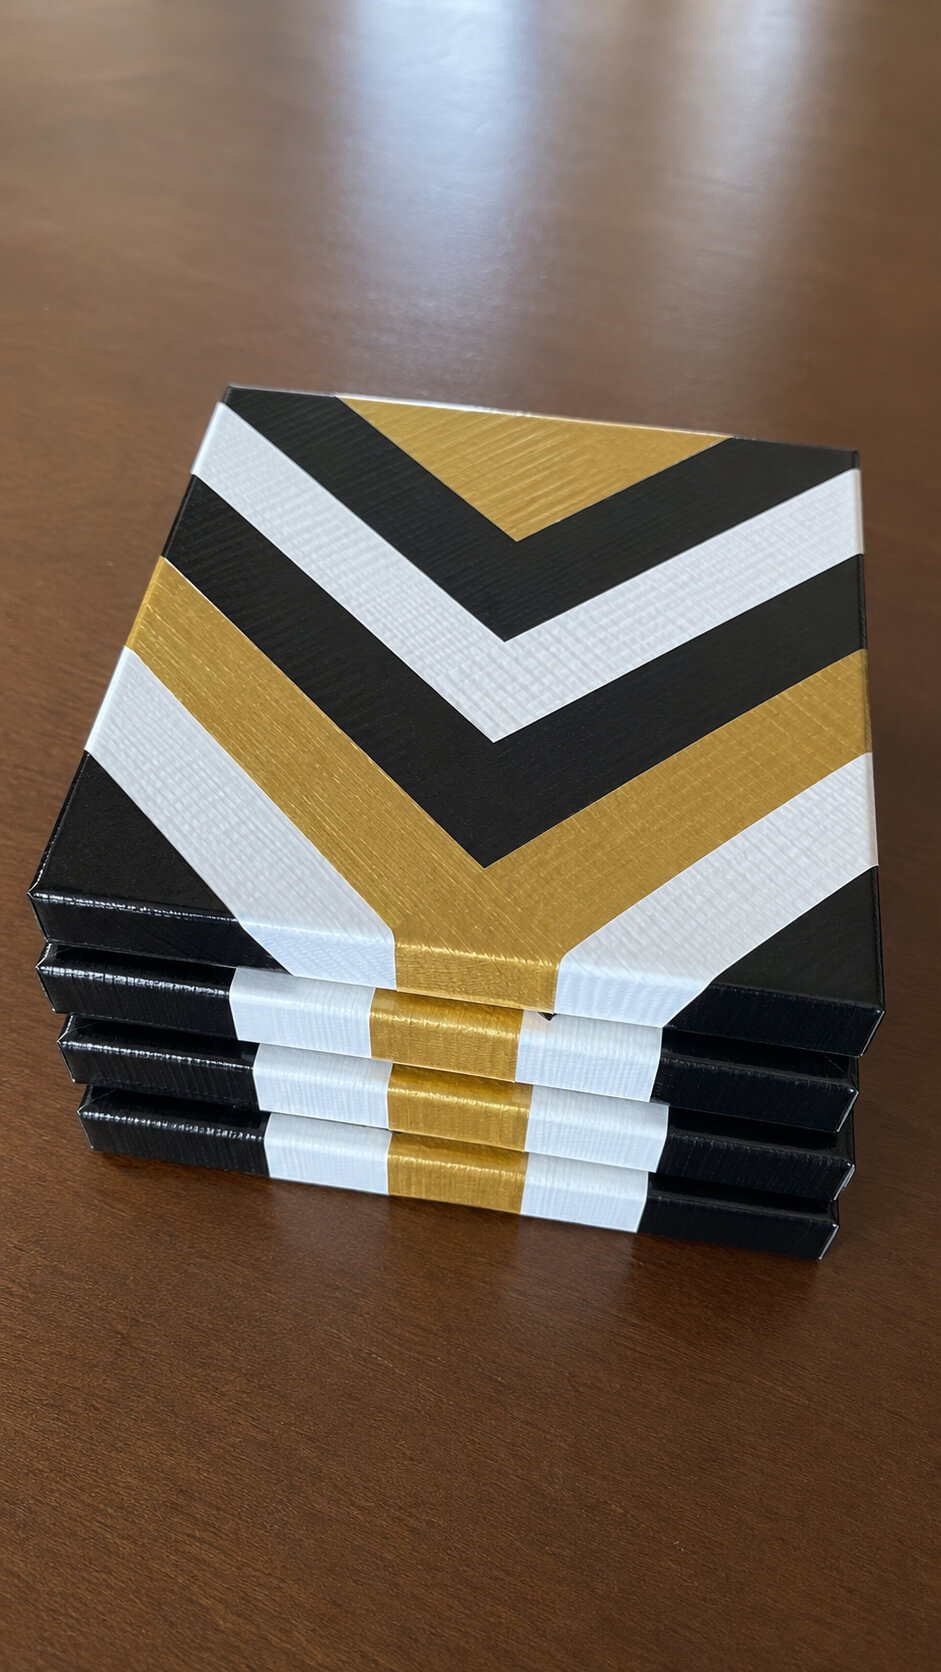
Protect your tables in style with custom-made duct tape coasters.
This is an easy and affordable way to add personality to your home decor.
Choose from a variety of colors, patterns, and textures to match your style.
You can even personalize them by adding your initials or fun designs.
Materials Needed
- Black duct tape
- White duct tape
- Gold duct tape
- Self-healing cutting mat
- Metal ruler
- Precision craft knife or rotary cutter
- Scissors
- Cutting template or square ruler
- Squeegee or old credit card for smoothing
- Cork sheets or thick cardstock (optional for added stiffness)
- Clear self-adhesive laminate or clear duct tape (optional for extra gloss)
Instructions
1. Create strips of colored duct tape
Cut long strips of black, white, and gold duct tape. Lay each strip sticky-side down on the cutting mat or overlap strips slightly to create flat sheets that can be cut into even widths for the pattern.
2. Cut uniform tape strips
Using a metal ruler and craft knife, cut the tape into evenly sized strips. Keeping every strip the same width ensures the finished chevron and striped designs look neat and professional.
3. Arrange the striped pattern
Place the tape strips side by side in your desired order, alternating the black, white, and gold colors. Smooth each strip as you work to eliminate wrinkles and air bubbles.
4. Assemble the chevron pattern
Position the strips diagonally so they meet in the center, forming a clean V-shaped chevron design. Trim the excess tape with a craft knife to create crisp, symmetrical edges.
5. Bond the pattern into a solid sheet
Apply additional tape to the back of the patterned surface to hold everything together securely. Press firmly with a squeegee or an old credit card to create a smooth, durable finish.
6. Cut the coaster squares
Measure and mark equal-sized squares on the completed patterned sheet. Carefully cut each square with a ruler and craft knife so every coaster has straight, consistent edges.
7. Reinforce the coasters if desired
Attach each patterned square to cork or thick cardstock for extra thickness and stability. Trim around the edges so the backing matches the size of the patterned top.
8. Seal the surface and edges
Cover the finished coasters with clear laminate or clear duct tape to create a glossy finish. Wrap or trim the edges neatly so they appear smooth, seamless, and resistant to moisture.
Tip
For the cleanest results, replace your craft knife blade as soon as it begins to drag through the tape. A sharp blade produces smoother cuts, sharper corners, and more professional-looking coasters.
14. Duct Tape Wallet Purse
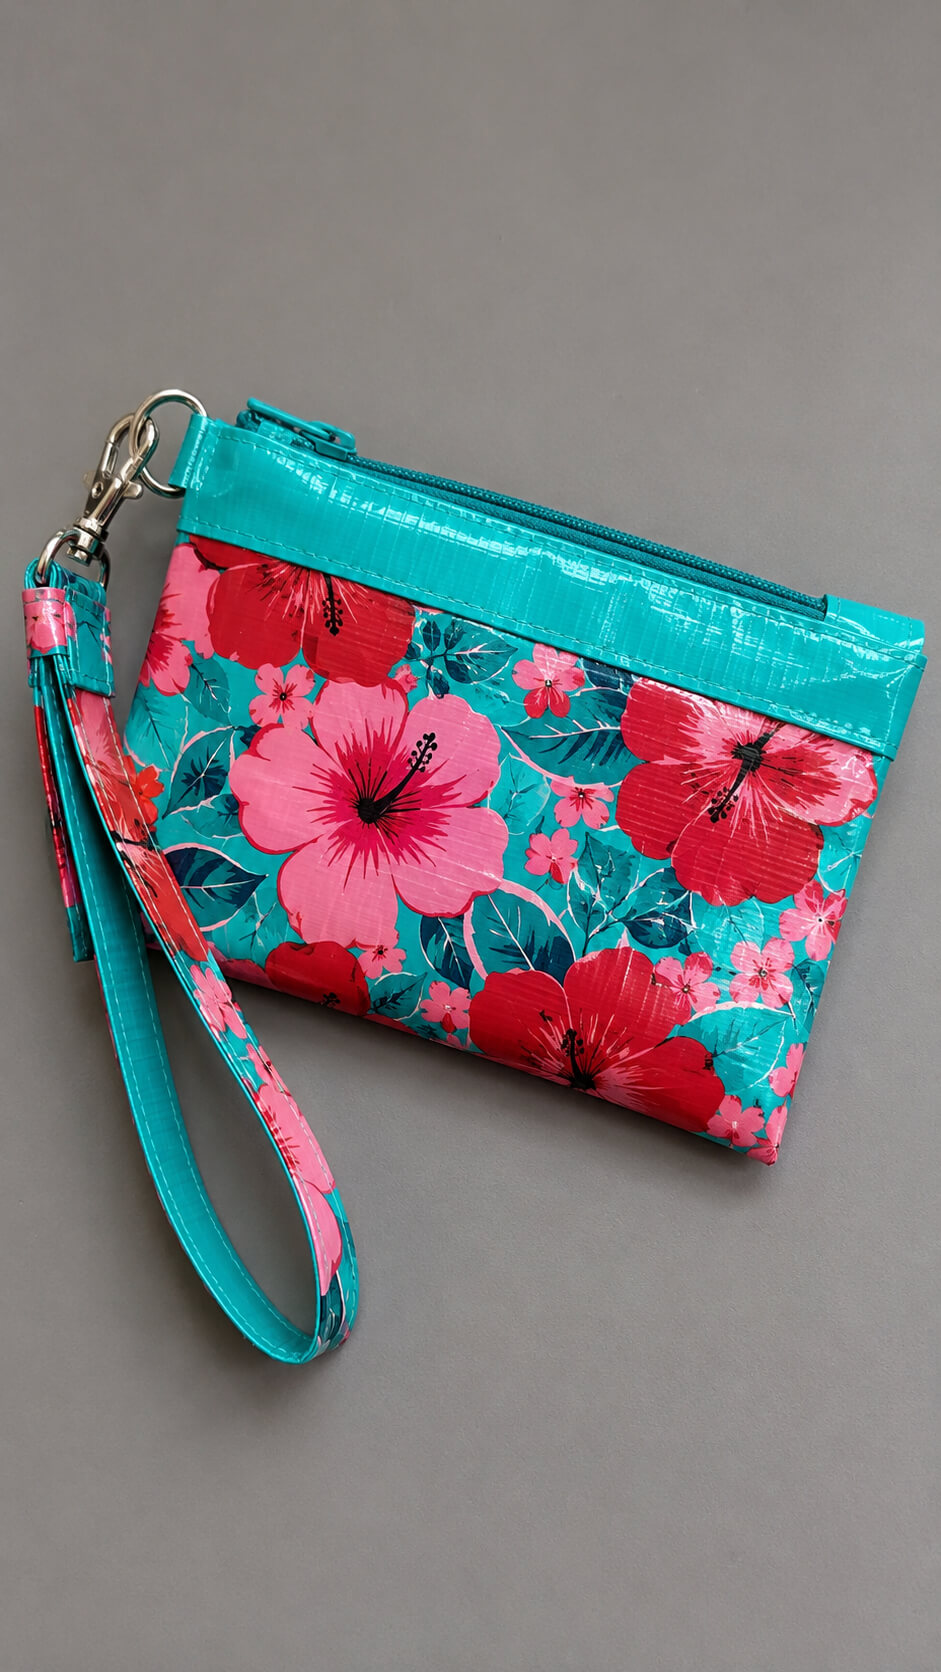
For those who love practical yet fashionable accessories, a duct tape wallet purse is the perfect DIY project.
These purses offer ample space for your cards, cash, and even a few extra essentials.
Get creative by mixing vibrant colors or incorporating patterns to create a purse that’s truly one-of-a-kind.
Materials Needed
- Floral duct tape (red and pink floral pattern)
- Teal duct tape
- Matching zipper
- Scissors or craft knife
- Cutting mat (optional)
- Ruler or measuring tape
- Pencil or washable marker
- Strap hardware (optional)
- Additional duct tape for reinforcing seams
Instructions
1. Cut the duct tape pieces to size
Measure and cut several strips of floral and teal duct tape based on the finished size you want for your wallet purse. Prepare extra strips for reinforcing the edges, creating the strap, and attaching the zipper. Accurate measurements will help your purse look neat and professional.
2. Create the main fabric panels
Lay overlapping strips of floral duct tape side by side with the sticky sides facing up. Cover the exposed adhesive by placing another layer of tape over the first, creating a sturdy double-sided sheet. Repeat until you have front and back panels for the purse.
3. Trim the panels into matching rectangles
Use a ruler and scissors to trim both panels to identical dimensions. Straight, even edges make it much easier to align the zipper and assemble the purse with a clean finish.
4. Attach the zipper to the top edge
Position the zipper between the front and back panels and secure it with strips of teal duct tape. Press firmly along the zipper tape to ensure it is securely attached while allowing the zipper to open and close smoothly.
5. Seal the sides and bottom
Fold the purse together with the patterned sides facing outward. Seal both sides and the bottom using teal duct tape, pressing firmly to remove any gaps or bubbles. Reinforce the seams with an additional strip of tape for extra durability.
6. Make the wrist strap
Cut a long strip of teal duct tape and fold it lengthwise to create a strong, double-sided strap. Attach one end to the purse using additional tape or hardware, ensuring it is securely fastened before use.
7. Reinforce the edges for a polished finish
Cover all exposed edges with narrow strips of teal duct tape. Carefully smooth each strip into place so the edges are sealed, durable, and resistant to peeling during everyday use.
8. Inspect and finish the purse
Open and close the zipper several times to confirm it operates smoothly. Trim away any uneven tape, press all seams firmly, and make any final adjustments until the purse has a sleek, finished appearance.
Tip
For the cleanest results, press each strip of duct tape down slowly with a ruler or plastic card to remove air bubbles and wrinkles. This creates a smoother surface and helps the purse last longer.
15. Duct Tape Magnets
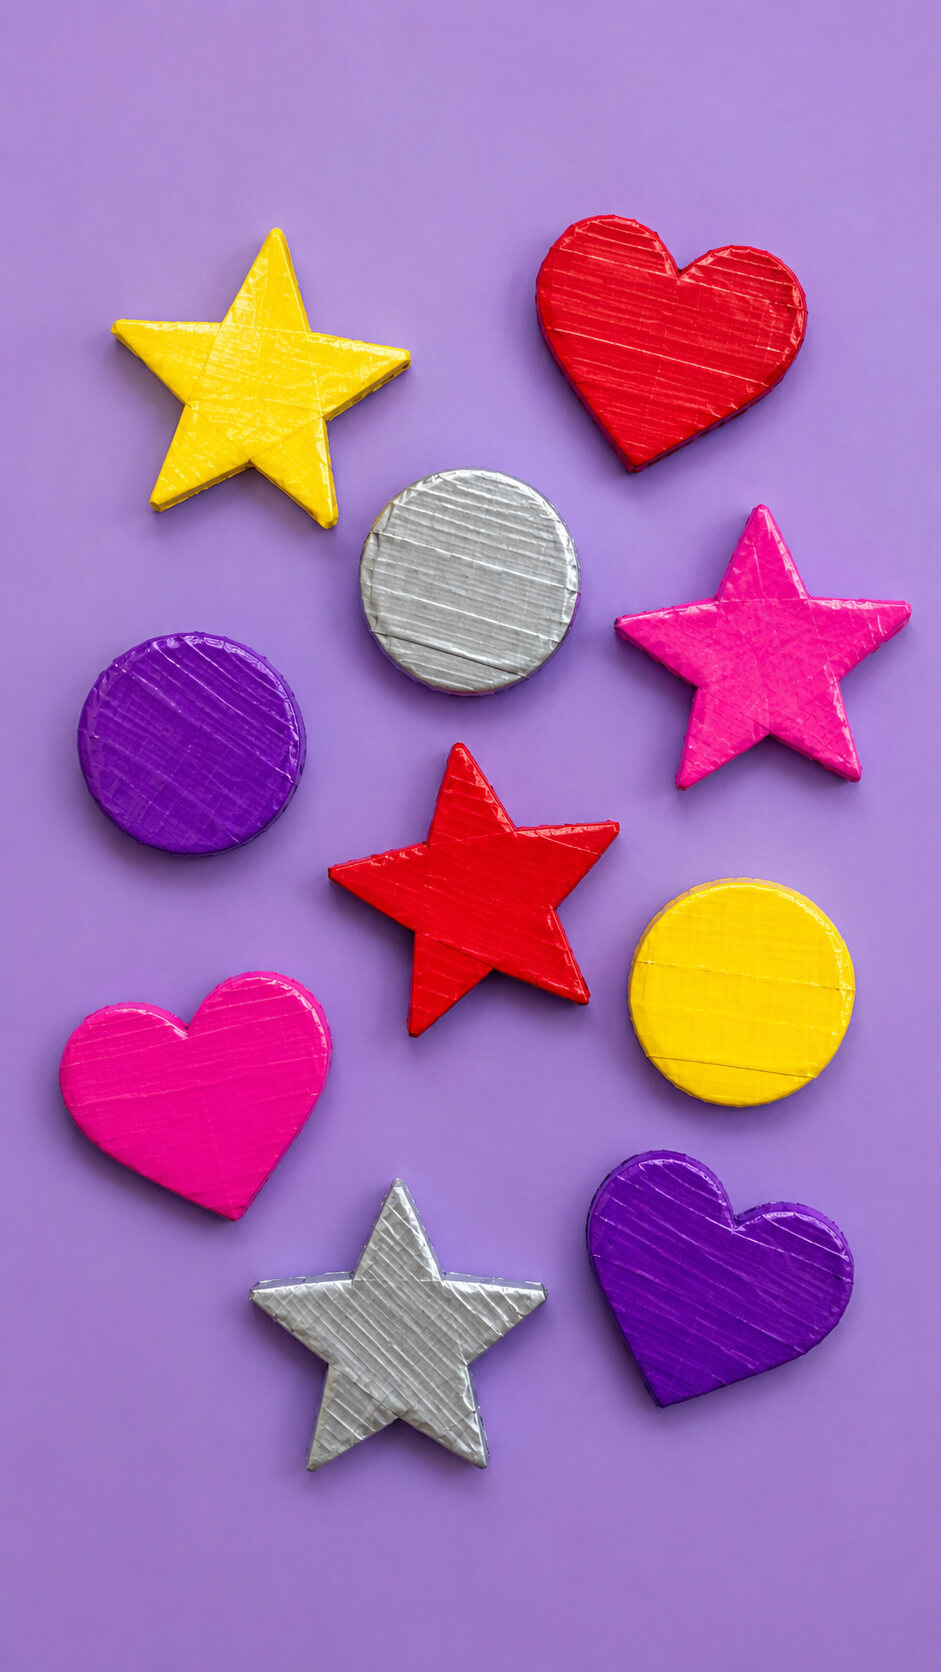
Brighten up your fridge with fun and quirky duct tape magnets.
This craft is as simple as cutting out fun shapes from your favorite duct tape designs and attaching magnets to the back.
You can make hearts, stars, or even tiny animals, and they’re perfect for showcasing photos, notes, or reminders.
Materials Needed
- Colored duct tape (yellow, red, silver, purple, or any colors you like)
- Thin cardboard or craft foam
- Strong adhesive magnetic sheets or magnetic strips
- Scissors
- Pencil
- Ruler (optional)
- Star, heart, and circle templates (optional)
Instructions
1. Gather your materials
Collect all of the supplies before you begin. Having everything ready will make the crafting process faster and help you create neat, evenly shaped magnets.
2. Trace your favorite shapes
Use a pencil to trace stars, hearts, and circles onto the cardboard or craft foam. You can use templates for perfectly even shapes or draw them freehand for a more personalized look.
3. Cut out each shape
Carefully cut along the traced lines using sharp scissors. Smooth, clean edges will help the duct tape adhere better and give the magnets a polished appearance.
4. Cover the shapes with duct tape
Wrap each cutout with your chosen duct tape color, folding the edges neatly around the back. Press firmly to remove wrinkles and air bubbles for a smooth finish.
5. Trim away any excess tape
Use scissors to carefully remove extra tape around the edges. This helps each magnet look clean and keeps the shapes well-defined.
6. Attach the magnetic backing
Cut magnetic sheets or strips to fit the back of each shape and press them firmly into place. Make sure the magnet covers enough surface area to securely hold the finished piece.
7. Arrange and display your magnets
Place the finished stars, hearts, and circles on a refrigerator, filing cabinet, or magnetic board. Mix different colors and shapes to create a bright and playful display.
Tip
For the strongest and longest-lasting magnets, use heavy-duty adhesive magnetic sheets and press them firmly onto clean, dry surfaces before using your finished magnets.
16. Duct Tape Belts
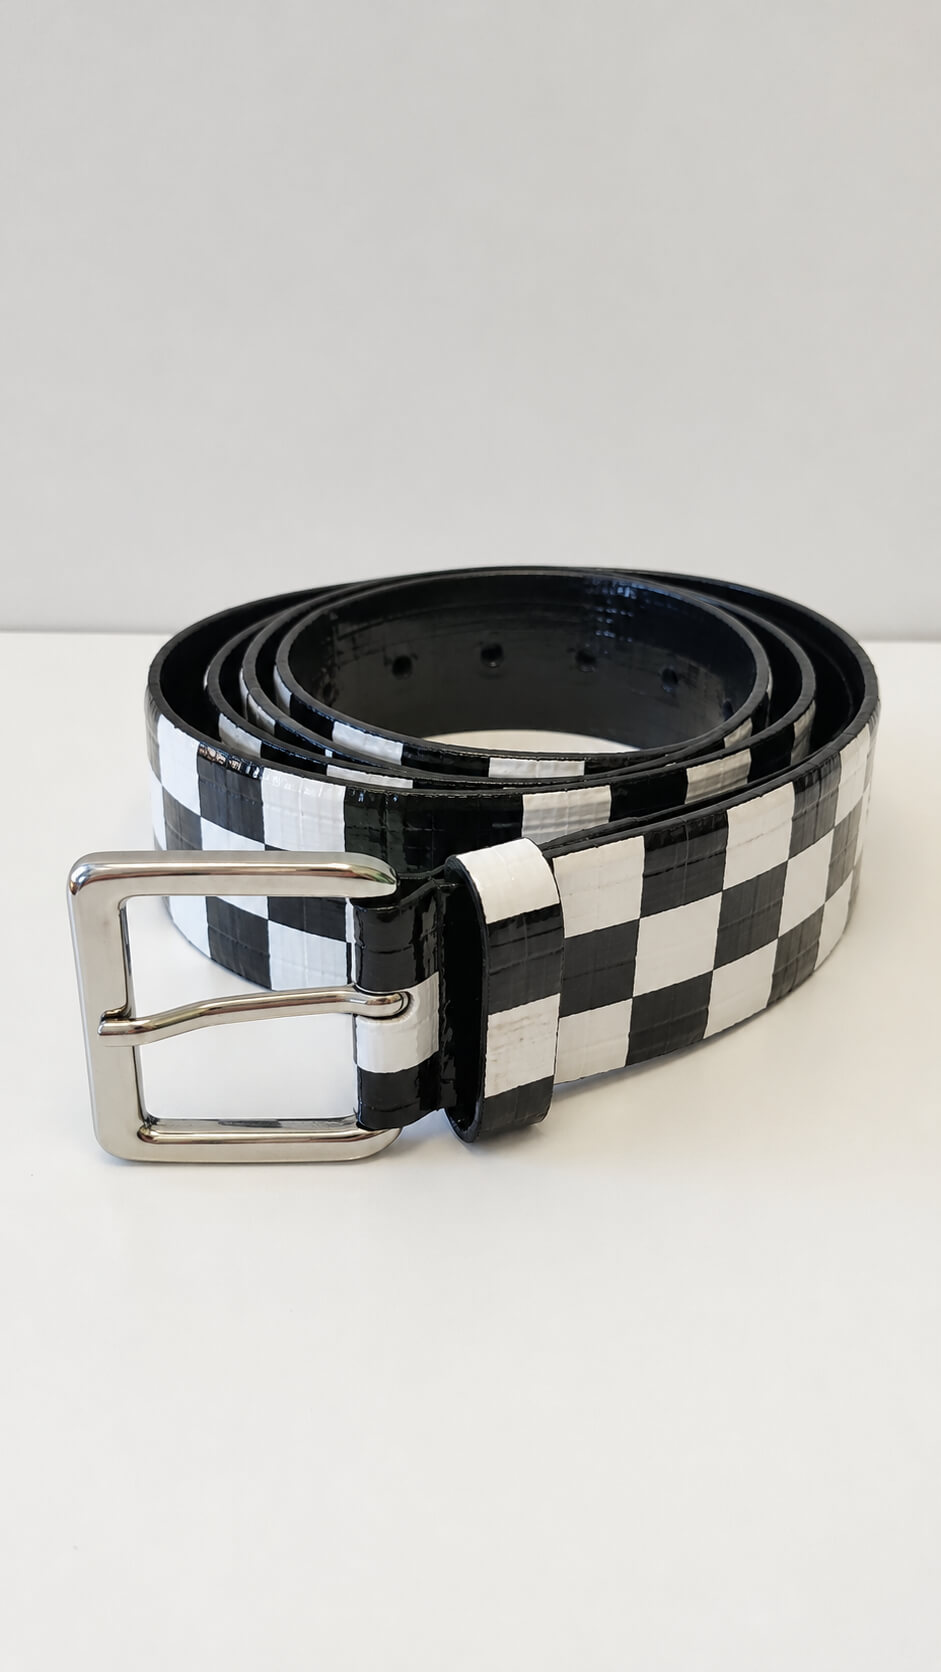
Make a statement with a duct tape belt!
This unique accessory is customizable to fit your personal style and size.
Whether you prefer a sleek, minimalist design or something bold with patterns and embellishments, you can create a belt that’s both functional and fashionable.
Materials You’ll Need
- Black duct tape
- White duct tape
- Cutting mat or smooth work surface
- Metal ruler or straightedge
- Sharp craft knife or scissors
- Measuring tape
- Silver belt buckle
- Hole punch
- Marker or pencil
Prepare the Belt Base
1. Create a sturdy belt strip
Measure your waist and add several extra inches for fastening. Lay overlapping strips of duct tape sticky-side up and cover them with another layer sticky-side down to create a strong, double-sided belt blank. Trim the strip to your preferred belt width using a ruler and craft knife so the edges are perfectly straight.
2. Build the checkerboard pattern
Cut equal-sized squares of black and white duct tape. Starting from one end, place the squares in an alternating checkerboard arrangement across the belt. Press each square firmly to remove air bubbles and keep the pattern aligned from edge to edge.
3. Seal the design with a glossy finish
Cover the completed checkerboard pattern with a layer of clear duct tape or carefully overlap glossy duct tape strips to protect the design. Smooth the surface with a ruler or plastic card to eliminate wrinkles and create a polished appearance.
4. Trim the belt for clean edges
Using a metal ruler as a guide, trim both sides of the belt so the edges are even and professional. Rounded corners on the tip of the belt help prevent peeling and give the finished belt a refined look.
5. Attach the silver buckle
Fold one end of the belt through the buckle frame and secure it with strong duct tape wrapped neatly around the folded section. Press firmly so the buckle remains secure while maintaining a clean appearance.
6. Punch evenly spaced belt holes
Measure and mark the hole positions at equal intervals near the opposite end of the belt. Use a hole punch to create clean, evenly spaced holes that allow the belt to fit comfortably while giving it a professional finish.
7. Inspect and display the finished belt
Check that the edges are smooth, the checkerboard pattern is aligned, and the buckle is firmly attached. Coil the belt neatly and place it on a plain white surface for storage or photography, allowing the bold black-and-white pattern and glossy finish to stand out.
Tip
For the cleanest results, use a fresh craft knife blade, measure every cut carefully, and press each piece of duct tape firmly before adding the next layer. This helps prevent bubbles, uneven edges, and lifting corners while giving the belt a durable, store-quality finish.
17. Duct Tape Christmas Ornaments
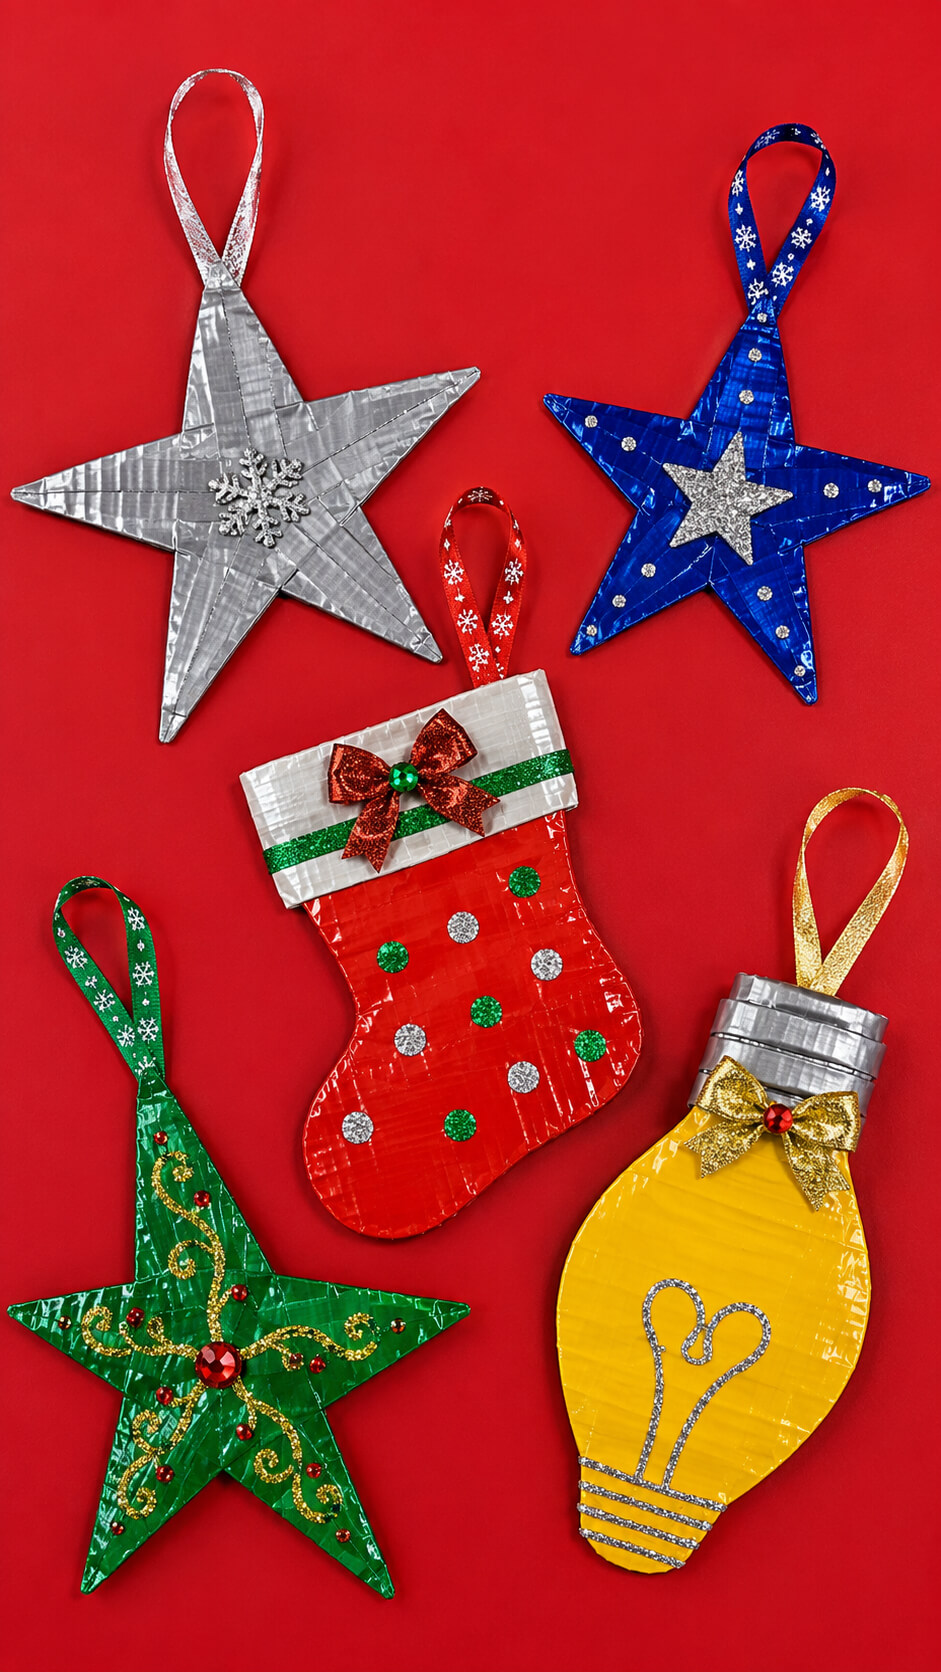
Create personalized Christmas ornaments with colorful duct tape.
Whether you’re making simple stars or intricate snowflakes, these ornaments add a touch of handmade charm to your tree.
You can even add a bit of glitter or ribbon to make them extra special for the holidays.
Materials
- Plain silver duct tape
- Cardstock or wax paper (for creating duct tape sheets)
- Scissors or a craft knife
- Pencil
- Star, stocking, and light bulb templates
- Fine glitter
- Small decorative bows
- Craft glue
- Thin ribbon for hanging loops
- Optional rhinestones or sequins
Instructions
1. Make flat sheets of duct tape
Lay strips of duct tape side by side on wax paper or cardstock, slightly overlapping the edges. Create sheets large enough for your ornament templates so they are easier to cut and maintain their shape.
2. Trace the ornament shapes
Place the star, stocking, and light bulb templates on the duct tape sheet and trace around them with a pencil or fine marker. Keep the designs thin and simple for a clean handmade appearance.
3. Cut out each ornament
Carefully cut along the traced lines using sharp scissors or a craft knife. Trim any uneven edges so each ornament has a neat and polished finish.
4. Decorate with festive embellishments
Apply small amounts of craft glue and add glitter, tiny bows, rhinestones, or sequins. Use only a few embellishments on each ornament to keep the designs elegant and lightweight.
5. Attach ribbon loops
Cut short lengths of ribbon and fold each piece into a loop. Glue or tape the ends securely to the back of each ornament so they can easily hang from a Christmas tree.
6. Let everything dry before displaying
Allow all glue and decorative accents to dry completely. Once finished, hang the ornaments on your tree, attach them to wrapped gifts, or display them as festive holiday decorations.
Tip
For extra durability, sandwich two layers of duct tape together before cutting the ornament shapes. This creates sturdier ornaments that hold their shape and last through many holiday seasons.
18. Duct Tape Luggage Tags
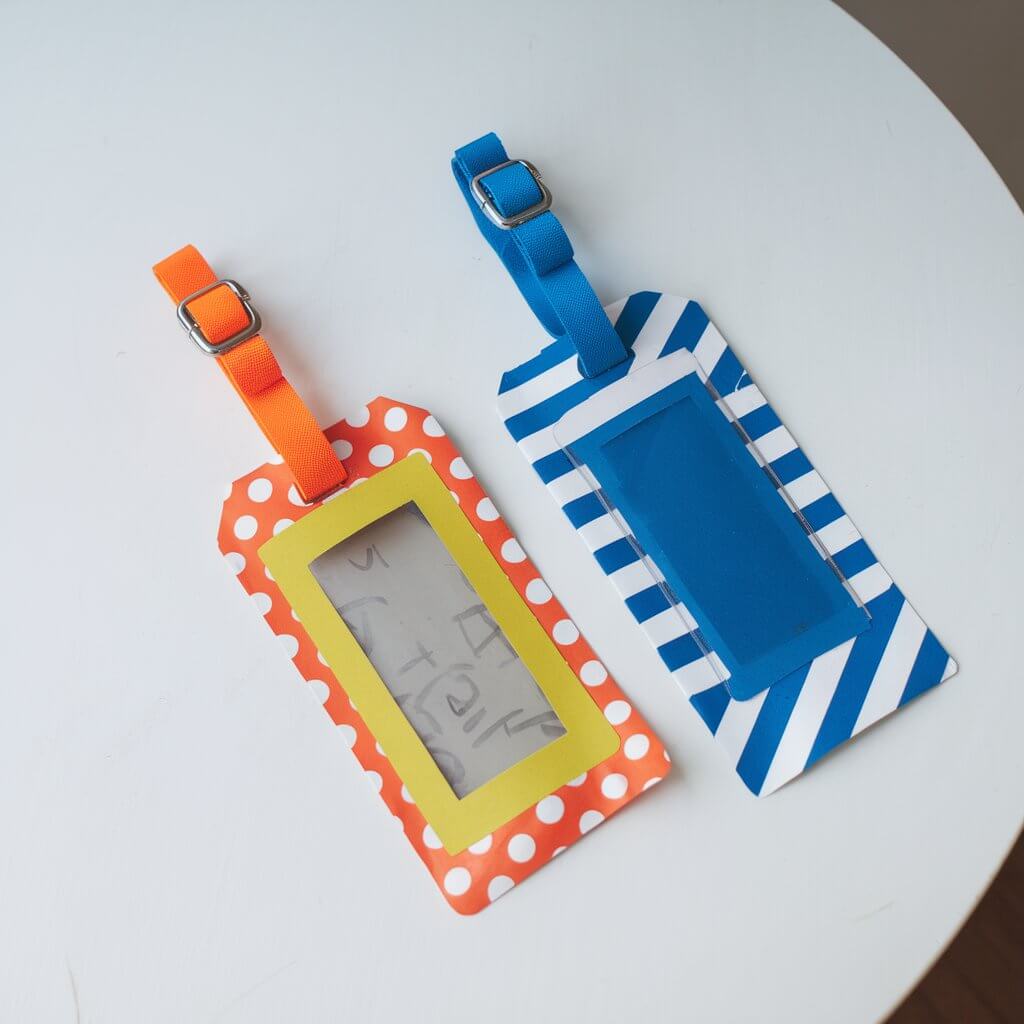
Make sure your luggage stands out with a custom-made duct tape luggage tag.
This easy project lets you create a tag in any color or pattern you prefer, with a spot to add your contact information.
It’s a practical and fun way to add some personality to your travel gear.
19. Duct Tape Earrings
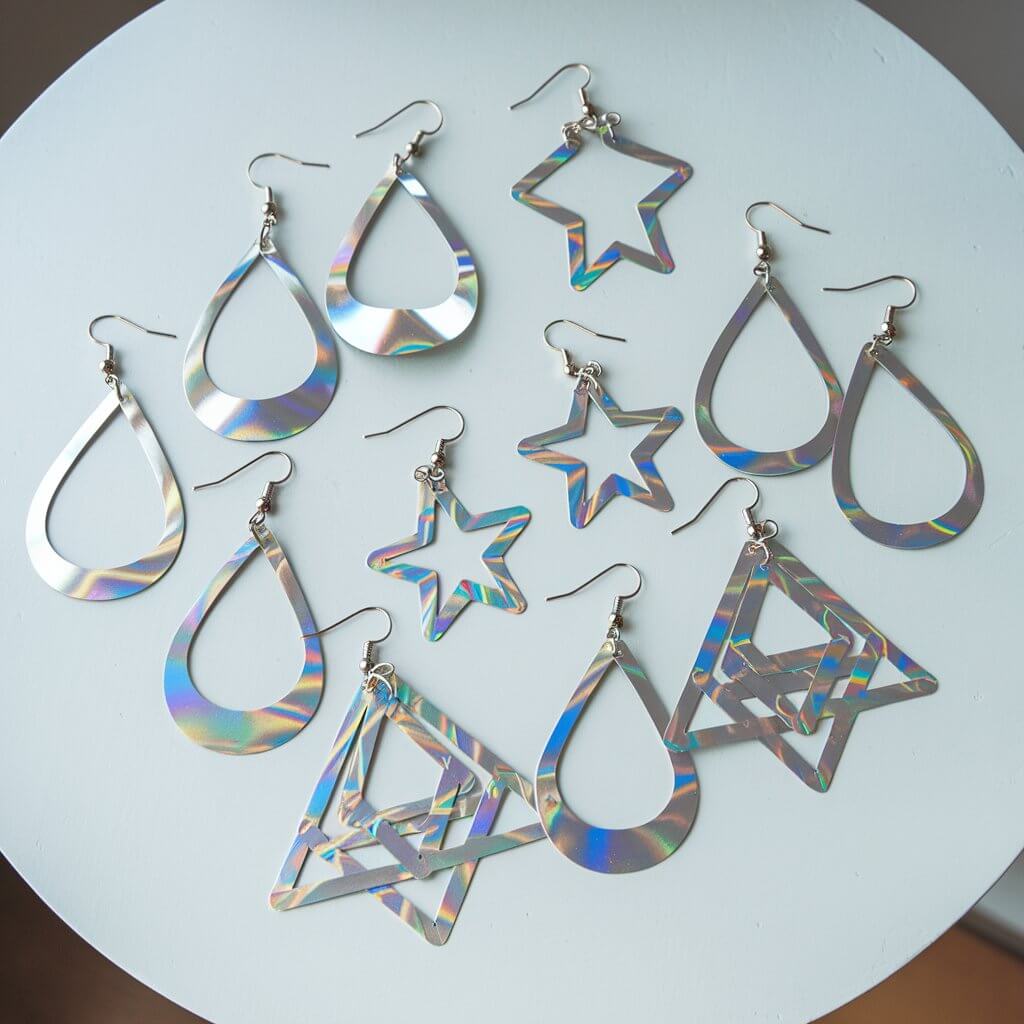
Add a touch of flair to your jewelry collection with duct tape earrings.
These lightweight accessories can be made in any shape or style.
Choose from simple geometric shapes for a modern look, or create intricate designs with various colors and patterns.
They’re a great conversation starter!
20. Duct Tape Cufflinks
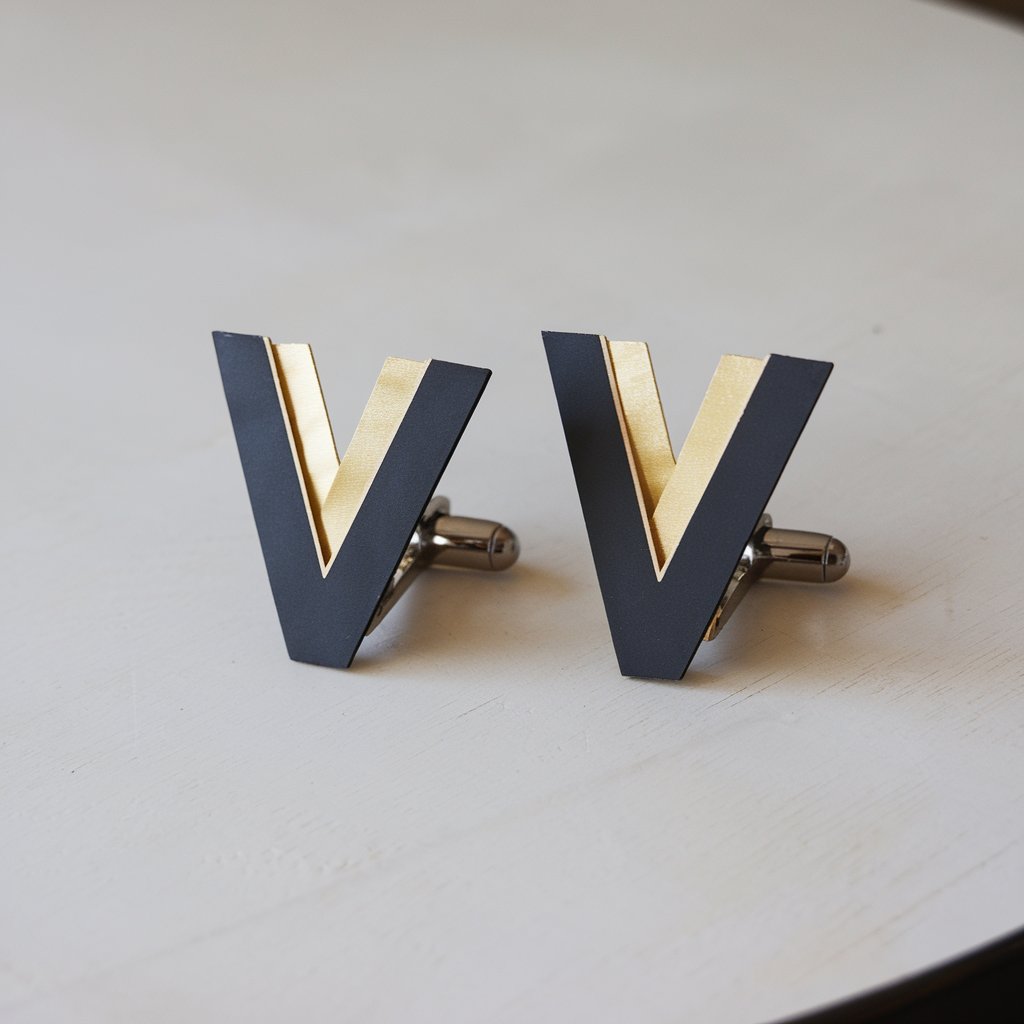
For the stylish man in your life, duct tape cufflinks make a fantastic DIY gift.
These tiny accessories can be personalized with any design you choose, from stripes to polka dots or even miniature images.
They’re simple to make, yet they add a pop of creativity to formal attire.
21. Duct Tape Purses
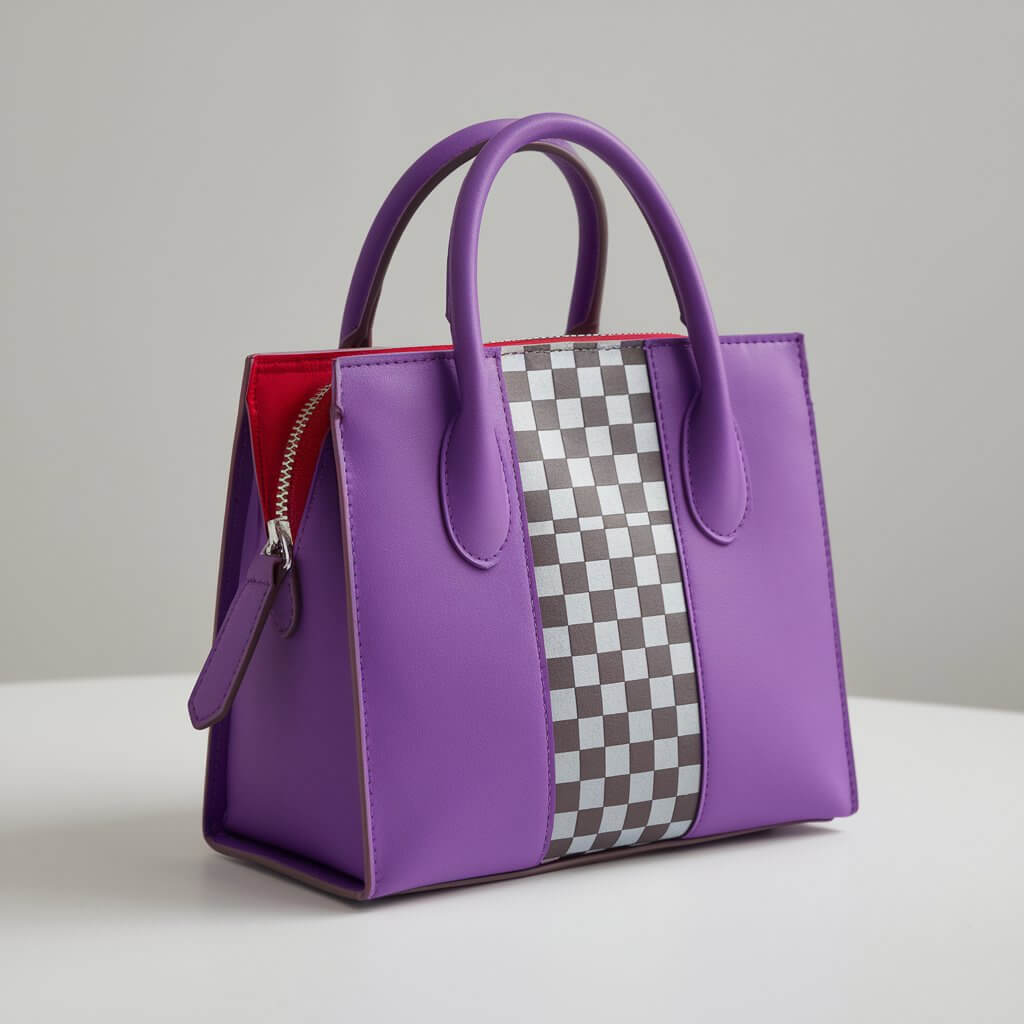
If you love a challenge, try making a full-size duct tape purse!
This project involves creating a structured bag with a sturdy duct tape exterior and a customizable interior.
You can add compartments, zippers, and embellishments to create the perfect accessory for any occasion.
22. Duct Tape T-Shirt
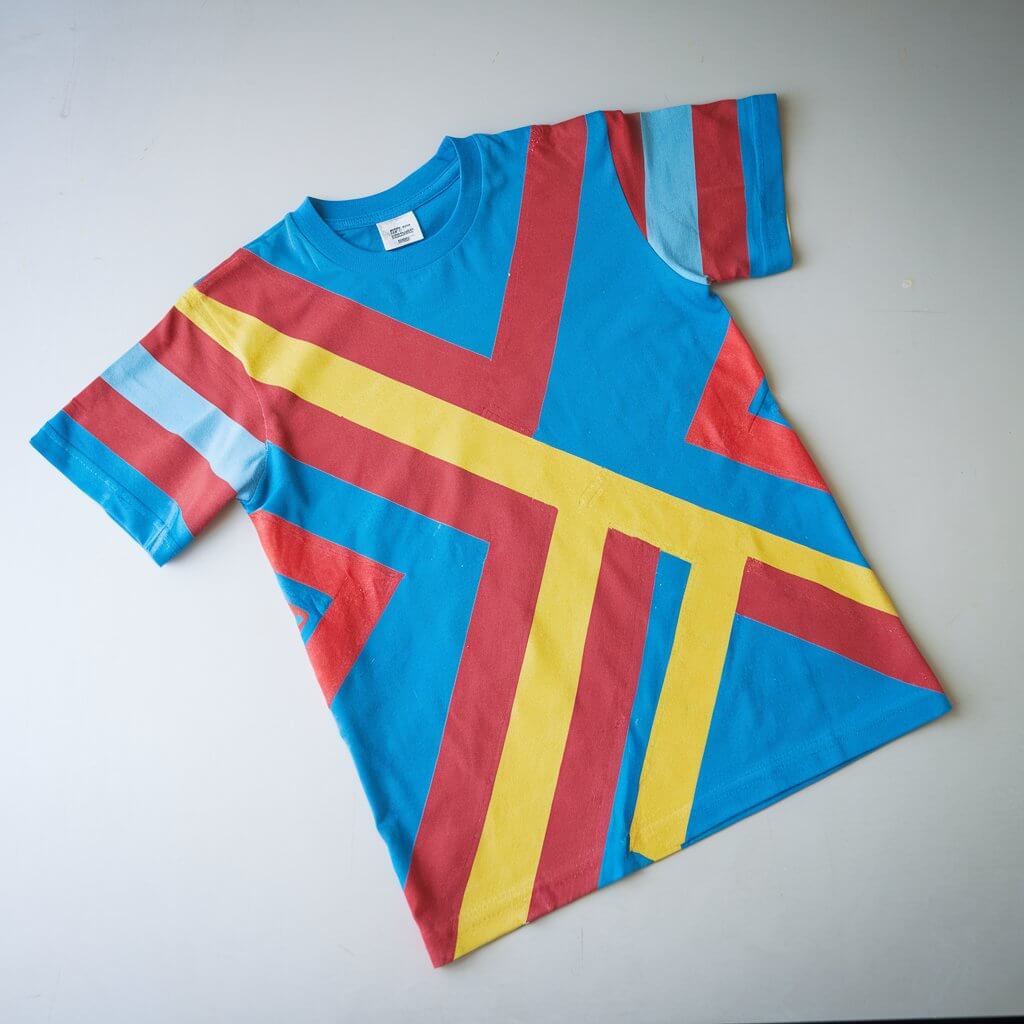
Make your own stylish duct tape t-shirt by using tape to create custom designs.
Whether you want to create a trendy graphic or a bold statement piece, duct tape makes it easy to express yourself on fabric.
Just make sure to use fabric-safe tape for comfort and durability.
23. Duct Tape Picture Frame
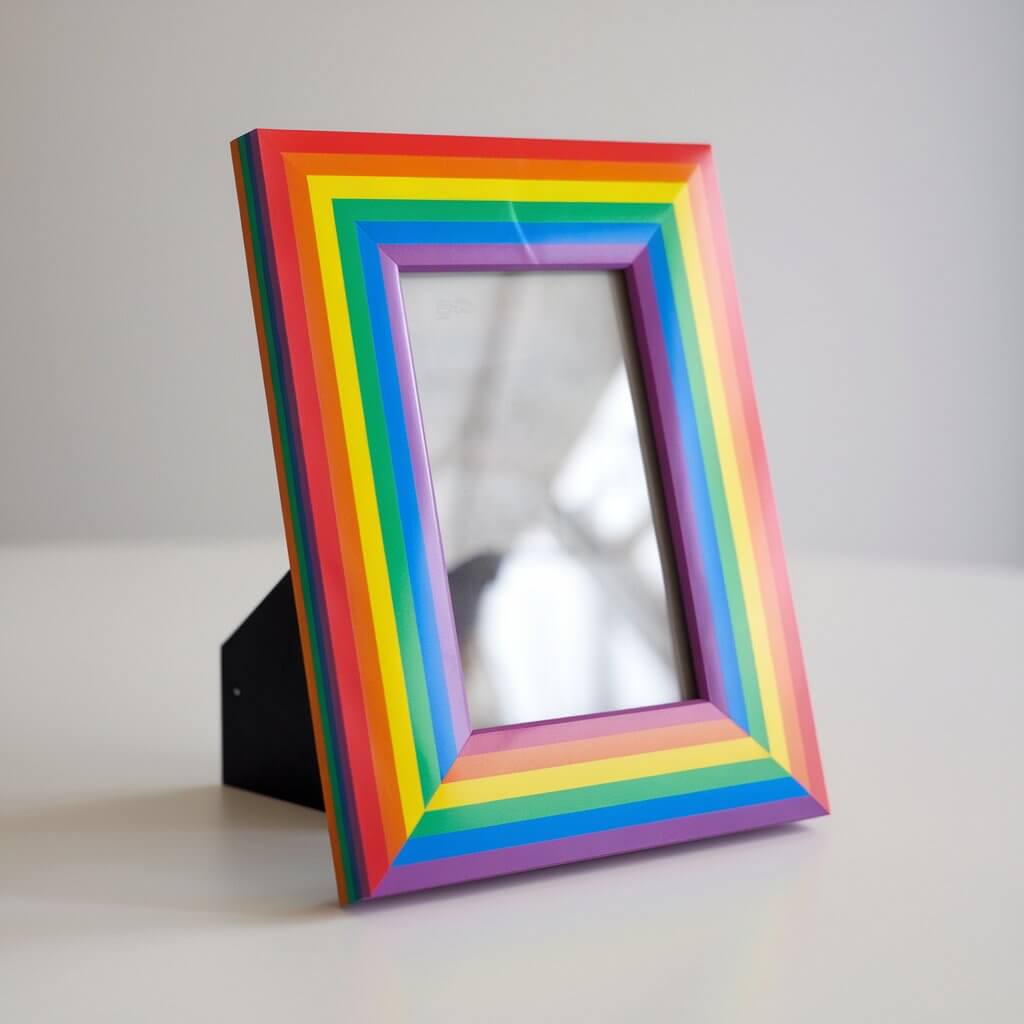
Create a personalized photo frame using duct tape.
You can make it as simple or elaborate as you like—adding color patterns, embellishments, or even using multiple layers for a textured effect.
This frame is a great way to showcase your favorite memories or give it as a thoughtful gift.
24. Duct Tape Shoe Decorations
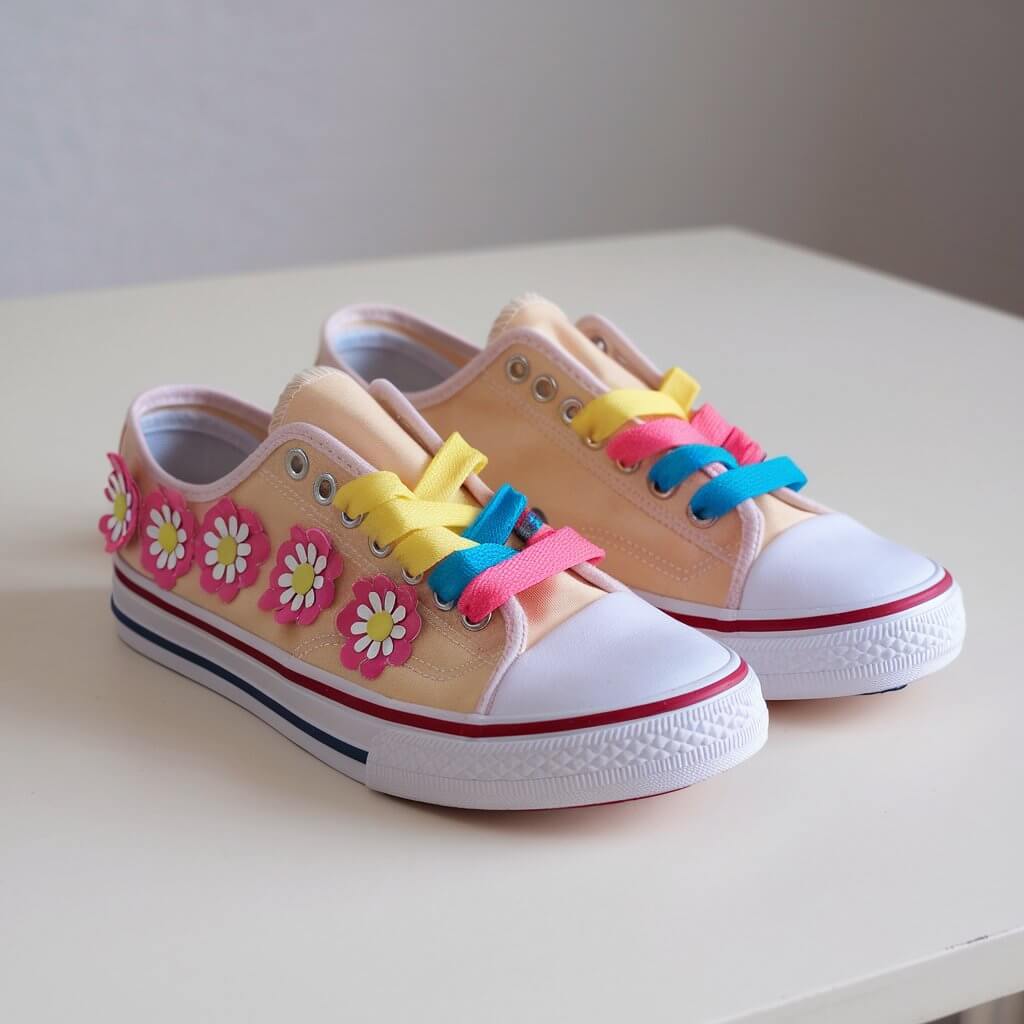
Add a fun twist to your sneakers with duct tape decorations.
You can create unique patterns, designs, or even little duct tape flowers to attach to the sides or laces.
This is a fun way to breathe new life into old shoes, and it’s a great way to showcase your creativity.
25. Duct Tape Picture Holder
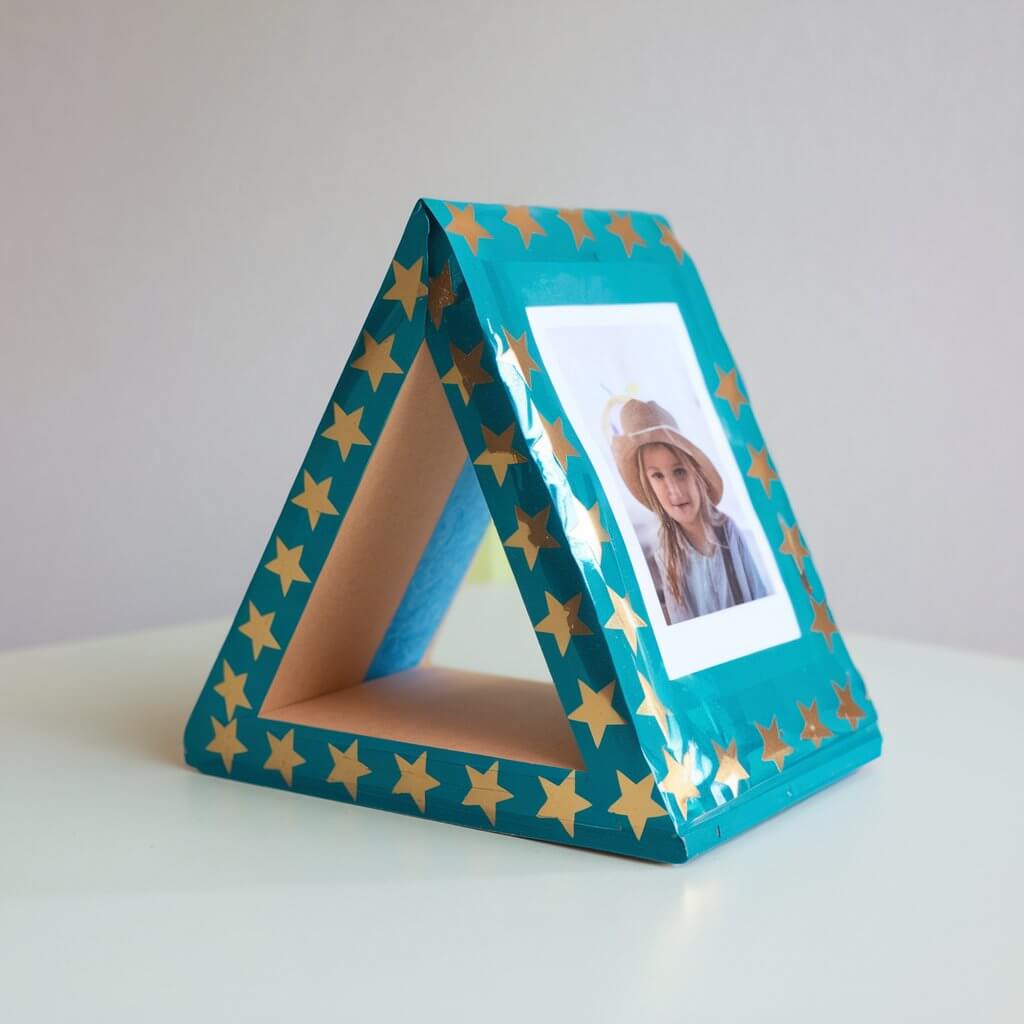
Make a stylish and functional picture holder out of duct tape.
Simply fold and shape the tape to create a sturdy base and design the top part to hold your photo.
These holders are great for displaying pictures on desks or shelves, and they make a thoughtful handmade gift.
26. Duct Tape Christmas Stockings
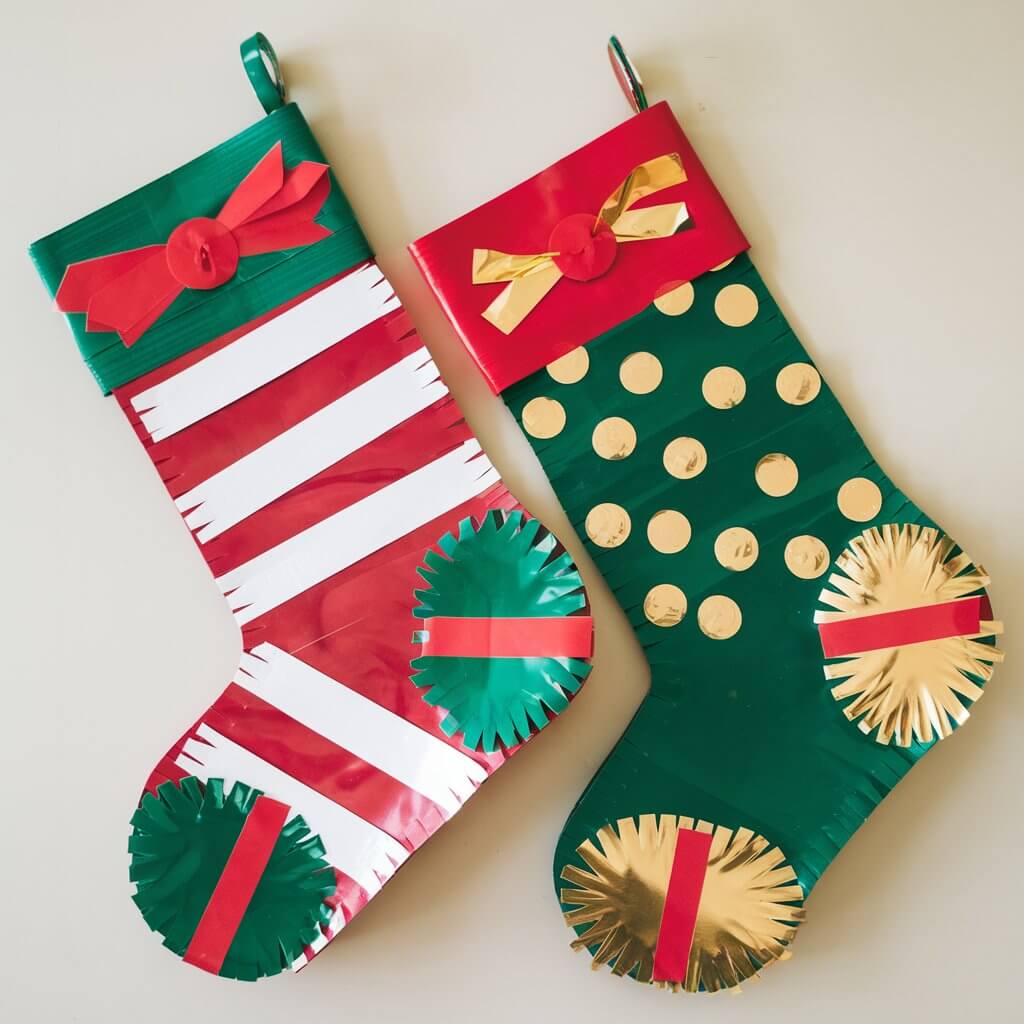
Get into the holiday spirit by creating personalized Christmas stockings out of duct tape.
These festive creations can be customized with your choice of colors, designs, and embellishments.
They make the perfect gift holders or unique decorations for your home during the holiday season.
27. Duct Tape Pin Cushions
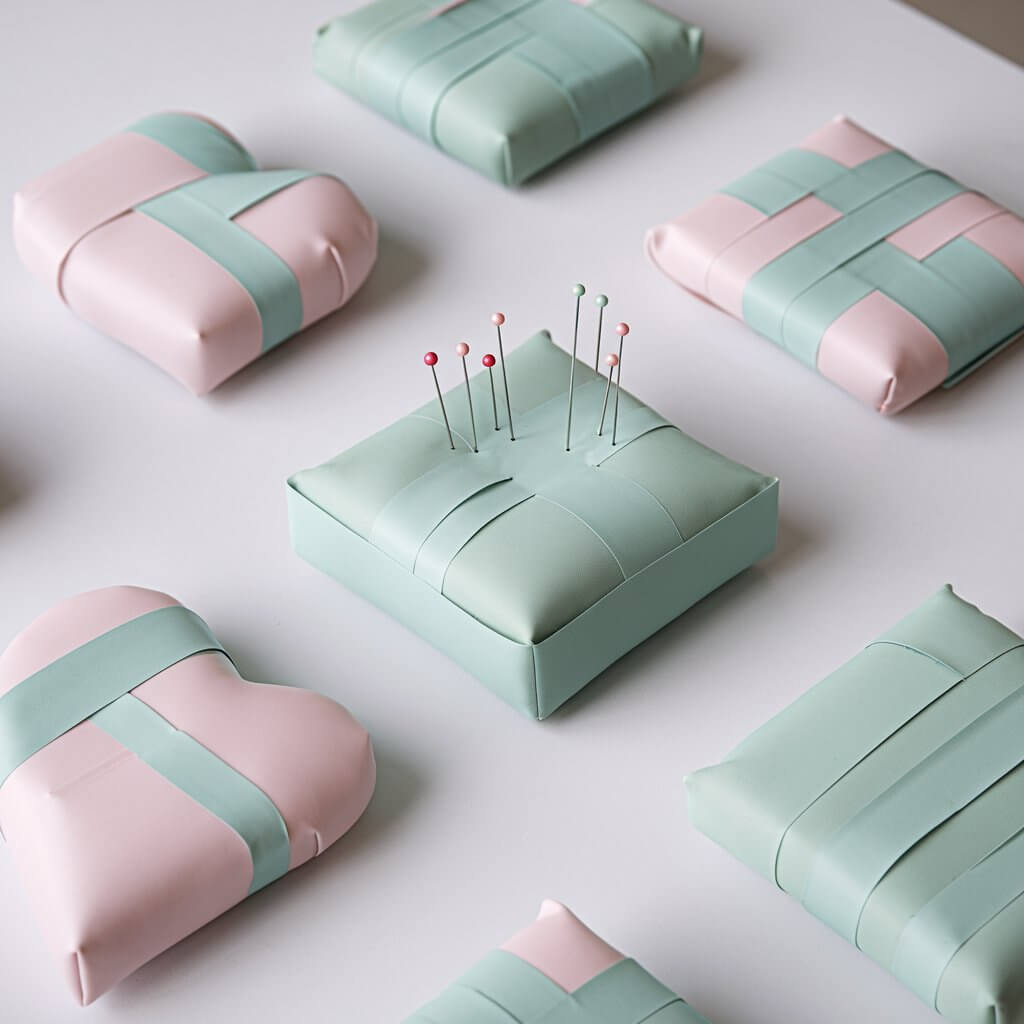
Sewing just got a lot more fun with duct tape pin cushions!
These little cushions are perfect for keeping your needles and pins organized while you craft.
You can make them in fun shapes, like hearts or squares, and even decorate them with patterns or embellishments for extra flair.
Wrap Up
Duct tape crafts are a fun and creative way to make cool, useful items with just a roll of tape!
Whether you’re making a wallet, keychain, or even a purse, the possibilities are endless.
Get crafty and let your imagination run wild.
Happy crafting!