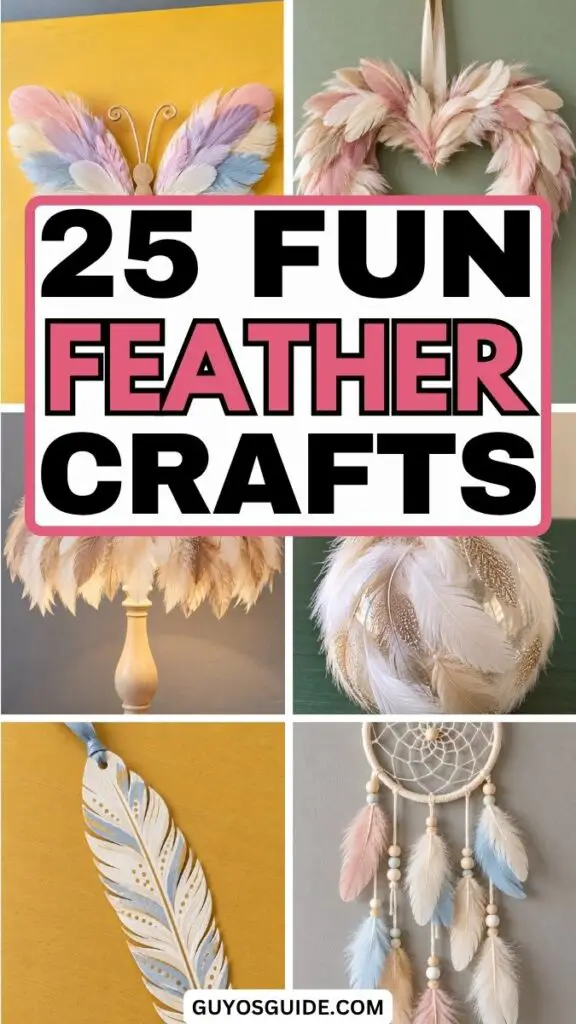
25 Fun Feather Crafts for All Ages to Try

I never realized how much you could create with a few simple feathers!
One afternoon, I started looking for fun ways to turn these light, delicate pieces into something beautiful.
What began as a small craft idea quickly turned into a collection of creative projects for all ages.
These feather crafts are easy, affordable, and perfect for adding a natural touch to your home or gifts.
So grab some feathers and let’s see what you can create!
1. DIY Feather Wall Hanging
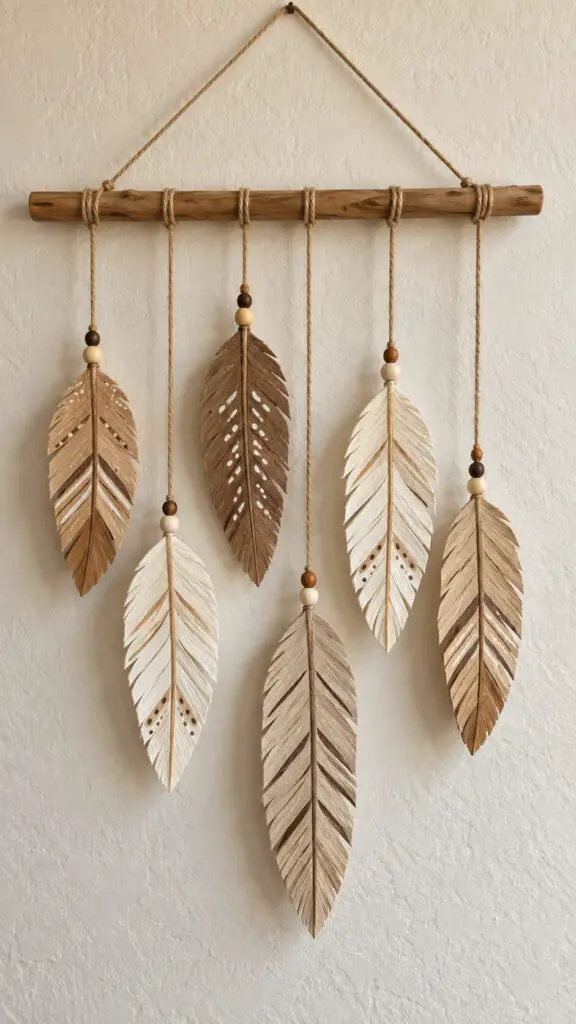
Turn simple feathers into a cozy piece of wall art with this easy craft.
Cut feather shapes from cardstock, felt, or faux leather, then add painted details and attach them to pieces of twine.
Tie the strands to a wooden dowel or fallen branch for a relaxed boho look.
Kids can decorate their feathers with dots, stripes, or glitter while adults handle the cutting.
It is inexpensive, lightweight, and surprisingly pretty when several feathers hang together at different lengths.
Materials
- Several sheets of thick craft paper, cardstock, or lightweight craft foam in cream, beige, tan, muted brown, and soft white
- Natural jute or cotton twine
- One smooth wooden dowel or straight natural branch
- Scissors
- Pencil
- Ruler
- Fine-tip paintbrush
- White, beige, brown, or muted acrylic paint
- Small wooden beads, optional
- Craft glue
- Sandpaper, optional, for smoothing the wooden dowel
- Small piece of twine for hanging the finished wall decoration
Instructions
1. Prepare the wooden dowel
Choose a smooth wooden dowel or straight natural branch that is long enough to support all of your feathers. If the surface feels rough, lightly sand it until it is smooth, then wipe away any dust. Leave the wood natural so it keeps the warm rustic appearance of the finished wall hanging.
2. Draw the feather shapes
Use a pencil to draw several elongated feather shapes onto your cream, beige, tan, brown, and white materials. Make some feathers longer and narrower and others slightly shorter and wider so the finished arrangement has natural variation. Give each feather a pointed tip and gently curved sides.
3. Cut out the feathers
Carefully cut along each pencil outline with sharp scissors. For a more realistic handmade appearance, make the edges slightly uneven rather than perfectly symmetrical. This creates the appearance of individual feather barbs and gives the finished wall hanging a softer, handcrafted texture.
4. Create the feather barbs
Starting near the central length of each feather, make a series of angled cuts toward the outside edge. Keep a narrow uncut section through the middle to act as the feather’s central shaft. Vary the length and angle of the cuts on different feathers so they do not all look exactly alike.
5. Add subtle painted details
Use a fine paintbrush to add simple lines, dots, stripes, or small diagonal markings to the feathers. Keep the decoration understated by using colors that are close to the natural material, such as white on beige, brown on cream, or muted tan on white. Allow the paint to dry completely before handling the feathers.
6. Add texture to the feather edges
Gently separate and bend the individual feather sections created by your cuts. Slightly curling a few sections forward and leaving others flat will create depth and make the feathers look more dimensional when they hang against the wall.
7. Attach the twine to each feather
Cut separate lengths of natural twine for the feathers, making each piece a different length. Secure one end of each strand to the center or top of a feather with a small amount of craft glue. If you are using wooden beads, thread one or two onto the twine above the feather and secure them in place.
8. Arrange the feathers by length
Lay the wooden dowel on a flat surface and arrange the feathers beneath it before attaching anything permanently. Place longer feathers toward the center or lower portion and shorter feathers toward the sides. Varying the lengths will create the balanced, layered appearance seen in the finished wall hanging.
9. Secure the feather strands to the dowel
Tie each strand of twine securely around the wooden dowel. Space the feathers apart so that their shapes remain visible without looking too evenly arranged. A slightly irregular arrangement helps the decoration retain its natural homemade character.
10. Create the hanging loop
Cut another length of twine and tie it securely to both ends of the wooden dowel. Adjust the loop so the dowel hangs horizontally and the feathers remain vertically suspended underneath it. Trim away any excess twine for a neat finish.
11. Check the finished arrangement
Hang the decoration temporarily and look at it from a short distance. Adjust the individual strands if some feathers overlap too much or one side looks heavier than the other. Rotate individual feathers until the painted details and different neutral tones are clearly visible.
12. Display the finished wall hanging
Place the completed feather wall hanging against a warm off-white or lightly textured wall where its natural colors can stand out. Let the feathers hang freely so they can move gently and cast soft shadows, emphasizing the layered handmade design.
Tip
For the most authentic boho look, avoid making every feather identical. Combine different neutral shades, slightly vary the feather sizes and twine lengths, and keep the painted patterns simple. A natural wooden branch with subtle imperfections will also give the finished wall hanging a more relaxed, handmade appearance.
2. Paper Feather Craft
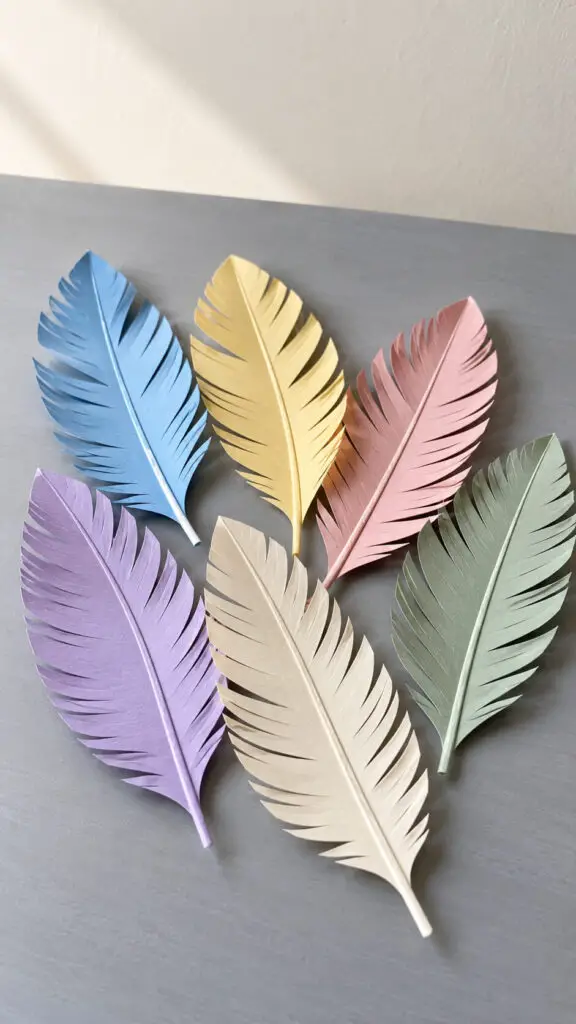
Paper feathers are one of those wonderfully simple crafts that can keep little hands busy without covering the entire table in supplies.
Fold colorful paper in half, sketch a feather shape, cut it out, and snip small angled cuts along both sides.
Open the paper to reveal the feather.
Try patterned scrapbook paper for a cheerful display, or let children paint plain paper first.
These feathers work beautifully for garlands, cards, gift wrapping, and classroom decorations.
Materials
- Cardstock or thick colored paper in soft blue, pale yellow, dusty pink, sage green, lavender, and warm cream
- Pencil
- Scissors
- Ruler, optional, for creating a straight central crease
- Glue stick or craft glue, optional
- Fine-tip markers, colored pencils, or crayons, optional, for adding decorative details
- A clean, flat surface for crafting
Instructions
1. Choose your paper colors
Choose several cardstock colors that work nicely together. A soft pastel palette of blue, yellow, pink, sage green, lavender, and cream creates a cheerful collection, but you can use any colors you have available. Using several shades makes the finished feathers look more interesting when they are arranged together.
2. Fold the cardstock in half
Take one sheet of cardstock and fold it carefully in half, pressing along the fold to create a clean crease. This center line will become the feather’s central shaft and will help you create a balanced shape. Repeat with additional sheets if you want to make several feathers in different colors.
3. Draw the feather shape
With the folded edge facing inward, lightly draw half of a feather along one side of the paper. Start with a narrow pointed tip, widen the shape toward the middle, and gradually narrow it again toward the bottom. Keep the center crease straight because it will form the backbone of your feather when the paper is opened.
4. Cut out the feather
Carefully cut around the pencil outline while keeping the paper folded. Take your time around the pointed tip and curved sides so the finished feather has a smooth silhouette. Children can use regular craft scissors with adult supervision, while younger children may enjoy decorating pre-cut feather shapes instead.
5. Create the feather barbs
Make many small angled cuts along both sides of the feather, working from the outer edge toward the center without cutting through the central crease. Keep the cuts relatively close together for a fuller feather or space them farther apart for a lighter, more delicate look. Varying the lengths slightly will make the feather look more natural.
6. Open the paper feather
Carefully unfold the cardstock to reveal the finished feather shape. The central folded crease should now run from the pointed tip down toward the base, creating a raised-looking central shaft. Gently smooth the paper without flattening the crease completely so the feather keeps some dimension.
7. Add decorative details
Personalize each feather with small dots, curved lines, stripes, or simple patterns. Use a fine-tip marker or colored pencil to draw along the central shaft and lightly decorate the individual barbs. You can keep some feathers plain for a minimalist appearance and make others colorful and playful.
8. Shape the feather slightly
Give the paper feather a little dimension by gently curling the sides upward with your fingers. Do not bend it sharply because cardstock can crease easily. A subtle curve along the feather makes it look more three-dimensional and prevents the finished craft from appearing completely flat.
9. Make a colorful collection
Repeat the process with your other cardstock colors until you have a small collection of paper feathers. Experiment with different sizes and shapes rather than making every feather identical. A mixture of large and small feathers in complementary colors looks especially attractive when displayed together as wall art, a garland, or a handmade decoration.
10. Arrange the finished feathers
Lay the completed feathers together and experiment with different arrangements before deciding how you want to use them. Overlap a few feathers for a layered display, spread them apart for individual artwork, or arrange them in a fan shape. You can also attach them to cardstock, string, or a decorative background to create a larger craft project.
Tip
For more realistic-looking feathers, make the cuts along each side slightly uneven instead of perfectly identical. The tiny variations make the paper look more natural and handmade. If you’re crafting with children, let them choose their own colors and patterns rather than trying to make every feather perfect—the little differences are what give this project its charm.
3. Feather Perler Bead Necklace
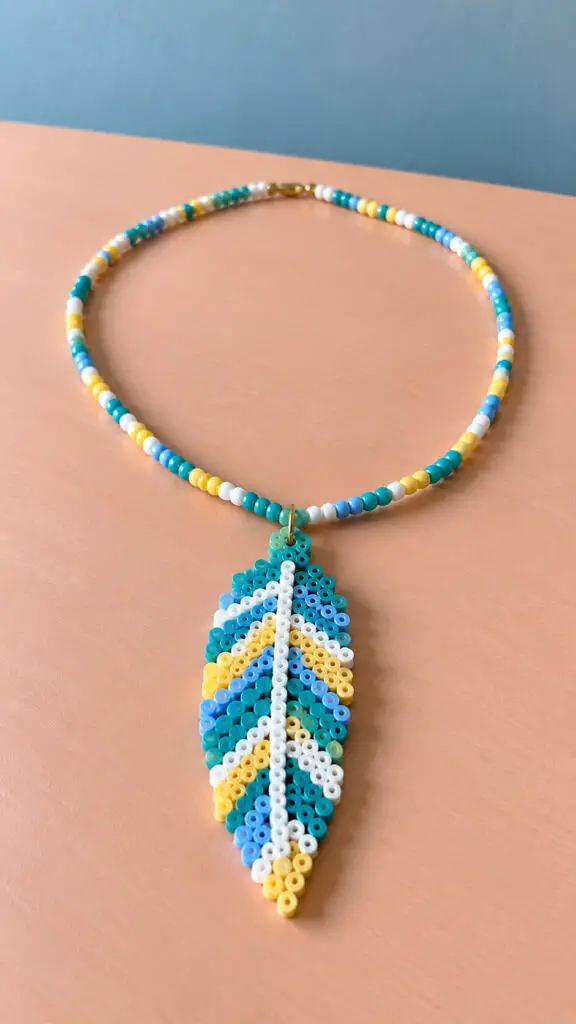
Create a cute feather pendant using Perler beads and a simple feather-shaped pattern.
Arrange the beads on a pegboard, carefully follow the design, and have an adult fuse them with an iron according to the bead manufacturer’s instructions.
Once cool, thread the finished feather onto a cord or colorful necklace chain.
Children will love choosing their own color combinations, from rainbow brights to earthy browns.
It makes a fun handmade accessory and a sweet little gift for a friend.
Materials
- Perler beads in turquoise, blue, white, and soft yellow
- A small square or rectangular Perler bead pegboard
- Perler bead ironing paper
- An iron
- A heat-resistant ironing surface
- Tweezers, optional, for placing individual beads
- A colorful necklace cord, beaded cord, or thin jewelry cord
- A small jump ring or suitable jewelry connector
- Small jewelry pliers, if needed for attaching the pendant
- Scissors, if trimming the necklace cord is necessary
Instructions
1. Choose the feather colors
Select turquoise, blue, white, and soft yellow Perler beads to create a bright, cheerful feather pendant. Use turquoise as the main color, blue for secondary sections, white for the central shaft and accents, and yellow for small highlights. Sorting the beads into separate little groups first makes the design much easier to assemble.
2. Plan the feather shape
Before placing the beads, decide how large you want the pendant to be and picture a long feather with a pointed tip, wider middle, and narrower top. The central shaft should run vertically through the design, while the colored bead sections branch outward from it. Keeping the shape symmetrical will give the finished necklace a clean, polished appearance.
3. Build the central shaft
Begin placing white Perler beads in a vertical line to create the feather’s central shaft. Start near the pointed bottom and work upward, keeping the line straight. Make the shaft long enough to divide the feather into two sides, but leave room around it for the turquoise, blue, and yellow sections that will form the feather’s barbs.
4. Shape the pointed feather tip
Build the bottom of the feather into a narrow point by placing only a few beads around the lowest part of the central shaft. Gradually make each row wider as you move upward. This creates the tapered shape that makes the pendant immediately recognizable as a feather rather than simply a colorful leaf.
5. Add the turquoise outer sections
Use turquoise Perler beads to build most of the feather’s outer shape. Place short rows of beads extending from the white central shaft toward both sides. Keep the rows roughly symmetrical, gradually increasing their length toward the middle of the feather. Leave the outer edges slightly stepped so the individual bead rows create a feather-like silhouette.
6. Add the blue bead sections
Introduce blue beads between some of the turquoise rows to give the feather more depth and movement. Alternate the colors rather than creating one large block of blue. Short blue sections along the sides of the white shaft will make the finished pendant look more detailed while still keeping turquoise as the dominant color.
7. Add white and yellow accents
Use additional white beads to create small decorative sections beside the central shaft, then add soft yellow beads in a few rows toward the lower and middle portions of the feather. Keep the yellow accents balanced on both sides. A little yellow goes a long way, so there is no need to cover the entire design with it.
8. Complete the upper feather shape
Continue building upward until the feather reaches its narrow top section. Make the upper rows progressively shorter so the design tapers naturally. Leave a small opening or suitable bead arrangement at the very top where a connector can later be attached. Check that the entire feather remains balanced from left to right.
9. Check every bead before ironing
Look closely at the completed design before applying heat. Make sure every bead is standing upright, the central shaft is continuous, and the turquoise, blue, white, and yellow sections are arranged as intended. Check the pointed tip and outer edges particularly carefully because small misplaced beads can change the shape of the pendant.
10. Cover the design with ironing paper
Place Perler bead ironing paper carefully over the entire feather, making sure every bead is underneath the paper. Move the pegboard and ironing setup onto a stable, heat-resistant surface. An adult should handle the iron, and the manufacturer’s recommended temperature and ironing instructions should always take priority.
11. Fuse the Perler beads
Following the Perler bead manufacturer’s instructions, gently move the heated iron over the ironing paper. Use controlled movements rather than leaving the iron in one spot for too long. The beads should fuse together while retaining enough of their individual shapes to preserve the colorful feather pattern.
12. Let the pendant cool completely
Allow the fused feather to cool before attempting to remove it from the pegboard. Carefully lift the finished design once it has hardened. If the manufacturer’s instructions recommend pressing the piece flat while cooling, follow those directions to help prevent the pendant from curling.
13. Attach the necklace connector
Once the feather has completely cooled, attach a small jump ring or suitable jewelry connector through an appropriate opening near the top of the pendant. Use jewelry pliers if necessary and make sure the connector is securely closed. The connection should be strong enough to keep the feather attached to the necklace cord during normal wear.
14. Add the colorful necklace cord
Thread the necklace cord through the connector and arrange it so the feather hangs naturally in the center. A turquoise, blue, white, or multicolored cord works particularly well with the bead palette. Adjust the length to create a comfortable necklace, then secure the ends using the appropriate closure for the type of cord you have chosen.
15. Display and wear your finished necklace
Give the completed necklace a final inspection and gently check that the pendant hangs straight. The colorful feather should sit prominently in the center while the necklace cord forms a comfortable curve around it. You can make several pendants in different color combinations for matching friendship necklaces, party favors, or handmade gifts.
Tip
For a neater feather, always build outward from the central white shaft rather than starting randomly around the edges. If children are making the necklace, let them choose the color pattern and arrange the beads, but have an adult handle the hot iron and jewelry tools. Making the feather slightly larger also gives you more room to create colorful patterns without losing the recognizable feather shape.
4. Feather Peacock Craft

Bring out those gorgeous peacock colors with a craft that practically begs for glitter.
Cut a large peacock body from cardstock and create its dramatic tail using overlapping paper feathers.
Add turquoise, green, blue, and gold details, then place small circles or sequins near the feather tips for extra sparkle.
Younger children can use pre-cut pieces, while older kids can design the individual feathers themselves.
Display your finished peacock on a wall, refrigerator, or craft-room shelf.
Materials
- Blue or turquoise cardstock for the peacock’s body and neck
- Green, teal, royal blue, and golden yellow cardstock for the tail feathers
- Small pieces of dark blue and light blue paper for the feather eye patterns
- Yellow or orange cardstock for the beak and feet
- Small googly eyes
- Blue, green, and yellow paper for the layered wings
- Thin strips of blue cardstock for the crest
- Scissors
- Craft glue or glue stick
- Pencil
- Ruler
- Small cardboard tube or folded cardstock for supporting the body
- Thick cardboard for the base
- Small circular objects for tracing the feather eye patterns
Instructions
1. Prepare the colorful cardstock
Gather your cardstock and decide which colors you want to use for the peacock’s feathers. Choose turquoise or bright blue for the body, then combine royal blue, teal, green, and golden yellow for the dramatic tail. Keep a few small pieces of contrasting paper aside for the decorative feather markings. Using several shades of blue and green will give your finished peacock a beautiful layered appearance.
2. Cut out the peacock’s body
Draw a rounded, slightly oval body shape onto turquoise cardstock and cut it out carefully. Create two matching pieces if you want the body to have a three-dimensional appearance. Join the pieces around a small cardboard tube or folded cardstock support, leaving enough room to attach the neck and tail. The body should be sturdy enough to stand upright without collapsing under the weight of the decorative feathers.
3. Shape the long peacock neck
Cut a long, gently curved neck from matching turquoise cardstock, making the upper section slightly rounded to form the head. Create a second matching piece and glue the two together for extra strength. Attach the lower end securely to the front of the body. Make sure the neck stands upright and curves naturally forward, giving your peacock its recognizable elegant silhouette.
4. Create the large tail feathers
Draw several long, pointed feather shapes onto blue, green, and teal cardstock. Make some feathers longer than others so the finished tail can spread into a dramatic fan. Cut out approximately fifteen to twenty feathers, depending on the size of your peacock. Add small angled cuts along the edges to imitate natural feather barbs, being careful not to cut through the center. Slightly fold each feather lengthwise to create dimension.
5. Make the decorative feather eyes
Cut small oval or teardrop shapes from golden yellow cardstock. Create slightly smaller ovals from light blue paper and tiny dark blue circles for the centers. Layer these shapes together to form the distinctive eye-like markings found on peacock feathers. Glue one completed marking near the pointed end of each large feather. Vary the sizes slightly so the markings look handmade while remaining visually consistent.
6. Assemble the oversized peacock tail
Cut a large semicircular backing from sturdy cardboard or thick cardstock. Begin attaching the longest feathers around the outer edge, spreading them outward like an open fan. Add medium-sized feathers between the larger ones, then fill the lower gaps with shorter feathers. Overlap the feathers slightly to hide the backing and create a full appearance. Arrange the colors evenly so the tail looks vibrant without having large sections of only one shade.
7. Attach the tail behind the body
Position the completed feather fan behind the peacock’s body, keeping its rounded lower edge near the base of the neck. Apply craft glue generously where the tail meets the body and reinforce the connection with an additional strip of cardboard on the back. Hold the pieces together until the glue begins to set. Check that the tail remains upright and centered rather than leaning heavily to one side.
8. Add the layered paper wings
Cut several small, rounded feather shapes from blue, turquoise, green, and yellow cardstock. Arrange them along each side of the peacock’s body, starting near the upper back and overlapping downward toward the tail. Glue the pieces in rows, leaving their pointed ends visible to imitate layered wing feathers. Use shorter pieces near the top and slightly longer pieces toward the bottom to create a natural, textured appearance.
9. Make the peacock’s face
Attach a small googly eye to each side of the peacock’s head. Cut a tiny triangle from yellow cardstock and fold it slightly down the middle to create a pointed beak. Glue the beak to the front of the face, just below the eyes. Keep the facial features small so they do not overwhelm the narrow neck. A slightly oversized googly eye can make the finished bird look especially cheerful and playful.
10. Create the decorative head crest
Cut three to five thin strips of turquoise cardstock and attach a tiny blue paper circle or teardrop shape to the top of each strip. Glue the lower ends together and secure them behind the peacock’s head. Spread the strips apart slightly to resemble the delicate crest feathers of a real peacock. Allow them to curve gently outward, creating a playful finishing detail above the eyes.
11. Cut and attach the peacock’s feet
Draw two small bird feet onto yellow or golden cardstock, giving each foot three forward-pointing toes. Cut them out and fold a small tab at the back of each foot for attaching to the body. Glue the tabs beneath the peacock, positioning the feet slightly apart for balance. If the tail makes the bird unstable, attach the feet and body to a small, sturdy cardboard base to help the finished craft stand securely.
12. Adjust the feathers and finish the peacock
Once the glue has dried, gently separate any feathers that are sticking together and adjust their positions to make the tail appear fuller. Check that the eye markings are visible and that the tail forms a balanced fan behind the body. Make sure the neck, wings, feet, and crest are firmly attached. Place your finished paper peacock on a flat surface where its colorful feathers can be admired from the front.
Tip
For a fuller, more impressive peacock tail, use three different feather lengths and arrange them in overlapping rows, placing the longest feathers at the back and the shortest near the body. If you’re making this craft with younger children, prepare the feather shapes and decorative eye markings beforehand so they can focus on assembling and decorating their birds. Use sturdy cardstock for the tail backing and body support, since ordinary printer paper may bend under the weight of the layered feathers.
5. Painted Feather Art
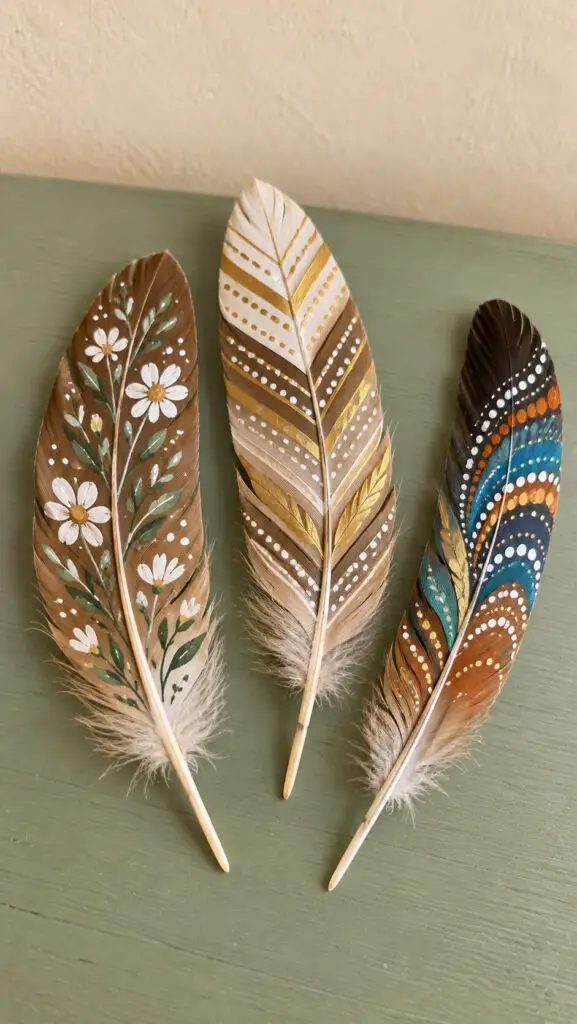
Real feathers become miniature canvases in this colorful project.
Use clean, dry feathers and paint them with tiny flowers, geometric patterns, dots, names, or simple landscapes.
Acrylic paint works particularly well because it gives good coverage without requiring much paint.
Encourage children to experiment with a fine brush and a light touch so the delicate feather structure remains visible.
Arrange several painted feathers in a frame afterward, and suddenly your craft table has produced something that looks surprisingly sophisticated.
Materials
- Three clean, dry natural feathers with intact barbs
- Acrylic craft paints in white, cream, gold, green, blue, orange, or other colors you enjoy
- Fine-detail paintbrushes, preferably with pointed tips
- A small amount of water for rinsing brushes
- Paper towel for gently drying brushes
- A small paint palette or shallow dish for mixing colors
- Newspaper or scrap paper for protecting the work surface
- Optional pencil for lightly sketching a pattern before painting
- Optional clear craft sealer suitable for feathers, if you want to protect the finished artwork
Instructions
1. Choose feathers with good shapes
Select three clean, dry feathers with fairly smooth barbs and clearly defined shafts. Try choosing feathers with slightly different shapes and natural colors so each finished piece has its own personality. Medium-to-large feathers are easiest to decorate because they provide enough surface area for small flowers, geometric lines, dots, and other details.
2. Clean the feathers gently
Make sure the feathers are free from visible dirt and loose debris before painting. If necessary, gently brush them with a clean, dry soft brush or carefully wipe the shaft. Avoid soaking delicate feathers because excess moisture can make the barbs clump together or lose their natural shape. Let any cleaned feathers dry completely before continuing.
3. Plan each feather design
Give each feather its own decorative pattern rather than making all three identical. Plan one with tiny white flowers and green leaves, another with geometric gold and cream lines, and the third with colorful dots and curved patterns. Lightly sketching a few guide marks with a pencil can help, but keep the designs loose enough to preserve the handmade appearance.
4. Paint the floral feather
Use the first feather for the floral design. Paint small white flowers along the natural surface, spacing them at different heights rather than creating a perfectly repetitive pattern. Add tiny green leaves and slender stems between the flowers. Use a small amount of paint on your brush so the natural brown or cream color of the feather remains visible underneath the artwork.
5. Create the geometric feather
Decorate the second feather with simple geometric details using cream and gold paint. Follow the direction of the central shaft and create angled lines, small chevrons, dots, or repeating bands that follow the feather’s natural structure. Keep the central shaft visible rather than covering it completely. The combination of metallic gold and soft cream should create a decorative pattern while still allowing the feather itself to remain the star.
6. Add colorful dots and curves
Use the third feather for a more playful pattern. Add small dots in several colors, then connect selected areas with delicate curved lines that follow the natural direction of the barbs. Try combining colors such as teal, orange, white, blue, and muted brown. Vary the size of the dots so the finished feather does not look mechanically stamped or overly uniform.
7. Keep the natural barbs visible
Apply the paint lightly instead of covering the entire feather surface with a thick layer. The individual barbs should remain clearly visible beneath and around the painted areas. This gives the finished craft a genuine handmade quality and prevents the feather from looking like a flat painted decoration. If a section becomes too heavily covered, simply allow it to dry rather than adding more paint.
8. Let each feather dry completely
Place the painted feathers somewhere safe and allow them to dry naturally. Avoid touching the painted sections while they are wet because the delicate barbs can stick together and the small decorative details may smear. Give extra drying time to areas containing metallic or layered paint, since thicker sections can take longer to become completely dry.
9. Arrange the finished feathers together
Once all three feathers are completely dry, arrange them as a small collection. Place the floral feather beside the geometric feather and the colorful dotted feather, allowing their different designs to complement one another. You can arrange them in a gentle fan, line them up by size, or position them at slightly different angles to create a more natural display.
10. Protect the painted designs if desired
If you want the feathers to last longer as decorative artwork, apply a very light coat of a clear craft sealer that is suitable for the feather material and your chosen paints. Follow the product’s instructions and allow the feathers to dry fully in a well-ventilated area. For a simple display that will be handled very little, leaving the painted feathers unsealed can also preserve their soft, natural texture.
Tip
Use less paint than you think you need, especially when working on the delicate barbs. A fine brush loaded with a small amount of slightly thinned acrylic paint gives you much better control for tiny flowers, leaves, dots, and curved lines. If you’re crafting with children, don’t worry about perfect patterns—the little variations are what make each painted feather look genuinely handmade.
6. Feather Hair Accessories
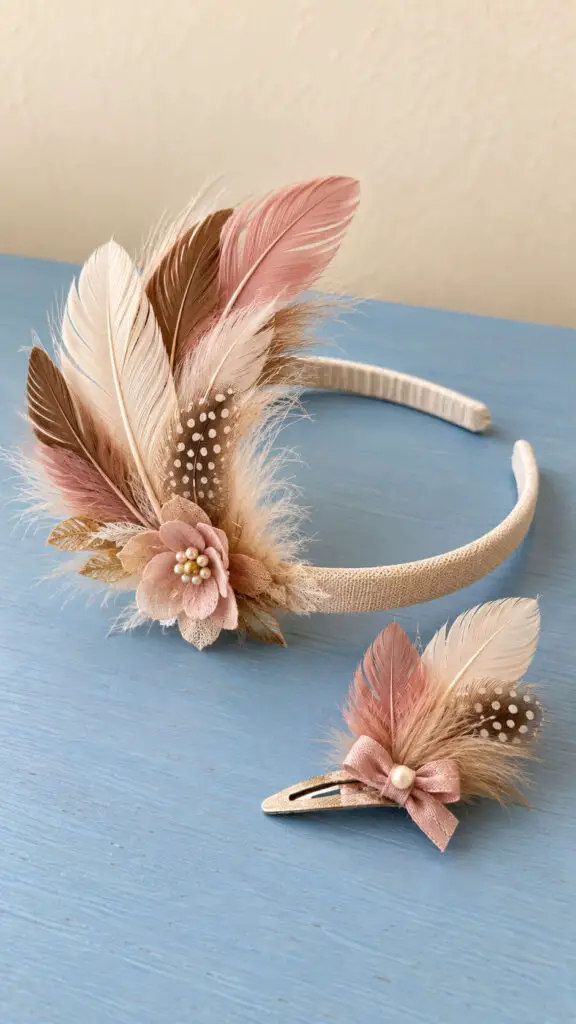
Make a playful hair accessory by attaching a few decorative feathers to a plain hair clip, barrette, or headband.
Choose feathers in coordinating colors and secure them with strong craft glue, keeping the glue away from areas that touch the skin.
Add a ribbon bow, bead, or small fabric flower for personality.
This is especially fun before parties, dress-up days, or family celebrations.
Just remind children that feathers can be delicate, so these accessories are best treated as special-occasion treasures.
Materials
- One plain fabric-covered headband
- One simple metal or snap hair clip
- Several lightweight feathers in cream, dusty rose, and soft brown
- Small piece of matching ribbon or fabric for the bow
- Small fabric flower, optional
- Strong craft glue suitable for fabric and accessories
- Small piece of felt for reinforcing the feather arrangement
- Scissors
- Tweezers, optional, for positioning small feathers
- Small decorative bead or pearl, optional
- Wax paper or scrap paper to protect the work surface
Instructions
1. Choose the feathers for each accessory
Select a few feathers in cream, dusty rose, and soft brown, choosing a mixture of long and short pieces. The longer feathers will create height on the headband, while the smaller feathers work well near the base and on the separate hair clip. Lay everything out first so you can see how the colors and sizes work together before gluing anything.
2. Arrange the headband feathers
Place the headband on your work surface and arrange the feathers along one side rather than covering the entire band. Start with the longest feather toward the back, then layer shorter cream, dusty rose, and brown feathers in front. Angle them slightly upward and outward so they create a soft, natural fan instead of standing in a perfectly straight row.
3. Create a balanced feather cluster
Continue layering the feathers until the cluster looks full without becoming too bulky. Place the cream feathers slightly toward the center, then use dusty rose and brown feathers to add contrast around them. Overlap the lower portions of the feathers so the stems are hidden. Step back occasionally and look at the arrangement from the front, since that is how the accessory will be seen when worn.
4. Prepare a small felt backing
Cut a small oval or teardrop-shaped piece of felt that is just large enough to cover the feather stems. This backing will help hold the feathers together and give you a stronger surface to attach them to the headband. Keep it smaller than the feather cluster so it cannot be easily seen once the accessory is finished.
5. Secure the feather cluster together
Apply a small amount of strong craft glue to the felt backing and carefully position the lower ends of the feathers onto it. Press the feathers gently into place, keeping their tips arranged in the direction you planned. Allow the glue to become secure according to its manufacturer’s instructions before moving the cluster. Avoid using excessive glue because it can seep through delicate feather fibers.
6. Attach the feather cluster to the headband
Once the feather cluster is secure, apply glue to the underside of the felt backing and carefully attach it to one side of the fabric-covered headband. Hold it in place for several seconds so it bonds properly. Position the cluster slightly above the band rather than directly across the top, allowing the feathers to rise naturally and giving the finished accessory a lighter, more wearable appearance.
7. Make the small fabric bow
Cut a narrow strip of ribbon or fabric and form it into a small bow. Keep the bow compact so it complements rather than hides the feathers. Secure the center with a small piece of ribbon, a stitch, or a tiny amount of suitable craft glue. Dusty rose or cream works particularly well with the feather colors, but you can choose any shade that coordinates with your design.
8. Decorate the hair clip
Arrange two small feathers on the top of the hair clip, placing one slightly behind the other so they overlap naturally. Add the tiny fabric bow near their base, covering the feather stems and attachment point. If you want a little extra detail, place a small decorative bead or pearl in the center of the bow. Keep the decoration lightweight so the clip remains comfortable and functional.
9. Secure the clip decorations
Glue the feather stems and bow securely to the top surface of the hair clip, taking care not to interfere with the opening and closing mechanism. Hold the pieces in position until the adhesive grips. Check underneath the clip for stray glue and remove any excess before it fully dries. Let the entire accessory cure according to the glue manufacturer’s instructions.
10. Check the finished accessories
Once everything is completely dry, gently inspect both accessories. Make sure the feathers are firmly attached, the headband still bends naturally, and the hair clip opens and closes without catching on any decoration. Lightly fluff the feather barbs with your fingers and adjust any feather that has shifted. The finished pieces should feel lightweight, secure, and comfortable rather than stiff or overloaded.
Tip
Use fewer feathers than you think you need at first. It is much easier to add another feather than to remove one after the glue has dried. For children, choose larger, sturdy feathers and keep the designs lightweight. If the accessories will be worn regularly, use an adhesive specifically suited to the materials and allow it to cure fully before wearing them. Store the finished pieces in a shallow box so the delicate feathers do not get crushed.
7. Feather Fascinator Hat
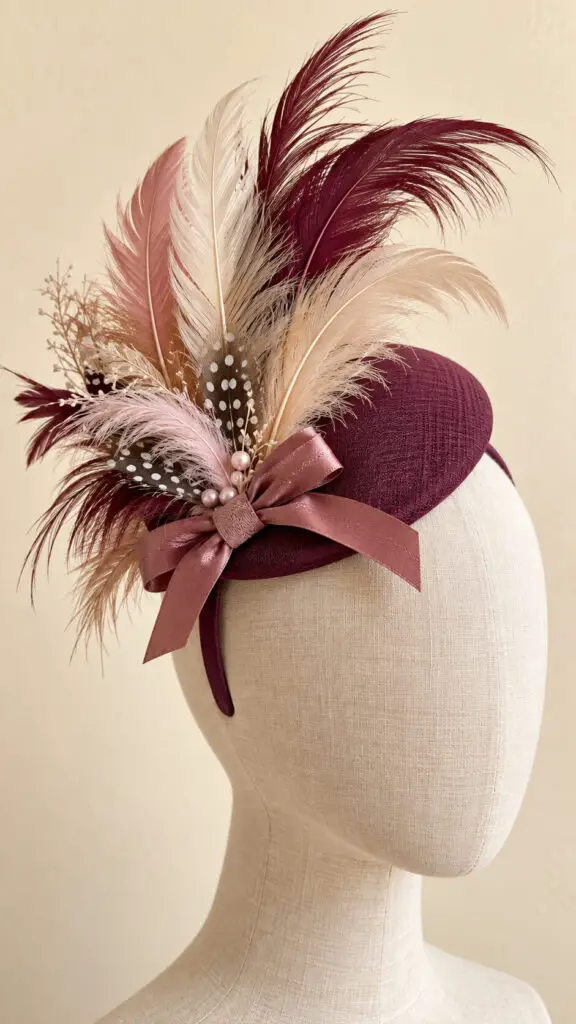
For a little dress-up fun, transform a plain headband or small craft hat into a feather fascinator.
Layer feathers in different lengths, adding a ribbon bow or decorative flower underneath to hide the attachment point.
Secure everything firmly with craft glue and allow it to dry completely before wearing.
Kids can choose a dramatic color combination, while adults may prefer something more elegant.
It is a wonderfully silly project for tea parties, costumes, birthdays, or simply declaring an ordinary Tuesday a fancy occasion.
Materials
- A small plain fascinator base, mini hat, or sturdy round piece of felt
- Deep plum, burgundy, or muted purple fabric
- Several decorative feathers in different lengths and coordinating colors
- Satin or grosgrain ribbon for the bow
- Strong fabric or craft glue
- Small beads, pearls, or another simple embellishment, optional
- Scissors
- Pencil or fabric marker
- Hair clip, comb, or small headband for attaching the fascinator
- A plain mannequin head or hat form, optional, for shaping and displaying the finished fascinator
Instructions
1. Prepare the fascinator base
Choose a small, sturdy fascinator base with a neat rounded shape. If you are making your own base, cut a firm piece of felt or lightweight millinery material into a smooth circle and cover it with deep plum or muted burgundy fabric. Make sure the fabric is pulled smoothly around the edges so the finished hat looks tidy rather than wrinkled.
2. Cover the base neatly
Cut enough fabric to cover the top and sides of the fascinator base, leaving a little extra around the edges. Carefully secure the fabric underneath the base with strong fabric glue, smoothing it as you work. Keep the surface flat and wrinkle-free. Allow the adhesive to dry completely before decorating so the base stays firm while you arrange the feathers.
3. Sort the feathers by length
Lay your feathers out and separate them into long, medium, and short pieces. Choose feathers that complement one another instead of making every feather identical. A few tall feathers will create height, while shorter feathers can fill the lower sections and give the decoration a fuller appearance. Burgundy, cream, blush, tan, and soft brown work particularly well with a plum or burgundy base.
4. Plan the feather arrangement
Before gluing anything, place the feathers against one side of the fascinator to experiment with the arrangement. Position the longest feathers toward the back or center, allowing them to extend upward and outward. Add medium feathers around them, then use shorter feathers near the bottom. Vary the heights and angles slightly so the arrangement looks natural rather than perfectly symmetrical.
5. Secure the longest feathers first
Once you are happy with the arrangement, glue the longest feathers into position first. Apply a small amount of strong adhesive to the lower end or shaft of each feather and press it firmly against the fascinator base. Hold each feather in place until it stays secure. Keep the feathers grouped toward one side so the finished fascinator has the characteristic dramatic sweep of a classic feathered hat.
6. Fill in the feather arrangement
Add the medium and shorter feathers around the longest ones, filling small gaps without completely hiding the individual feathers. Allow some feathers to curve outward while others point slightly upward. This mixture of directions gives the fascinator movement and makes the finished piece look more lively. Avoid adding too many feathers at once; it is much easier to add another feather than to remove one covered in glue.
7. Create the coordinating ribbon bow
Cut a suitable length of satin or grosgrain ribbon and form a small, neat bow. Choose a shade that complements the feathers, such as dusty rose, muted burgundy, cream, or a slightly lighter plum. Secure the center of the bow with a small amount of glue or a short piece of matching thread. Keep the bow proportional to the hat so it enhances the feathers rather than competing with them.
8. Attach the bow beneath the feathers
Position the finished ribbon bow at the base of the feather arrangement, where the feather shafts meet the fascinator. Apply a small amount of strong craft or fabric glue to the back of the bow and press it firmly into place. The bow should cover the feather attachment points and create a polished transition between the fabric-covered hat and the decorative feathers.
9. Add a small decorative accent
If you want a little extra detail, add a few small pearls, beads, or another understated embellishment around the center of the bow. Keep this part simple because the feathers should remain the star of the fascinator. A handful of tiny accents can provide a lovely finishing touch without making the design look crowded or overly elaborate.
10. Attach the fascinator to a hair accessory
Turn the fascinator over and attach a sturdy hair clip, comb, or small headband to the underside. Use strong adhesive and position the attachment point near the center of the base so the fascinator will sit securely when worn. Allow the adhesive to cure fully according to the product’s instructions before trying it on. This is especially important because the feathers add height and movement to the finished piece.
11. Check the balance and shape
Place the fascinator on a plain mannequin head or hat form and look at it from the front, side, and back. Check that the feathers are securely attached and that the hat sits comfortably at an attractive angle. Gently reposition any feather that looks too crowded or points awkwardly. The goal is a playful but polished silhouette, with the feather tips naturally reaching different heights.
12. Let the fascinator dry completely
Allow every glued section to dry and cure fully before wearing the fascinator. Resist the temptation to test it immediately—craft glue has a sneaky way of looking finished before it actually is. Once completely dry, gently touch the feathers and bow to make sure everything remains firmly attached. Store the fascinator somewhere dry where the delicate feather tips will not become crushed.
Tip
Use feathers in different lengths and textures rather than choosing a large number of identical feathers. The variation creates height, movement, and that charming handmade look. If the fascinator feels too heavy on one side, remove or reposition a feather before adding more. For a particularly polished result, keep the base, ribbon, and feather colors within the same general color family while allowing one or two contrasting feathers to provide interest.
8. Feather Lampshade Decor
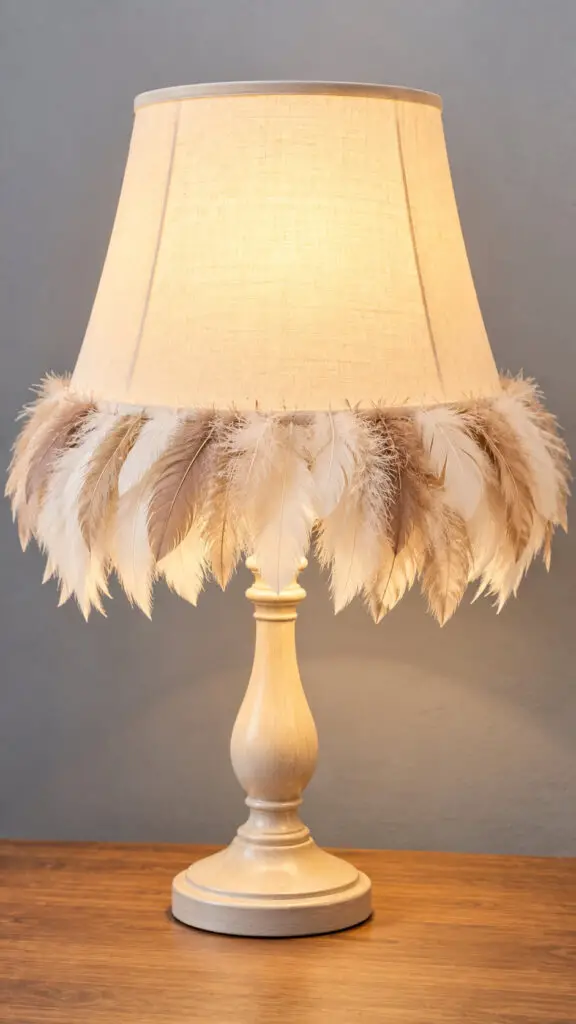
Give an old lampshade a soft, decorative makeover with faux feathers.
Arrange the feathers around the lower edge or in a gentle cascading pattern, then attach them with suitable fabric or craft adhesive.
Keep the feathers well away from bulbs and heat sources, and use LED lighting for a safer decorative setup.
This craft works particularly well in bedrooms, reading corners, or cozy craft spaces.
The result has a dreamy texture that makes an ordinary lamp feel completely transformed.
Materials
- A plain warm ivory or cream fabric lampshade
- Soft faux feathers in cream, ivory, beige, and light taupe
- Fabric-safe craft adhesive or a suitable glue for the lampshade material
- A small amount of removable tape, optional, for temporarily positioning feathers
- A clean, dry workspace
- A small LED bulb suitable for the lampshade
- Scissors, optional, if trimming ribbon or adhesive strips is necessary
Instructions
1. Choose a suitable lampshade
Start with a simple fabric lampshade that has a smooth lower edge and enough space for the feathers to be attached securely. An ivory, cream, or light beige shade works especially well because it allows the soft feather colors to blend naturally. Avoid using a lampshade with a damaged fabric surface, as the adhesive may not hold properly.
2. Select coordinating feathers
Choose lightweight faux feathers in cream, ivory, soft beige, and light taupe. Mix slightly different feather sizes so the finished trim does not look too rigid or uniform. Keep the colors close together for the soft, elegant appearance of the project. Avoid very dark or brightly colored feathers if you want the gentle neutral look shown in the craft idea.
3. Prepare the lampshade surface
Make sure the lower outside edge of the lampshade is clean and completely dry before attaching anything. Gently wipe away dust with a clean, dry cloth if necessary. Do not soak the fabric or use cleaning products that could leave moisture behind. A clean surface gives the adhesive a much better chance of holding the feathers securely.
4. Arrange the feathers before gluing
Lay the feathers around the lower edge of the lampshade without applying adhesive yet. Position them so they slightly overlap one another, with the feather tips pointing downward. Alternate the cream, ivory, beige, and taupe shades to create a natural pattern. Step back occasionally and check the arrangement from different angles so you can spot any noticeably empty areas.
5. Create a gentle feather cascade
Allow the feathers to hang at slightly different lengths instead of lining up every tip perfectly. Place a few longer feathers between shorter ones to create the soft cascading effect that makes the lampshade look more interesting. Keep the arrangement relatively light and airy rather than covering the entire shade with a thick layer of feathers.
6. Secure the first feather
Begin attaching the feathers at the lower edge of the lampshade, using a small amount of fabric-safe adhesive on the upper portion of each feather. Press the feather gently against the shade and hold it in place according to the adhesive manufacturer’s instructions. Start with one feather and make sure it is secure before continuing around the lampshade.
7. Continue attaching the feather row
Work gradually around the lampshade, attaching one feather at a time. Slightly overlap each new feather with the previous one so the attachment points are hidden. Keep checking the spacing as you go, because adding too many feathers can make the trim look bulky. The goal is a graceful row rather than a thick feather-covered lampshade.
8. Keep the feathers away from the bulb
Make sure every feather remains safely positioned on the outside lower edge of the shade and does not extend toward the light bulb or any hot electrical component. Use an LED bulb that produces less heat, and follow the lampshade and bulb manufacturer’s safety instructions. Never allow decorative materials to touch the bulb or block ventilation around the lighting fixture.
9. Allow the adhesive to dry completely
Leave the lampshade undisturbed while the adhesive dries according to the manufacturer’s recommended drying time. Resist the temptation to pick it up or adjust the feathers while the glue is still setting. Once dry, gently inspect the entire feather trim and press down any loose attachment points only if the adhesive instructions allow it.
10. Position the finished lampshade
Place the completed lampshade on its intended lamp base and check that it sits securely and evenly. Turn on the lamp using the recommended LED bulb and observe the feathers for a moment to make sure they remain safely away from the light source. The finished lampshade should have a warm ivory surface with a soft row of cream and taupe feathers creating a cozy decorative edge.
Tip
Use feathers with naturally varied shapes rather than trying to make every piece identical. The slight differences make the finished lampshade look more relaxed and handmade. For the safest result, keep all decorative feathers well away from the bulb and electrical components, use a suitable LED bulb, and follow the manufacturer’s safety instructions for both the lamp and adhesive.
9. Feather Bird Craft
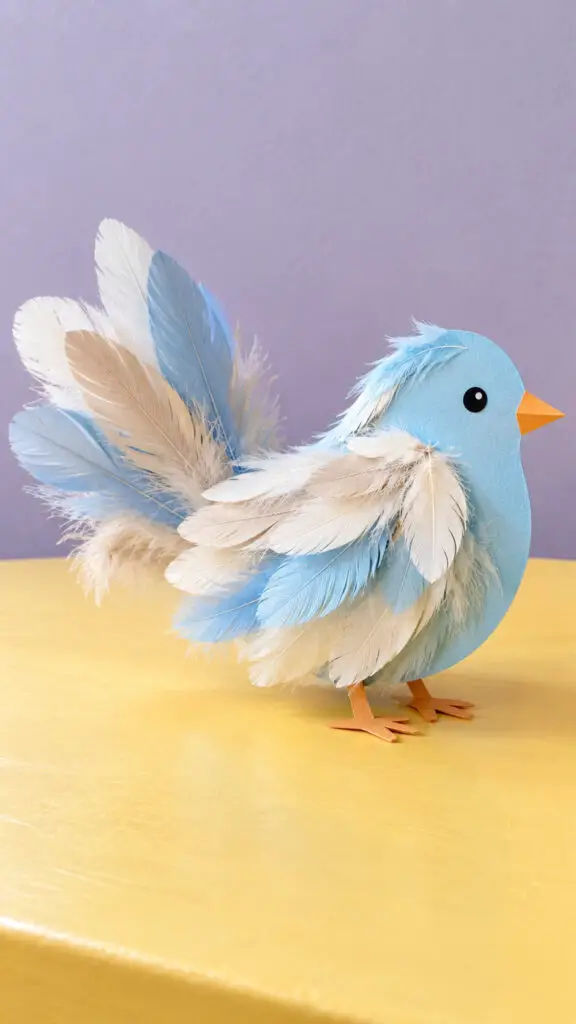
Create a cheerful little bird from cardstock, then give it a feathery makeover.
Cut a simple bird body, add a paper beak and googly eyes, and cover portions of the body with real or paper feathers.
Layer them from tail toward head so they overlap naturally.
Children can invent colorful imaginary birds instead of worrying about making a scientifically accurate species.
Add a string loop to turn the finished bird into a hanging decoration, or glue it onto a craft stick for a puppet.
Materials
- Sky-blue cardstock for the bird’s body
- Cream and pale blue real or faux feathers
- Orange cardstock or construction paper for the beak and feet
- Black paper or a small black sticker for the eye
- Scissors
- Child-safe craft glue
- Pencil
- Optional: a small piece of cardboard for reinforcing the bird
- Optional: washable markers for adding extra details
Instructions
1. Draw the bird body
Place a sheet of sky-blue cardstock on your work surface and lightly draw a rounded bird shape with a slightly curved back and a fuller lower section. Keep the body fairly simple because the feathers will provide most of the texture. Add a small rounded head at the front so the finished shape clearly resembles a cheerful little bird.
2. Cut out the bird shape
Carefully cut around the bird outline with scissors, following the curves as smoothly as possible. If younger children are participating, an adult can cut the main body while the child concentrates on decorating it. Check the edges after cutting and trim away any obvious pencil marks or uneven sections before continuing.
3. Create the orange beak
Cut a small triangle from orange cardstock to make the bird’s beak. Fold the triangle gently along its center if you want a slightly dimensional appearance, then glue it onto the front of the bird’s head. Keep the beak relatively small so it complements the rounded body rather than overpowering the feather decoration.
4. Add the bird’s eye
Give the bird a simple black eye by cutting a tiny circle from black paper or using a small black sticker. Place it slightly above and behind the beak. A single black eye is enough to give the craft personality, but you can make it slightly larger for a playful children’s-craft appearance.
5. Arrange the body feathers
Before gluing anything, lay the cream and pale blue feathers over the bird’s body to decide where they should go. Begin near the tail and arrange the feathers so they overlap toward the head. This arrangement creates a natural layered effect because each feather partially covers the one beneath it. Mix the cream and blue feathers rather than keeping each color in a separate section.
6. Build the feathered tail
Use several longer feathers to create the bird’s fuller tail. Place the longest feathers toward the back first, then layer shorter feathers over their bases. Angle the feathers slightly outward so the tail has a fan-like shape. Avoid covering the entire cardstock body because leaving some blue visible helps the paper bird remain recognizable.
7. Glue the feathers onto the body
Once you are happy with the arrangement, lift the feathers one at a time and apply a small amount of craft glue underneath each feather’s base. Press each feather gently onto the cardstock and hold it briefly so it stays in position. Work from the tail toward the head, allowing each new feather to overlap the previous one naturally.
8. Add feathers to the wings
Choose several smaller cream and pale blue feathers for the bird’s wings. Arrange them in a curved cluster along the middle of the body, with the feather tips pointing backward toward the tail. Glue them down in layers, keeping the central blue cardstock visible around the head and lower body so the finished bird does not become completely covered.
9. Make the bird’s feet
Cut two small orange feet from cardstock. Each foot can be a simple narrow shape with three tiny toes extending from the bottom. Glue the feet underneath the bird’s body so they peek out beneath the feathers. If the bird will be displayed standing upright, reinforce the feet with an extra layer of cardstock to make them sturdier.
10. Let the bird dry completely
Leave the completed bird undisturbed until the glue has dried thoroughly. This is important because the feathers can shift if the craft is picked up too soon. Once dry, gently check each feather and press down any loose edges. Avoid pulling on the feathers, as their delicate barbs can easily become separated.
11. Give the bird a final check
Look over the finished craft and make any small adjustments needed. Make sure the orange beak is firmly attached, the black eye is clearly visible, and the feathers overlap from the tail toward the body. If any area looks too empty, add one or two small feathers rather than covering the whole bird with another thick layer.
Tip
For the fluffiest and most natural-looking bird, use a mixture of feather sizes instead of making every feather identical. Longer feathers work beautifully for the tail, while shorter, softer feathers are better for the body and wings. If you’re crafting with young children, let them choose the feather colors and arrange the pieces themselves—the slightly wonky results are often what make homemade crafts so charming.
10. Feather Dreamcatcher
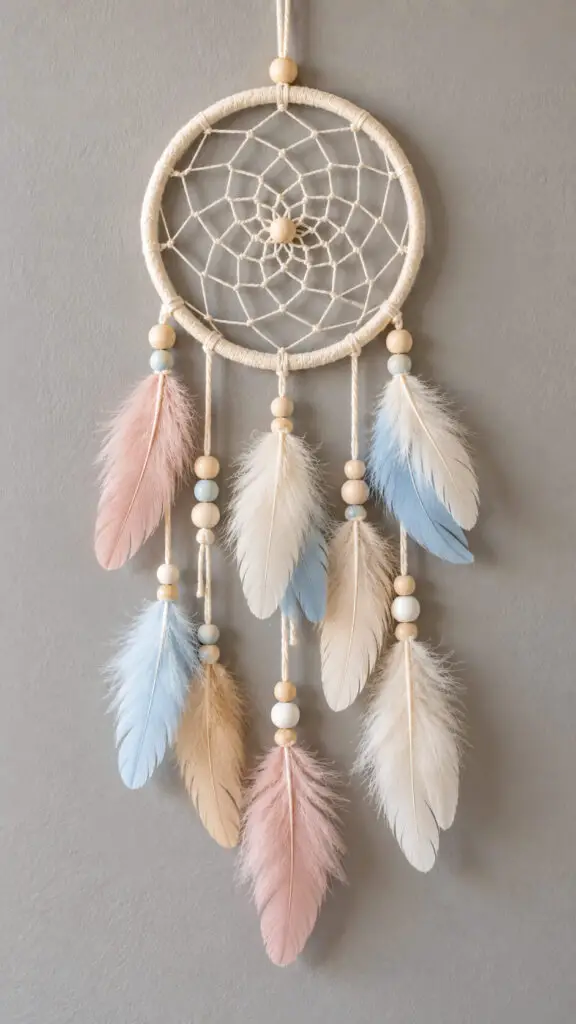
Make a child-friendly dreamcatcher using a wooden embroidery hoop, yarn, and colorful feathers.
Wrap the hoop with yarn, then weave additional yarn across the center in a loose web pattern.
Tie several strands underneath and decorate them with feathers, beads, and ribbons.
This craft offers plenty of room for personal choices, which is exactly what makes it fun.
Younger children may need help with the weaving, but they can take charge of choosing colors and decorating the hanging strands.
Materials
- One wooden embroidery hoop, approximately 6–8 inches in diameter
- Natural cream-colored yarn or cotton cord for wrapping the hoop
- Additional cream, white, or beige yarn for weaving the center
- Soft white, beige, pale blue, and dusty pink feathers
- Small wooden beads in natural, white, or pastel shades
- Scissors
- Craft glue, optional, for securing loose yarn ends
- A small length of sturdy cord or yarn for hanging the finished dreamcatcher
Instructions
1. Prepare the wooden hoop
Start with a clean wooden embroidery hoop and separate the inner and outer rings if necessary. Use the smooth inner ring as your base, or keep the two pieces together if you prefer a slightly thicker frame. Check the hoop for rough areas and gently smooth them before beginning so the yarn will wrap evenly and your finished dreamcatcher will have a neat appearance.
2. Wrap the hoop with cream yarn
Tie the end of the natural cream-colored yarn securely around the hoop, then begin wrapping it tightly around the entire wooden frame. Keep each strand close to the previous one so the wood gradually disappears beneath the yarn. Continue around the hoop until it is completely covered. Tie the yarn securely at the end and trim away any excess, using a tiny amount of craft glue if needed to keep the knot from loosening.
3. Create the center hanging loop
Cut a separate piece of sturdy yarn or cord and tie it securely around the top of the wrapped hoop. Form a small loop above the frame so the finished dreamcatcher can hang vertically. Make the loop large enough to fit comfortably over a small hook or nail, but avoid making it excessively long because the hoop should remain balanced when displayed.
4. Begin weaving the center web
Cut a long piece of cream-colored yarn for the web. Tie one end securely near the top of the hoop, then stretch the yarn across the inside of the frame and wrap it around the opposite section of the hoop. Continue working around the circle, creating evenly spaced sections. Gradually move inward with each round so the yarn begins forming a simple web pattern rather than a solid woven center.
5. Build the web toward the middle
Continue weaving the yarn around the hoop and connecting the strands toward the center. Keep the tension firm enough to hold the shape without pulling so tightly that the wooden hoop bends or the web becomes distorted. You can create a traditional-looking radial pattern or keep the design loose and simple. Tie the yarn securely once you reach the center, then trim any excess.
6. Prepare the feather strands
Cut several lengths of yarn in different sizes, making some noticeably longer than others. This variation will give the finished dreamcatcher a natural cascading appearance. Choose feathers in soft white, beige, pale blue, and dusty pink, then pair them with a few wooden beads. Arrange the colors before attaching them so no single shade becomes concentrated in only one area.
7. Attach the wooden beads
Thread one or more wooden beads onto selected hanging strands, positioning them at different heights. Tie small knots beneath the beads to keep them from sliding downward. You can use natural wooden beads for a neutral appearance or mix white and pastel beads with the feathers for a softer decorative style. Leave a little space between bead groupings so the finished strands do not look crowded.
8. Secure the feathers to the strands
Tie the feathers securely to the ends of the yarn strands, placing them at different heights around the bottom of the hoop. Use white and beige feathers near the center, then balance them with pale blue and dusty pink feathers toward the sides. Make sure each feather hangs freely rather than overlapping heavily with another. A mixture of long and short feathers will make the dreamcatcher look more graceful and handmade.
9. Arrange the hanging strands around the hoop
Tie the decorated strands to the lower portion of the wooden hoop, spacing them around the bottom rather than placing every strand in one spot. Let some strands hang close to the hoop while others extend farther downward. Step back occasionally to check the overall balance. If one side looks heavier, move a strand or adjust its length before making the knots permanent.
10. Finish and display the dreamcatcher
Inspect the completed dreamcatcher for loose knots, uneven yarn ends, or feathers that need repositioning. Trim excess yarn carefully and secure any loose ends with a small amount of craft glue if necessary. Hang the finished dreamcatcher vertically from its top loop against a simple wall where the feather colors and woven center can be clearly seen. Keep it securely mounted and out of reach of very young children.
Tip
For a softer, more coordinated dreamcatcher, keep the main colors limited to cream, white, beige, pale blue, and dusty pink, as these shades work beautifully together without overwhelming the delicate feathers. Let the hanging strands vary in length rather than making them perfectly symmetrical—the slight differences give the finished craft a more natural, relaxed look.
11. Feather Bookmark
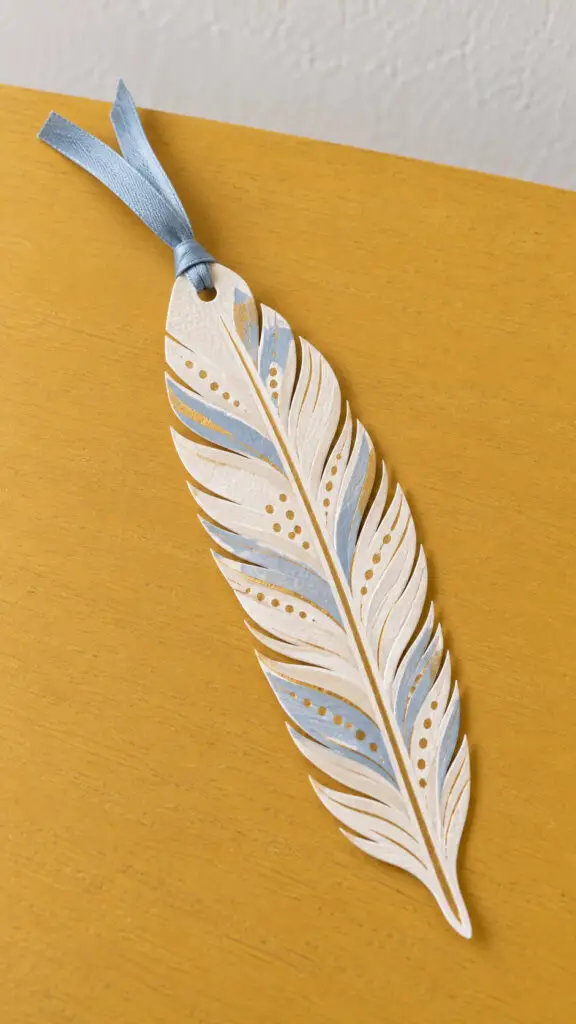
A handmade feather bookmark is practical enough to use every day and simple enough for an afternoon craft session.
Cut a feather from cardstock or sturdy decorative paper, then add painted lines, metallic accents, or patterned paper details.
Punch a hole at the top and thread through a ribbon or piece of yarn.
Laminate the finished bookmark if you want extra durability.
It is a lovely rainy-day project for young readers and makes a thoughtful handmade gift for teachers, grandparents, or book-loving friends.
Materials
- Sturdy cardstock in cream, ivory, or another light color
- Dusty-blue ribbon, approximately 8–10 inches long
- Metallic gold craft paint or a gold paint marker
- Fine-tip paintbrush, if using craft paint
- Pencil for lightly sketching the feather shape
- Scissors
- Single-hole punch
- Ruler, optional, for keeping the central shaft straight
- Craft glue, optional, if adding extra paper details
- Scrap paper to protect the work surface while painting
Instructions
1. Choose your cardstock
Select a sturdy piece of cardstock that can hold its shape when tucked between book pages. Cream, ivory, pale beige, or white works especially well because the muted-gold and dusty-blue details will stand out beautifully. Avoid very thin paper, which can bend easily, especially when the bookmark is used regularly.
2. Draw the feather shape
Lightly sketch a long feather silhouette onto the cardstock using a pencil. Make the feather narrow at the top and bottom, with a slightly fuller middle section. Add a straight or gently curved central shaft running from the base toward the pointed tip. Aim for a graceful shape rather than making it perfectly symmetrical.
3. Cut out the feather
Carefully cut around the pencil outline with scissors. Take your time around the curves and pointed tip because clean edges will make the finished bookmark look much more polished. If you are crafting with children, an adult can handle the cutting while the child concentrates on decorating the feather.
4. Cut the feather barbs
Create the characteristic feathered edges by making small angled cuts from both sides toward the central shaft. Keep the cuts relatively close together, but do not cut through the shaft. Vary the length of the cuts slightly so the feather has a more natural appearance instead of looking like a perfectly uniform paper shape.
5. Define the central shaft
Use a pencil or ruler to check the position of the central shaft before decorating. Once you are happy with it, lightly trace over the line with a muted-gold paint marker or a very fine paintbrush and gold craft paint. Keep the line thin enough that it looks delicate while remaining clearly visible.
6. Add the dusty-blue details
Paint narrow dusty-blue sections along selected feather barbs, leaving plenty of the cream cardstock visible. You can create alternating blue accents on opposite sides or use a few longer curved sections for a more artistic look. Keep the blue details slightly irregular so the bookmark retains the charm of a handmade craft.
7. Decorate with muted gold
Add small gold dots, short curved lines, or delicate accents between the blue sections. Avoid covering the entire feather with paint because the contrast between the cream cardstock, dusty blue, and gold is what gives the bookmark its elegant appearance. Let each painted section remain thin and lightweight so the paper does not become overly saturated.
8. Let the paint dry completely
Place the decorated feather flat and allow all paint to dry thoroughly before handling it further. If you used several layers of paint, give the bookmark additional drying time. Moving it too soon can smear the gold details or leave fingerprints in the paint, and nobody wants a beautiful feather bookmark with an accidental thumbprint right across it.
9. Punch the ribbon hole
Use a single-hole punch to make a small hole near the top of the feather. Position the hole in the center, leaving enough cardstock around it so the paper remains strong. Avoid placing it too close to the edge because repeated pulling on the ribbon could weaken or tear the cardstock.
10. Attach the dusty-blue ribbon
Thread one end of the dusty-blue ribbon through the punched hole and pull it through until both ends are approximately even. Pass the loose ends through the loop and gently tighten to create a simple knot at the top of the bookmark. Leave enough ribbon extending beyond the feather to make a visible decorative tassel.
11. Check the finished bookmark
Examine the bookmark from top to bottom and make sure the feather shape remains sturdy, the painted details are completely dry, and the ribbon is securely attached. Trim any loose ribbon threads if necessary. The finished piece should be long enough to mark a page while remaining slim enough to sit comfortably inside a closed book.
12. Use the bookmark in your favorite book
Slide the feather bookmark between the pages of a book, leaving the decorated feather and dusty-blue ribbon visible above the pages. For a coordinated set, make several bookmarks using different feather shapes and color combinations. They also make thoughtful handmade gifts for teachers, book-loving friends, grandparents, or anyone who enjoys a little handmade personality in their reading time.
Tip
For a more realistic feather, keep the central shaft slightly thicker than the surrounding painted lines and make the angled edge cuts gradually shorter near the pointed tip. If children are making the bookmark, let them choose the colors and decorate the feather freely—the slightly wonky details are often what make handmade crafts feel special.
12. Feather Easter Eggs
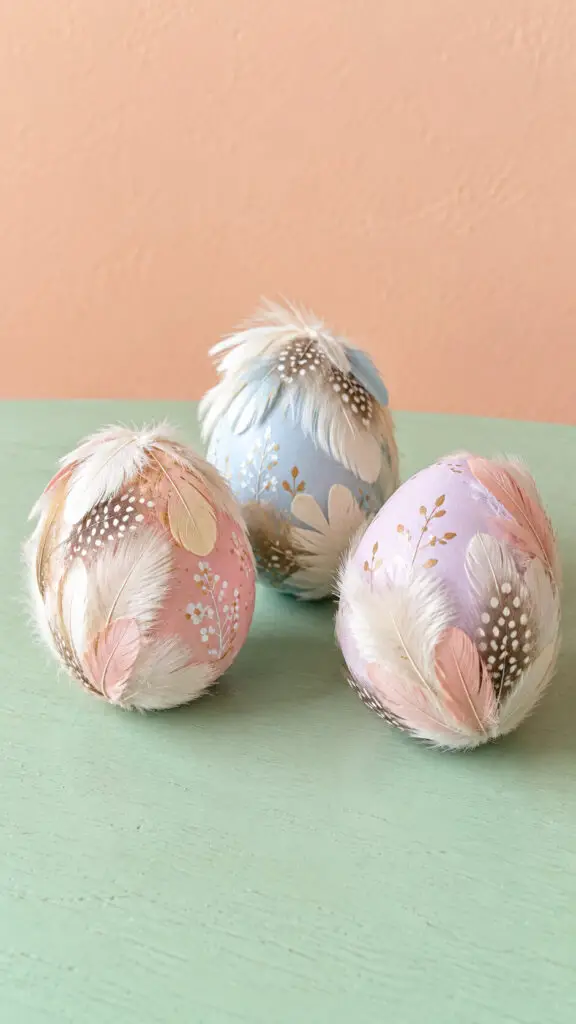
Give ordinary Easter decorating a feathery twist by turning plastic or papier-mâché eggs into colorful little decorations.
Paint the eggs first and let them dry completely.
Then glue small feathers around selected areas, leaving some of the painted surface visible.
Pastel feathers create a soft spring appearance, while bright colors make the eggs feel more playful.
Display them in a basket with shredded paper grass.
This is an especially nice project for children who enjoy decorating more than they enjoy the inevitable egg-dye cleanup.
Materials
- Lightweight decorative eggs made from plastic, papier-mâché, foam, or another craft-safe material
- Small white feathers
- Small cream-colored feathers
- Small blush or pale pink feathers
- Pastel pink, pale blue, and soft lavender paint
- Paintbrushes in small and medium sizes
- Craft glue suitable for the egg material
- A small bowl or palette for paint
- Newspaper or scrap paper to protect the work surface
- Optional: fine-tip paint markers for adding small dots, flowers, or decorative lines
- Optional: small tweezers for positioning delicate feathers
Instructions
1. Choose and prepare the eggs
Select three lightweight decorative eggs in similar sizes so they look cohesive when displayed together. If you are using plain white or unfinished eggs, make sure their surfaces are clean and dry before painting. Place each egg somewhere stable while you work so it does not roll around. Children can help choose which egg will become pink, blue, and lavender.
2. Paint the eggs in pastel colors
Paint one egg pastel pink, another pale blue, and the third soft lavender. Apply thin, even coats rather than trying to cover the surface with one thick layer. Allow each coat to dry before adding another if the original surface is still showing through. Keep the colors soft and light so the delicate feathers will remain the stars of the finished craft.
3. Let the painted surfaces dry completely
Allow the eggs to dry thoroughly before adding any feathers. This is an important little pause, especially when crafting with children who are usually ready to decorate approximately three seconds after painting. A completely dry surface helps the glue adhere properly and prevents the feathers from becoming messy or stuck in wet paint.
4. Plan the feather arrangements
Before using glue, place a few feathers against each egg to decide where you want them to go. Give every egg a slightly different design. One can have feathers clustered around the top, another can have a curved feather border around one side, and the third can have a combination of overlapping feathers near the upper and lower sections. Leaving some painted surface exposed keeps the eggs from looking completely covered.
5. Add small painted details
If you want additional decoration, use a fine paintbrush or paint marker to add tiny dots, simple flowers, curved lines, or delicate branches to the exposed areas of the eggs. Keep these details light and scattered rather than covering the entire surface. White, cream, or soft gold details look particularly pretty against pastel colors and help connect the three different eggs visually.
6. Apply small amounts of craft glue
Use a small amount of craft glue on the area where the first feather will be attached. Avoid spreading glue over large sections because excess adhesive can make delicate feathers look clumped and stiff. Work in small areas so you can control exactly where each feather sits. An adult can help with the glue if younger children are participating.
7. Attach the feathers gently
Press each feather into the glue with a light touch, holding it in place for a few seconds if necessary. Arrange the feathers so their natural curves follow the shape of the egg. Some feathers can overlap slightly to create a soft layered effect, while others can sit individually along a curved border. Avoid flattening the feather barbs because their fluffy texture is part of the charm.
8. Create a different design on each egg
Give each egg its own personality instead of making all three identical. On the pink egg, try a curved arrangement of white and blush feathers. On the blue egg, cluster cream feathers around the upper section. On the lavender egg, combine white and blush feathers along one side. The three designs should coordinate without looking like copies of one another.
9. Allow the feathers to set
Leave the decorated eggs undisturbed until the glue has dried completely according to the adhesive manufacturer’s directions. Avoid picking up the eggs too soon because the feathers can shift before the glue has properly bonded. Once dry, gently inspect each egg and press down only on any feather that needs a little extra attachment.
10. Arrange the finished Easter eggs
Display the three finished eggs together so their pastel colors and feather details can be appreciated as a group. Place the pink, blue, and lavender eggs close enough to feel like a collection while allowing each one to remain visually distinct. They look lovely as a small spring display on a table, shelf, basket, or Easter decorating area.
Tip
Use tiny feathers rather than large, heavy ones because they are easier to attach to curved eggs and create a softer finished appearance. For a particularly pretty result, combine fluffy white feathers with a few blush or cream feathers rather than covering the eggs entirely. If children are making the craft, let them choose the feather placement—the slightly uneven arrangements are what make homemade Easter decorations feel special.
13. Feather Garland
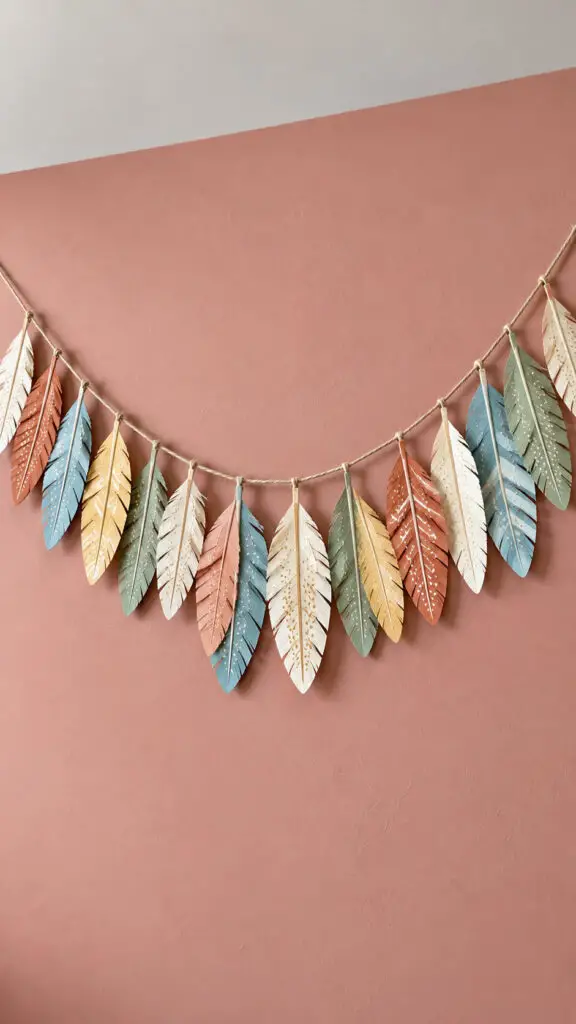
A feather garland is an easy way to decorate a bedroom, party table, classroom, or seasonal display.
Cut feather shapes from paper in several sizes, decorate them with crayons or paint, and attach them to twine using small pieces of tape or glue.
Mix solid colors with patterned feathers so the garland feels handmade rather than overly coordinated.
Older children can experiment with symmetrical designs, while younger ones can simply enjoy creating a wonderfully colorful collection of feathers.
Materials
- Cardstock or decorative paper in cream, terracotta, soft blue, pale yellow, and muted green
- Natural-colored twine or thin cotton cord
- Scissors
- Pencil
- Ruler, optional, for keeping feather sizes consistent
- White craft glue or double-sided tape
- Paint or markers for adding simple feather patterns
- Small hole punch, optional
- Clothespins or small clips, optional, for holding the feathers while glue dries
Instructions
1. Choose your paper colors
Pick a small collection of coordinating cardstock colors for the garland. Cream, terracotta, soft blue, pale yellow, and muted green create a warm, cheerful palette that works especially well for spring, bedrooms, playrooms, parties, or everyday home decor. Using several colors will give the finished garland variety without making it look too busy.
2. Draw the feather shapes
Use a pencil to draw several feather outlines onto your cardstock. Make some feathers long and narrow and others slightly shorter and wider so the finished garland has a relaxed, handmade appearance. Each feather should have a pointed or gently rounded tip and a narrow base where it will eventually attach to the twine.
3. Cut out each feather
Carefully cut around the pencil outlines with scissors. You do not need every feather to be perfectly identical—in fact, small differences make the finished garland look more natural. If children are helping, let them create their own feather shapes while an adult handles the scissors when necessary. Make enough feathers to fill the length of your chosen twine.
4. Create the feather barbs
Add small angled snips along both sides of each paper feather to create individual feather-barb details. Start near the lower portion and work upward toward the tip, leaving the center section intact. Be careful not to cut all the way through the middle. These little cuts make a surprisingly big difference because they turn a plain paper shape into something that actually looks like a feather.
5. Add simple painted patterns
Decorate some of the feathers with small dots, stripes, curved lines, or simple geometric patterns. You can use white paint on terracotta paper, muted green lines on cream paper, or tiny golden-yellow dots on blue feathers. Leave a few feathers plain as well. Mixing patterned and unpatterned pieces gives the garland a more natural rhythm and keeps the design from becoming overwhelming.
6. Prepare the twine
Cut a length of natural-colored twine slightly longer than the area where you plan to display the garland. Leave several extra inches at both ends so you can create loops for hanging. Lay the twine out straight before attaching the feathers, and decide where you want the center of the garland to sit. A longer piece of twine can create a deeper curve when hung.
7. Arrange the feathers by color
Before gluing anything, place the finished feathers along the twine and experiment with different color combinations. Alternate the colors rather than placing every shade together. Try positioning the largest feathers near the center and smaller ones toward the ends, or mix the sizes throughout for a more playful look. Taking a few minutes to arrange everything first saves you from having to reposition glued pieces later.
8. Attach the feathers to the twine
Secure each feather to the twine at its narrow base using a small amount of craft glue or a piece of double-sided tape. Leave slight spaces between the feathers instead of packing them tightly together. You can attach them all at the same height for a tidy appearance or vary their lengths slightly to create a relaxed, flowing arrangement.
9. Let the garland dry completely
Allow the adhesive to dry fully before lifting or hanging the garland. If any feather bases begin to curl while drying, gently flatten them and use small clips to hold them in place until the glue has set. Avoid pulling on the twine while the adhesive is still wet. Giving the project plenty of drying time helps prevent loose feathers once the garland is displayed.
10. Hang the finished feather garland
Tie a small loop at each end of the twine and hang the completed garland on a wall, mantel, shelf, bedroom doorway, or party backdrop. Let the center dip slightly lower than the ends so the feathers form a gentle curve. Step back and adjust the spacing or angles if needed. A few feathers pointing slightly differently can make the finished decoration feel much more natural.
Tip
For a fuller-looking garland without using a huge amount of paper, make the feathers in three different sizes and overlap a few of the smaller ones near the larger feathers. If you’re crafting with children, let them decorate the paper before you cut the feather shapes—their dots, stripes, and wobbly little patterns often become the sweetest part of the finished decoration. Store the garland flat when you’re finished using it so the paper feathers stay crisp.
14. Feather Bookmark Fan
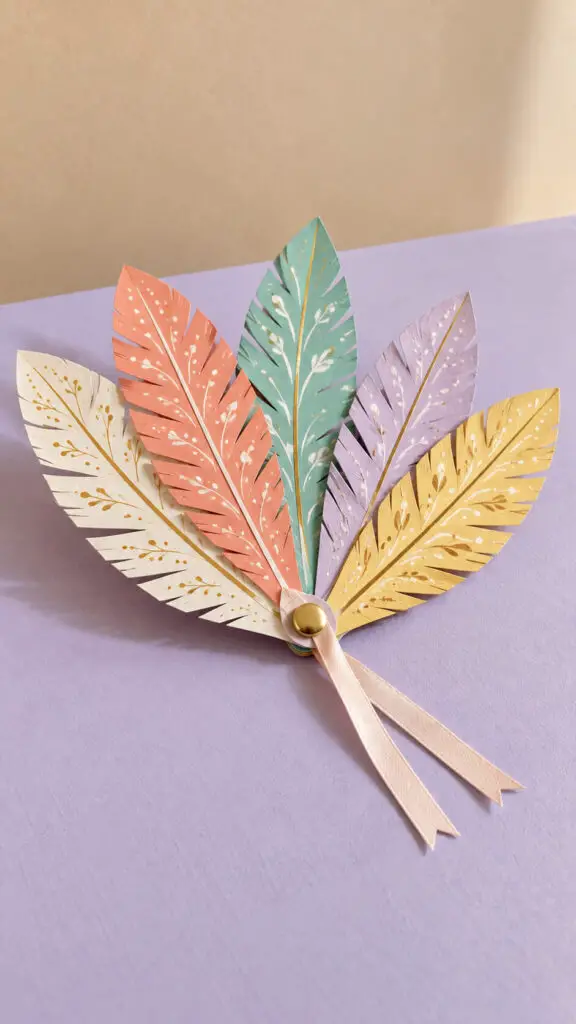
Combine several paper feathers to make a playful fan-style bookmark.
Cut five or six feathers from cardstock, decorate each differently, and punch a small hole near their bases.
Join them with a paper fastener so they can spread apart like a tiny fan.
Add a ribbon through the center for an extra flourish.
This craft is particularly fun for children who love stationery because the finished piece is both decorative and useful.
It also gives them an excuse to make several color combinations.
Materials
- Five or six sheets of cardstock in cream, muted coral, soft teal, lavender, and golden yellow
- Pencil
- Scissors
- Ruler
- Fine-tip markers, colored pencils, or paint pens for decorating
- Small round paper fastener or brad
- Narrow ribbon
- Hole punch
- Glue, optional, for adding decorative details
- A book to test the finished bookmark
Instructions
1. Choose your feather colors
Select five or six coordinating cardstock colors for your bookmark fan. A combination of cream, muted coral, soft teal, lavender, and golden yellow creates the cheerful pastel look of the finished craft. You can use one color twice if you want a larger fan, or substitute your favorite shades to make the bookmark completely your own.
2. Draw the feather shapes
Use a pencil to draw five or six feather shapes on the cardstock. Make each feather approximately the same length, but vary the width and angle slightly so the finished fan feels natural rather than perfectly uniform. Give each feather a pointed tip, a narrow base, and a clear central shaft running from the bottom toward the tip.
3. Cut out each feather
Carefully cut around each pencil outline with scissors. Add small angled snips along both sides of every feather to imitate individual feather barbs, stopping before you reach the central shaft. Keep the cuts fairly shallow so the feathers remain sturdy enough to use as bookmarks. Erase any visible pencil marks once the shapes are finished.
4. Add decorative feather patterns
Decorate each cardstock feather with a simple pattern that complements its color. Try tiny dots on the cream feather, curved white lines on the coral one, delicate leaf shapes on the teal feather, small stars on the lavender feather, and subtle botanical marks on the golden-yellow feather. Keep the patterns light enough that the feather shapes remain the main focus.
5. Strengthen the feather bases
Check the bottom of every feather and make sure the cardstock around the base is wide enough to hold the paper fastener. If a feather has a particularly narrow base, trim or reshape it slightly. The bases need to overlap when assembled, so keeping this area sturdy will help the finished bookmark open and close without tearing.
6. Arrange the feathers into a fan
Lay all the finished feathers on a flat surface and overlap their bottom sections. Spread their upper portions outward so they form a miniature hand fan. Experiment with the order of the colors until you like the arrangement. Keep the center feather slightly higher if you want a balanced fan shape, with the remaining feathers gradually angling outward on both sides.
7. Mark the joining point
Once you are happy with the arrangement, hold the feather bases together and mark a small point near the bottom where all the layers overlap. This should be close enough to the base to keep the feathers securely connected but far enough from the edge that the cardstock will not tear. Make sure the mark is in approximately the same position on every feather.
8. Punch the center hole
Use a small hole punch to create one hole through the marked area of the stacked feather bases. If punching through all the layers at once is difficult, punch the feathers individually using the same marked position. Keep the holes aligned so the paper fastener can pass through all of the feathers without forcing or bending them.
9. Secure the feather fan
Push the small round paper fastener through the aligned holes and open the fastener on the back to hold all the feathers together. Do not tighten it too much because the feathers need enough room to spread outward naturally. Adjust each feather around the fastener until the fan looks even and the different colors are clearly visible.
10. Add the ribbon
Punch a small hole near the joining point or use the existing fastener area if it allows enough room, then thread a narrow ribbon through it. Tie the ribbon securely so it hangs from the bottom of the bookmark. A cream, white, or pastel ribbon works beautifully, although a contrasting color can make the finished craft more playful.
11. Shape the finished fan
Gently spread the feathers into their final fan arrangement. Angle the individual pieces so the pointed ends face slightly different directions while remaining clearly recognizable as feathers. Avoid bending the cardstock too sharply. The goal is to create a graceful fan that folds together enough to slip between book pages while still opening beautifully when displayed.
12. Test the bookmark in a book
Place the finished feather fan between the pages of a book to make sure it sits comfortably without being too bulky. The ribbon should remain outside the book while the feather pieces mark the page. If the feathers feel too stiff or spread too widely, gently bring them closer together until the bookmark fits naturally between the pages.
Tip
Use slightly heavier cardstock if you want the feather bookmark to last through lots of reading. For children, pre-cutting the feather shapes can make the decorating and assembling much easier. You can also make several fans using different color combinations—one for each favorite book, season, or family member.
15. Feather Greeting Cards
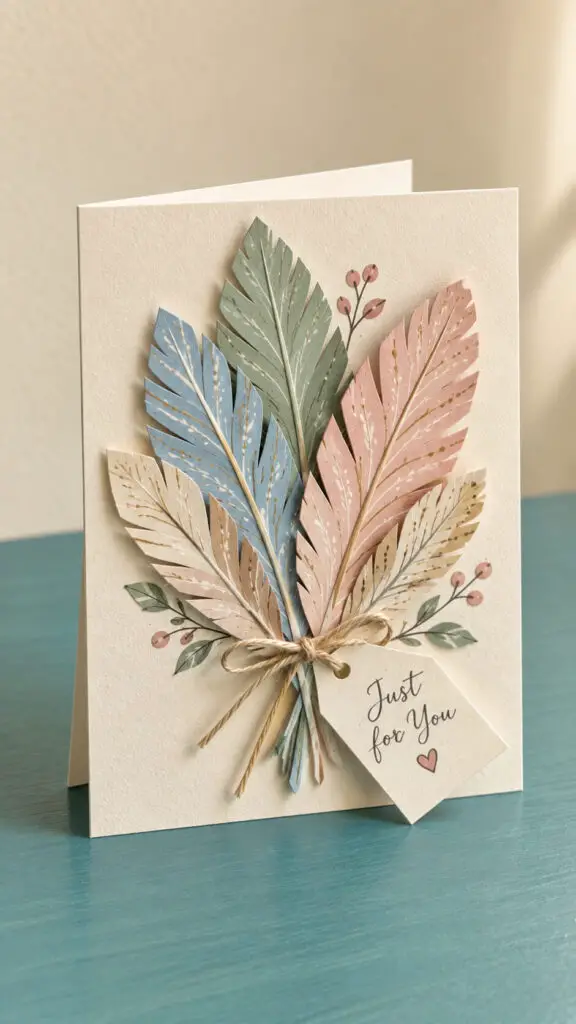
Make handmade cards using layered feather shapes as the main decoration.
Start with folded cardstock, then add paper feathers in different colors, textures, and sizes.
A simple handwritten message can finish the design without overwhelming it.
Try arranging the feathers into a heart, bouquet, bird, or abstract pattern.
Children can make cards for birthdays, thank-you notes, or just-because surprises.
There is something especially sweet about receiving a card that clearly involved fingerprints, crooked glue, and a whole lot of enthusiasm.
Materials
- Warm cream or ivory cardstock for the card base
- Decorative paper in soft sage, dusty blue, blush pink, and natural beige
- Scissors
- Pencil
- Ruler
- Glue stick or craft glue
- Fine-tip pen for drawing feather details
- Twine or thin natural-colored string, optional
- Small blank paper tag, optional
- Decorative envelope, optional
Instructions
1. Prepare the card base
Fold a sheet of warm cream cardstock in half to create the greeting card. Run your finger firmly along the fold so the card closes neatly. A standard rectangular card works well, but you can make a square card if you prefer a more modern look. Keep the front surface clean and smooth because this will be the background for your feather bouquet.
2. Choose the feather colors
Select decorative paper in soft sage, dusty blue, blush pink, and natural beige. These colors create a gentle, coordinated palette without making the card look too busy. You can use scrapbook paper, construction paper, or lightweight cardstock. If you want a more natural appearance, choose papers with subtle textures rather than very bold prints.
3. Cut the paper feathers
Draw several feather shapes onto your colored papers, varying their lengths and widths. Cut each shape carefully with scissors, creating a pointed tip and slightly curved sides. Make some feathers larger for the back of the bouquet and smaller ones for the front. You do not need every feather to be identical; small differences will make the finished card look more handmade.
4. Add the feather details
Use a fine-tip pen to draw a central line down each paper feather. Add short diagonal lines branching outward from the center to suggest individual feather barbs. Try slightly different patterns on each color. White or metallic pens can look particularly pretty on dusty blue or sage paper, while a brown or taupe pen works beautifully on blush and beige feathers.
5. Arrange the feather bouquet
Before using any glue, arrange the finished feathers on the front of the card. Place the tallest feathers toward the center and back, then layer shorter feathers around them. Angle some feathers slightly left and right so the arrangement resembles a small bouquet or graceful fan. Move the pieces around until the composition looks balanced and the colors are evenly distributed.
6. Attach the larger feathers
Start gluing the larger feathers onto the card first. Apply a thin amount of glue to the lower portion of each feather, leaving the upper section slightly raised if you want a dimensional effect. Press each piece gently against the cardstock for several seconds. Avoid covering the entire feather with glue because the layered edges are what give this craft its lovely handmade texture.
7. Layer the smaller feathers
Add the smaller feathers over the larger ones, positioning them toward the center and lower portion of the bouquet. Slightly overlap the edges so the arrangement feels full without becoming crowded. Vary the colors as you work, placing sage beside blush, blue beside beige, and so on. The goal is to create depth while allowing every feather to remain recognizable.
8. Create a simple bouquet tie
Cut a short piece of natural-colored twine and tie it around the lower section of the feather arrangement. A small bow can make the bouquet look like a gathered bunch of flowers. Keep the knot relatively flat against the card so the finished card can still fit comfortably inside an envelope. If you prefer a cleaner design, simply draw a small ribbon shape instead.
9. Add a decorative message area
Create a small blank paper tag or simple label near the lower corner of the feather bouquet. Write a short message such as “Just for You,” “Thank You,” “Happy Birthday,” or “Thinking of You.” Keep the lettering small enough that it complements the feathers rather than becoming the main feature. A handwritten message gives the card that personal touch that store-bought cards simply cannot fake.
10. Check the finished card
Look over the card carefully and make sure all the feathers are securely attached. Check that no large blobs of glue are visible and that the layers still have a little dimension. Make sure the card can close without bending the feathers. If any edges are lifting, add a tiny amount of glue underneath and press them down gently until secure.
Tip
For an especially beautiful card, use a mixture of smooth cardstock and lightly textured decorative paper so the feathers have subtle differences in appearance. If children are making the card, let them choose their own feather colors and patterns rather than aiming for perfect symmetry. Allow the glue to dry completely before closing or placing the card in an envelope, especially if you have added raised paper layers or twine.
16. Feather Pencil Topper
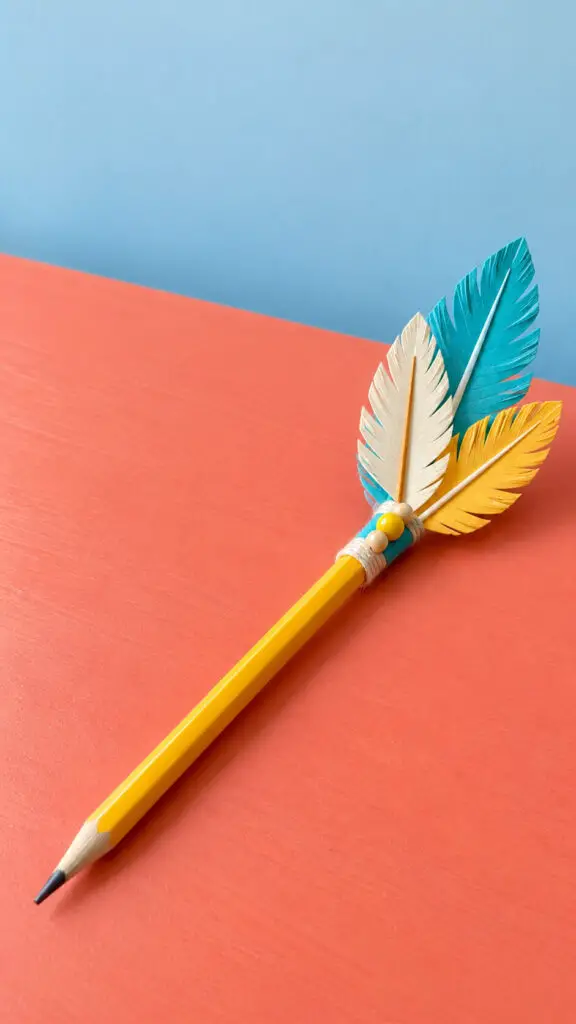
Turn an ordinary pencil into a tiny bird-inspired accessory with a feather topper.
Cut a small feather from felt or cardstock and decorate it with markers or paint.
Attach it securely to a small piece of cardstock wrapped around the pencil rather than gluing directly to the writing end.
Add a tiny bead or paper eye if you want to turn it into a bird character.
These toppers are quick to make and are perfect for school-supply decorating or party favors.
Materials
- A standard wooden pencil
- A small piece of cardstock or craft felt
- Turquoise, cream, and yellow cardstock or felt
- A pencil, ruler, or feather template for shaping
- Child-safe scissors
- Craft glue
- One small decorative bead or paper accent
- A small piece of twine or thin string, optional
- A small strip of cardstock for making the topper sleeve
- Markers or colored pencils, optional, for adding feather details
Instructions
1. Choose the feather colors
Select turquoise, cream, and yellow cardstock or felt for the feather. You can use one color for each feather or combine all three colors into a cheerful layered design. For a simpler children’s version, choose one main color and use the other two for small decorative details.
2. Draw the feather shape
Draw a narrow feather shape onto the cardstock or felt, approximately 2 to 3 inches long. Make the feather pointed at the top and slightly wider through the middle, then taper it toward the bottom. Leave a narrow section at the base so it can be attached securely to the pencil.
3. Cut out the feather
Carefully cut around the feather outline with scissors. Try to keep the edges smooth and symmetrical, but don’t worry if the shape is not perfectly even. Handmade crafts look much more charming when they have a little personality rather than looking as though they came straight from a factory.
4. Create the feather barbs
Use scissors to make tiny angled cuts along both sides of the feather, working from the outer edge toward the central shaft. Keep the cuts close together but do not cut through the middle. Leave a narrow uncut strip running from the bottom to the pointed tip to represent the feather’s central shaft.
5. Add the feather details
Use a marker or colored pencil to emphasize the central shaft and add a few fine lines between the feather barbs. If you are using turquoise, cream, and yellow, try placing small yellow or cream marks on the turquoise feather for contrast. These little details make the topper look more like a real feather without making the project complicated.
6. Make the pencil attachment
Cut a small narrow strip of cardstock and wrap it around the upper part of the pencil to create a loose sleeve. Check that it fits securely but can still slide over the pencil if necessary. Glue the overlapping ends of the strip together, keeping the pencil itself free so the topper does not become permanently stuck to it.
7. Attach the feather to the sleeve
Apply a small amount of craft glue to the upper portion of the cardstock sleeve and carefully position the bottom of the feather against it. Hold the feather in place until the glue begins to grip. Make sure the feather stands upright rather than leaning too far to one side, as this will give the finished pencil a neat and balanced appearance.
8. Add the decorative accent
Place a small decorative bead, paper circle, or another lightweight accent near the base of the feather. A yellow bead looks especially cheerful against turquoise, while a cream accent gives the project a softer appearance. Use only a small amount of glue and allow it to dry thoroughly before handling the pencil.
9. Let the topper dry completely
Set the decorated pencil aside on a flat surface while the glue dries. Avoid picking it up or moving the feather during this time because the attachment point needs to become firm. Follow the drying time recommended for your particular craft glue, especially if children are eager to start using their new pencil immediately.
10. Check the finished pencil topper
Once everything is completely dry, gently check that the feather is firmly attached and that the small barbs have not become stuck together. The pencil should rest naturally on a table while the feather remains upright and clearly visible. Trim any loose cardstock fibers if necessary, then your playful feather pencil topper is ready for schoolwork, drawing, or decorating a pencil cup.
Tip
For a sturdier topper, use felt instead of very thin paper, or layer two cardstock feathers together before attaching them. Keep the feather lightweight so it does not make the pencil awkward to hold. If young children are making the craft, let them decorate and cut the feather while an adult helps with the small attachment pieces and any stronger adhesive.
17. Feather Dreamy Mobile
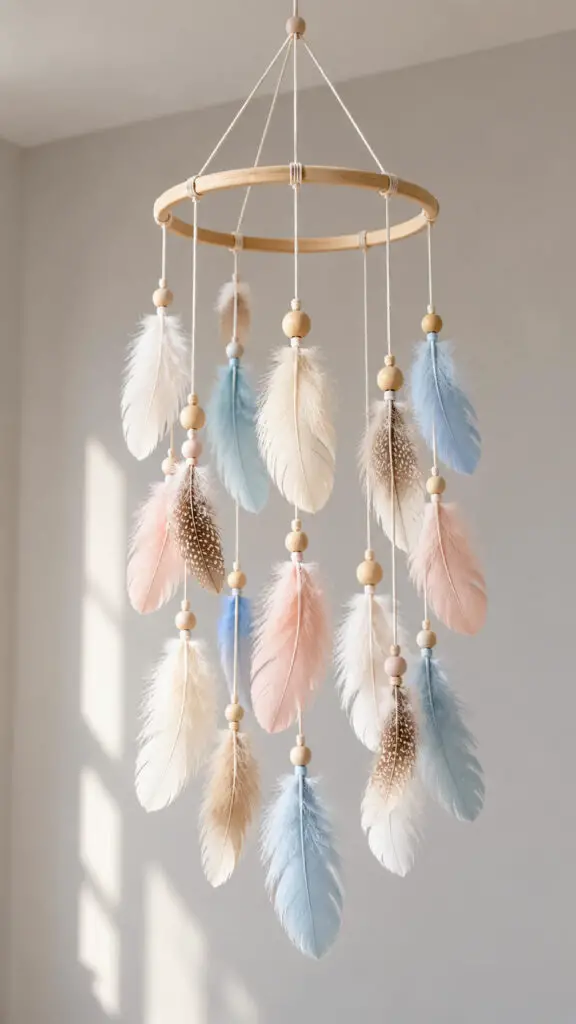
Create a lightweight hanging mobile with feathers, thread, and a simple wooden hoop.
Tie feathers to several lengths of thread, spacing them unevenly to create movement.
Add beads or paper stars between some of the feathers for extra interest.
Keep the finished mobile light and securely assembled, especially if it will hang in a child’s room.
It makes a calming decoration for a reading nook or bedroom, and watching the feathers gently move is oddly relaxing—even for grown-ups.
Materials
- One small wooden embroidery hoop or lightweight wooden ring
- Soft white, cream, pale blue, and blush-colored feathers
- Natural cotton cord, twine, or strong thread
- Several small wooden beads
- Scissors
- Craft glue, if needed to secure knots
- A small piece of cord for hanging the mobile
- A pencil or ruler for measuring, optional
Instructions
1. Prepare the wooden hoop
Start with a clean, smooth wooden hoop that will serve as the main frame of your mobile. Check that it is lightweight and free from rough edges or splinters. If you are crafting with children, an adult can inspect and prepare the hoop first. The hoop should be large enough to support several hanging strands while still remaining light and easy to suspend.
2. Plan the feather arrangement
Lay out your white, cream, pale blue, and blush feathers before attaching anything. Choose a mixture of longer and shorter feathers so the finished mobile has movement and visual depth. Avoid arranging all the colors in identical positions. A slightly irregular arrangement will make the mobile look more natural when the feathers gently sway.
3. Cut the hanging strands
Cut several lengths of cotton cord or strong thread for the feather strands. Make some strands longer than others, creating a variety of lengths for the finished mobile. You can begin with around six to eight strands, depending on the size of your hoop. Leave a little extra cord at each end so you have enough room to tie secure knots.
4. Attach the strands to the hoop
Tie the prepared strands evenly around the wooden hoop, spacing them around the circle rather than placing them all in one area. Secure each knot firmly and trim away excess cord if necessary. Keep the strands hanging freely so the feathers will have enough room to move without becoming tangled with neighboring pieces.
5. Add the wooden beads
Thread one or two small wooden beads onto selected strands before attaching the feathers. Position the beads at different heights to keep the design from looking too uniform. Secure each bead according to the type of cord you are using. The natural wood adds warmth to the soft feather colors without making the mobile feel overly decorated.
6. Attach the feathers
Tie the feathers securely to the lower ends of the strands, using different feather colors throughout the arrangement. Place a white feather beside a blush one, then perhaps use a pale blue feather on another strand. Allow the feathers to hang naturally rather than forcing them into perfectly straight positions. Their delicate movement is an important part of the finished craft.
7. Balance the mobile
Hold the hoop by its center and check how evenly it hangs. If one side drops noticeably lower than another, adjust the position or length of the supporting strands. Move individual feathers and beads until the weight is reasonably balanced. This small adjustment makes a big difference because a well-balanced mobile will hang gracefully rather than leaning to one side.
8. Create the hanging support
Cut three or four equal lengths of strong cord and tie them at evenly spaced points around the top of the wooden hoop. Bring the cords together above the center and secure them into one strong hanging point. Check that the support is firmly attached before displaying the mobile. The mobile should hang securely without putting excessive strain on any single strand.
9. Check every attachment
Give the completed mobile a careful inspection before hanging it. Make sure the hoop knots are secure, the beads cannot easily slide off, and the feathers are firmly attached. Trim any loose ends that distract from the finished design. This is also a good opportunity to gently separate any feathers that have become tangled while you were assembling the mobile.
10. Hang the mobile in a suitable spot
Choose a quiet location where the finished mobile can move gently in the air without touching furniture or nearby objects. Hang it against a simple wall or in a bedroom, craft corner, or decorative space where its pastel feathers can be appreciated. Keep decorative mobiles securely out of reach of babies and young children, and do not place them directly above a crib or sleeping area.
Tip
Use feathers with slightly different lengths and textures to make the mobile feel more natural and dimensional. If you want a particularly soft nursery-inspired look, keep the palette limited to cream, white, pale blue, blush, and natural wood. Most importantly, keep the mobile lightweight and securely assembled, and treat it as decorative wall or room décor rather than a toy.
18. Feather Gift Wrap
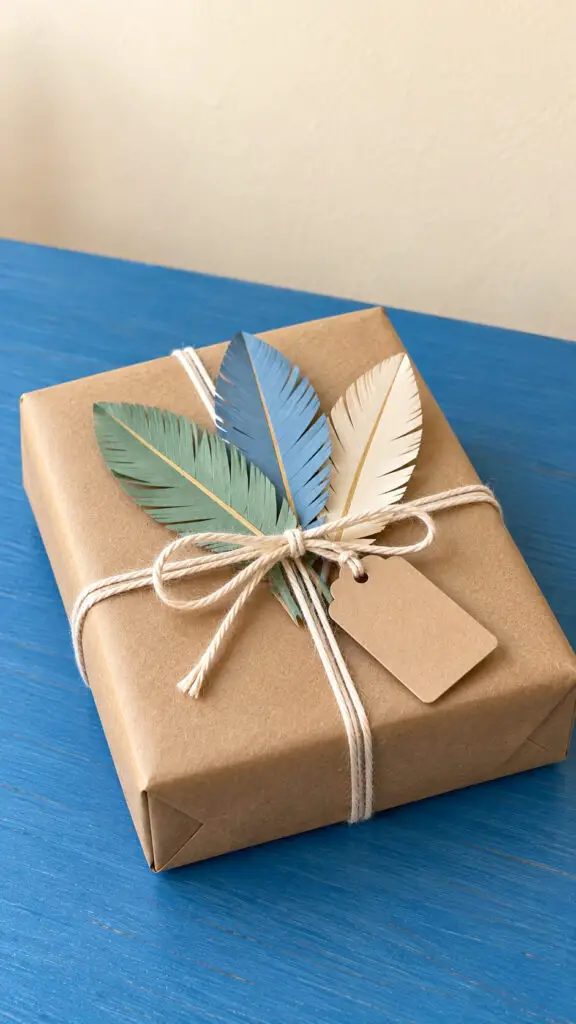
Make presents feel extra special by adding a handmade feather embellishment to the wrapping.
Wrap the gift in kraft paper or plain colored paper, then tie it with twine or ribbon.
Tuck in one or two decorative feathers and finish with a small handwritten tag.
For children, paper feathers are a safer and more colorful option.
You can also coordinate the feather colors with the recipient’s favorite colors.
It is a tiny detail, but it makes even a simple package look thoughtfully prepared.
Materials
- A rectangular gift box
- Natural kraft wrapping paper
- Cream-colored twine
- Cardstock or thick decorative paper in muted sage green, dusty blue, and warm cream
- Scissors
- A plain kraft-paper gift tag
- A hole punch
- Glue or double-sided tape
- A pencil for marking feather shapes
- Optional ruler for making clean paper folds
Instructions
1. Wrap the gift in kraft paper
Place the gift box in the center of a sheet of natural kraft paper and wrap it neatly, folding the paper tightly around the edges of the box. Crease each corner firmly so the package has clean, defined edges. Secure the final paper flap underneath the box with double-sided tape or a small amount of glue, keeping the outside surface free from visible adhesive.
2. Cut the paper feathers
Choose cardstock in muted sage green, dusty blue, and warm cream for the feather embellishments. Lightly sketch three feather shapes with pointed tips and slightly rounded sides, then cut them out carefully. Make each feather a little different in size so the finished decoration feels natural rather than perfectly uniform.
3. Shape the feather barbs
Use scissors to make many small angled cuts along both sides of each paper feather. Stop each cut before reaching the center so the feather remains intact. The cuts should be close enough together to create delicate feather barbs while leaving a solid central section. Avoid cutting all the way through the paper, or your feather may become several very enthusiastic paper strips.
4. Add the central feather creases
Fold each paper feather gently along its length to create a subtle central crease. Open it again so the crease remains visible without making the feather sharply folded. This small detail gives the paper feathers more dimension and makes them look less flat when they are tucked into the gift wrap.
5. Arrange the feathers together
Place the sage green, dusty blue, and warm cream feathers together and overlap their lower ends slightly. Position the tallest feather toward the back, with the smaller feathers angled slightly outward. Adjust their positions until the colors balance nicely and all three feather shapes remain clearly visible.
6. Tie the gift with cream twine
Wrap the cream-colored twine around the gift box, crossing it neatly over the center. Tie the twine securely into a simple bow on the top of the package. Leave the loops and loose ends long enough to create a relaxed handmade appearance, but trim any excessively long pieces so they do not overwhelm the feather decoration.
7. Tuck the feathers beneath the bow
Slide the lower ends of the three paper feathers underneath the center of the twine bow. Position them so the bow holds them securely without crushing the delicate paper barbs. Angle the feathers slightly apart to make the sage green, dusty blue, and warm cream colors easy to see from above.
8. Prepare the handmade gift tag
Use a small plain kraft-paper gift tag for a simple rustic finish. If the tag does not already have a hole, punch one near the top. Thread a short piece of cream twine through the hole and attach the tag to the main bow, positioning it slightly to one side of the feathers.
9. Secure the decorative details
Check the finished package carefully and make sure the feathers are held firmly beneath the bow and the gift tag is not covering them. If a feather keeps slipping out, add a tiny piece of double-sided tape underneath its lower end. Keep the adhesive hidden so the finished gift still looks naturally assembled rather than overly constructed.
10. Finish the gift with a relaxed handmade look
Give the completed package one final adjustment by gently spreading the feather barbs and arranging the three feathers at slightly different angles. Keep the decoration simple and uncluttered so the natural kraft paper, cream twine, and muted feather colors remain the stars of the design. The finished gift should look thoughtful, handmade, and special without needing a mountain of decorations.
Tip
Use thicker cardstock rather than ordinary printer paper when making the feathers because it holds the cut barbs and central crease much better. If you are preparing several gifts, make a small collection of feathers in different sizes ahead of time so you can mix and match them quickly. For a more rustic appearance, leave the kraft paper slightly natural-looking instead of trying to make every fold perfectly flawless.
19. Feather Resin Pendant
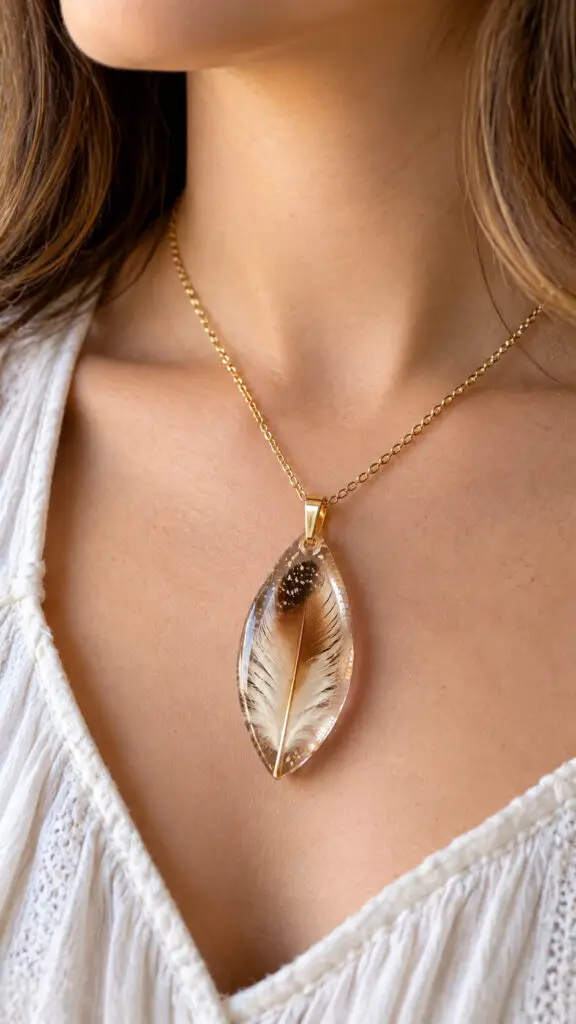
For older crafters, a small feather can become a beautiful resin pendant.
Place a carefully chosen feather inside a suitable jewelry mold and use resin according to the product’s safety instructions.
Once fully cured, add a jewelry finding and chain.
Because resin requires careful handling, ventilation, and adult supervision, this is not a little-kid project.
The finished pendant can preserve a particularly pretty feather while creating a wearable keepsake that feels personal without being overly complicated.
Materials
- A small clean, naturally shaped feather
- Clear casting resin suitable for jewelry, such as two-part epoxy resin
- Resin hardener, if required by your chosen resin
- Small teardrop, oval, or feather-shaped silicone jewelry mold
- Disposable mixing cups
- Wooden mixing sticks
- Nitrile gloves
- Protective covering for the work surface
- Small tweezers for positioning the feather
- Jewelry pendant bail or small jewelry connector
- Jewelry adhesive suitable for resin and metal
- Thin necklace chain
- Small jump ring
- Fine-grit sandpaper, optional, for smoothing rough resin edges
- Small disposable measuring cups or a precise measuring tool recommended by the resin manufacturer
Instructions
1. Choose and prepare the feather
Select a small, attractive feather that fits comfortably inside your jewelry mold. It should be clean, completely dry, and free from loose dirt or moisture. Gently remove any damaged barbs, but avoid trimming away the central shaft or delicate edges that give the feather its natural character. Make sure the feather is small enough to leave a clear border of resin around it.
2. Protect your workspace
Cover your work surface before handling resin, and work in a well-ventilated area while following the safety instructions provided with your specific resin. Put on nitrile gloves and keep children and pets away from the workspace. Resin should be handled according to its manufacturer’s directions, including any required ventilation, protective equipment, mixing ratio, and curing precautions.
3. Prepare the jewelry mold
Choose a clean silicone mold with a teardrop, oval, or similarly elegant shape. Make sure the mold is completely dry and sitting level on your protected work surface. A level mold is important because liquid resin can easily move toward one side if the surface is tilted, leaving you with an uneven pendant.
4. Mix the resin according to its instructions
Measure and combine the resin and hardener exactly according to the manufacturer’s specified ratio. Stir slowly and thoroughly, scraping the sides and bottom of the mixing cup as directed. Avoid vigorous stirring because it can introduce unnecessary bubbles. Work within the resin’s recommended working time so you have enough time to position the feather before the mixture begins to cure.
5. Pour a thin base layer
Pour a small amount of mixed clear resin into the bottom of the mold to create a thin base layer. You do not need to fill the mold at this point. A shallow layer gives the feather something to rest against and helps prevent it from sitting directly against the bottom of the finished pendant.
6. Position the feather carefully
Using clean tweezers, gently place the feather onto the thin resin layer. Position the central shaft so it runs naturally through the length of the pendant, with the feather barbs clearly visible on both sides. Make small adjustments before the resin begins to set. Leave a clear margin around the feather so the finished pendant has a transparent border that highlights its shape.
7. Cover the feather with clear resin
Slowly add more mixed resin until the feather is completely covered. Pour gradually rather than flooding the mold all at once, allowing the resin to flow around the feather and fill the spaces between its delicate barbs. Check the surface from different angles to make sure the feather remains fully submerged and that no part of it is sticking above the resin.
8. Remove visible bubbles and allow the pendant to cure
Inspect the surface for bubbles and follow your resin manufacturer’s recommended method for removing them. Do not use an open flame near resin, and do not improvise heating methods that are not approved for your particular product. Once the surface looks clear, leave the mold undisturbed for the full curing period specified by the manufacturer. Resist the temptation to touch it early—the pendant needs time to become completely hardened.
9. Remove and inspect the finished pendant
Once the resin has fully cured, gently flex the silicone mold and release the pendant. Examine the edges and surface for rough spots or imperfections. If necessary, carefully smooth minor rough edges with suitable fine-grit sandpaper while following appropriate safety precautions. Wipe away any sanding residue before continuing with the jewelry assembly.
10. Attach the jewelry bail
Choose a small pendant bail that complements the size and shape of your resin piece. Apply a suitable jewelry adhesive according to its instructions and attach the bail securely to the top of the cured pendant. Keep the pendant flat and undisturbed while the adhesive cures. A centered bail will help the finished feather hang straight instead of twisting sideways.
11. Connect the pendant to the necklace
Open a small jump ring carefully, attach it to the jewelry bail, and connect the jump ring to a thin necklace chain. Close the jump ring securely so the pendant cannot slip out. Choose a subtle metallic chain in gold, silver, or another finish that complements the feather without competing with the transparent resin.
12. Let every adhesive cure completely
Before wearing the necklace, allow the jewelry adhesive to cure for the entire time recommended by its manufacturer. Do not test the pendant by pulling on it while the adhesive is still setting. Once everything is completely cured and secure, gently check the bail, jump ring, and chain connections to make sure the pendant hangs naturally.
Tip
Choose a naturally attractive feather with a strong central shaft and delicate, clearly defined barbs because the transparent resin will magnify its details. For the most elegant result, use a simple teardrop mold and keep the feather centered with plenty of clear resin surrounding it. Work slowly and patiently—resin jewelry rewards careful preparation much more than rushing.
20. Feather Wreath
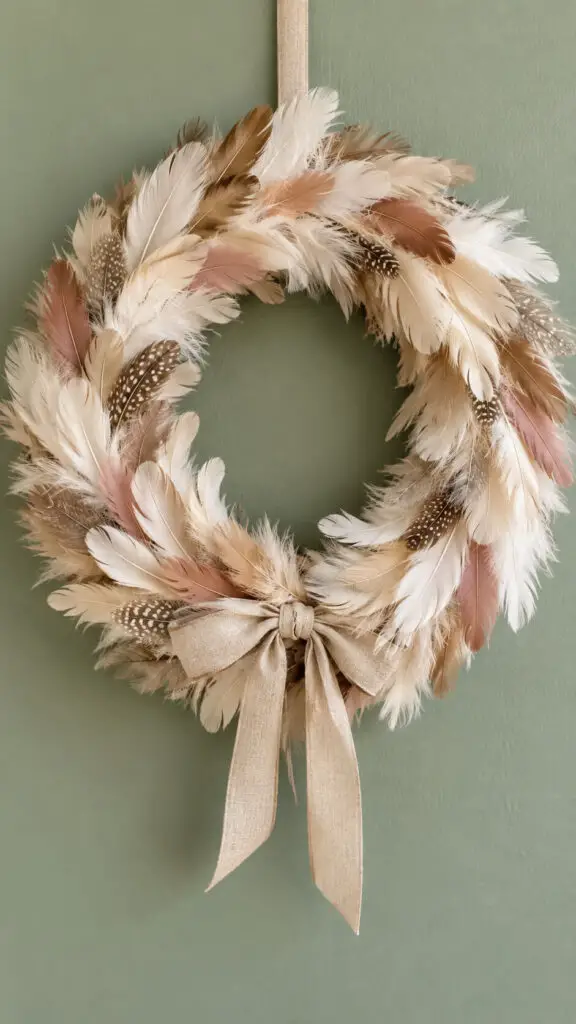
Create a soft, textured wreath by attaching feathers around a cardboard, foam, or grapevine wreath base.
Arrange them in one direction for a neat look or alternate their angles for something more whimsical.
Add a ribbon bow, small wooden sign, or decorative flower in the center.
Faux feathers are particularly useful for a wreath that will be displayed for a long time.
This project works for seasonal decorating, bedroom doors, craft rooms, or anywhere that could use a little extra fluff.
Materials
- A lightweight cardboard, foam, or grapevine wreath base
- Soft feathers in cream, beige, pale brown, and muted blush
- Strong craft glue suitable for the wreath base
- A neutral ribbon, such as natural linen, cotton, or burlap
- Scissors
- A small piece of twine or ribbon for hanging, if needed
- Newspaper or scrap paper to protect the work surface
Instructions
1. Prepare the wreath base
Choose a lightweight circular wreath base that is sturdy enough to support several layers of feathers. A cardboard or foam base works particularly well for a simple homemade version. If using cardboard, make sure the circle is smooth and the edges are not rough. Decide which part of the wreath will be the top before beginning so you can keep the feather direction consistent.
2. Sort the feathers by color and size
Separate your feathers into small groups according to their colors and sizes. Keep cream, beige, pale brown, and muted blush feathers together so you can easily create a balanced arrangement. Put the larger feathers aside for the main outer layer and reserve smaller feathers for filling gaps. This little bit of organizing makes the actual decorating much easier and prevents the wreath from becoming accidentally lopsided.
3. Plan the feather direction
Before gluing anything, arrange a few feathers around the wreath to decide how you want them to overlap. For a traditional wreath, point the feathers in the same general direction around the circle, following the curve of the base. You can also alternate the direction slightly for a softer, fuller appearance. Planning first lets you see how the colors will look together before the glue becomes involved.
4. Start with the outer edge
Begin attaching feathers along the outside edge of the wreath base. Apply a small amount of craft glue to the lower end or shaft of each feather and press it firmly onto the base. Keep the feathers close together while allowing their tips to extend beyond the edge. Work gradually around the circle rather than covering one large section at a time.
5. Overlap the feathers naturally
Continue adding feathers around the wreath, overlapping each new feather slightly over the one before it. This layered arrangement helps hide the wreath base and creates the soft, fluffy texture that makes a feather wreath look full. Avoid arranging every feather at exactly the same angle. Small differences in direction and shape will make the finished wreath feel more natural and handmade.
6. Build the second layer
Once the outer edge is covered, add another layer of feathers slightly closer to the center of the wreath. Use a mixture of medium-sized cream, beige, brown, and blush feathers to fill the visible spaces. Position the new feathers so their shafts are hidden beneath the previous layer. Keep the center opening clear as you work, checking occasionally to make sure the wreath still has an even circular shape.
7. Fill small gaps with shorter feathers
Look carefully around the wreath for areas where the cardboard, foam, or other base is still visible. Use smaller feathers to fill these spaces instead of forcing large feathers into them. Tuck the smaller pieces underneath neighboring feathers where possible. This creates a fuller appearance without making the wreath look bulky or uneven.
8. Balance the colors around the wreath
Step back and look at the entire wreath before adding the final feathers. If one section contains too many brown or blush feathers, add a few cream or beige feathers nearby to balance the colors. Try to spread each shade around the entire circle instead of keeping similar colors clustered together. A slightly irregular arrangement is perfectly fine and often looks more natural.
9. Secure loose feathers
Allow the glue to dry according to the manufacturer’s instructions, then gently inspect the wreath. If any feathers lift away from the base, apply a small additional amount of glue beneath the shaft and press it back into place. Avoid using excessive glue because visible glue can take away from the soft, natural appearance of the feathers. Let all repaired areas dry completely before handling the wreath further.
10. Add the neutral ribbon
Choose a simple neutral ribbon in a natural shade such as cream, tan, beige, or soft brown. Tie it into a modest bow and attach it near the top or bottom of the wreath. A linen-style ribbon works especially well because its subtle texture complements the feathers without competing with them. Keep the bow relatively simple so the feather arrangement remains the main feature.
11. Create a hanging loop
If the wreath does not already have a way to hang, attach a short length of sturdy twine or ribbon to the back. Secure both ends firmly to the wreath base, making sure the attachment point is strong enough to support the finished decoration. Keep the hanging loop hidden from the front so the wreath maintains its clean, finished appearance when displayed.
12. Display the finished wreath
Hang your completed feather wreath on a clean wall, door, bedroom hook, or other suitable surface. Give the feathers a gentle fluff with your fingers if any became flattened while you were working. Avoid placing the wreath somewhere exposed to strong moisture or constant handling, as delicate feathers can lose their shape. The finished piece looks especially lovely as understated bedroom or seasonal home decor.
Tip
Use feathers with slightly different lengths and natural variations rather than trying to make every feather identical. The small differences give the wreath more texture and make it look genuinely handmade. If you’re crafting with children, let them choose the color placement while an adult handles the stronger adhesive. For the fullest result, always work from the outside toward the center and keep the wreath’s circular opening visible as you build each layer.
21. Feather Quill Pen
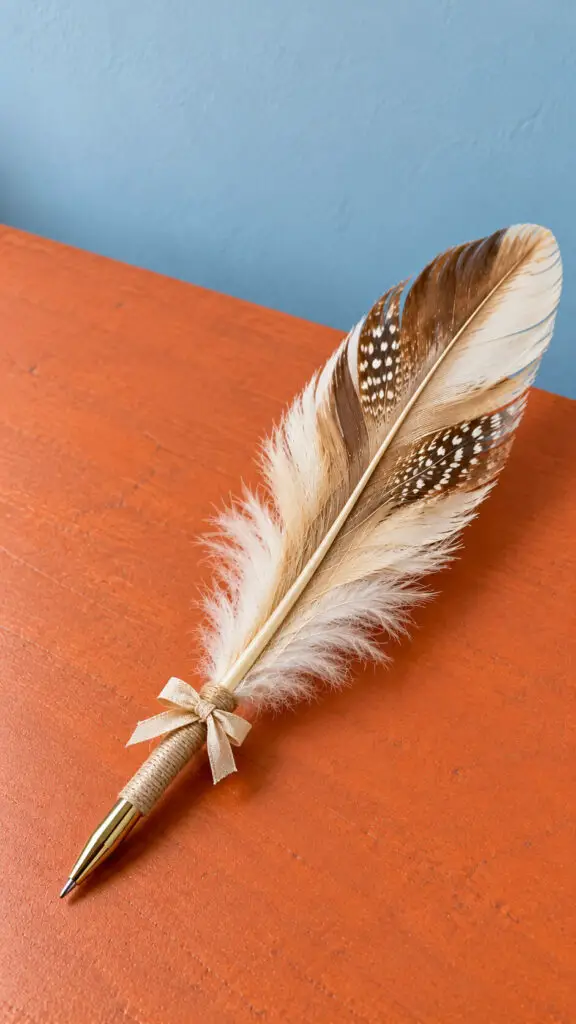
Bring a little old-fashioned charm to craft time by making a decorative feather quill.
Choose a sturdy feather and attach a pen refill or slim writing insert to the hollow shaft using craft glue.
Adults should handle any trimming or sharp tools needed during assembly.
Decorate the shaft with a small ribbon or metallic paint if desired.
While it may not replace your favorite modern pen for homework, it is delightful for writing pretend letters, treasure maps, royal proclamations, and extremely important messages about snack time.
Materials
- One long, naturally shaped feather with a sturdy hollow shaft
- A slim writing insert or suitable pen refill
- Strong craft glue or a small amount of suitable adhesive
- Neutral-colored ribbon, approximately 10–15 cm long
- Thin twine, optional, for wrapping the base
- Scissors for trimming the ribbon
- A small piece of cardstock or scrap paper for testing the finished pen
- A suitable work surface for assembly
- Adult supervision when trimming, gluing, or working with small components
Instructions
1. Choose a suitable feather
Select a long feather with a sturdy, reasonably straight hollow shaft. Cream, tan, brown, or naturally patterned feathers work particularly well for an old-fashioned quill appearance. Look for one with intact barbs and a tapered shape, since damaged or very soft feathers may be difficult to attach securely to the writing insert.
2. Clean the feather gently
Before assembling the quill, make sure the feather is clean and completely dry. Carefully remove loose debris with your fingers or a very soft, dry cloth. Avoid soaking the feather because excess moisture can make the delicate barbs lose their natural shape. If the feather has badly damaged sections, gently remove only the loose pieces rather than trimming away large areas.
3. Check the feather shaft
Examine the hollow shaft at the bottom of the feather to make sure it is strong enough to hold the writing insert. The shaft should be relatively straight and should not have major cracks or splits. If it feels extremely fragile, choose another feather rather than forcing the insert into it. A sturdy shaft will make the finished quill much more comfortable and durable to handle.
4. Prepare the writing insert
Choose a slim writing insert or pen refill that can fit inside the feather shaft without forcing it. The insert should be long enough to extend comfortably from the feather and provide a usable writing tip. If the insert needs trimming, an adult should handle this part carefully. Test the fit before adding glue so you know the pieces will sit together properly.
5. Fit the insert into the shaft
Carefully slide the writing insert into the hollow base of the feather. It should fit snugly without splitting the shaft. If it slides in too loosely, use only a small amount of suitable craft adhesive to help secure it. Avoid filling the entire shaft with glue, since excessive adhesive can make the base bulky and may interfere with the writing insert.
6. Secure the quill base
Apply a small amount of strong craft glue where the feather shaft meets the writing insert, following the adhesive manufacturer’s instructions. Hold the pieces together gently until they remain stable. Keep the feather upright or resting securely while the adhesive cures. Allow sufficient drying time before decorating or testing the quill so the joint does not accidentally loosen.
7. Wrap the base neatly
For a more finished appearance, wrap a short length of thin neutral-colored twine around the area where the feather shaft and writing insert meet. Keep the wrapping snug but not so tight that it damages the feather. Secure the end discreetly with a tiny amount of adhesive. This simple detail helps hide the connection and gives the quill a charming handmade, vintage appearance.
8. Add a small ribbon accent
Tie a very small neutral ribbon around the base of the feather, just above the wrapped section. Cream, beige, taupe, or soft brown ribbon works particularly well with natural feather colors. Keep the bow small so it complements the feather rather than overwhelming it. Trim the ribbon ends neatly, making sure they do not interfere with the writing tip or your grip.
9. Shape the feather gently
Once everything is secure and completely dry, carefully fluff the feather barbs with your fingertips. Gently separate sections that may have become compressed during assembly, but do not pull on individual barbs. The goal is to restore the feather’s natural fullness while keeping its original tapered silhouette. A few slightly uneven barbs can actually make the finished quill look more authentic and handmade.
10. Test the finished quill
Test the quill on a small piece of scrap paper before using it for a longer writing project. Hold it comfortably near the decorated base and make a few gentle strokes. If the writing insert moves, stop using the quill and reinforce the connection after allowing the adhesive to dry fully. Once secure, the finished feather pen can be used for notes, pretend letters, journaling, or decorative writing.
Tip
Choose the feather first and then find a writing insert that fits its shaft rather than trying to force a thick refill into a delicate feather. For the prettiest result, keep the decoration simple: a natural feather, a neatly wrapped base, and one tiny neutral ribbon are enough to create that charming old-fashioned quill look. Always follow the safety and handling instructions for any adhesive or writing insert you use, and have an adult handle any trimming or potentially sharp components.
22. Feather Animal Faces
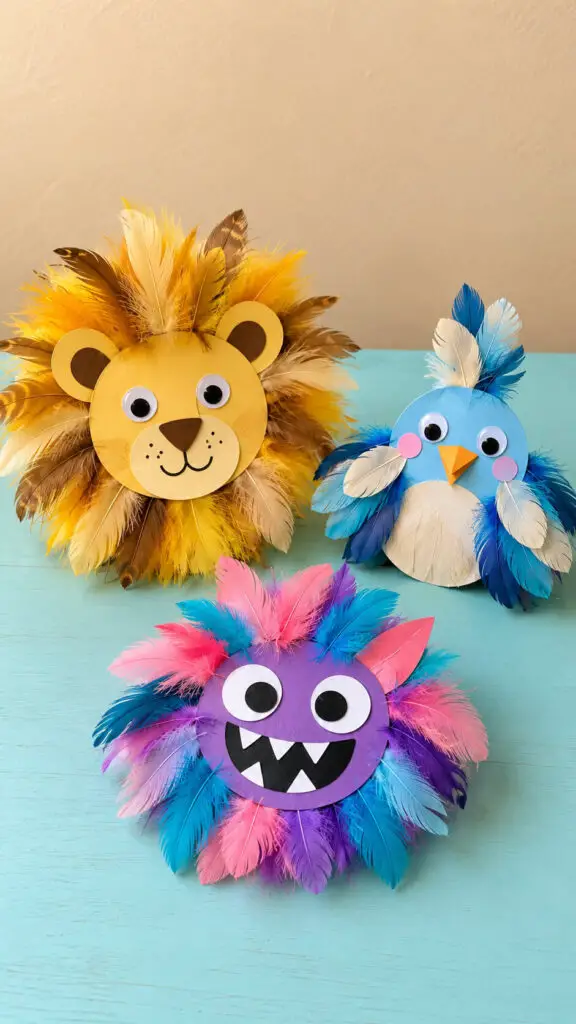
Turn feathers into funny animal faces by combining them with paper shapes.
Make a lion with a fluffy feather mane, a bird with layered feathers, or a silly monster with oversized eyes.
Use cardstock for the face and arrange feathers around the edges with child-safe glue.
The beauty of this project is that there is no wrong answer.
A purple lion with enormous googly eyes? Absolutely.
A bird wearing a paper crown? Even better.
Let children’s imaginations make the rules.
Materials
- Cardstock in several colors, such as yellow, brown, blue, cream, purple, pink, and black
- Small craft feathers in golden, blue, cream, pink, purple, and other bright colors
- Googly eyes or white and black cardstock for making eyes
- Child-safe craft glue
- Scissors
- Pencil
- Black marker
- Optional small paper scraps for beaks, ears, teeth, noses, and other facial details
- A flat surface for assembling the animal faces
Instructions
1. Choose the animal characters
Decide which three animal faces you want to create before cutting the cardstock. For this project, make a cheerful lion with a fluffy golden feather mane, a small blue-and-cream bird with layered feathers, and a colorful monster with large expressive eyes. Choosing the characters first makes it easier to plan the cardstock colors and feather combinations.
2. Cut the main face shapes
Use a pencil to draw a large circle or rounded shape for each character’s face on cardstock. Cut out a yellow or golden face for the lion, a blue face for the bird, and a purple face for the monster. The shapes do not need to be perfectly symmetrical. Slightly uneven edges actually make the finished crafts feel more homemade and give them that charming children’s-project look.
3. Create the lion’s facial details
Cut two small rounded ears from yellow cardstock and add smaller brown or tan circles inside them. Cut a cream-colored muzzle and a small brown nose, then draw a simple smiling mouth with a black marker. Attach two googly eyes above the muzzle. Keep the expression friendly and simple so the lion looks cheerful rather than overly complicated.
4. Build the lion’s feather mane
Arrange golden, yellow, cream, and a few light-brown feathers around the outside edge of the lion’s face. Point the feathers outward so they create a full, fluffy mane. Layer shorter feathers over longer ones to give the mane plenty of texture and dimension. Once you are happy with the arrangement, glue each feather securely to the back or outer edge of the cardstock face.
5. Shape the bird’s body and face
Use blue cardstock to create the bird’s rounded face and body shape, then add a cream-colored oval section to the front for its belly. Cut a small orange triangle for the beak and attach two googly eyes above it. Add small pink or light-blue paper circles to the cheeks if you want a particularly playful expression. Keep the bird’s features large enough to remain recognizable.
6. Layer the bird’s feathers
Choose blue and cream feathers in several sizes for the bird. Place the longer feathers around the sides and lower portion of the body, then add shorter feathers over them to create layered wings. Arrange a few feathers at the top of the head for a tiny crest. Glue the feathers down one at a time, making sure the layers remain visible instead of covering one another completely.
7. Give the monster a playful face
Cut a large purple or brightly colored cardstock shape for the monster. Add two large white circular eyes with black pupils, positioning them slightly unevenly for a funny expression. Cut a wide black mouth and add several white triangular paper teeth. You can also add pointed paper ears or horns in pink, blue, or orange. The sillier the expression, the better—this character is definitely not trying to look serious.
8. Decorate the monster with colorful feathers
Choose a mixture of pink, turquoise, purple, blue, and other bright feathers for the monster’s hair and outer edge. Arrange the feathers around the top and sides of the face, allowing them to point in different directions. Mix long and short feathers to create a wild, fluffy hairstyle. Slightly uneven placement is encouraged because it gives the monster more personality and keeps the craft from looking machine-made.
9. Arrange all three faces
Place the finished lion, bird, and monster on a flat surface before permanently gluing any loose pieces. Position the lion slightly to one side, the bird beside it, and the monster toward the front or center. Check that all three faces are clearly visible and that the feathers do not completely cover their facial features. This little arrangement also lets you spot any pieces that need adjusting.
10. Secure the remaining pieces
Once you are satisfied with the designs, glue down any loose feathers, eyes, ears, beaks, teeth, or other cardstock details. Use small amounts of glue rather than large blobs, especially around the feathers. Give each animal enough time to dry completely before moving it. This helps prevent feathers from shifting and keeps the faces looking neat.
11. Add the finishing details
Use a black marker to add tiny details such as whisker dots on the lion, simple wing lines on the bird, or expressive eyebrow marks on the monster. Avoid adding too many details because the feathers and large facial features should remain the stars of the project. A few small marks can make the characters look surprisingly expressive.
12. Display the finished animal faces
Let all three crafts dry completely, then display them together on a table, bulletin board, refrigerator, or craft-room wall. You can also attach cardstock loops to the backs and hang them individually. A group display works especially well because the three characters have completely different personalities—the lion is fluffy, the bird is sweet, and the monster is delightfully goofy.
Tip
Use feathers with different lengths and textures rather than making every animal perfectly uniform. The lion looks best with fuller golden feathers, the bird benefits from neat blue-and-cream layers, and the monster can handle the wildest combination of colors. If young children are making the project, pre-cut the cardstock shapes and let them take charge of choosing and arranging the feathers.
23. Feather Christmas Ornament
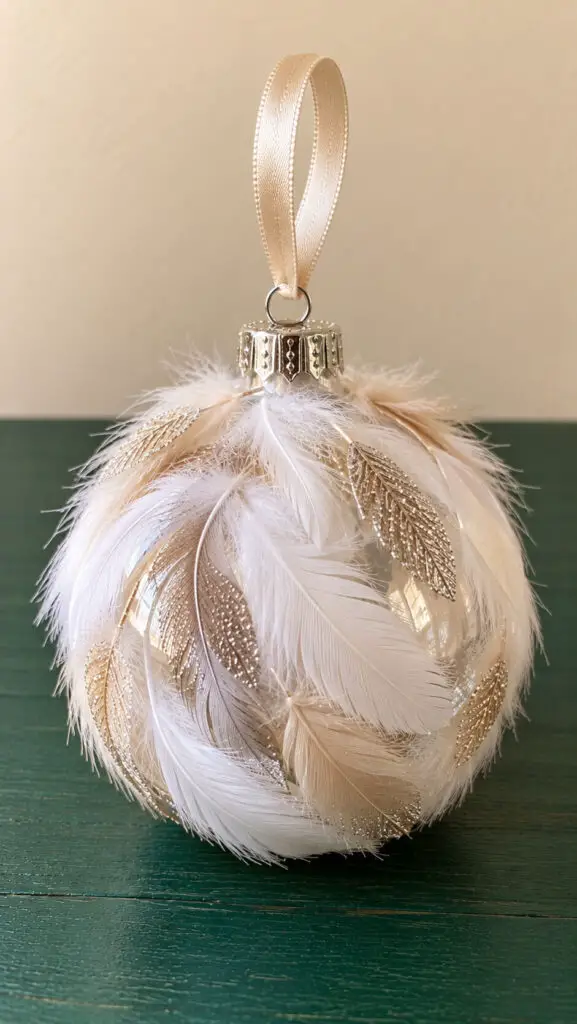
Create a lightweight Christmas ornament by decorating a clear plastic or paper ornament base with feathers.
Fill the inside with small feathers for a snowy, fluffy appearance, or glue decorative feathers onto the outside.
Add ribbon for hanging and personalize it with the year or a child’s name.
Choose white and silver for a wintery style, or use bright colors for something cheerful.
These ornaments are also lovely handmade keepsakes that can return to the tree year after year.
Materials
- A clear or white lightweight Christmas ornament, preferably plastic for a child-friendly option
- Small soft feathers in white, cream, ivory, and pale silver
- A narrow satin or grosgrain ribbon for the hanging loop
- Craft glue suitable for the ornament surface
- Small scissors for trimming feathers or ribbon
- A small piece of scrap paper for protecting the work surface
- Optional fine silver glitter or metallic decorative accents
- Optional cotton swab or small paintbrush for spreading a thin layer of glue
Instructions
1. Choose the ornament base
Select a lightweight round ornament with a smooth surface. A clear ornament works especially well because portions of the transparent surface can remain visible between the feathers, creating a delicate winter effect. A white ornament gives the finished decoration a softer, snow-covered appearance. Make sure the ornament is clean and completely dry before decorating it.
2. Sort the feathers by color and size
Separate the feathers into small groups of white, cream, ivory, and pale silver. Choose a mixture of short fluffy feathers and slightly longer feathers so the ornament has plenty of texture. Avoid using feathers that are excessively large or heavy because they can make the ornament difficult to hang. Sorting everything first makes the decorating process much easier.
3. Plan the feather arrangement
Before adding glue, hold a few feathers against the ornament to decide how you want them positioned. Arrange the feathers so they follow the rounded shape of the ornament rather than sticking randomly in every direction. Leave small sections of the clear or white surface visible between some of the feathers. This gives the finished ornament a lighter, more natural appearance instead of making it look completely covered.
4. Start decorating near the ornament cap
Begin placing the smallest feathers around the upper portion of the ornament, directly underneath the metal cap. Apply a small amount of craft glue to the base of each feather and press it gently against the ornament. Work gradually around the sphere rather than covering one entire side at once. Keeping the first layer neat will make the later feathers easier to arrange.
5. Layer the feathers around the surface
Continue attaching feathers around the ornament, slightly overlapping each one with the previous feather. Alternate white, cream, ivory, and pale silver feathers to create subtle variation. Follow the curve of the ornament and angle the feather tips naturally downward or outward. Avoid using too much glue because excess adhesive can become visible between the delicate feather fibers.
6. Add the larger feathers for texture
Once the first layer is established, add a few slightly larger feathers across the middle and lower sections. Position them so their shafts follow the curve of the ornament while their soft barbs fan outward. A mixture of sizes helps the ornament look fluffy and dimensional. Keep the arrangement balanced rather than making one side noticeably heavier than the other.
7. Leave some of the ornament visible
Resist the temptation to cover every tiny section of the ornament. Leaving small areas of the clear or white base visible allows light to reflect through the ornament and gives the finished decoration an airy winter appearance. The feathers should look intentionally layered rather than packed tightly together. Step back occasionally and check the ornament from several angles as you work.
8. Add subtle silver accents
If you want a slightly more festive appearance, add a few pale silver feathers or very small touches of fine silver glitter. Keep the metallic details restrained so they complement the soft feathers instead of overpowering them. A few strategically placed silver accents can catch natural light beautifully and give the ornament a gentle snowy sparkle without making it look overly glittery.
9. Attach the ribbon loop
Cut a narrow piece of ribbon long enough to create a comfortable hanging loop. Thread the ribbon through the small round opening in the metal ornament cap and tie or secure the ends together so the loop sits neatly above the ornament. The ribbon should be attached through the metal hanging hardware rather than simply glued to the feathers, giving the ornament a stronger and more reliable way to hang.
10. Check the finished ornament
Inspect the entire ornament once all the feathers are attached. Look for loose feathers, visible excess glue, uneven areas, or places where the feather arrangement feels too crowded. Gently reposition or trim any feather that looks out of place once the glue has set according to the adhesive manufacturer’s instructions. Make sure the hanging ribbon is secure before displaying the ornament.
11. Let the ornament dry completely
Place the finished ornament somewhere safe and allow the adhesive to dry fully according to the glue manufacturer’s recommended drying time. Avoid moving or hanging it while the glue is still wet because the feathers may shift out of position. Once completely dry, gently lift the ornament by its ribbon and check that the feathers remain securely attached.
12. Display the feather ornament
Hang the finished feather ornament from a Christmas tree branch, decorative hook, or seasonal display. White and cream feathers look especially pretty among green branches because their soft texture stands out against the darker foliage. Keep the ornament away from open flames, candles, heaters, and other heat sources. For a child’s room, display it somewhere secure and out of reach of young children.
Tip
For the softest winter-inspired look, use mostly white and cream feathers and add only a few pale silver ones for sparkle. If you’re making this ornament with children, choose a lightweight plastic ornament and let an adult handle scissors and any adhesive that requires supervision. The biggest secret is less glue and more layering—small amounts of adhesive keep the feathers looking fluffy instead of stiff and messy.
24. Feather Butterfly Craft
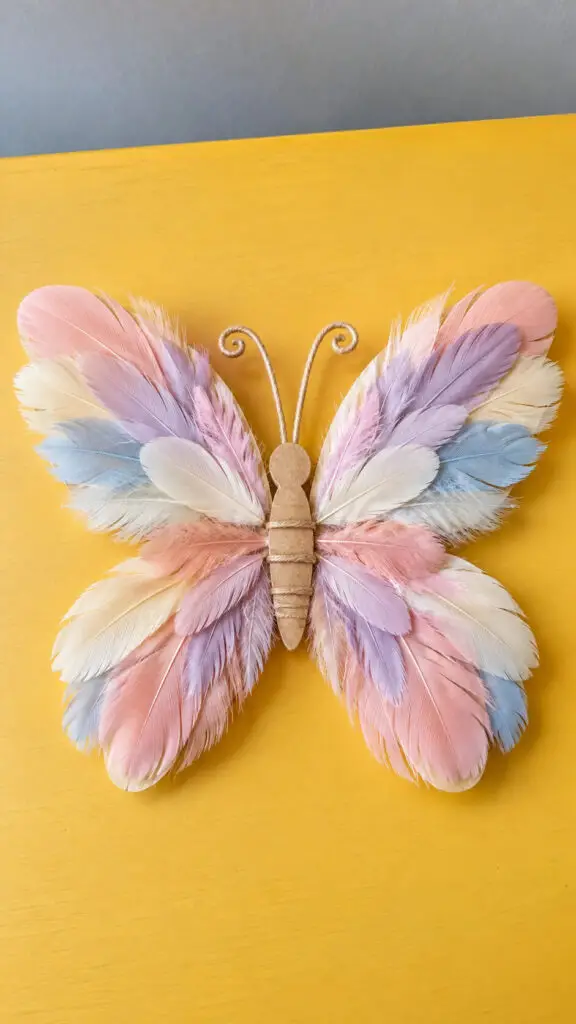
Give the classic paper butterfly a feathery makeover by using feathers for its wings.
Cut a simple butterfly body from cardstock, then arrange matching or contrasting feathers on either side.
Add pipe-cleaner antennae and a few painted dots for detail.
This is a great way to introduce symmetry because children can try matching the two wings while still having plenty of creative freedom.
Hang several butterflies together for a colorful spring display that feels light, playful, and wonderfully handmade.
Materials
- A piece of sturdy cardstock in soft brown, cream, or another natural color for the butterfly body
- Pastel feathers in pink, lavender, pale blue, and cream
- Two thin pieces of craft wire or pipe cleaners for the antennae
- Craft glue suitable for paper and feathers
- Scissors
- Pencil
- Ruler, optional, for marking the body
- Small paintbrush, optional, for applying glue neatly
- A sheet of scrap paper to protect your work surface
Instructions
1. Sketch the butterfly body
Draw a simple butterfly body onto the cardstock, keeping it narrow and elongated so there will be plenty of room for the feather wings. Make the upper portion slightly rounded for the head and gradually widen the lower portion for the body. A body measuring about 4 to 5 inches long works nicely, but you can make yours larger or smaller.
2. Cut out the cardstock body
Carefully cut around the butterfly outline with scissors. Smooth away any uneven edges so the body looks neat. You can leave the cardstock its natural brown or cream color for a simple homemade appearance, or lightly decorate it with a few understated lines. Avoid adding too much decoration because the colorful feather wings should remain the main attraction.
3. Prepare the feather wings
Sort the feathers into four groups: pink, lavender, pale blue, and cream. Choose feathers with similar lengths for each side of the butterfly so the finished wings look balanced. Separate larger feathers for the outer edges and slightly smaller feathers for the inner portions. Gently arrange them before gluing so you can see how the colors will work together.
4. Build the upper wings
Begin creating the upper wings by placing the longer feathers on either side of the butterfly body. Angle the feathers outward and slightly upward so their tips point away from the center. Layer shorter feathers over the bases of the longer ones, creating a soft, full wing. Keep the arrangement as symmetrical as possible while allowing the natural feather shapes to remain visible.
5. Create the lower wings
Add a second group of feathers beneath the upper wings to form the butterfly’s lower wings. Use slightly shorter feathers and angle them downward and outward. Combine pale blue, cream, pink, and lavender so the lower wings coordinate with the upper pair. Leave the tips clearly separated enough that the butterfly silhouette remains easy to recognize.
6. Arrange the feathers before gluing
Take a moment to look at the complete butterfly before applying glue. Check that the left and right wings have similar shapes, colors, and overall fullness. Move individual feathers until the four wings feel balanced. This little pause can save a surprising amount of frustration later because feathers are much easier to rearrange before they are glued down.
7. Glue the feathers in layers
Apply small amounts of craft glue to the feather bases and attach them to the cardstock body. Start with the bottom layer and gradually work toward the top, allowing each feather to overlap the one beneath it slightly. Keep the glue concentrated near the feather shafts rather than coating the delicate barbs. This helps preserve the fluffy, natural texture of the wings.
8. Shape the antennae
Cut two thin pieces of craft wire or pipe cleaner to create the butterfly’s antennae. Gently curve the upper ends into small curls, then attach the lower ends behind the cardstock head with glue. Position the antennae so they spread outward evenly. If you’re making the butterfly with young children, an adult can handle cutting and shaping the wire.
9. Let the butterfly dry completely
Leave the finished butterfly flat on your protected work surface while the glue dries. Avoid picking it up or moving the feathers during this time because the delicate layers can shift before the adhesive has fully set. Follow the drying time recommended for your particular glue. Once dry, gently check the feather bases and secure any loose pieces with a tiny additional amount of glue.
10. Display your feather butterfly
Place the finished butterfly on a shelf, craft table, or other flat surface where its layered wings can be seen from above. You can also attach a small loop to the back if you would like to hang it as seasonal decoration. Several butterflies in different pastel color combinations would make a lovely spring display, especially when each one has its own personality.
Tip
For the prettiest layered effect, use the largest feathers on the outside of each wing and gradually work toward smaller feathers near the butterfly’s body. Don’t worry if the feathers aren’t perfectly identical—the slight differences make the finished butterfly look more natural and genuinely handmade.
25. Feather Heart Wreath
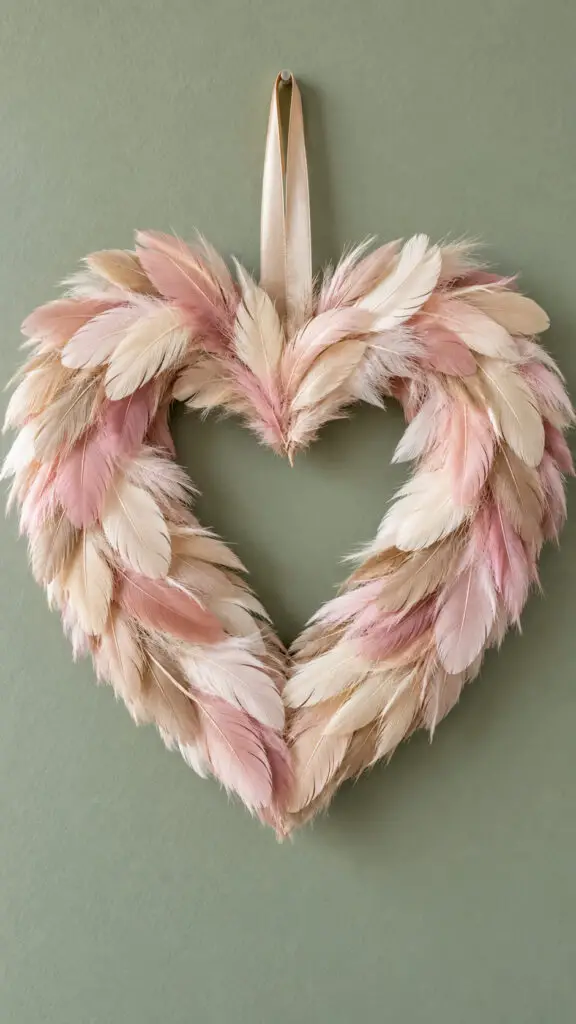
Finish your collection with a heart-shaped wreath made from layered feathers.
Cut a heart frame from sturdy cardboard, then glue feathers around it so they overlap and gradually cover the base.
Add a ribbon loop at the top for hanging and decorate the center with a small paper flower or handwritten message.
It makes a sweet Valentine’s Day decoration, but there is no reason to pack it away afterward.
A feather heart is perfectly happy brightening a bedroom or craft corner all year.
Materials
- A piece of sturdy cardboard or a lightweight heart-shaped wreath base
- Soft feathers in cream, beige, blush, pale rose, and similar neutral shades
- Craft glue suitable for attaching feathers to cardboard
- A small piece of neutral-colored ribbon for hanging
- Pencil and scissors, if making the heart-shaped base from cardboard
- A ruler, optional, for helping create an even heart shape
- Newspaper or scrap paper to protect the work surface
Instructions
1. Create the heart-shaped base
Draw a large heart shape on sturdy cardboard, making the outline wide enough to support several layers of feathers. Carefully cut out the heart, then cut a smaller heart from the center to create an open wreath shape. Keep the frame reasonably thick so it remains sturdy beneath the feathers. If you already have a lightweight heart-shaped wreath base, you can skip this part and begin decorating it.
2. Sort the feathers by color and size
Separate your feathers into small groups according to their colors and sizes. Keep the cream, beige, blush, and pale rose feathers together so you can distribute them throughout the wreath. Put longer feathers in one group and shorter feathers in another. Sorting everything first makes the decorating process much easier and helps you avoid accidentally using all of one color on one side.
3. Plan the feather arrangement
Lay several feathers loosely around the cardboard heart before adding glue. Arrange them so their pointed ends generally follow the direction of the heart’s outline, with the feather tips pointing outward or along the curve. Mix the colors rather than creating separate color sections. This quick planning stage helps the finished wreath look naturally layered instead of having obvious empty patches.
4. Start decorating at the lower point
Begin attaching feathers near the bottom point of the heart, where the two sides meet. Apply a small amount of craft glue to the base of each feather and press it firmly onto the cardboard. Position the first few feathers so they follow the angle of the heart. Starting here gives you a clear reference point for working upward along both sides.
5. Layer feathers along one side
Continue adding feathers up one side of the heart, overlapping each new feather slightly over the previous one. Keep the feather shafts hidden as much as possible beneath the next layer. Follow the curve of the cardboard rather than placing every feather at exactly the same angle. Small differences in size and direction will make the wreath look softer and more naturally handmade.
6. Match the arrangement on the other side
Work your way up the opposite side while keeping the overall shape balanced. The two sides do not need to be perfectly identical, but try to distribute similar colors and feather sizes throughout the design. If one side contains several blush feathers, place a few blush feathers on the opposite side as well. This creates visual balance without making the wreath look overly precise.
7. Fill the upper curves
Once the lower sides are covered, add feathers around the rounded upper curves of the heart. Use shorter feathers where the curves become tighter because they are easier to position neatly. Angle each feather so its shape follows the heart rather than sticking awkwardly away from the wreath. Overlap the feathers generously enough to hide most of the cardboard underneath.
8. Cover any visible gaps
Inspect the entire wreath from several angles and look for exposed areas of cardboard. Add small feathers to these spaces, placing them underneath or between existing layers where possible. Avoid adding too much glue, as excessive adhesive can make delicate feather fibers stiff and noticeable. The goal is to create a full, fluffy surface while still allowing individual feathers to remain recognizable.
9. Add the ribbon loop
Cut a piece of neutral ribbon long enough to create a comfortable hanging loop. Attach both ends securely to the top center or back of the heart wreath, depending on the design of your cardboard base. Allow the glue to dry completely before lifting the wreath by the ribbon. A cream, beige, or soft blush ribbon works especially well with the feather colors without distracting from the heart.
10. Let the wreath dry completely
Place the finished wreath on a flat surface and allow all the glue to dry according to the adhesive manufacturer’s instructions. Avoid moving or hanging it too soon because loose feathers can shift while the glue is still setting. Once completely dry, gently check the wreath and press down any feathers that need a little extra adhesive. Handle the finished piece carefully to preserve its soft texture.
Tip
For the prettiest feather heart wreath, use a mixture of feather lengths instead of making every layer identical. Longer feathers are excellent for the broader sections, while shorter ones make the upper curves and inner edges easier to cover. Keep a few of the smallest feathers aside until the end so you can disguise tiny gaps without disturbing the main arrangement. If making this craft with children, have an adult handle the scissors and supervise the use of craft glue.