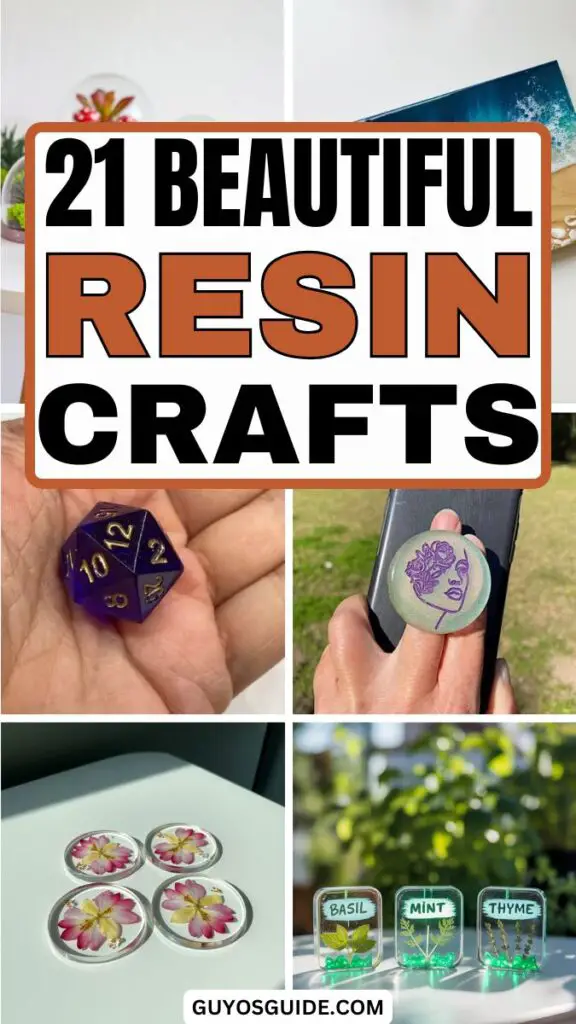
21 Beautiful Resin Crafts to Try for Your Next DIY Project

resin crafts - Guyo's Guide

I’ve ruined more T-shirts than I can count trying to get crafty, so trust me—I know the mess and the struggle.

I used to think resin crafts were only for super-skilled DIY pros with fancy tools and perfect Instagram feeds.

There was a time when my resin projects ended up more like sticky puddles than pretty coasters!

Yes, I’ve had resin stuck to my table, my hair, and somehow even my dog. But I kept going.

After a lot of trial and error (and more than a few YouTube deep dives), I found some resin craft ideas that are actually fun, doable, and seriously cute.

These resin projects aren’t just easy—they’re the kind you’ll actually want to show off or gift.

So let’s dive into some resin craft ideas you’ll love to make:


1. Resin Coasters with Dried Flowers

A photograph of four round resin coasters arranged in a neat square on a bright white tabletop. Each coaster is crystal-clear, showcasing meticulously preserved pink, purple, and yellow pressed petals in symmetrical, artistic designs, with tiny golden flakes subtly scattered throughout. The coasters sit flush against each other, catching the light, while the tabletop’s clean surface reflects the gentle, diffused light from above. A soft shadow gently falls behind the coasters, creating depth and highlighting their delicate beauty.

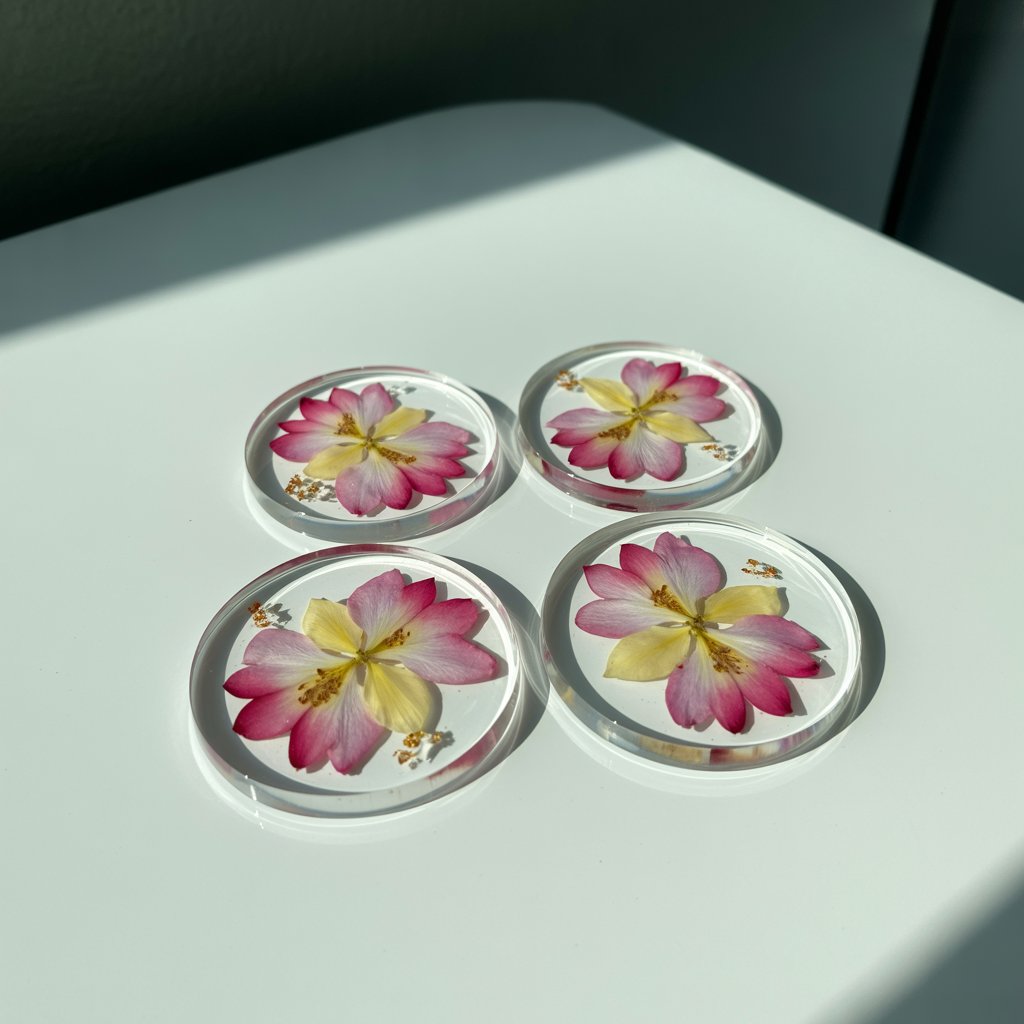
These are my absolute go-to gift! 

Just pop pressed flowers into silicone molds, pour in your resin, and voilà—mini works of art. 

I love using wildflowers from family hikes. 

They’re practical, pretty, and such a meaningful way to preserve nature’s beauty on your coffee table.


2. Galaxy-Inspired Resin Keychains

A photograph of five handcrafted resin keychains arranged neatly on a stark, bright white tabletop. Each keychain is a miniature galaxy, swirling with deep purples, blues, and shimmering silver hues, accentuated by tiny holographic star confetti and a scattering of silver glitter embedded within the clear resin. The keychains are subtly angled to catch the light, showcasing the embedded details, with delicate metal jump rings and keyring attachments visible. Soft, diffused lighting illuminates the scene, creating gentle highlights on the resin and emphasizing the galactic swirls.

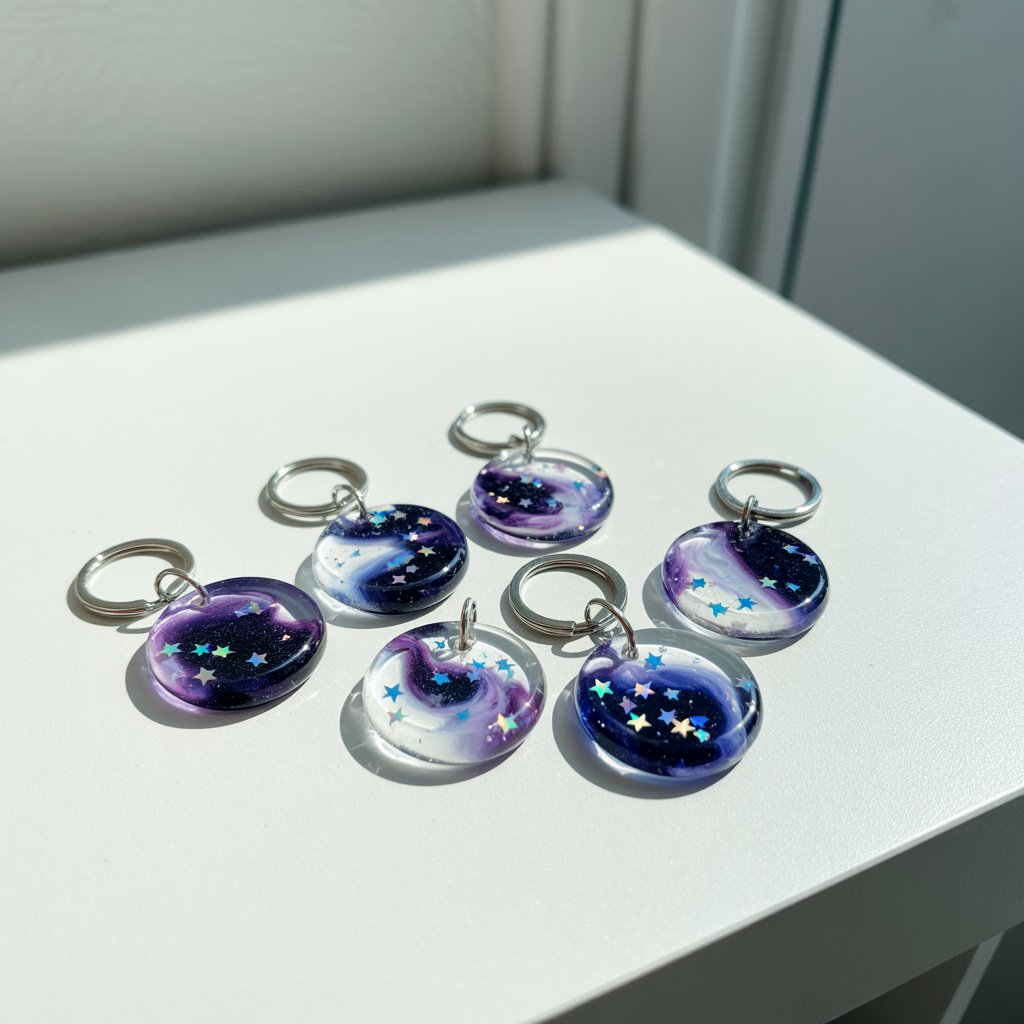
These are a blast to make with teens! 

Mix deep purples and blues with glitter for that dreamy cosmic vibe. 

Add tiny star charms if you’re feeling extra. 

My daughter and I made a dozen in one afternoon—great bonding, and now everyone wants one.

Time: 30–45 min (plus curing time)
Great for: Teens & cosmic vibes

You’ll Need:

  • Epoxy resin & hardener
  • Keychain mold
  • Deep blue, purple, white resin pigments
  • Glitter & star confetti
  • Mixing cups & sticks
  • Keychain rings
  • Gloves & safety gear

Instructions:

1️⃣ Mix resin with hardener (follow your kit’s ratio).
2️⃣ Color it: Separate into small cups. Tint with blues, purples, and a touch of white.
3️⃣ Pour into mold in swirls. Add glitter and star confetti for that galaxy effect.
4️⃣ Let cure (usually 24 hrs).
5️⃣ Pop out & attach keychain rings.


3. Resin Ring Holders

A chic and functional simple homemade craft setup featuring cone-shaped resin ring holders positioned on a plain white bright white table. The cones vary in height and are decorated with swirls of blush pink, gold foil flakes, and a pearlescent sheen. A few of the ring holders display dainty rings stacked around them. A soft glow from the lighting highlights the glossy, smooth finish of each holder, emphasizing their sculptural beauty.

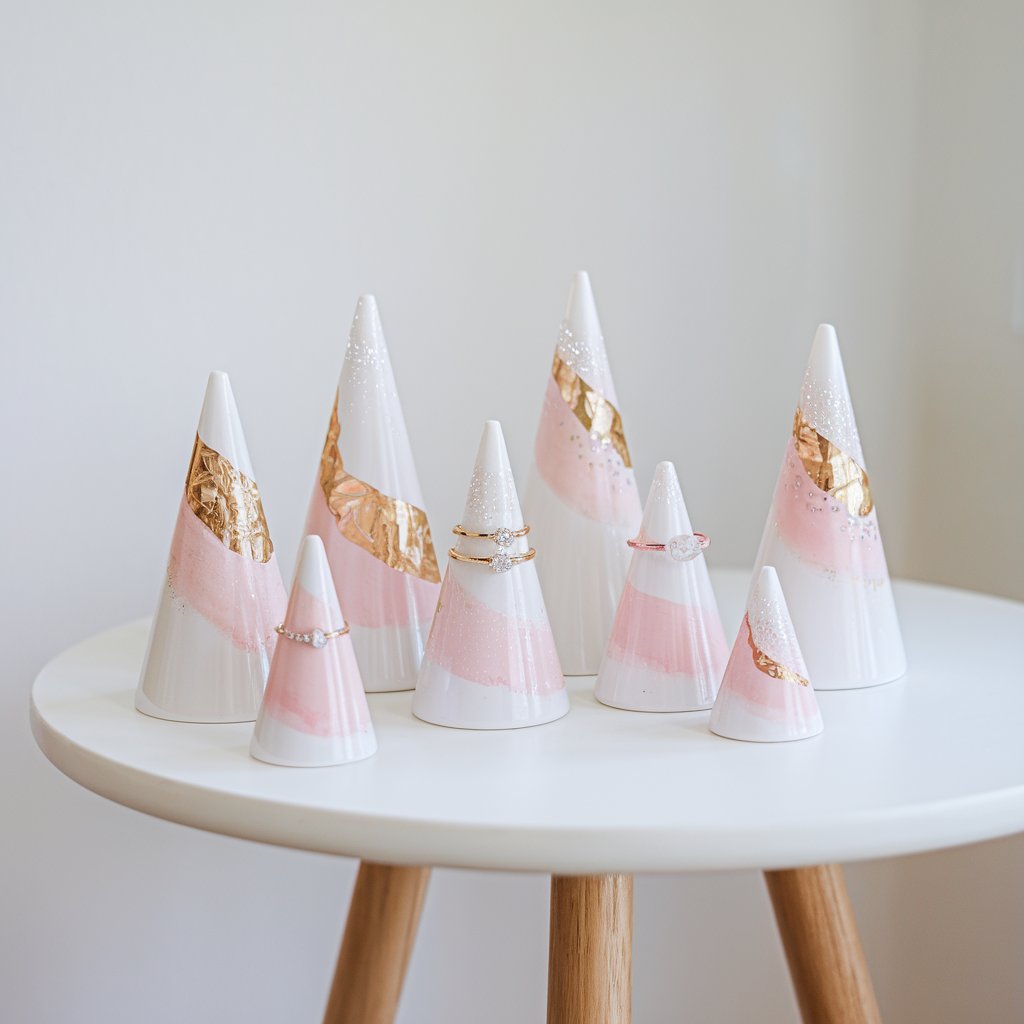
These little cones look so fancy on a dresser. 

I swirl in pastel pigments or gold flakes—depends on my mood! 

They’re simple to make and keep my rings from disappearing (again). 

A cute solution for chaos and a fun girls’ night project, too.

Time: 40 min hands-on (plus curing time)
Perfect for: Teens, jewelry lovers, & organizing chaos with glam

You’ll Need:

  • Cone-shaped silicone mold
  • Epoxy resin & hardener
  • Pastel resin pigments (or acrylic paint)
  • Gold foil or glitter (optional but fabulous)
  • Mixing cups & sticks
  • Gloves and a work mat

Instructions:

1️⃣ Mix resin with hardener (check your kit’s ratio).
2️⃣ Add color: Stir in soft pastel pigments—or swirl in a bit of each for a marbled look.
3️⃣ Dress it up: Add gold foil, glitter, or shimmer powder.
4️⃣ Pour slowly into the cone mold to avoid bubbles.
5️⃣ Cure fully (usually 24–48 hrs).
6️⃣ Pop it out and admire your elegant new ring home!

Bonus tip: Use painter’s tape to block off a clean area if you want a sharp color edge or dipped look.


4. Ocean Wave Resin Art

A serene beach-inspired simple homemade craft resting flat on a plain white bright white table. The craft is a rectangular wooden canvas with layered resin art. The resin is tinted with multiple shades of ocean blue and teal, gradually lightening toward the "shore". A white resin wave detail is foamed and feathered, creating the illusion of real crashing surf. Seashells and tiny white pebbles are embedded near the bottom edge, enhancing the shoreline effect. The clear, glossy surface of the resin reflects light beautifully, bringing movement and depth to the artwork.

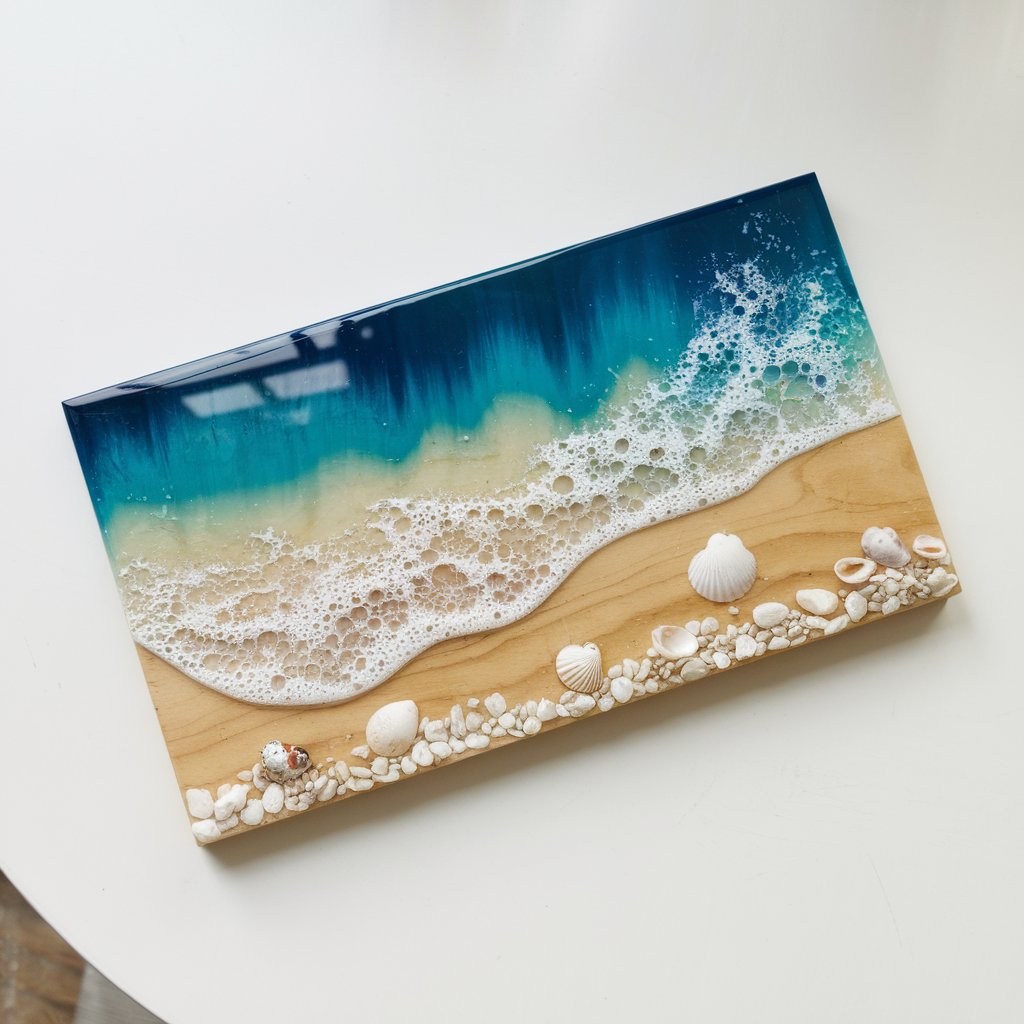
Every time I make one, I can almost hear seagulls. 

Use a wood board, mix blues and white, and swirl with a heat gun for those foamy waves. 

It’s therapeutic, honestly. 

Bonus points if you add sand from your favorite beach—makes it feel personal.

Time: 45 min hands-on (plus curing time)
Perfect for: Beach lovers, zen seekers, and DIY wall art fans

You’ll Need:

  • Wood board or canvas panel
  • Epoxy resin & hardener
  • Blue, turquoise & white resin pigments
  • Heat gun or hair dryer
  • Sand, shells, or tiny pebbles (optional)
  • Mixing cups, sticks, gloves

Instructions:

1️⃣ Prep your surface – Tape the edges and lay your board flat.
2️⃣ Mix resin with hardener (check your brand’s instructions).
3️⃣ Tint it: Divide into 3–4 cups. Add blue, turquoise, and white pigment.
4️⃣ Pour the ocean: Start with deep blue at the top, blend into turquoise, then leave space for clear or sandy resin near the “shore.”
5️⃣ Add foam: Drizzle white along the “shoreline.”
6️⃣ Swirl & wave: Use a heat gun to blow the white resin into wave patterns. Move slowly to create that foamy surf look.
7️⃣ Add beachy bits: Press in shells, sand, or stones while it’s still tacky.
8️⃣ Cure fully (24–48 hrs), then display your beachy masterpiece!

Pro tip: Use real sand from a special trip to make it sentimental.


5. Resin Light Switch Covers

A photograph of three handmade resin-coated light switch covers arranged neatly on a bright white tabletop. One cover sparkles with chunky rainbow glitter, another displays a swirling pattern of soft pastel colors, and the third is embedded with tiny gold confetti stars, all creating a glassy, polished appearance. Soft, natural light illuminates the covers, highlighting the texture and depth of the resin, while a simple white background emphasizes the playful craft. The arrangement showcases the decorative elements with a clean and minimalist aesthetic.

Forget boring beige! 

These are an easy way to make a room pop. 

I’ve made glittery ones for the kids’ rooms and marble-style for the hallway. 

They’re quick, fun, and people always ask where I bought them. 

You didn’t—it’s handmade magic.


6. Alphabet Resin Letters

A photograph of a meticulously arranged display of handmade resin letters on a bright white tabletop. Each letter of the alphabet, from “A” to “Z”, is uniquely decorated with colorful accents like miniature beads, iridescent glitter, delicate flower petals, and shimmering sprinkles, showcasing the transparent resin's intricate details. The letters are neatly positioned to spell out words such as “FUN” and “CRAFT,” creating a playful and inviting aesthetic, with soft natural light highlighting the textures and colors. A gentle shadow falls behind the letters, adding depth and emphasizing their handcrafted charm.

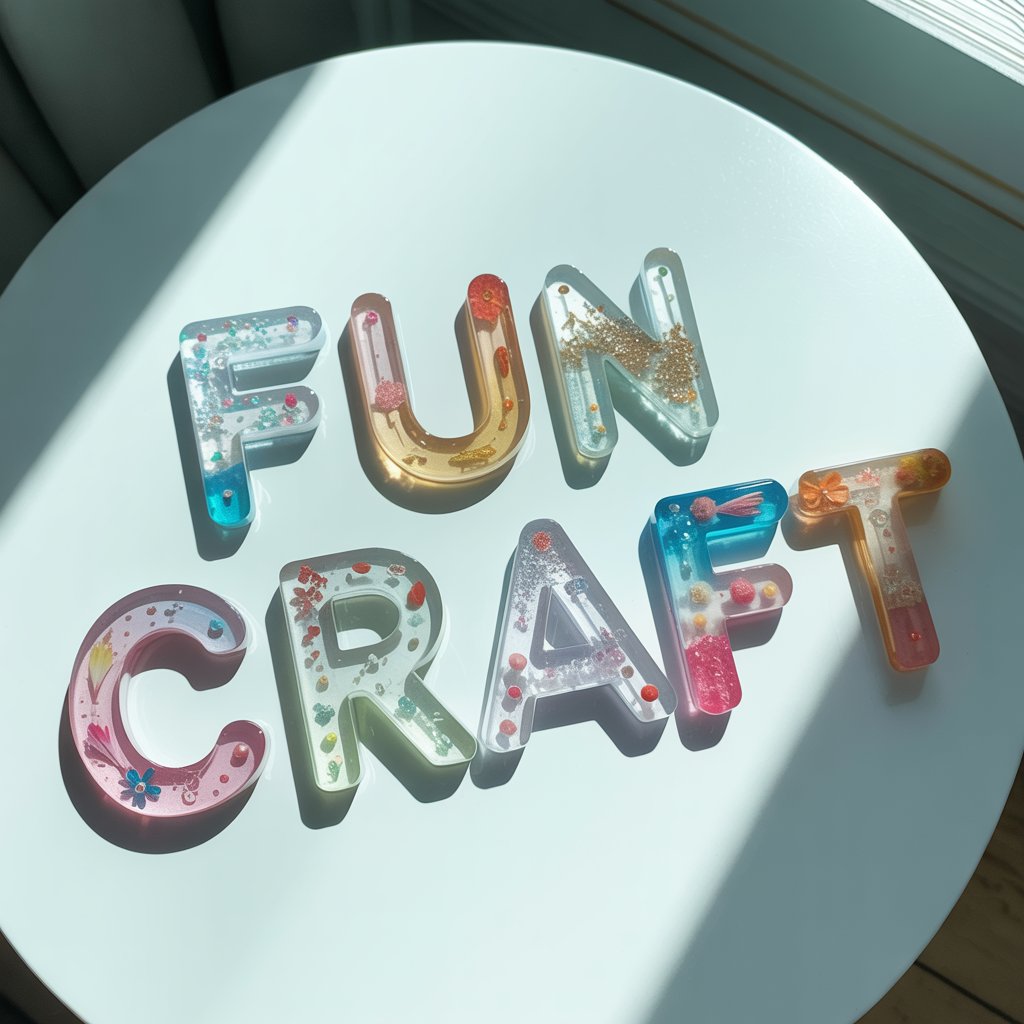
Perfect for playrooms, nurseries, or fridge magnets. 

Add glitter, sprinkles, or tiny beads—whatever sparks joy. 

My toddler learned to spell her name with hers! 

They’re fun to customize and educational without anyone even realizing they’re learning. Parenting win.


7. Resin and Wood Cheese Boards

A photo of a homemade craft cheese board. One side is a smooth, warm-toned wood, and the other side is filled with rich, translucent blue resin. The resin section contains subtle swirls of gold mica powder. The board is placed on a plain white table. The background is bright and the lighting is natural.

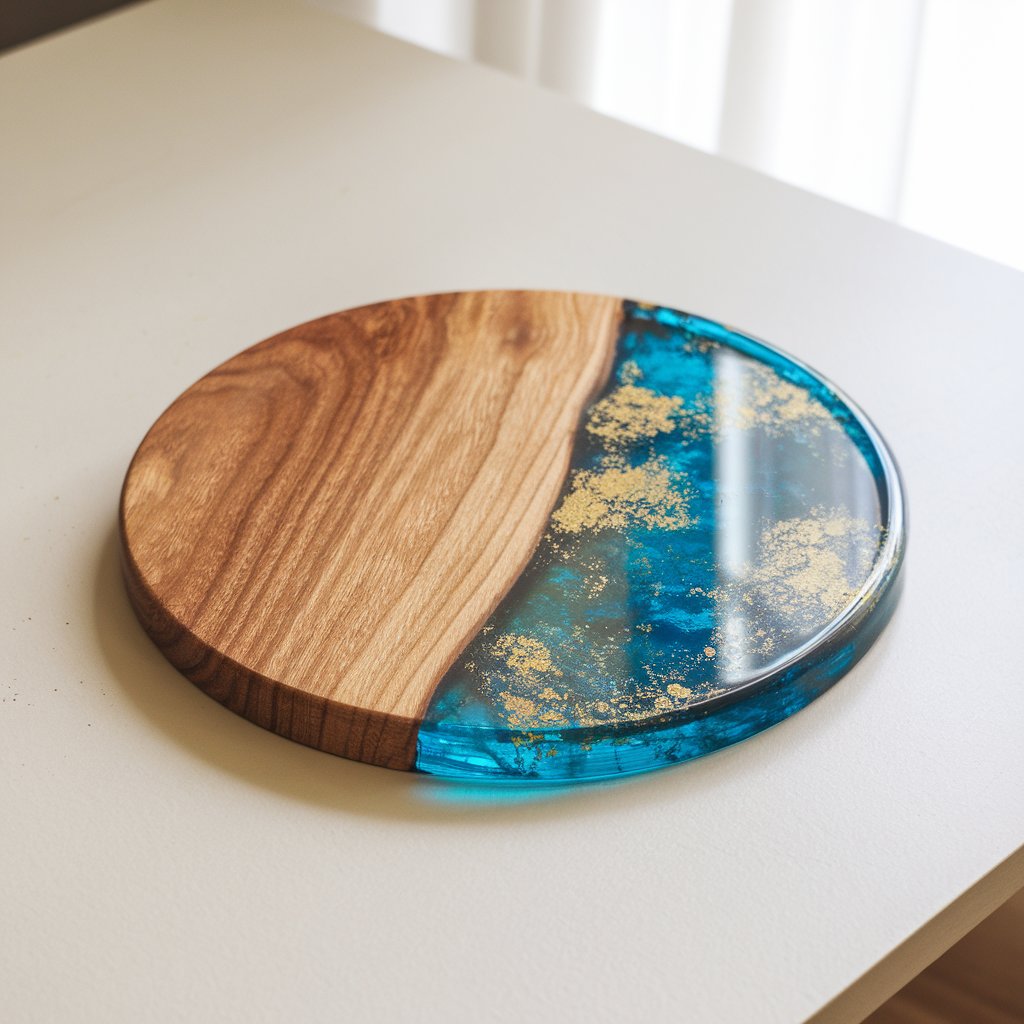
Oh, these are classy. 

I love mixing warm wood with glossy tinted resin—it’s the perfect combo of rustic and modern. 

Ideal for serving snacks at girls’ night or gifting to that one friend who always hosts. 

Add handles for bonus points.


8. Resin Bookmark Magic
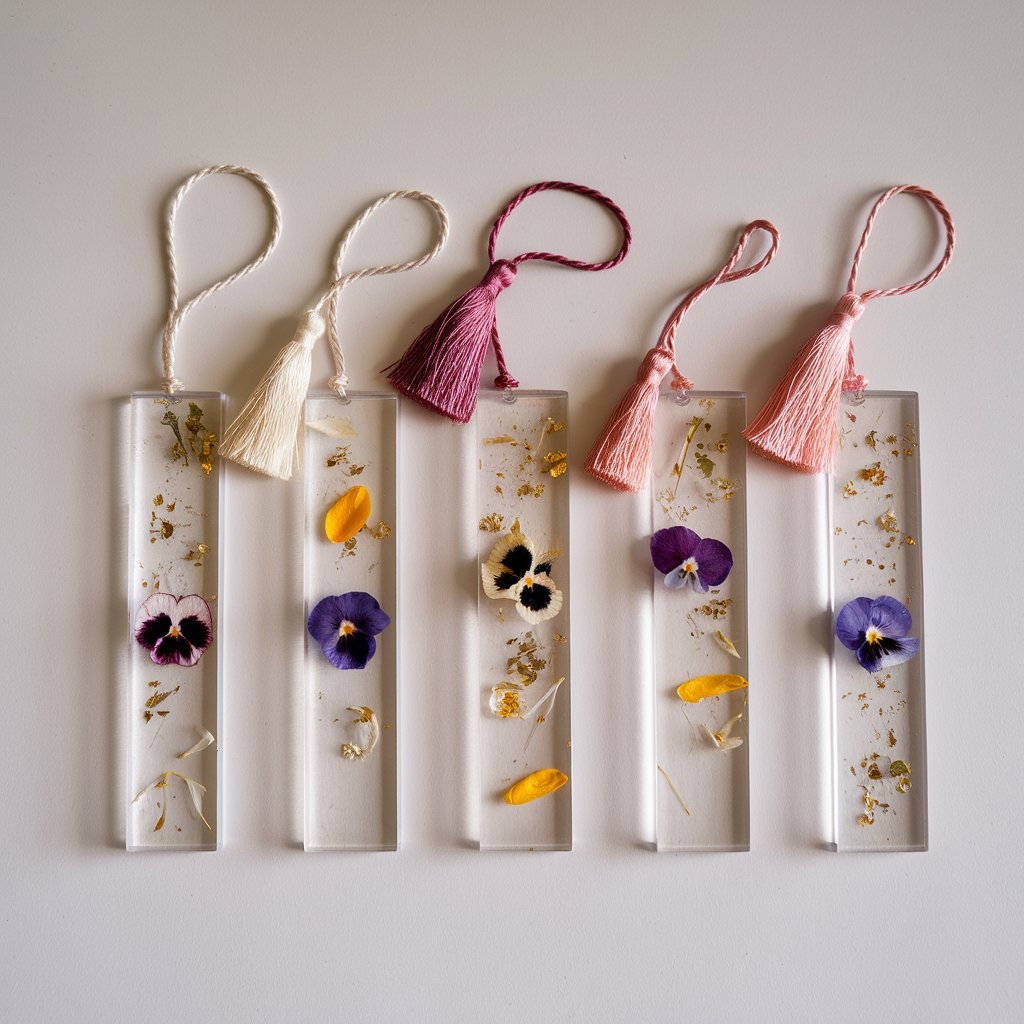
A photo of a simple homemade craft celebrating book lovers. There are five slim, rectangular resin bookmarks side-by-side on a plain white table. Each bookmark features carefully placed pressed flower petals, tiny gold flakes, and a thin satin tassel looped through the top hole. The bookmarks are semi-transparent, allowing light to pass through and highlight the suspended elements. The clean background emphasizes the elegance and detail of these handcrafted accessories.

Bookworms, rejoice! 

These slim little bookmarks are so charming. 

I like pressing tiny petals or confetti inside and finishing with a tassel. 

Every one feels like a story waiting to happen. 

They’re also a lovely touch to tuck into a gifted book.


9. Resin Jewelry Dishes

A photo of a simple homemade craft arrangement on a white table. There are three small round resin dishes with unique designs. One dish has a swirling metallic rose gold pattern. Another dish has embedded daisy petals. The third dish has a soft lavender tone and foil flakes. The lighting emphasizes the reflective resin finish and gentle curvature of the dish edges, adding to their polished, boutique look.

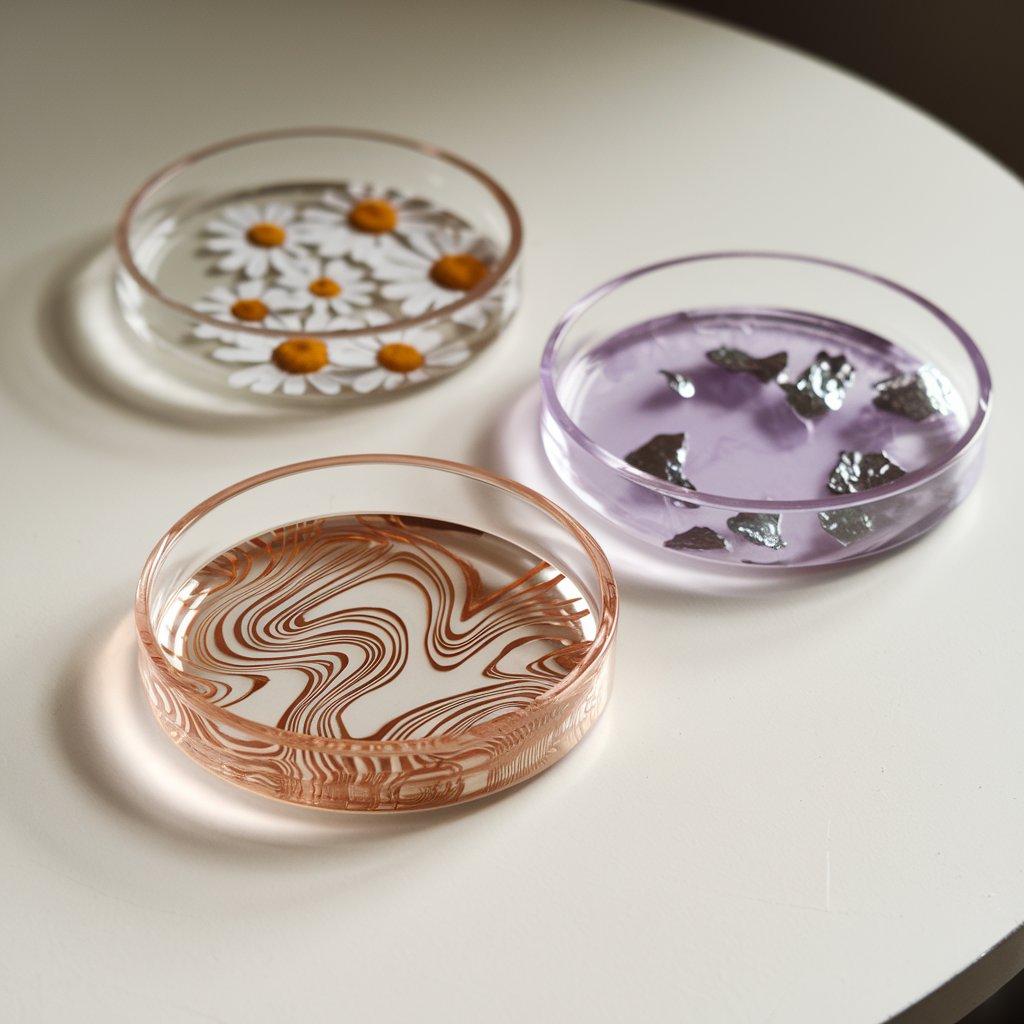
You can never have too many of these. 

I keep one by the sink, one on my nightstand, one by the front door. 

Swirl in metallic flakes or make it match your decor. 

They catch clutter in the prettiest way possible.


10. Mini Resin Terrariums

A whimsical and vibrant homemade craft scene set atop a plain white table. There are five dome-shaped mini resin terrariums. Inside each terrarium, there are tiny faux succulents, bright green moss, and miniature mushroom charms encased in crystal-clear resin. The background is plain white.

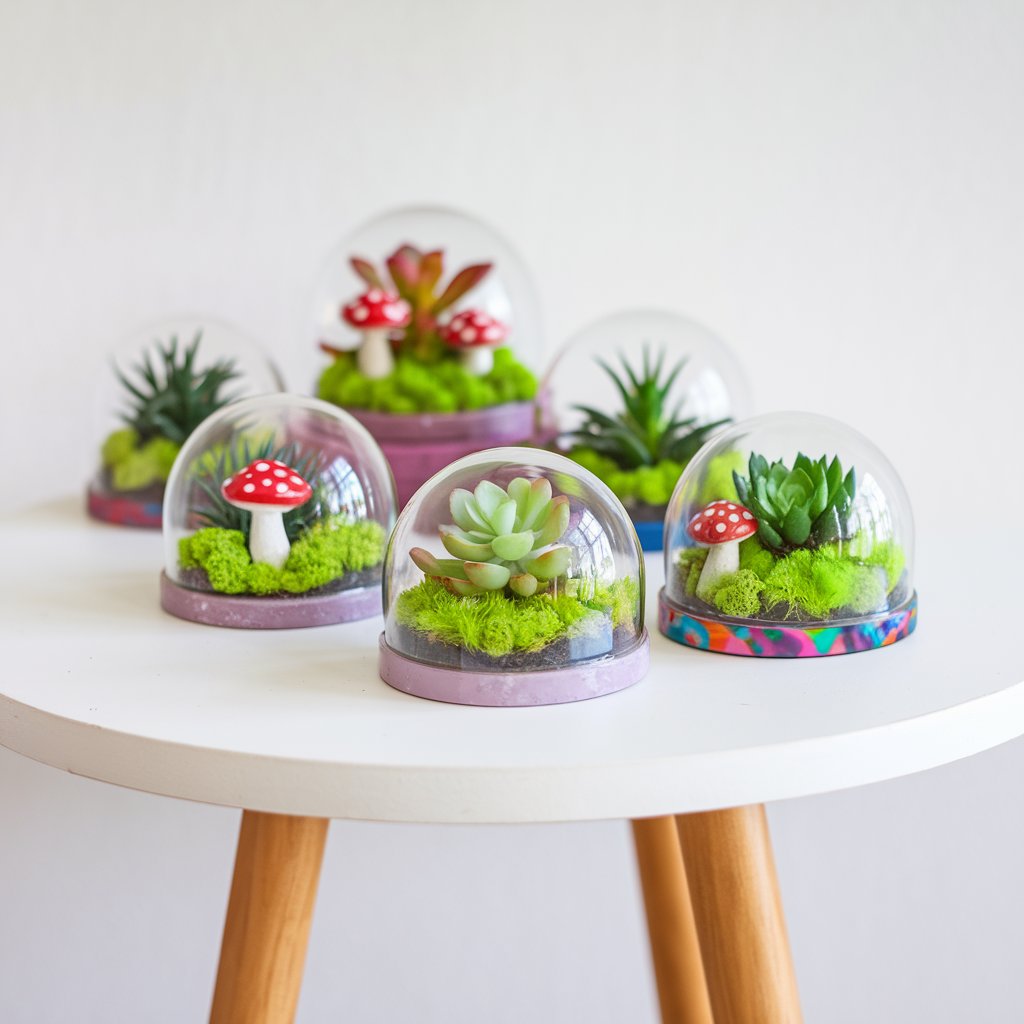
These are like little fairy gardens in a dome! 

I use tiny faux plants, moss, and even little mushroom charms. 

They’re cute as ornaments, paperweights, or fridge magnets if you add a backing. 

Kids love helping pick the mini pieces, too.


11. Geode-Inspired Resin Art

A flat lay photo of a simple homemade craft on a bright white table. The craft is a square geode-inspired resin artwork. The resin is tinted in layers of deep amethyst, pinks, and shimmering whites, mimicking the natural rings of a geode. Crushed glass and metallic flakes create a crystal cluster effect at the center, with gold-painted outlines enhancing each layer. The surface glows under direct light, revealing depth and luster. The glossy finish reflects light like polished stone.

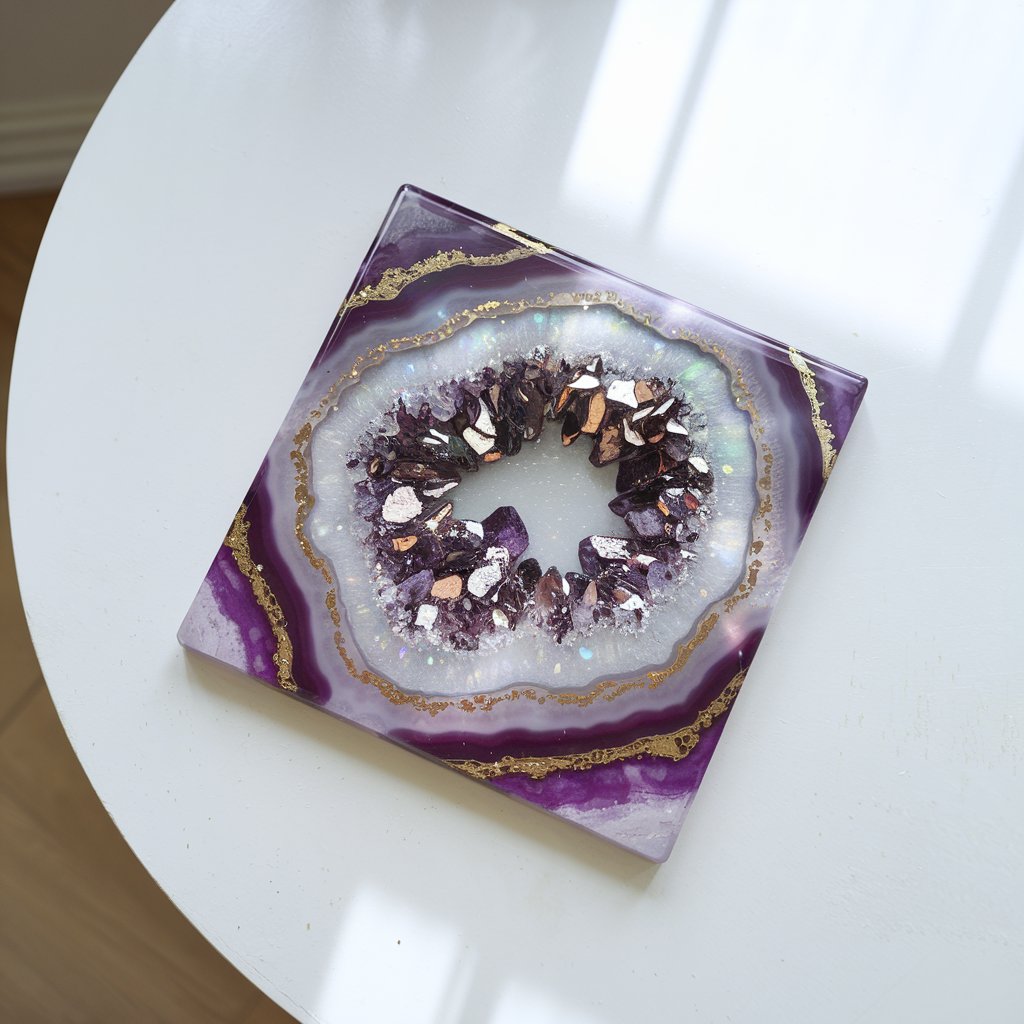
Channel your inner crystal queen. 

Swirl rich jewel tones with crushed glass and metallics. 

Looks super fancy but actually pretty forgiving to make. 

Hang it up or gift it to that friend who’s always charging their crystals. You know the one.


12. Resin Hair Clips

A photograph of ten colorful resin hair clips meticulously arranged on a bright white tabletop. The clips showcase a playful aesthetic, varying in shape – rectangular, oval, and triangular – and adorned with unique designs like iridescent confetti glitter, pressed real flowers, miniature slices of lemon, and swirling pastel pigments, all nestled within clear resin. Each clip is attached to a gleaming gold or silver hairpin base, with a few clips partially assembled, revealing the crafting process. Soft, diffused window light illuminates the scene, creating subtle reflections on the glass-like surfaces and casting gentle shadows that highlight the vibrant details.

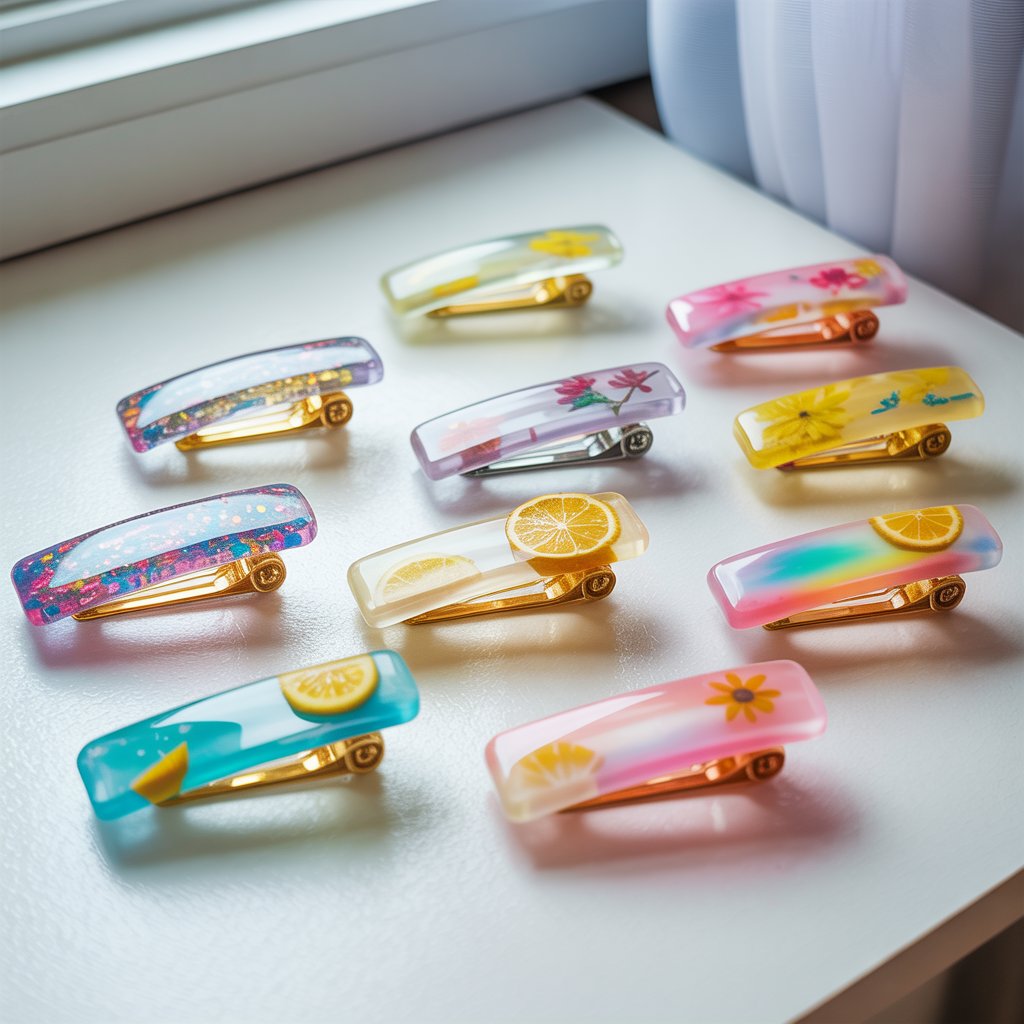
My teen and I made a whole rainbow set during spring break. 

They’re lightweight, bold, and super customizable. 

I love mixing glitter and foil flakes, she adds smiley faces and butterflies. 

Instant style boost—and way cheaper than boutique clips!


13. Resin Pet Tags

A photograph of three handmade resin pet ID tags artfully arranged on a clean, bright white table. The tags are shaped like a bone, a heart, and a circle, each showcasing the name "Tino" in crisp black vinyl lettering and sprinkled with iridescent star confetti. The bone tag features tiny paw print charms embedded within the resin, while the heart tag displays a scattering of fine silver glitter, and the circular tag has a gentle gradient of blue and green. Soft, natural light illuminates the scene, highlighting the translucent quality of the resin and creating subtle reflections on the table surface.

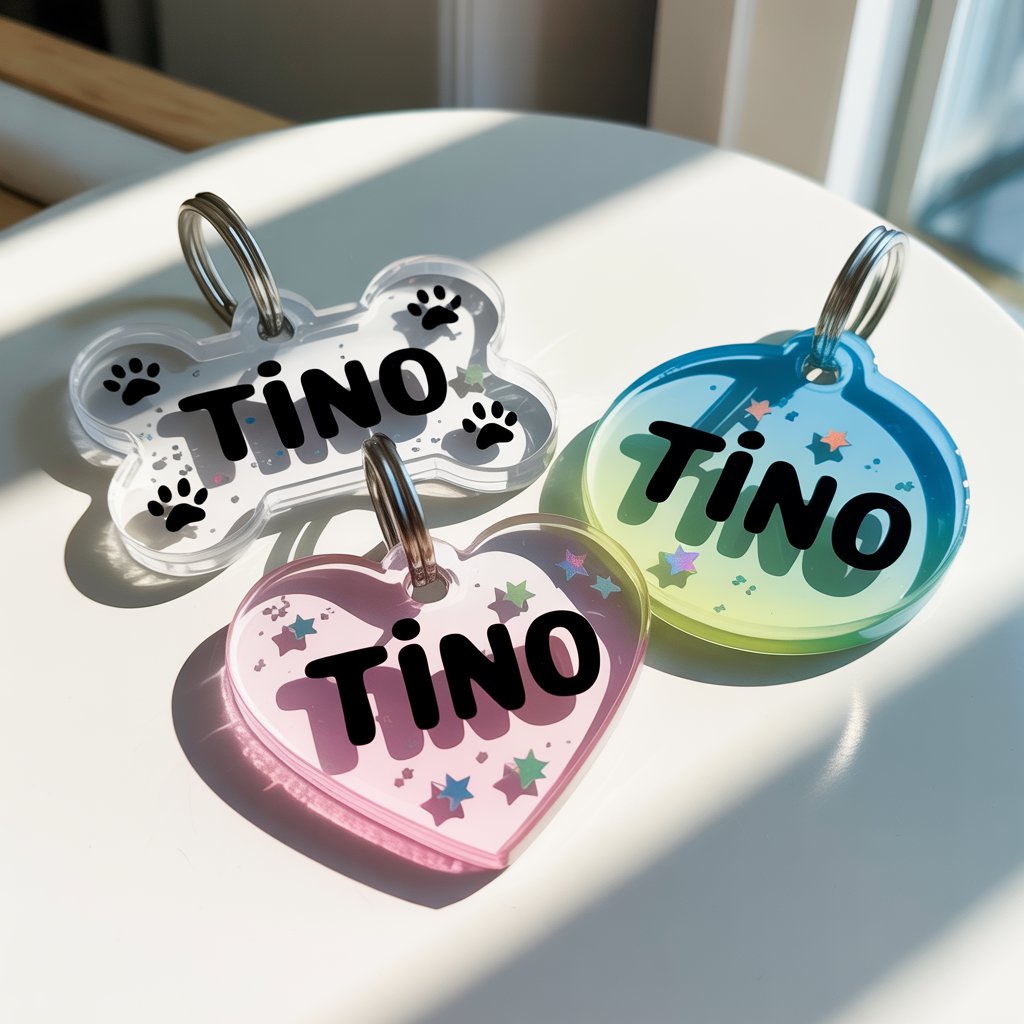
Let your fur babies strut in style! 

Customize tags with your pet’s name, add glitter or paw print stickers, and choose colors that match their vibe. 

My dog has one with glow powder—fabulous and functional during nighttime walks.


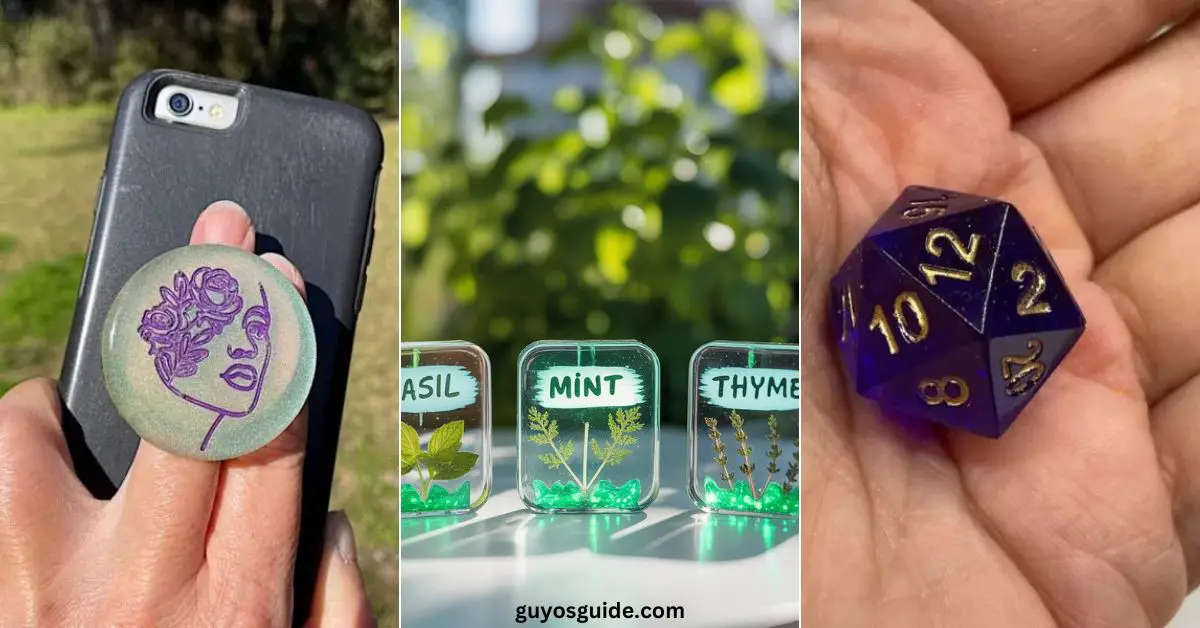
14. Resin Phone Grips

IMG 2583 e1645037115487
Source: resinobsession.com

These are a hit with teens and tweens. 

Just make a small circle design, pop it on a phone grip base, and you’ve got a tiny canvas for your personality. 

I’ve made marbled ones, floral ones, even a glittery cat for my niece.


15. DIY Resin Dice

finished D20 die scaled e1649866216239
Source: resinobsession.com

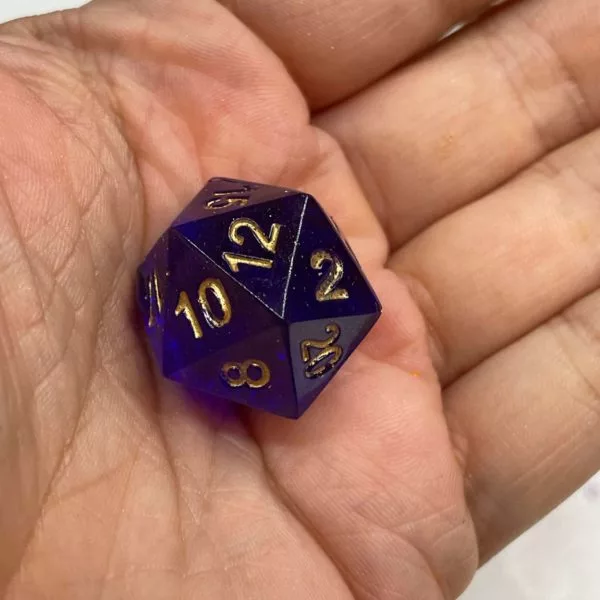
Calling all game night lovers! 

Making your own dice is oddly satisfying. Swirl in mica, add mini items, or go glow-in-the-dark. 

My son made a D&D set, and now his friends all want custom versions. 

Nerdy? Sure. Awesome? Absolutely.


16. Resin Photo Blocks

A close-up still life photograph showcases two handcrafted resin photo blocks resting on a stark white tabletop, evoking a sense of cherished memories. One block is square, displaying a miniature photo of a bride and groom exchanging vows, while the other is rectangular, featuring a joyful child’s portrait with a beaming smile – both encased in crystal-clear resin with delicate gold leaf accents around the edges. Soft, diffused natural light gently illuminates the blocks, highlighting the encapsulated images and creating subtle reflections on the polished table surface, while a scattering of dried lavender sprigs softly frames the arrangement. The clean, minimalist backdrop accentuates the emotional warmth and intimate detail of these treasured keepsakes.

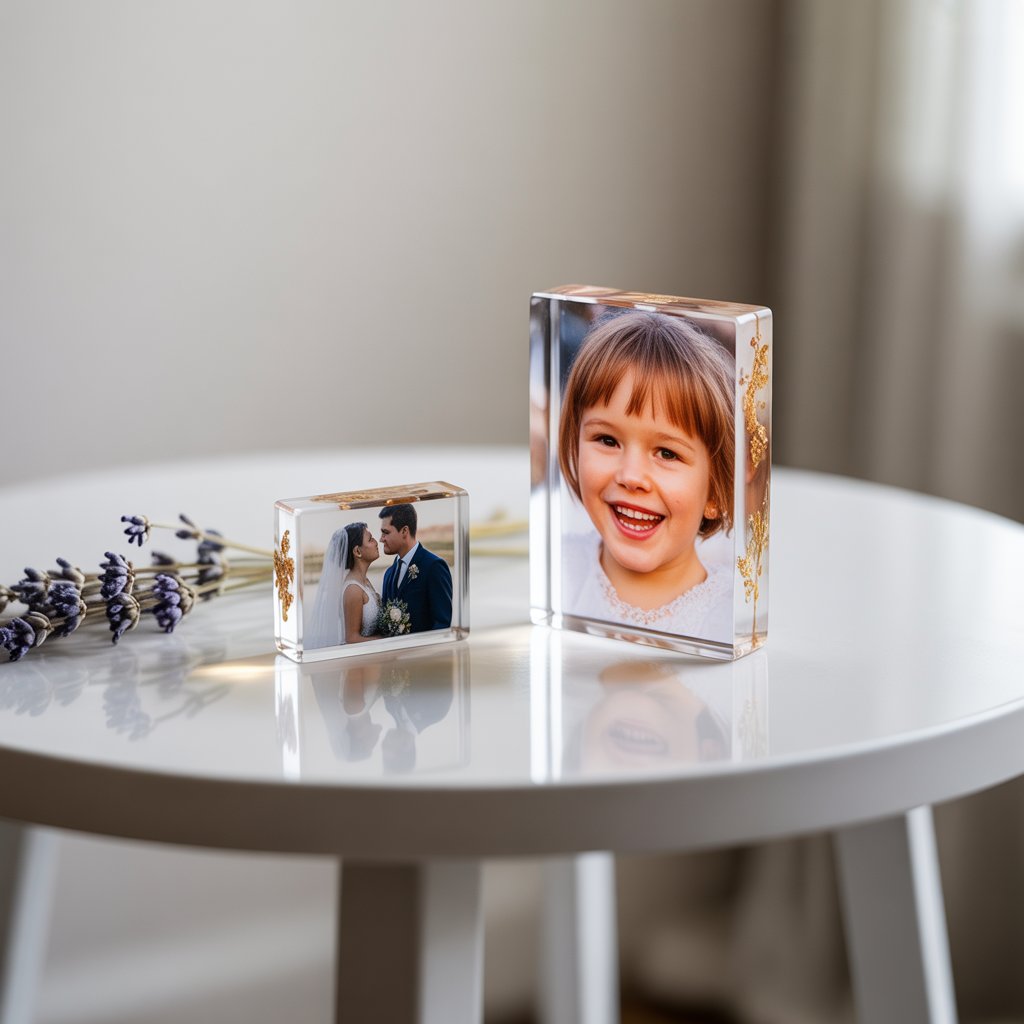
These are little memory cubes I keep on my desk—way more fun than frames. 

Just print small photos, seal them in resin, and you’ve got a modern keepsake. 

Add glitter or foil for sparkle. Great for gifts too—my mom cried happy tears over hers!


17. Resin Feather Pendants

DIY resin feathers with EasyCast 8678 720x1080.jpg
Source: sustainmycrafthabit.com

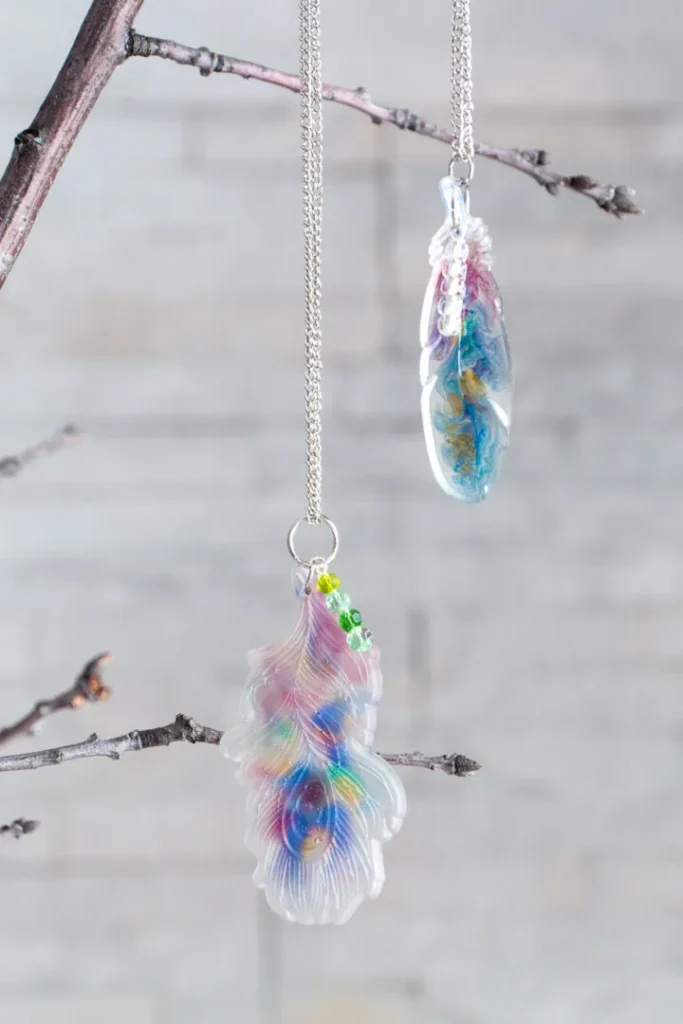
There’s something so magical about feathers in resin. 

I usually use soft neutrals or iridescent powders for a dreamy look. 

Attach to a leather cord or dainty chain, and you’ve got a beautiful boho necklace that looks like it came from a boutique.


18. Glow-in-the-Dark Garden Markers

A photograph of three homemade resin garden markers arranged neatly on a bright white table, illuminated by soft natural light. Each rectangular marker has rounded edges and displays a handwritten plant name in a black paint marker: “Basil”, “Mint”, and “Thyme”. The clear resin encases vibrant green glow-in-the-dark powder and delicate dried herb leaves, creating a rustic yet charming effect with subtle sparkles, especially noticeable under a faint UV light source subtly positioned behind the markers. A shallow depth of field focuses attention on the markers, with a blurred background of lush green foliage and dappled sunlight.

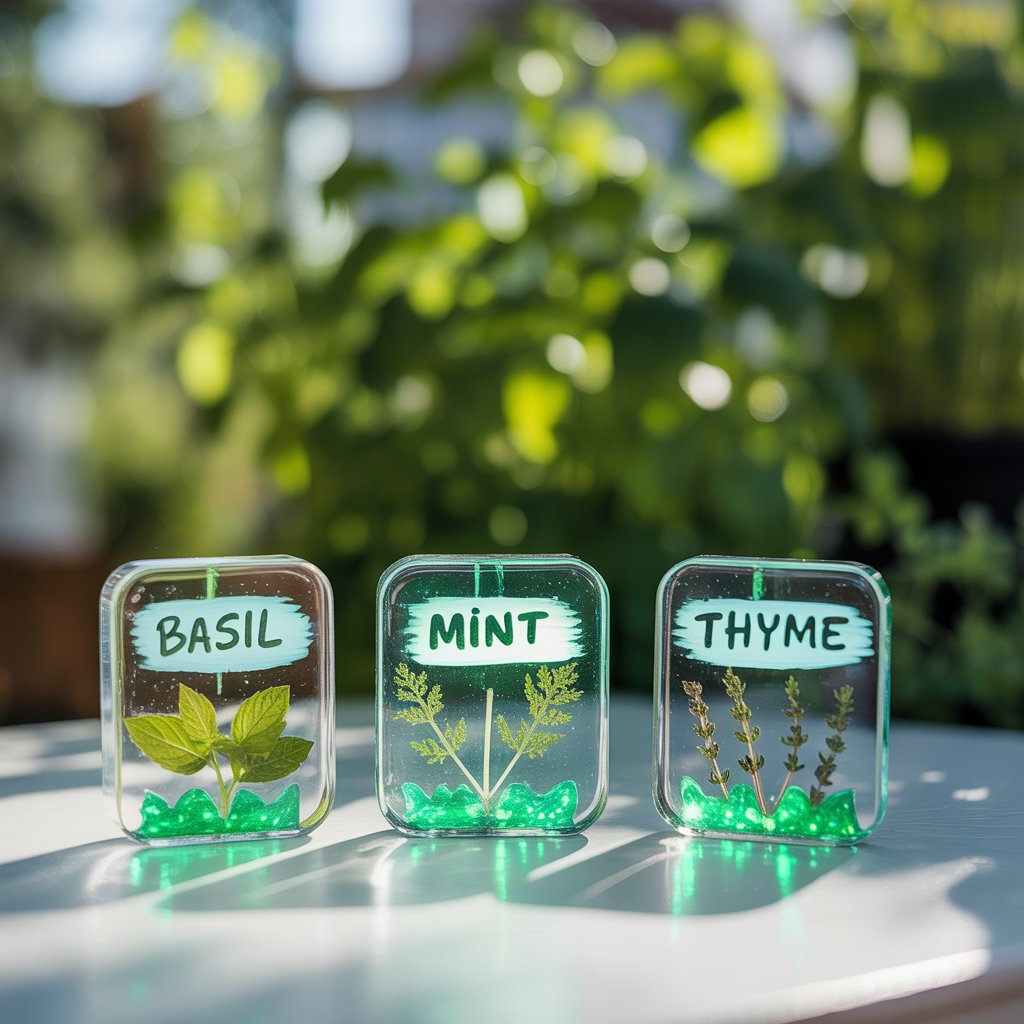
Total backyard game-changer. Mix glow powder with clear resin and pour into label molds. 

I write plant names on with a paint pen. 

They soak up the sun all day and glow softly at night. Makes late-night watering feel a little magical.


19. Resin Drawer Pulls

How to Make Drawer Pulls from Resin
Source: resincraftsblog.com

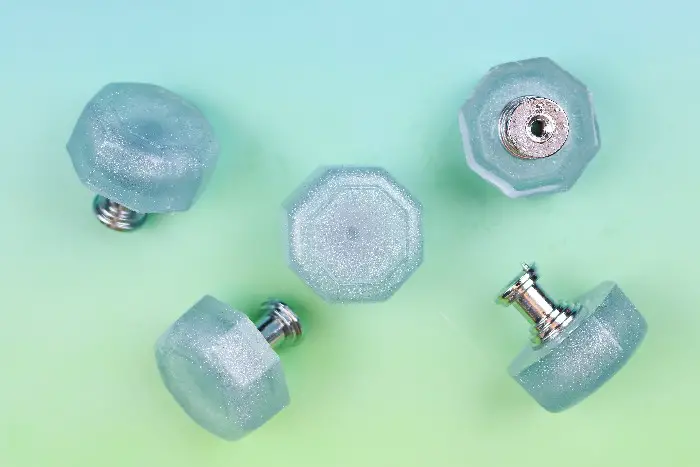
These are my favorite furniture upgrade! 

Use bold colors, pressed flowers, or shimmer to match your decor. 

Attach to drawer bases with screws, and boom—your old dresser looks brand new. 

I redid my craft drawers this way and smile every time I open them.


20. Resin Clock Face

A photograph of a handmade resin clock face presented on a pristine white table, showcasing a simple and elegant design. The round clock face features a mesmerizing swirl of navy, gold, and pearl-white pigments, punctuated by shimmering metallic flakes radiating outwards from a central brass hub. Black clock hands point to the numbers delicately painted around the edge in a minimalist style, while the reflective resin surface catches the soft overhead lighting. The clean background emphasizes the clock's design, creating a visually appealing and focused composition.

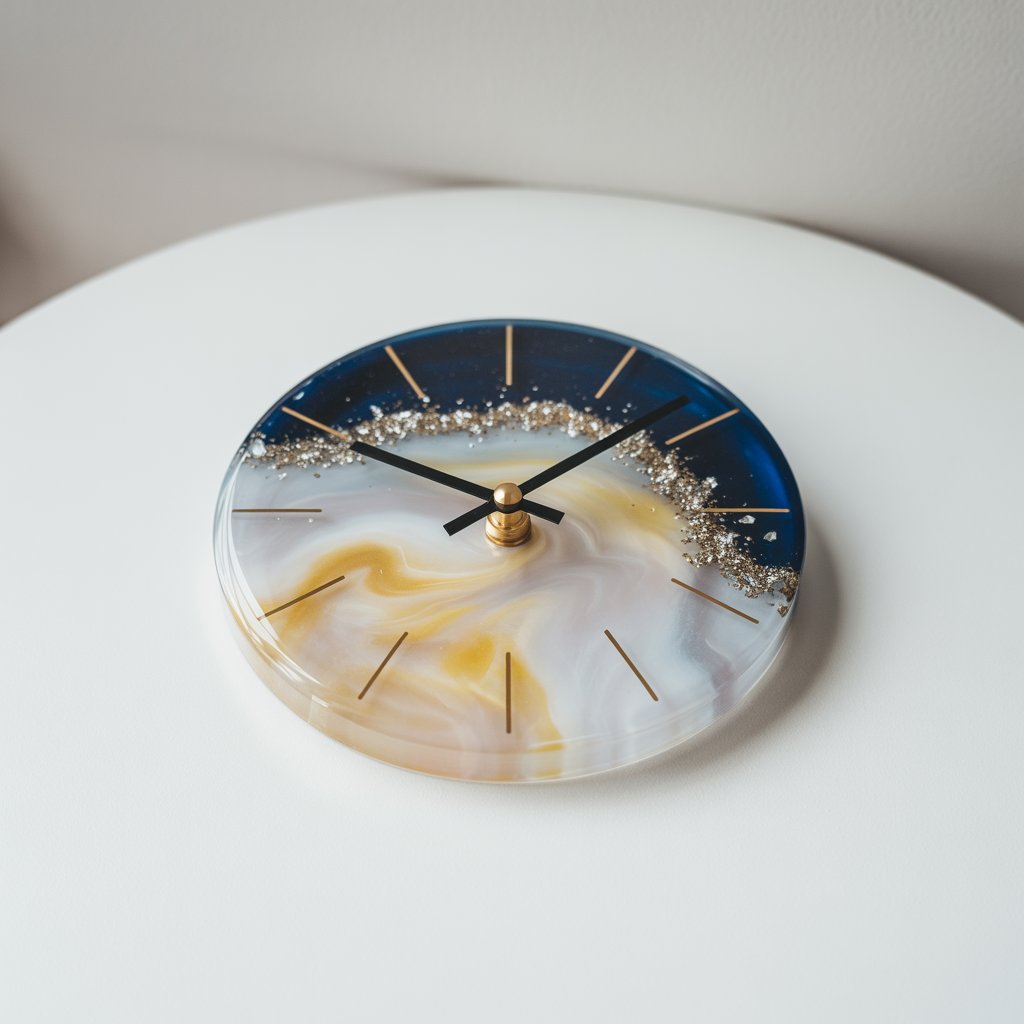
Make time beautiful. 

I love pouring resin into a circular mold with gold flakes, then adding a quartz clock kit. 

You can go abstract, floral, or minimalist depending on your style. 

It’s one of those projects that feels way more impressive than it is.


21. Resin Magnets

A photo of a simple homemade craft arrangement on a plain white table. There are three small round resin Hello Kitty objects. One has a swirling white design, another has embedded daisy petals, and the third has a soft lavender tone. The lighting highlights the reflective resin finish and gentle curvature of the Hello Kitty edges, giving them a polished, boutique appearance.

Quick, cute, and perfect for beginners. 

Use fun molds—hearts, fruit, even letters—and add whatever little things make you smile. 

Once they cure, glue on a magnet and stick them all over your fridge. 

Warning: once you start, it’s hard to stop making them!


Wrap Up

Resin crafts are fun, colorful, and full of creativity. 

You can make gifts, decorate your home, or just enjoy crafting with friends. 

There’s something for everyone, and the best part is—it’s easy to start. 

Grab some resin and let your imagination shine. 

Happy crafting!

resin crafts

Similar Posts