19 Irresistible Grilled Cheese Recipes for Cheese Lovers

Love grilled cheese?
You’re in the right place!
In this article, we’ll share some delicious grilled cheese recipes that are easy to make and super tasty.
From classic to creative, there’s something for everyone to enjoy.
Let’s get started!
1. Classic Grilled Cheese
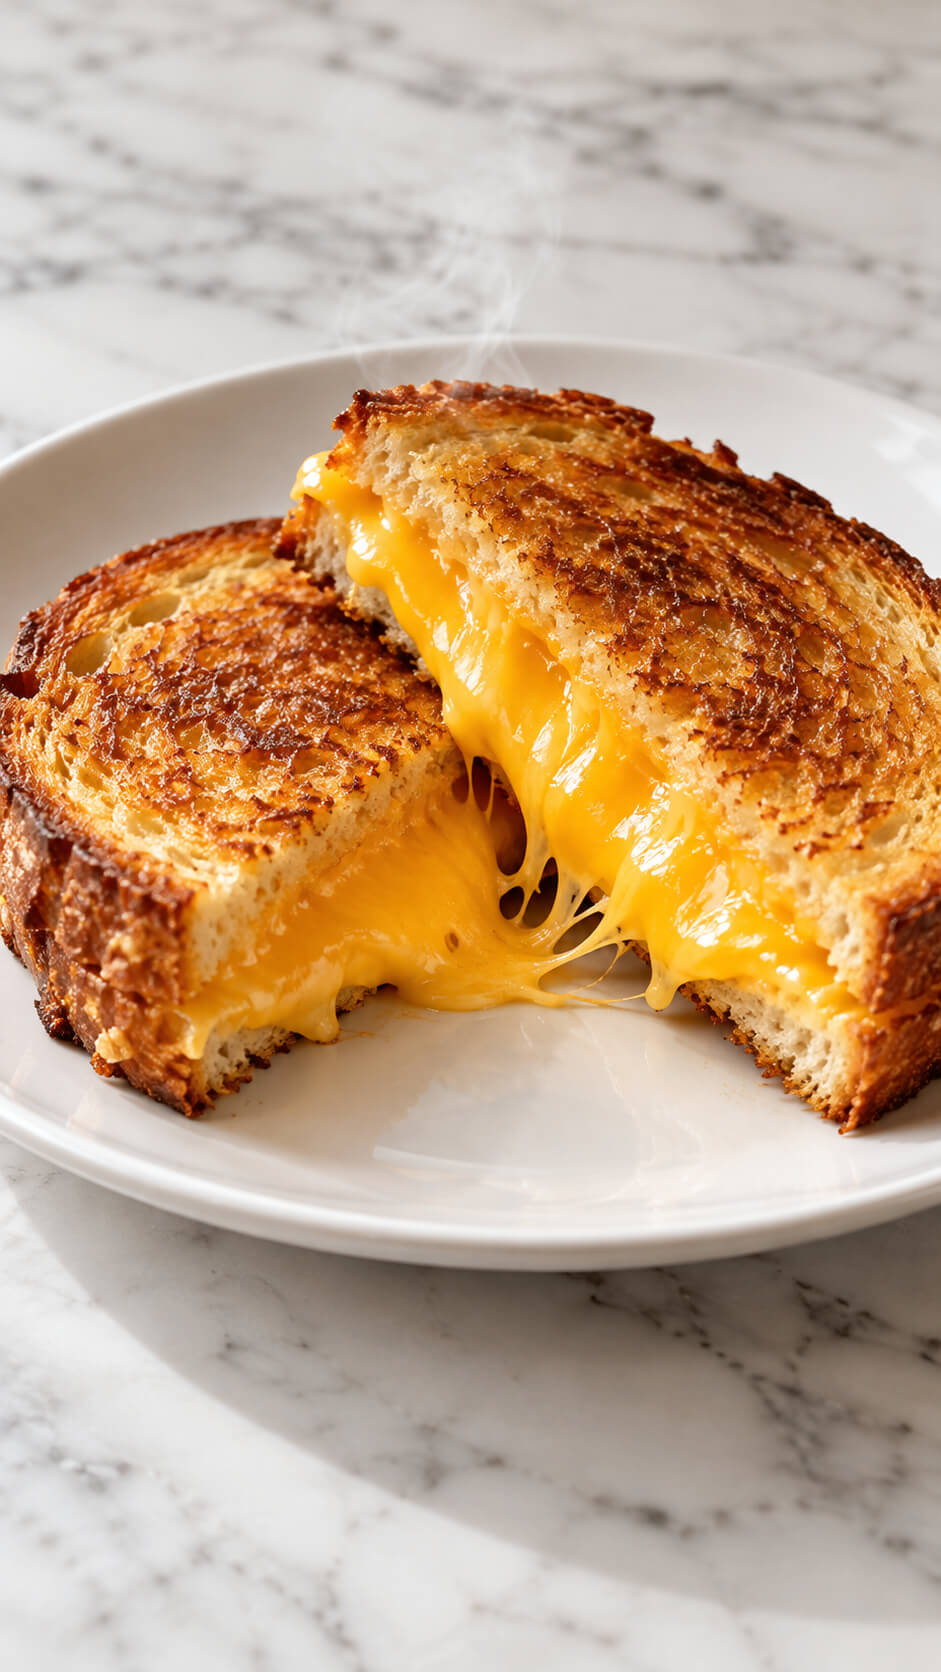
You can never go wrong with a timeless classic.
The golden, buttery bread with ooey-gooey melted cheddar cheese between two slices is comfort food at its finest.
Whether you’re serving it to picky eaters or those looking for a nostalgic treat, this grilled cheese never disappoints.
It’s simple yet endlessly satisfying, perfect for any occasion.
Ingredients
- 2 slices of bread (white, sourdough, or your favorite bread)
- 2–3 slices cheddar cheese, or about ½ cup shredded cheddar
- 1 tablespoon softened butter
- 1 teaspoon mayonnaise (optional, for extra crispiness)
Instructions
1. Prepare the bread and cheese
Place the two slices of bread on a clean work surface. Spread softened butter evenly over one side of each slice. If desired, spread a thin layer of mayonnaise over the butter for an extra-crispy, golden crust. Prepare the cheddar cheese by slicing it thinly or shredding it so it melts evenly.
2. Assemble the sandwich
Place one slice of bread in a pan or on a plate with the buttered side facing down. Arrange the cheddar cheese evenly over the unbuttered side, spreading it close to the edges for a cheesy bite throughout. Place the second slice of bread on top, with the buttered side facing outward.
3. Heat the frying pan
Place a nonstick frying pan or skillet over medium-low heat. Allow it to warm for about 1–2 minutes before adding the sandwich. Keeping the heat moderate helps the bread turn golden brown without burning before the cheese melts.
4. Cook the first side until golden brown
Place the assembled sandwich in the warm pan. Cook for approximately 3–4 minutes, pressing gently with a spatula to help the bread make even contact with the pan. Watch for a crisp, golden-brown crust and lower the heat if the bread starts browning too quickly.
5. Flip and melt the cheese
Carefully flip the sandwich with a spatula and cook the other side for another 3–4 minutes. The bread should become evenly golden and crispy while the cheddar softens into a smooth, gooey filling. If the bread browns before the cheese melts, cover the pan for a minute to trap heat and help the cheese melt.
6. Check the sandwich and remove it from the pan
Gently press the sandwich with the spatula and check that both sides are crisp and the cheese is fully melted. If necessary, cook for another minute over low heat. Transfer the sandwich to a plate and let it rest for about 1 minute so the melted cheese settles slightly.
7. Cut and serve the sandwich
Use a sharp knife to cut the grilled cheese diagonally into two halves. Arrange the halves on a clean white plate with the cheesy cut sides facing upward. Serve while warm to enjoy the contrast between the crunchy, buttery bread and the melted cheddar center.
Tip
For the perfect grilled cheese, cook it slowly over medium-low heat rather than using high heat. This allows the cheddar to melt completely while the bread develops a deep golden-brown crust. For an even creamier filling, combine cheddar with a little mozzarella, which adds extra cheese pull without overpowering the cheddar flavor.
2. Bacon Grilled Cheese
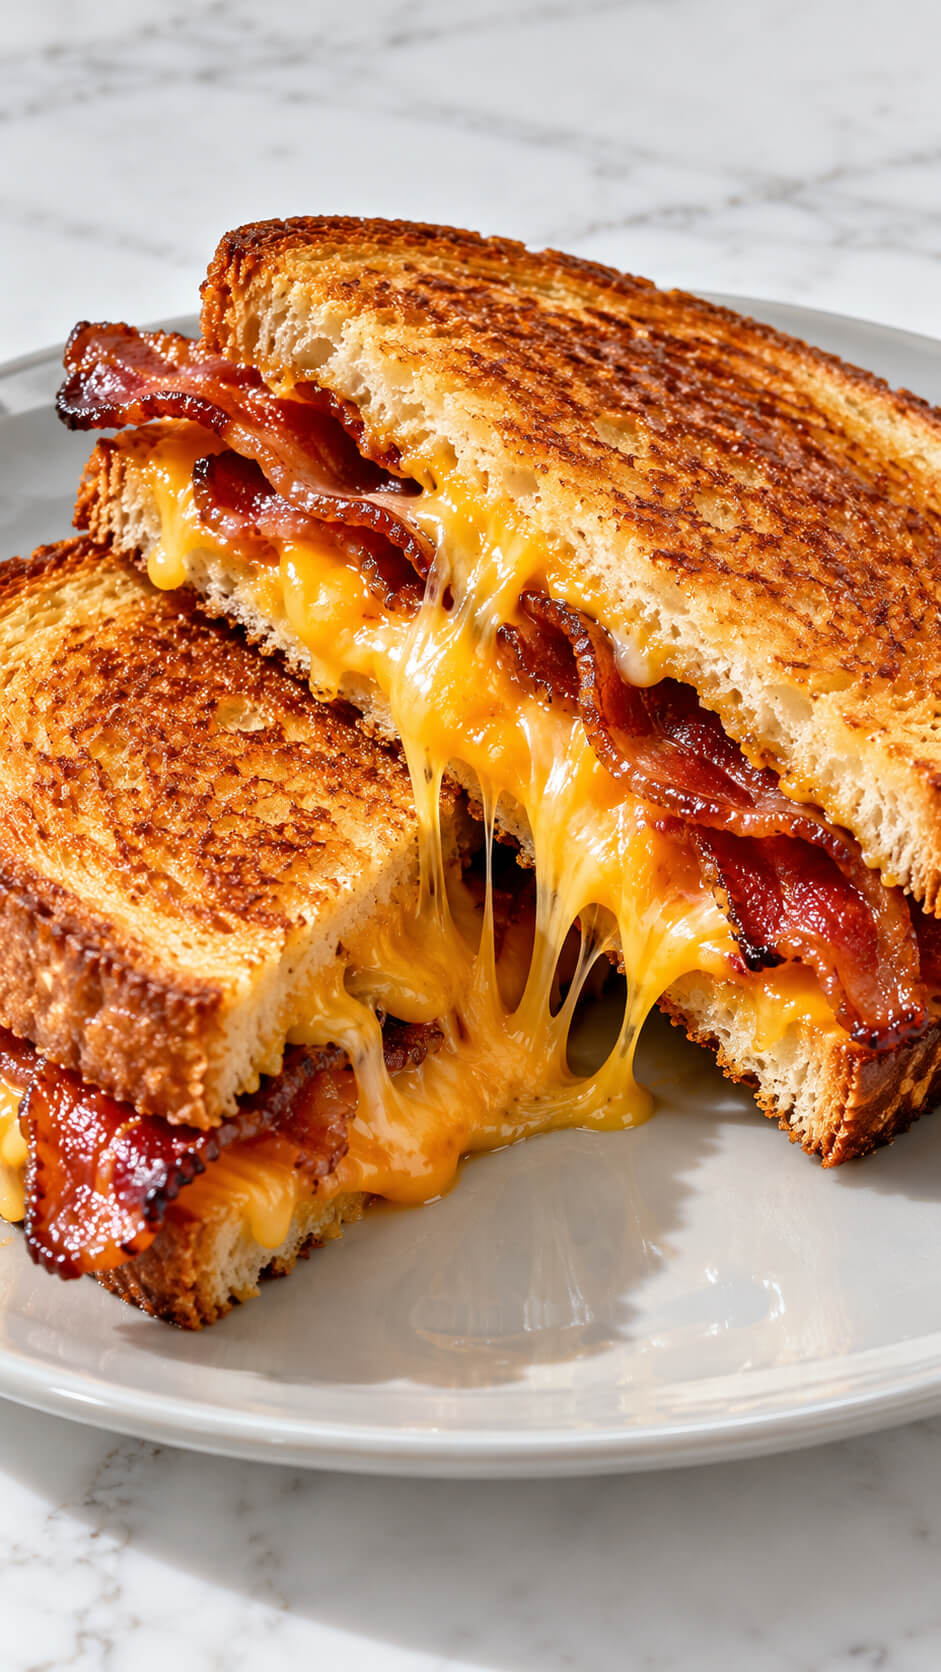
Add a smoky twist to your grilled cheese by layering crispy bacon between the bread slices.
The crunch of the bacon combined with the melty cheese takes this sandwich to the next level.
Serve it as a savory snack or pair it with tomato soup for a cozy meal.
Ingredients
- 4 slices of thick-cut white bread or sourdough bread
- 4 strips of bacon
- 1 cup (100 g) shredded cheddar cheese
- 2 tablespoons unsalted butter, softened
- 2 slices of cheddar cheese (optional, for extra cheesiness)
- 1 tablespoon mayonnaise (optional, for extra-crispy bread)
- A pinch of black pepper (optional)
Instructions
1. Cook the bacon until crispy
Place the bacon strips in a cold frying pan and cook over medium heat for 6–10 minutes, turning occasionally, until golden brown and crispy. Transfer the bacon to a paper towel-lined plate to drain excess grease. Once slightly cooled, break the strips in half if needed to fit the bread.
2. Prepare the bread with butter
Spread the softened butter evenly over one side of each bread slice. Make sure the butter reaches the edges to help the bread toast evenly and develop a rich, golden-brown crust. For extra crispiness, you can mix the butter with a thin layer of mayonnaise.
3. Assemble the sandwich with cheese and bacon
Place two bread slices butter-side down on a clean surface. Add a layer of shredded cheddar cheese, followed by the crispy bacon strips. Add the optional cheddar slices and finish with the remaining shredded cheese. Top each sandwich with another bread slice, keeping the buttered side facing outward.
4. Toast the sandwich over medium-low heat
Heat a nonstick frying pan over medium-low heat. Place the sandwiches in the pan and cook for 3–5 minutes on the first side, pressing gently with a spatula. Allow the bread to turn golden brown while the cheese begins to melt. Avoid using high heat, as the bread may burn before the cheese melts completely.
5. Flip the sandwich and melt the cheese
Carefully flip each sandwich using a wide spatula. Cook for another 3–5 minutes until the second side is golden and crispy and the cheddar cheese is fully melted. If the bread browns too quickly, reduce the heat and cover the pan for a minute or two to help the cheese melt evenly.
6. Slice the sandwich and serve
Transfer the sandwiches to a cutting board and let them rest for about 1 minute. Slice diagonally to reveal the layers of crispy bacon and gooey melted cheddar. Serve immediately while the bread is warm and crunchy and the cheese is still stretchy.
Tip
For the ultimate bacon grilled cheese, use freshly shredded cheddar and cook the sandwich slowly over medium-low heat. Freshly shredded cheese melts smoothly, while gentle heat gives the bread a crisp, buttery crust without burning it. For an even richer flavor, combine cheddar with a little mozzarella to create long, satisfying cheese pulls.
3. Tomato Basil Grilled Cheese
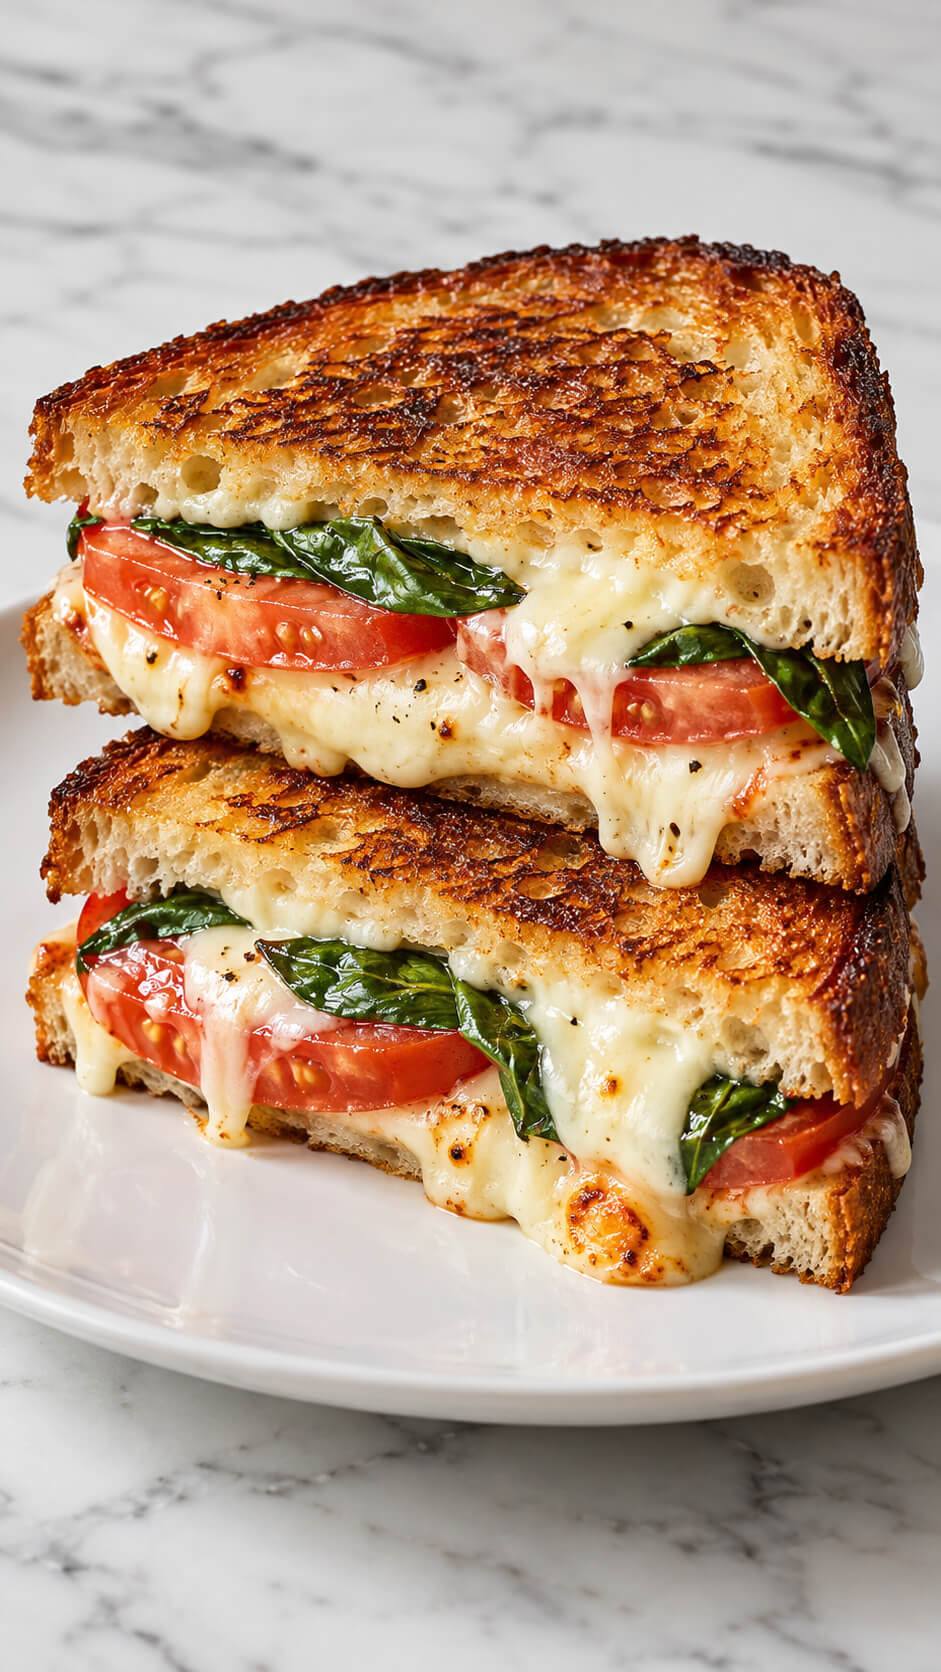
Inspired by the classic caprese, this grilled cheese features juicy slices of tomato and fresh basil leaves layered with mozzarella.
The vibrant flavors from the herbs and tomato perfectly complement the creamy cheese, creating a refreshing yet comforting sandwich.
Ingredients
- 4 slices of sourdough or artisan bread
- 200 g (7 oz) fresh mozzarella cheese, sliced
- 1 large ripe red tomato, thinly sliced
- 8–10 fresh basil leaves
- 2 tablespoons softened butter
- 1 tablespoon olive oil
- ¼ teaspoon salt, or to taste
- ¼ teaspoon freshly ground black pepper
- ¼ teaspoon dried Italian herbs (optional)
Instructions
1. Prepare the bread
Place the bread slices on a clean work surface. Spread softened butter evenly over one side of each slice, making sure to cover the edges. This helps the bread develop a beautiful golden-brown crust and a rich, buttery flavor when grilled.
2. Prepare the tomato and mozzarella
Wash the tomato and slice it thinly. Pat the tomato slices gently with a paper towel to remove excess moisture. Slice the mozzarella into even pieces so it melts quickly and distributes evenly throughout the sandwich.
3. Assemble the sandwich
Place two bread slices buttered-side down on a clean surface. Layer the mozzarella slices over the bread, followed by the tomato slices and fresh basil leaves. Season lightly with salt, black pepper, and dried Italian herbs if desired. Add another layer of mozzarella, then cover each sandwich with the remaining bread slices, keeping the buttered sides facing outward.
4. Heat the skillet
Place a nonstick skillet or frying pan over medium-low heat. Add the olive oil and allow it to warm gently. The pan should be hot enough to toast the bread slowly without burning it before the cheese melts.
5. Grill the sandwiches until golden
Place the assembled sandwiches in the skillet. Cook for approximately 4–5 minutes on the first side, pressing gently with a spatula to help the ingredients hold together. Allow the bread to develop a crisp, golden-brown crust with slightly charred edges.
6. Flip and melt the cheese
Carefully flip the sandwiches using a wide spatula. Cook the other side for another 3–5 minutes, until golden and crispy. If the bread is browning too quickly, reduce the heat. The mozzarella should become soft, stretchy, and deliciously melted, while the tomatoes warm through and release their flavor.
7. Cut and stack the sandwiches
Remove the sandwiches from the skillet and let them rest for about 1 minute. Using a sharp serrated knife, cut each sandwich diagonally in half. Stack the halves slightly on top of each other on a plate, positioning them so the melted mozzarella, red tomato slices, and green basil leaves are clearly visible.
8. Serve the grilled cheese
Serve immediately while the bread is still crunchy and the mozzarella is warm and gooey. Arrange the sandwich halves neatly on the plate and enjoy the combination of buttery toasted bread, creamy cheese, sweet tomato, and fragrant basil.
Tip
For the ultimate crispy grilled cheese, cook the sandwich over medium-low heat rather than high heat. This gives the mozzarella enough time to melt before the bread becomes too dark. Always pat the tomato slices dry to prevent a soggy sandwich, and use low-moisture mozzarella if you want a thicker, stretchier cheese pull.
4. Ham and Cheese Grilled Cheese
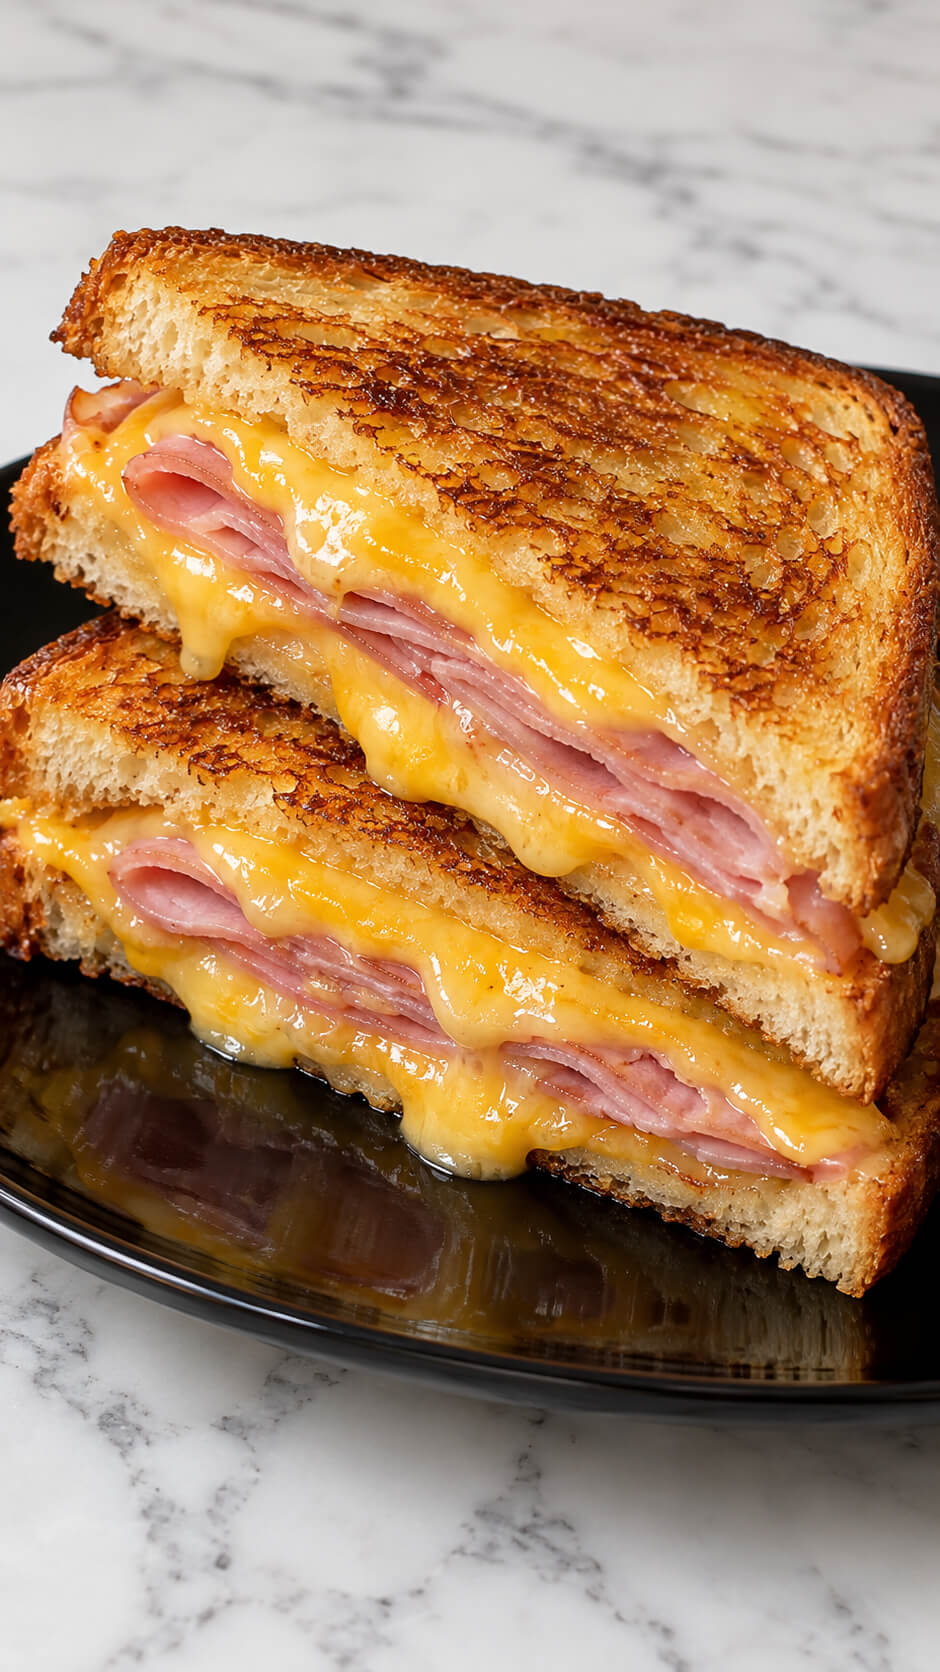
For an easy, protein-packed twist, add deli-sliced ham to your grilled cheese.
The salty, savory ham blends perfectly with the melty cheese, making it heartier.
This version is ideal for lunch, and kids love the combo of ham and cheese in every bite.
Ingredients
- 4 slices of sandwich bread
- 4 slices of ham
- 4 slices of cheddar cheese
- 2 tablespoons butter, softened
- 1 teaspoon mayonnaise (optional, for extra golden, crispy bread)
Instructions
1. Prepare the bread
Place the four slices of bread on a clean work surface. Spread a thin, even layer of softened butter over one side of each slice. If desired, spread a little mayonnaise over the butter for an extra crispy, golden-brown exterior.
2. Layer the ham and cheddar cheese
Place two slices of bread butter-side down on a plate or cutting board. Add two slices of cheddar cheese to each, followed by two slices of ham. Finish with another slice of cheddar cheese on top of the ham to help hold the filling together as it melts.
3. Assemble the sandwiches
Cover each prepared sandwich with the remaining bread slices, keeping the buttered sides facing outward. Press gently so the layers stay together without squeezing out the filling.
4. Heat the pan
Place a nonstick skillet or frying pan over medium-low heat. Allow it to warm for about 1–2 minutes. A moderate temperature helps the bread toast evenly while giving the cheddar cheese enough time to melt completely.
5. Grill the sandwiches until golden
Place the sandwiches in the heated pan and cook for approximately 3–5 minutes on the first side. Press gently with a spatula and check the underside occasionally. Flip when the bread is golden brown and crisp, then cook the other side for another 3–5 minutes.
6. Melt the cheese completely
Continue cooking over medium-low heat until both sides are evenly browned and the cheddar cheese is soft, creamy, and melted around the ham. If the bread browns too quickly, reduce the heat slightly and cover the pan for a minute to help the cheese melt.
7. Cut the sandwiches diagonally
Transfer the grilled sandwiches to a cutting board and let them rest for about one minute. Using a sharp knife, cut each sandwich diagonally into two triangles. This reveals the delicious layers of ham and melted cheddar cheese inside.
8. Stack and serve the sandwiches
Arrange the sandwich halves on a plate, stacking them slightly to show the golden crust and cheesy filling. Serve immediately while the bread is crisp and the cheese is warm and gooey.
Tip
For the best results, cook the sandwiches over medium-low heat rather than high heat. This allows the cheddar cheese to melt evenly without burning the bread. For an extra indulgent finish, add one additional slice of cheddar cheese to each sandwich and use freshly sliced bread for a crisp, buttery exterior.
5. Jalapeño Popper Grilled Cheese
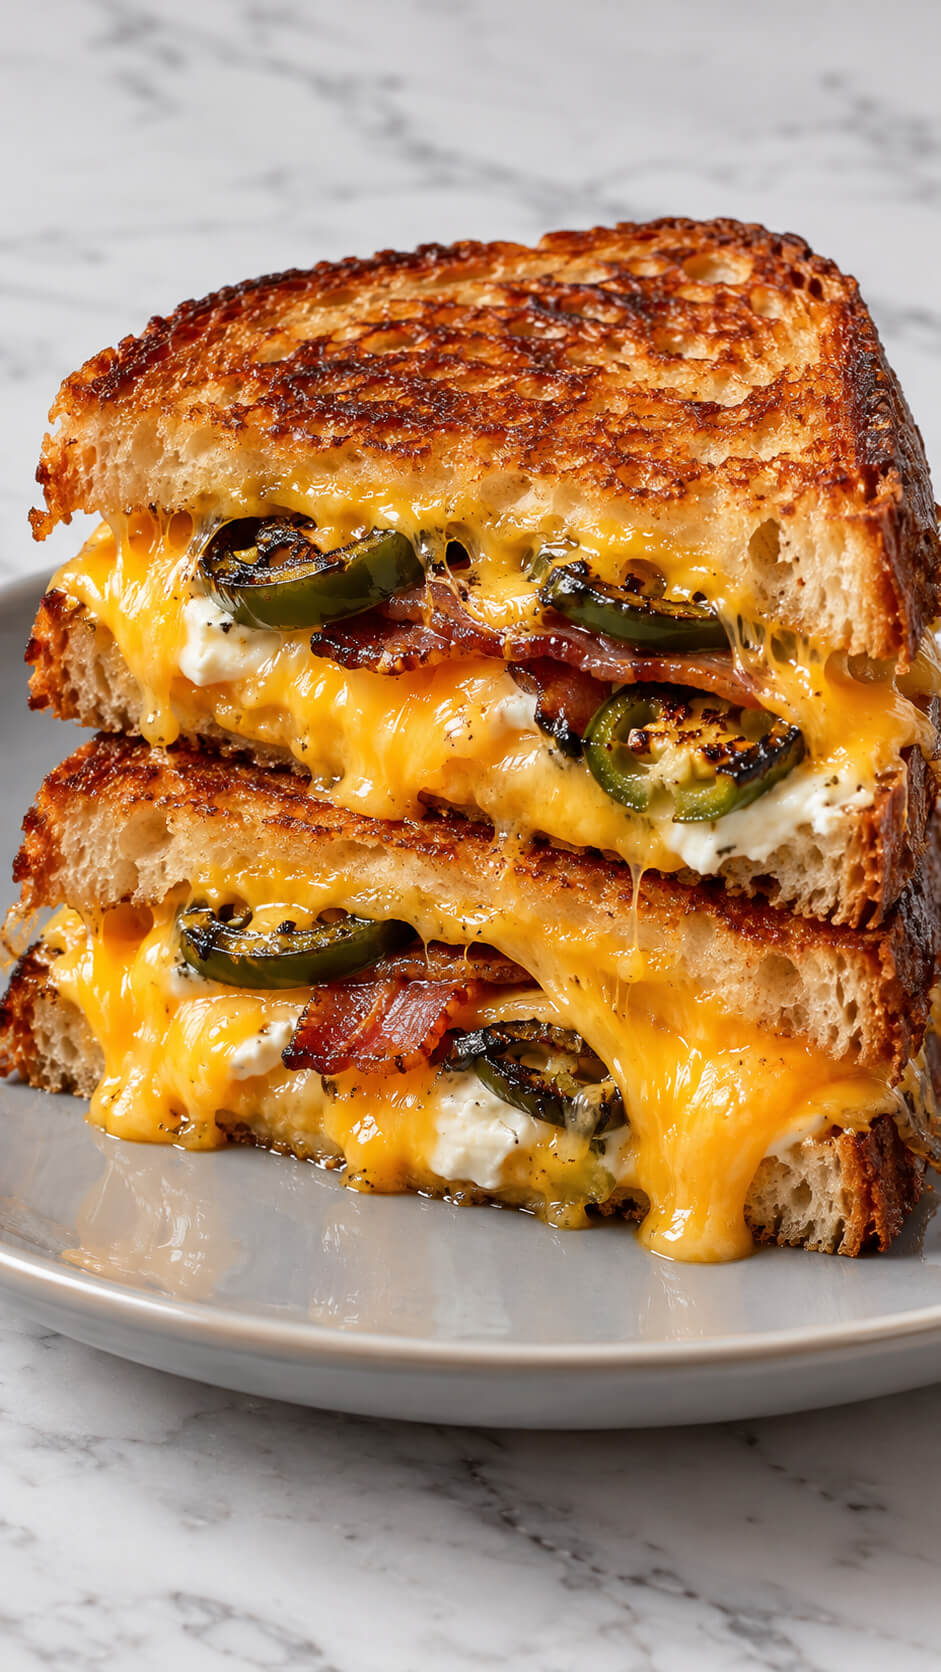
If you like a little heat, try this version inspired by jalapeño poppers.
It’s made with cream cheese, shredded cheddar, and sliced jalapeños for a spicy kick.
The cream cheese adds richness, while the jalapeños bring the heat—perfect for those who love bold flavors.
Ingredients
- 4 slices thick-cut sourdough or white bread
- 1½ cups shredded cheddar cheese
- 4 slices bacon
- 2–3 fresh jalapeños, sliced
- 4 tablespoons cream cheese, softened
- 3 tablespoons butter, softened
- ½ teaspoon garlic powder
- ¼ teaspoon black pepper
- ¼ teaspoon smoked paprika (optional)
Instructions
1. Cook the bacon
Cook the bacon in a skillet over medium heat for 5–8 minutes, turning occasionally until crispy. Transfer it to a paper towel-lined plate to drain excess grease, then break or cut each slice into smaller pieces.
2. Grill the jalapeños
Slice the jalapeños into thin rings, removing the seeds if you prefer a milder flavor. Place them in the same skillet and cook for 2–3 minutes, turning occasionally until softened and lightly charred. Set aside.
3. Prepare the creamy cheese mixture
Place the softened cream cheese in a small bowl and mix it with the garlic powder, black pepper, and smoked paprika, if using. Stir until smooth and well combined, creating a rich, flavorful spread.
4. Assemble the sandwiches
Spread butter evenly over one side of each bread slice. Turn the bread over and spread the cream cheese mixture on the unbuttered sides. Add a generous layer of shredded cheddar, followed by the grilled jalapeños and crispy bacon. Top with more cheddar and cover with the remaining bread slices, keeping the buttered sides facing outward.
5. Grill the sandwiches until golden
Heat a skillet over medium-low heat. Place the assembled sandwiches in the pan and cook for 3–5 minutes on each side, pressing gently with a spatula. Flip carefully and continue cooking until both sides are deeply golden brown and the cheddar has melted completely. Reduce the heat if the bread browns too quickly before the cheese melts.
6. Melt the cheese completely
Once both sides are crisp, cover the skillet with a lid for 1–2 minutes to help the cheese melt evenly. Remove the lid and check that the filling is hot, creamy, and stretchy. Allow an extra minute over low heat if needed.
7. Cut and stack the sandwiches
Transfer the sandwiches to a cutting board and let them rest for 1–2 minutes so the melted cheese settles slightly. Cut each sandwich diagonally in half using a sharp knife. Stack the halves on a plate with the cut sides facing forward to reveal the gooey cheddar, grilled jalapeños, creamy cheese, and bacon.
Tip
For the ultimate crispy crust and extra-creamy center, grate your own cheddar cheese instead of using pre-shredded cheese, which often contains anti-caking agents. Cook the sandwich over medium-low heat to give the cheese enough time to melt without burning the bread. For extra heat, leave some jalapeño seeds in the filling.
6. Avocado Grilled Cheese
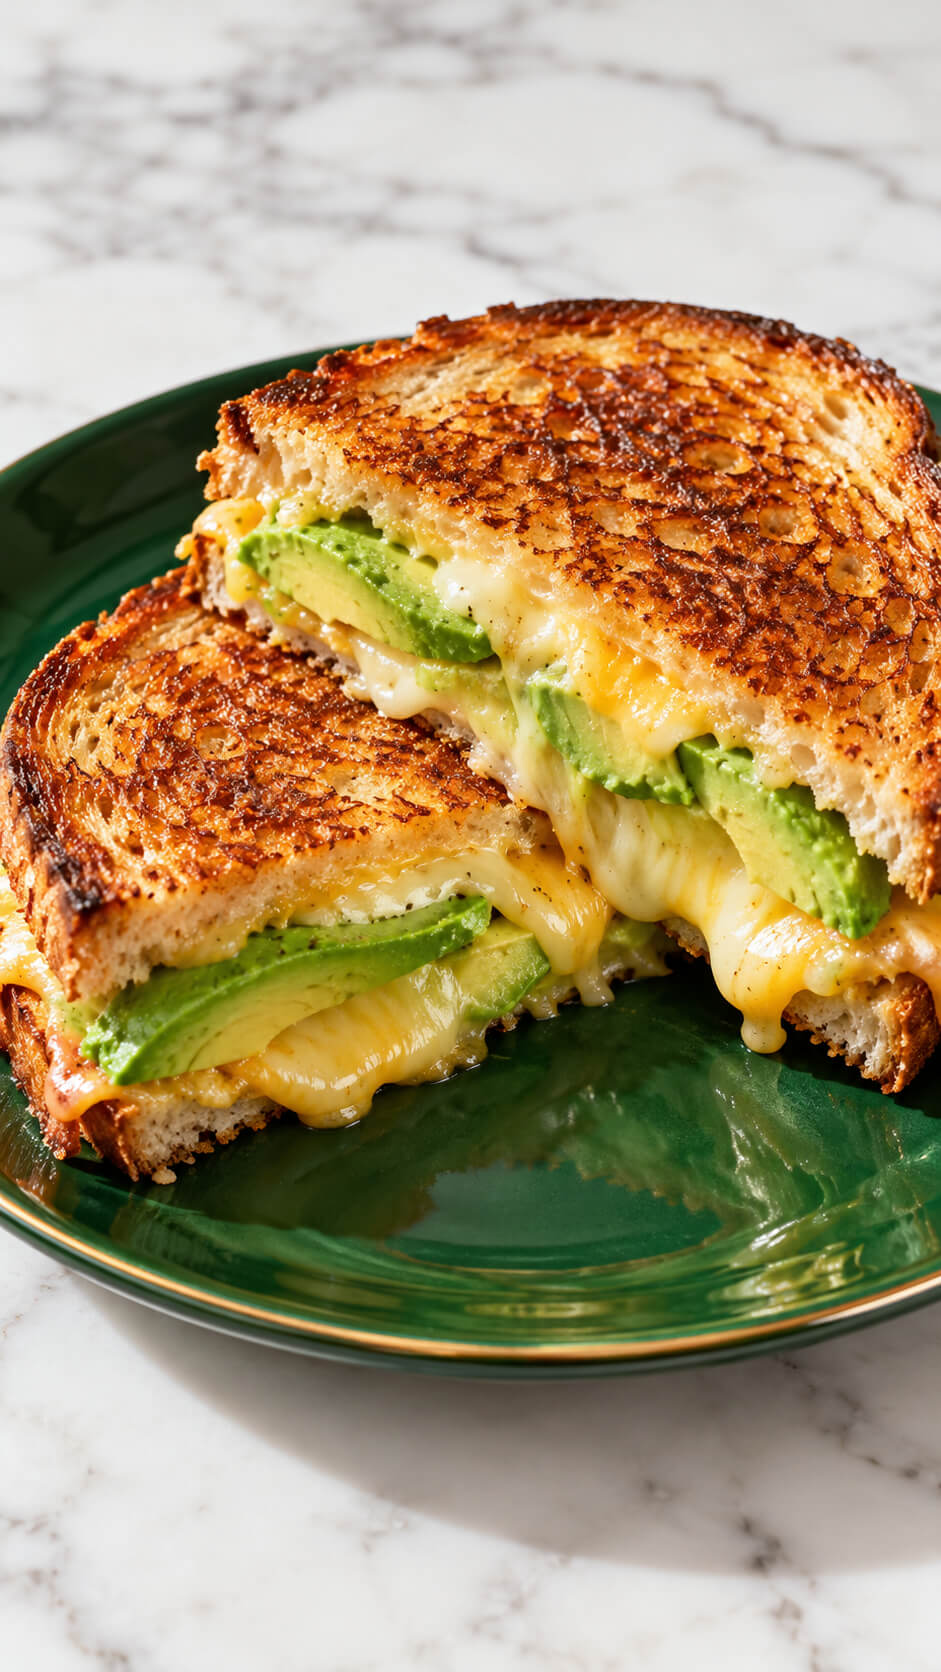
Make your grilled cheese healthier and more filling by adding creamy avocado slices.
The buttery avocado pairs beautifully with melted cheese and crispy bread, adding a smooth texture and rich flavor.
It’s a great way to sneak in some healthy fats and keep things interesting.
Ingredients
- 4 slices of bread (sourdough or white bread)
- 1 ripe avocado, sliced
- 1 cup (100 g) shredded mozzarella or cheddar cheese
- 2 tablespoons butter, softened
- ¼ teaspoon salt, or to taste
- ¼ teaspoon black pepper
- ¼ teaspoon garlic powder (optional)
Instructions
1. Prepare the avocado
Cut the avocado in half, remove the pit, and scoop out the flesh. Slice it into thin, even pieces so it layers easily inside the sandwich. Season lightly with salt and black pepper to enhance its natural creamy flavor.
2. Butter the bread
Spread softened butter evenly over one side of each bread slice. This will help the bread develop a crispy, golden-brown crust as it cooks. Sprinkle a little garlic powder over the butter if you want extra flavor.
3. Add the cheese and avocado
Place two bread slices on a clean surface with the unbuttered sides facing up. Sprinkle half of the shredded cheese over each slice, arrange the avocado slices evenly on top, and finish with the remaining cheese. The cheese helps hold the avocado in place and creates a gooey filling.
4. Assemble the sandwiches
Place the remaining bread slices on top, with the buttered sides facing outward. Press each sandwich gently so the ingredients stay together while cooking. Make sure the avocado and cheese are spread evenly to help the sandwich heat through.
5. Cook until golden and crispy
Heat a nonstick skillet over medium-low heat. Place the sandwiches in the skillet and cook for about 3–5 minutes on each side, pressing gently with a spatula. Flip carefully and continue cooking until both sides are golden brown and the cheese has melted completely.
6. Slice the sandwiches
Transfer the cooked sandwiches to a cutting board and let them rest for about one minute. Use a sharp knife to cut each sandwich diagonally in half. This reveals the creamy green avocado and melted cheese inside while keeping the crispy bread intact.
7. Serve the sandwich
Arrange the sandwich halves on a plate with the cut sides facing upward to showcase the filling. Serve immediately while the cheese is still warm and stretchy and the bread remains crisp.
Tip
For the best results, cook the sandwich over medium-low heat rather than high heat. This allows the cheese to melt fully before the bread becomes too dark. Use a ripe but firm avocado to achieve a creamy texture without making the sandwich soggy.
7. Pesto Grilled Cheese
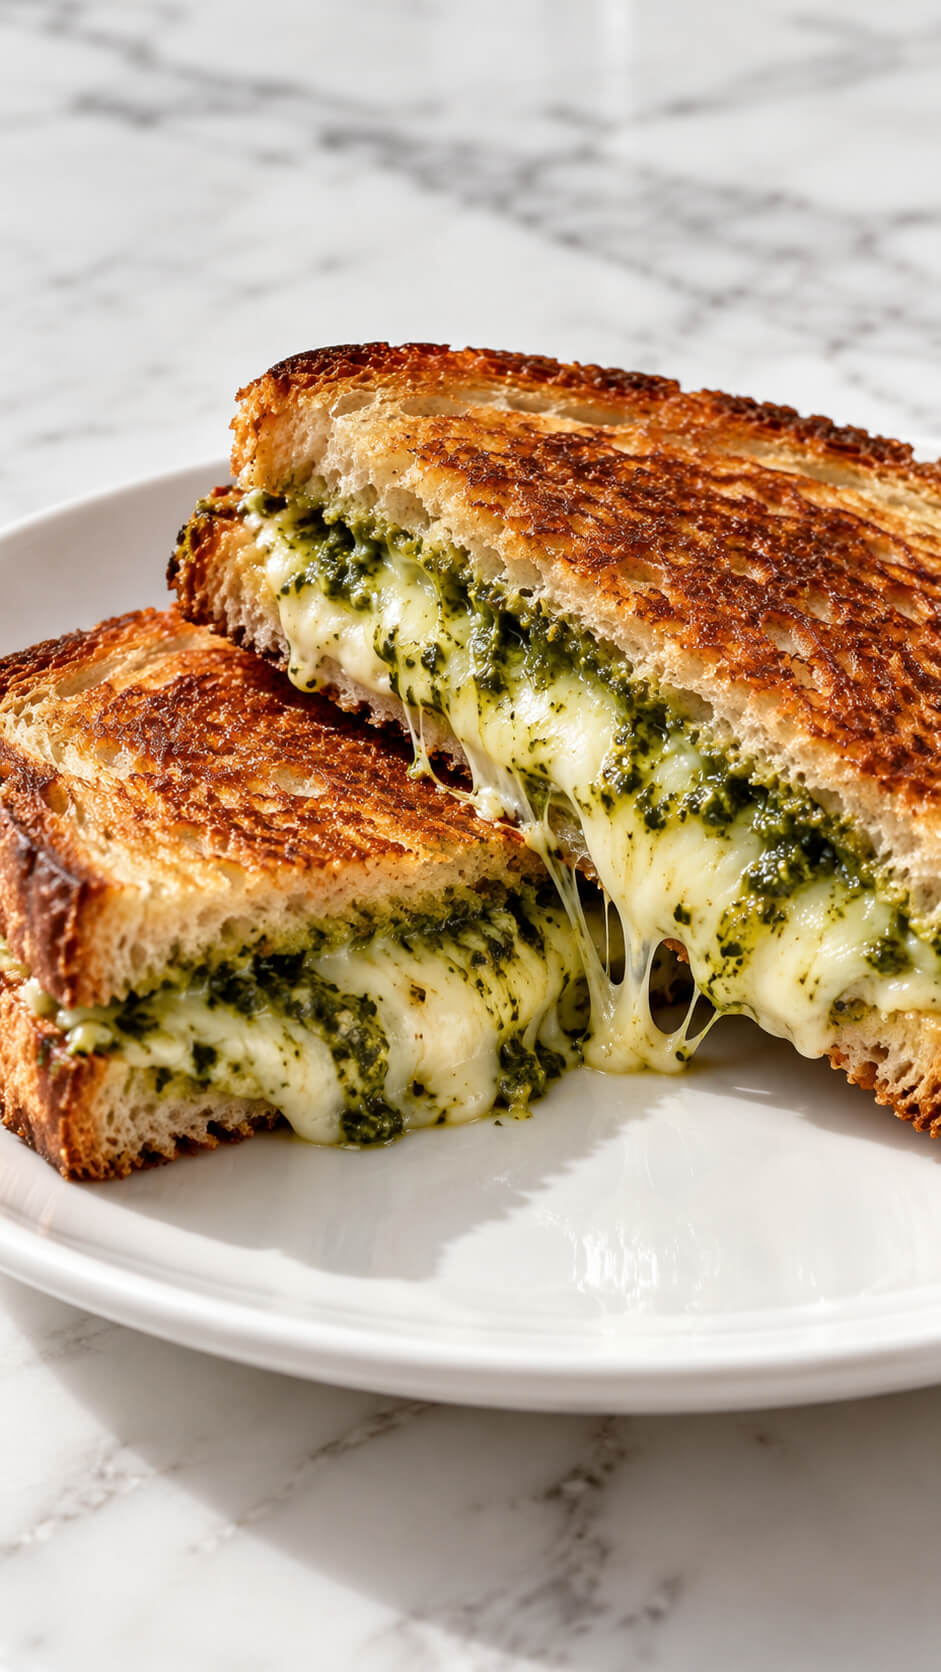
Brighten up your grilled cheese with a smear of fresh pesto.
The basil, garlic, and pine nuts from the pesto give this sandwich an aromatic punch, elevating the traditional flavor.
Combine it with mozzarella or provolone for a Mediterranean-inspired twist.
Ingredients
- 4 slices sourdough bread or thick-cut sandwich bread
- 1 cup (100–120 g) shredded mozzarella cheese
- 3 tablespoons basil pesto
- 2 tablespoons softened butter
- 2 tablespoons grated Parmesan cheese (optional)
- 1 tablespoon olive oil (optional, for extra crispiness)
Instructions
1. Prepare the bread and pesto
Lay the bread slices on a clean work surface. Spread the basil pesto evenly over one side of each slice, making sure to cover the surface for a rich, herby flavor in every bite.
2. Add the mozzarella cheese
Divide the shredded mozzarella between two slices of bread, spreading it evenly over the pesto. Sprinkle with Parmesan cheese if desired, then place the remaining bread slices on top with the pesto-covered sides facing inward.
3. Butter the outside of the sandwiches
Spread softened butter evenly over the outer sides of each sandwich. For an extra-crispy crust, mix the butter with a little olive oil before spreading it onto the bread.
4. Heat the skillet
Place a nonstick skillet or frying pan over medium-low heat. Allow it to warm for a minute or two before adding the sandwiches. Keeping the heat moderate helps the bread become golden and crisp without burning before the mozzarella melts.
5. Grill the sandwiches until golden
Place the sandwiches in the warm skillet and cook for 3–5 minutes on the first side, pressing gently with a spatula. Cook until the bread is crisp and deeply golden brown, with the cheese beginning to melt.
6. Flip and melt the cheese
Carefully flip each sandwich and cook for another 3–5 minutes. If the bread is browning too quickly, reduce the heat. Cover the skillet briefly with a lid to help the mozzarella melt completely while keeping the outside crunchy.
7. Slice and serve the sandwich
Transfer the grilled sandwiches to a plate and let them rest for about one minute. Slice each sandwich diagonally to reveal the stretchy mozzarella and green pesto swirls inside. Serve immediately while the cheese is warm and gooey.
Tip
For the best pesto grilled cheese, cook the sandwich over medium-low heat rather than high heat. This allows the mozzarella to melt evenly while the bread develops a crunchy, golden crust. Use thick-cut sourdough for extra texture, and avoid adding too much pesto, as excess moisture can make the bread soggy.
8. BBQ Chicken Grilled Cheese
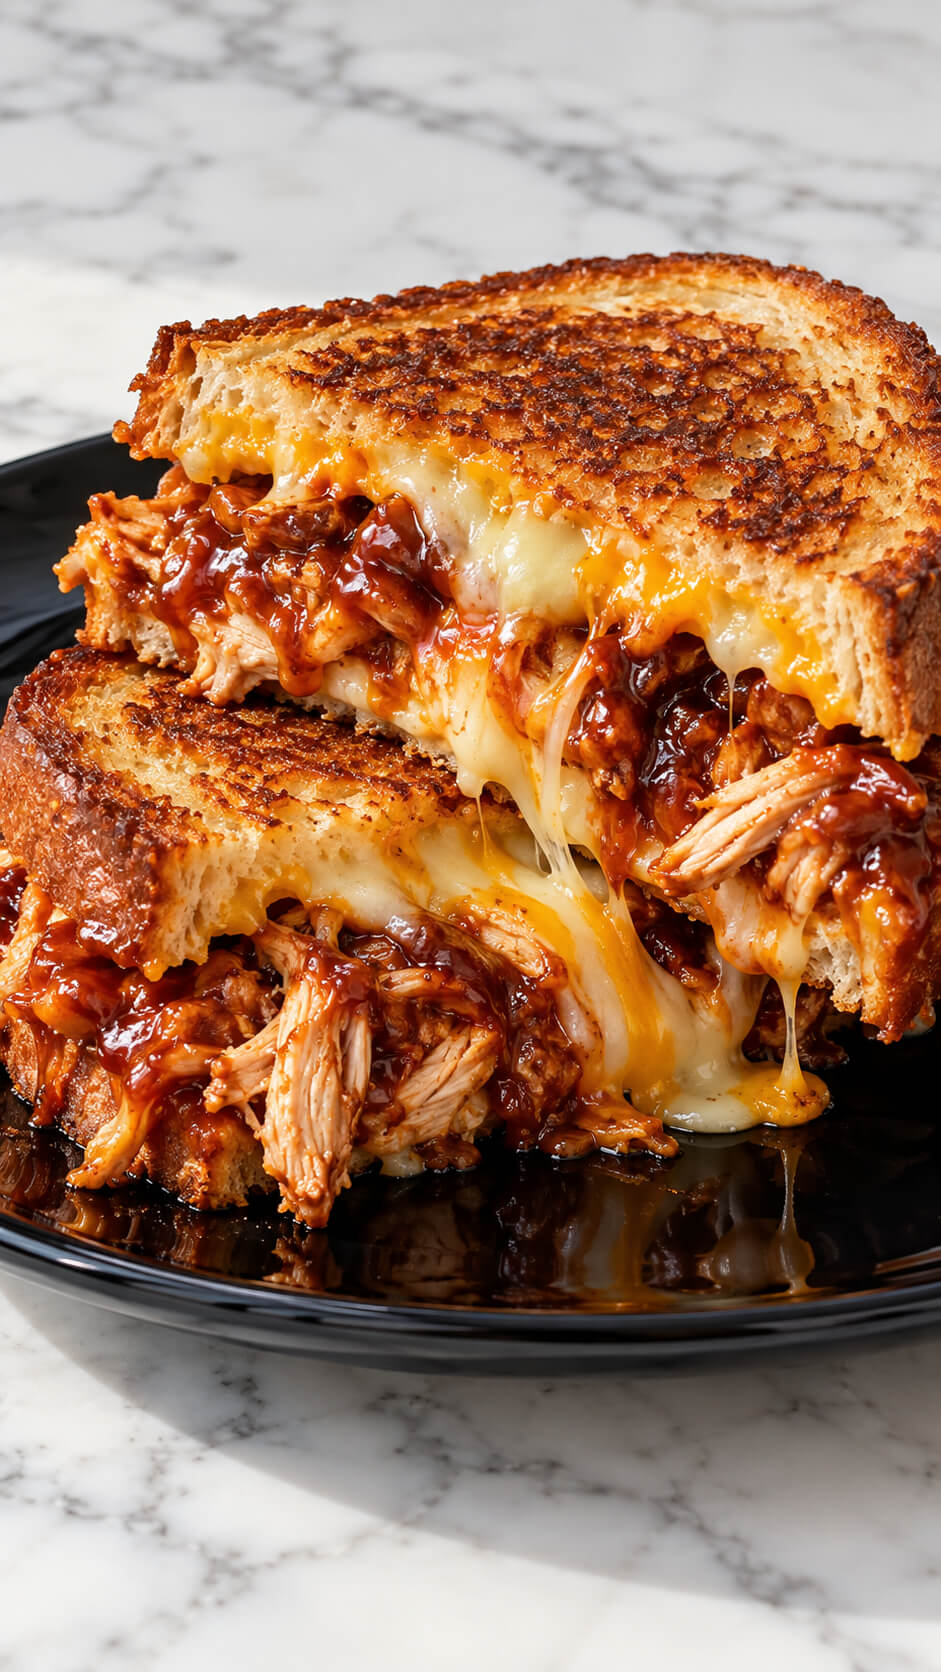
Transform your grilled cheese into a hearty meal by adding shredded BBQ chicken.
The sweet and smoky barbecue sauce combined with gooey cheese makes this a flavorful, filling sandwich.
It’s perfect for a quick dinner or a fun weekend lunch.
Ingredients
- 4 slices thick-cut sourdough or white bread
- 2 cups cooked shredded chicken
- ½ cup barbecue sauce
- 1 cup shredded cheddar cheese
- 1 cup shredded mozzarella cheese
- 3 tablespoons butter, softened
- 1 tablespoon mayonnaise (optional, for extra golden crust)
- ¼ teaspoon garlic powder
- ¼ teaspoon smoked paprika
- Salt and black pepper, to taste
Instructions
1. Prepare the shredded chicken
Place the cooked shredded chicken in a medium bowl. Add the barbecue sauce, garlic powder, smoked paprika, a pinch of salt, and black pepper. Mix thoroughly until every piece of chicken is coated in the thick, smoky sauce. The chicken should be moist and flavorful without being overly watery.
2. Mix the cheeses
Combine the shredded cheddar and mozzarella in a separate bowl. Cheddar provides a rich, sharp flavor, while mozzarella creates the stretchy, gooey texture that makes this sandwich irresistible. Shredding the cheese yourself helps it melt smoothly.
3. Prepare the bread
Spread softened butter evenly over one side of each bread slice. For an extra-crispy crust, mix the butter with the optional mayonnaise before spreading. Keep the coating even, reaching all the way to the edges so the bread browns beautifully during cooking.
4. Assemble the sandwiches
Place two bread slices on a clean surface with the unbuttered sides facing up. Add a generous layer of the cheese mixture, followed by the BBQ chicken. Top with more cheese to help hold the filling together, then cover with the remaining bread slices, keeping the buttered sides facing outward.
5. Toast the sandwiches slowly
Heat a nonstick skillet over medium-low heat. Place the sandwiches in the skillet and cook for about 4–5 minutes on the first side until the bread becomes golden brown and crisp. Avoid using high heat because the bread may burn before the cheese melts.
6. Flip and melt the cheese
Carefully flip each sandwich using a wide spatula. Cook for another 4–5 minutes, gently pressing down to help the filling settle. If the bread browns too quickly, reduce the heat and cover the skillet briefly to help the cheese melt completely.
7. Check the filling
Remove the sandwiches from the skillet once both sides are deeply golden and the cheese is melted throughout. If the chicken was refrigerated before cooking, ensure the filling reaches 165°F (74°C). Allow the sandwiches to rest for about 1–2 minutes so the cheese settles slightly while remaining deliciously gooey.
8. Cut and serve the sandwiches
Place the sandwiches on a plate and cut each one diagonally with a sharp knife. Arrange the halves with the cut sides facing upward to showcase the shredded BBQ chicken, melted cheddar, mozzarella, and glossy barbecue sauce. Serve immediately while the bread is crispy and the cheese is still stretchy.
Tip
For the ultimate indulgent sandwich, use a combination of sharp cheddar and mozzarella, and keep the heat at medium-low so the cheese melts before the bread becomes too dark. If your BBQ chicken is very saucy, drain off any excess liquid before assembling to prevent soggy bread. For an extra smoky flavor, choose a hickory-style barbecue sauce.
9. Spinach and Artichoke Grilled Cheese
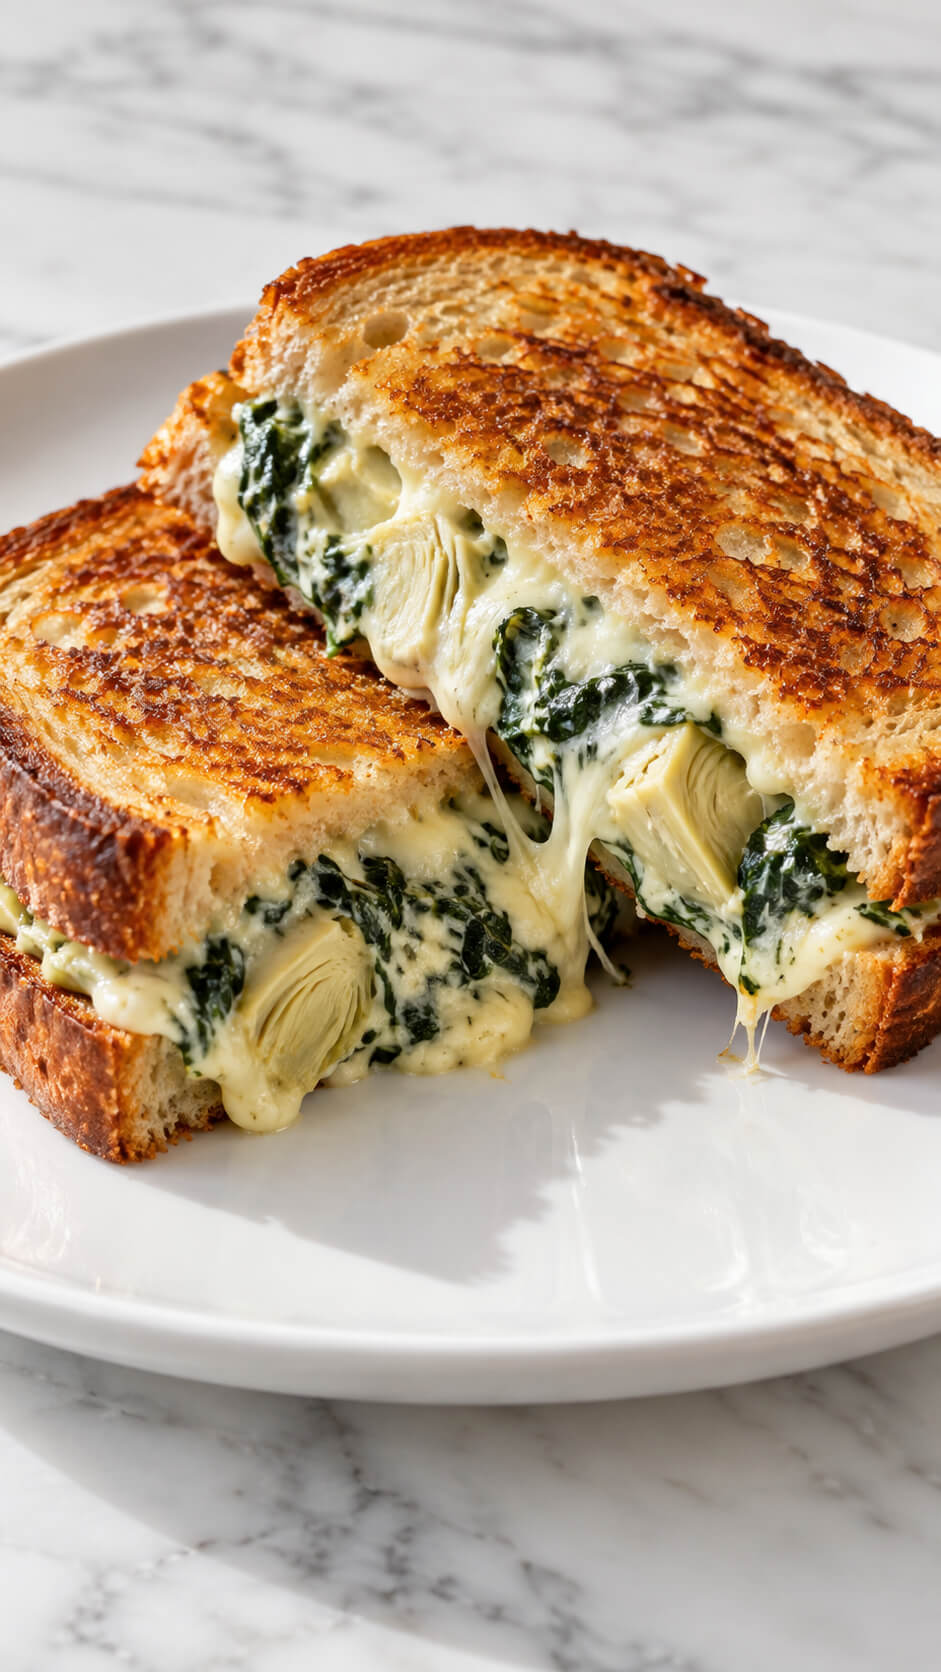
Take inspiration from your favorite dip and incorporate spinach and artichokes into your grilled cheese.
The creamy, cheesy filling gets a burst of flavor from the artichokes, while spinach adds a subtle earthiness.
This version is indulgent yet packed with some greens!
Ingredients
- 4 slices sourdough or thick-cut sandwich bread
- 1 cup fresh spinach, roughly chopped
- ½ cup canned or jarred artichoke hearts, drained and chopped
- ½ cup shredded mozzarella cheese
- ¼ cup cream cheese, softened
- ¼ cup grated Parmesan cheese
- 1 small garlic clove, minced
- 2 tablespoons butter, softened
- 1 tablespoon mayonnaise (optional, for extra creaminess)
- ¼ teaspoon salt, or to taste
- ¼ teaspoon black pepper
Instructions
1. Prepare the spinach and artichokes
Heat a small skillet over medium heat and add the chopped spinach. Cook for 1–2 minutes until wilted, stirring occasionally. Add the minced garlic and cook for another 30 seconds until fragrant. Remove from the heat and allow the spinach to cool slightly. Squeeze out excess moisture if needed, then stir in the chopped artichoke hearts.
2. Mix the creamy cheese filling
In a medium bowl, combine the softened cream cheese, mozzarella, Parmesan, mayonnaise if using, salt, and black pepper. Add the spinach and artichoke mixture and stir until everything is evenly combined. The filling should be thick, creamy, and packed with vegetables and cheese.
3. Prepare the bread slices
Lay the four bread slices on a clean work surface. Spread the softened butter evenly over one side of each slice. These buttered sides will form the crispy, golden exterior of the sandwiches.
4. Assemble the sandwiches
Place two bread slices on the work surface with the buttered sides facing down. Spread the creamy spinach and artichoke filling evenly over the unbuttered sides. Divide the filling between the slices, spreading it close to the edges without overfilling. Top each with the remaining bread slices, keeping the buttered sides facing outward.
5. Toast the sandwiches until golden
Heat a nonstick skillet over medium-low heat. Place the sandwiches in the skillet and cook for 3–5 minutes on the first side until the bread is golden brown and crisp. Press gently with a spatula to help the bread make even contact with the pan.
6. Melt the cheese filling completely
Carefully flip the sandwiches and cook for another 3–5 minutes on the other side. Keep the heat at medium-low so the bread does not burn before the cheese melts. If necessary, cover the skillet for 1–2 minutes to help the filling become warm, creamy, and gooey.
7. Slice and serve the sandwiches
Transfer the grilled cheese sandwiches to a plate and let them rest for about one minute. Slice each sandwich in half to reveal the creamy spinach and artichoke filling. Serve immediately while the bread is crisp and the cheese is warm and melted.
Tip
For the crispiest crust and creamiest filling, remove as much moisture as possible from the spinach and artichokes before mixing them with the cheese. Cook the sandwiches over medium-low heat rather than high heat, allowing the cheese to melt thoroughly while the bread develops a rich, golden-brown crust.
10. Apple and Cheddar Grilled Cheese
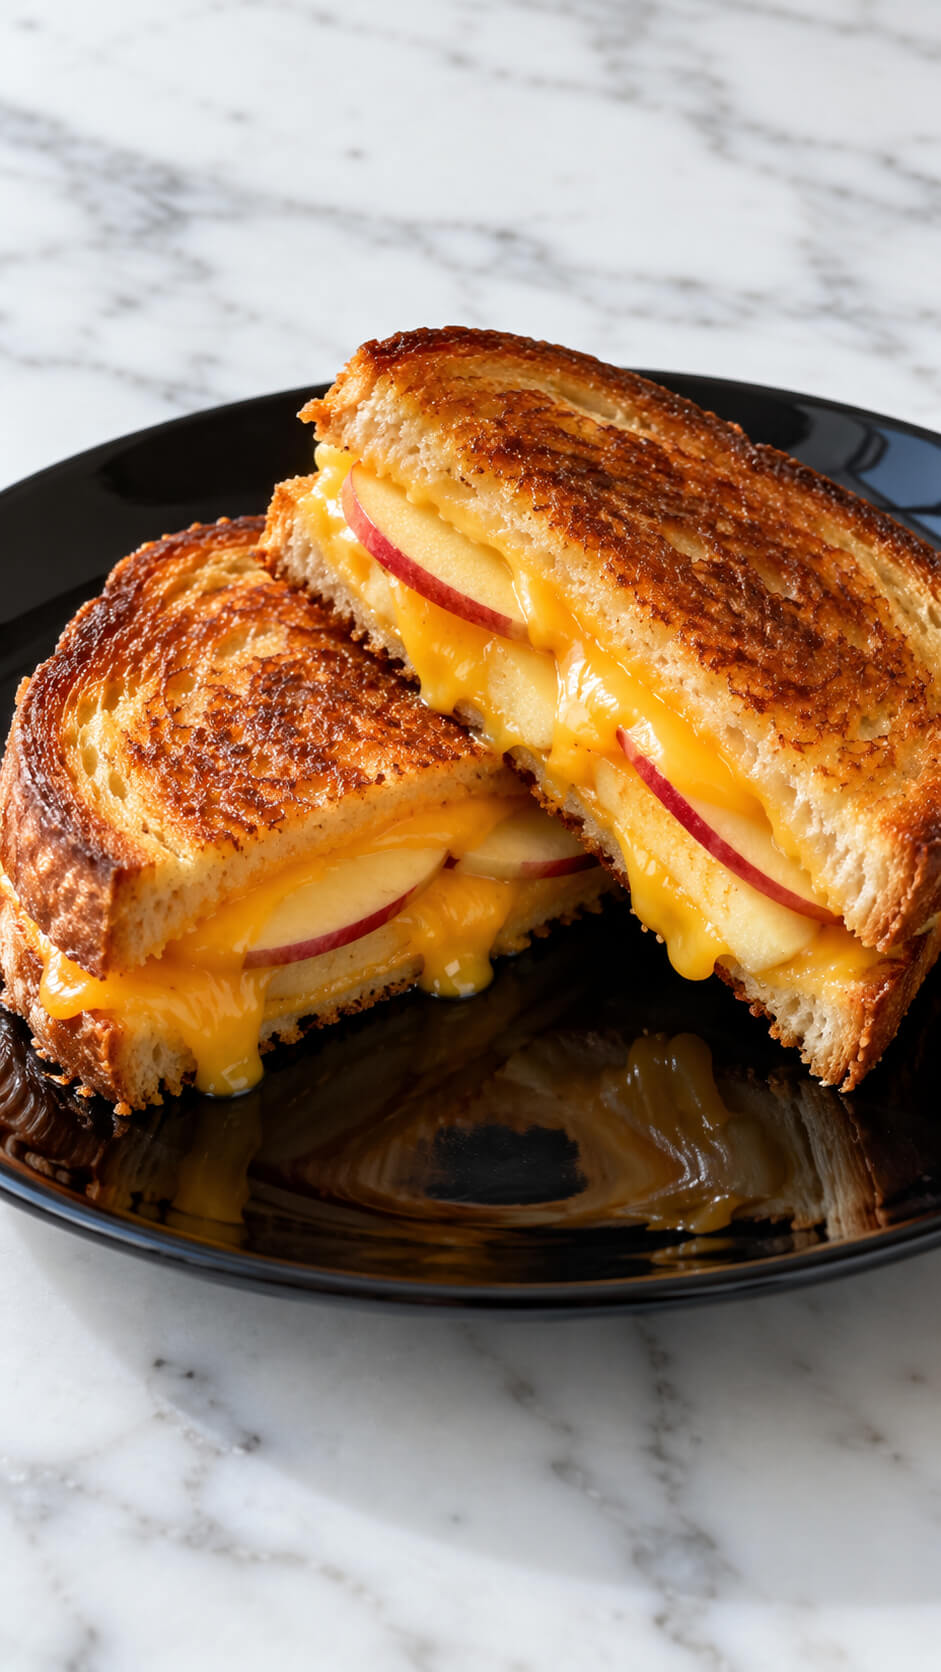
For a sweet and savory combination, layer thin slices of crisp apple with sharp cheddar.
The sweetness and crunch of the apple add a delightful contrast to the rich, melty cheese.
This grilled cheese is perfect for fall or when you want something a little different.
Ingredients
- 4 slices of sourdough or thick-cut bread
- 1 medium apple, red or green, thinly sliced
- 1 cup (100–120 g) sharp cheddar cheese, grated or thinly sliced
- 2 tablespoons butter, softened
- 1 teaspoon Dijon mustard (optional)
- A pinch of black pepper (optional)
Instructions
1. Prepare the apple slices
Wash the apple thoroughly, remove the core, and slice it into thin pieces. Pat the slices dry with a paper towel to remove excess moisture, helping the sandwich stay crisp rather than soggy.
2. Prepare the bread
Spread a thin, even layer of softened butter on one side of each bread slice. If desired, spread a little Dijon mustard on the unbuttered side of two slices for a tangy flavor that balances the sweetness of the apple.
3. Assemble the sandwich
Place two bread slices on a clean surface with the buttered sides facing down. Add a layer of sharp cheddar cheese, arrange the thin apple slices on top, and finish with another layer of cheddar. The cheese on both sides helps hold the filling together as it melts. Cover each sandwich with the remaining bread slices, keeping the buttered sides facing outward.
4. Heat the pan
Place a nonstick skillet or frying pan over medium-low heat. Allow it to warm for a minute or two before adding the sandwiches. Moderate heat is important because it allows the cheese to melt fully without burning the bread.
5. Grill the sandwiches until golden
Place the assembled sandwiches in the warm pan with the buttered sides touching the pan. Cook for about 3–5 minutes, pressing gently with a spatula, until the underside is golden brown and crisp.
6. Flip and melt the cheese
Carefully flip the sandwiches and cook for another 3–5 minutes. Reduce the heat if the bread browns too quickly. Continue cooking until both sides are beautifully toasted and the cheddar is completely melted, with the apple slices warmed but still slightly crisp.
7. Cut the sandwiches in half
Transfer the grilled sandwiches to a cutting board and let them rest for about one minute. Cut each sandwich diagonally in half to reveal the layers of melted cheddar and thinly sliced apple. The brief resting time helps the filling settle while keeping the cheese deliciously gooey.
8. Serve the grilled cheese
Arrange the sandwich halves on a plate with the cut sides facing upward to showcase the melted cheese and apple slices. Serve immediately while the bread is crisp and the cheese is warm and stretchy.
Tip
For the best sweet-and-savory flavor, use a tart apple such as Granny Smith with sharp cheddar cheese. Cook the sandwich over medium-low heat and cover the pan briefly during cooking to help the cheese melt evenly without over-toasting the bread. For an extra touch of flavor, add a tiny pinch of black pepper or a drizzle of honey inside the sandwich before grilling.
11. Brie and Pear Grilled Cheese
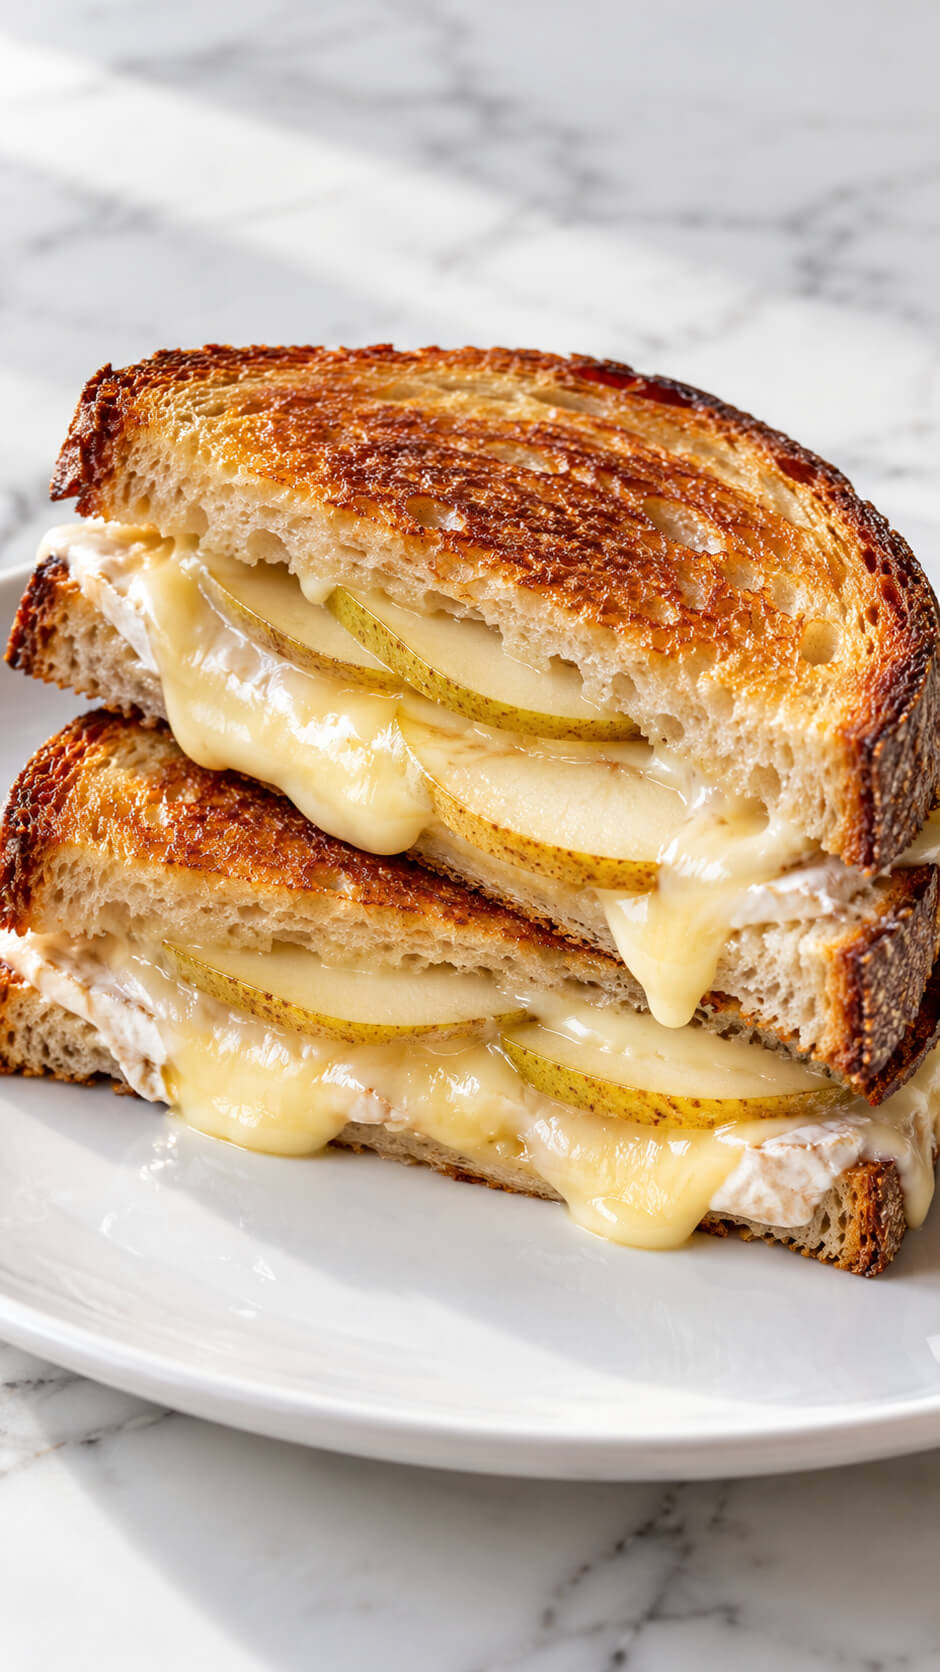
Sophisticated and elegant, the brie and pear combo makes for an elevated grilled cheese.
The soft, buttery brie melts into a creamy delight, while the thinly sliced pear adds a hint of sweetness.
Ideal for a brunch or a light dinner when you’re feeling fancy.
Ingredients
- 4 slices sourdough bread
- 150 g Brie cheese, sliced
- 1 medium ripe pear, thinly sliced
- 2 tablespoons butter, softened
- 1 teaspoon honey (optional)
- A pinch of freshly ground black pepper (optional)
Instructions
1. Prepare the pear slices
Wash the pear, remove the core, and slice it thinly. Thin slices fit neatly inside the sandwich and soften slightly as the cheese melts, adding a delicate sweetness and juicy texture.
2. Prepare the Brie cheese
Slice the Brie into thin pieces, keeping the rind on if desired. Brie rind is edible and softens during cooking. Having the cheese sliced before assembling the sandwich helps it melt evenly.
3. Assemble the sandwich
Spread butter evenly over one side of each bread slice. Place two slices of bread buttered-side down, then layer the Brie and pear slices over the unbuttered sides. Drizzle with a little honey if you prefer a sweeter flavor, and add a pinch of black pepper for balance. Top with the remaining bread slices, keeping the buttered sides facing outward.
4. Heat the pan
Place a nonstick skillet or frying pan over medium-low heat and allow it to warm for 1–2 minutes. Avoid high heat because the bread may brown too quickly before the Brie has melted completely.
5. Grill the sandwich until golden
Place the assembled sandwiches in the warm pan. Cook for 3–5 minutes on the first side until the bread develops a crisp, golden-brown crust. Press gently with a spatula to encourage even contact with the pan.
6. Flip and melt the cheese
Carefully flip the sandwiches and cook for another 3–5 minutes. Reduce the heat if the bread browns too quickly. Continue cooking until both sides are crisp and golden, the Brie is soft and creamy, and the pear slices are warmed through.
7. Rest and slice the sandwich
Transfer the grilled sandwiches to a plate and let them rest for about 1 minute. Cut each sandwich diagonally with a sharp knife to reveal the melted Brie and delicate pear layers. Allowing the sandwich to rest briefly helps the filling settle while remaining deliciously gooey.
8. Serve the sandwich
Serve immediately while the bread is warm and crisp and the Brie is melted. Arrange the sandwich halves on a plate, with the cut sides facing upward to showcase the creamy cheese and pear slices.
Tip
For the best results, use ripe but firm pears, such as Bartlett or Anjou, so they provide sweetness without becoming mushy. Cook the sandwich over medium-low heat to achieve a beautifully toasted crust while giving the Brie enough time to melt. For an extra gourmet touch, drizzle a little honey over the pear slices before closing the sandwich.
12. Mushroom and Swiss Grilled Cheese
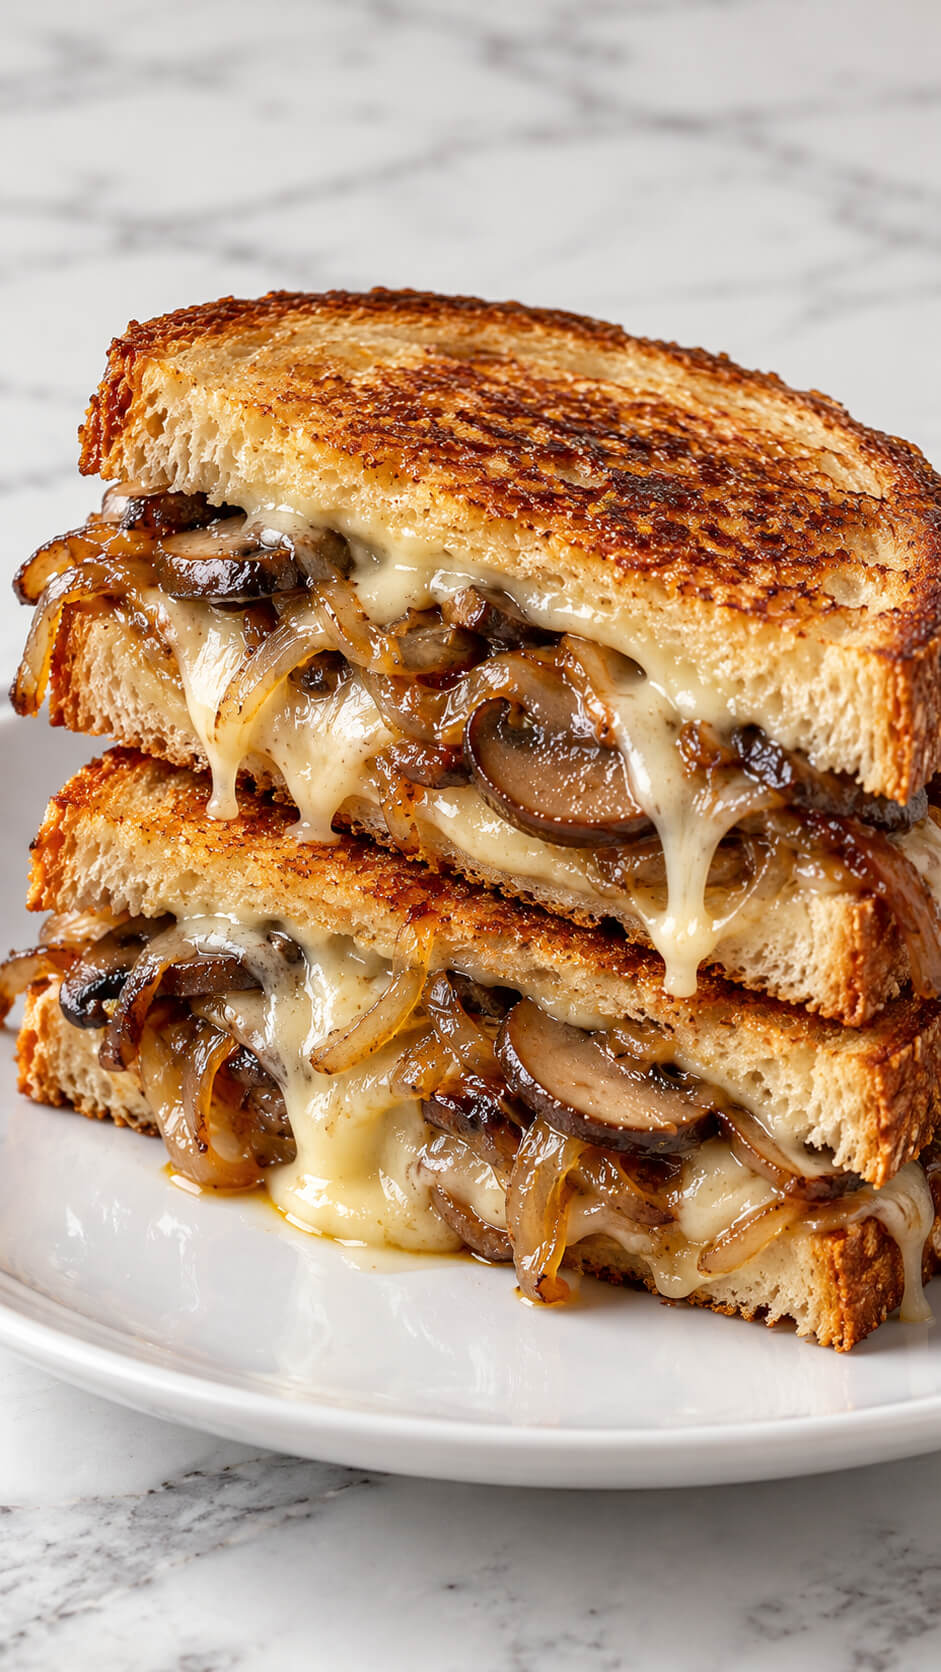
Earthy mushrooms sautéed in butter and garlic pair beautifully with nutty Swiss cheese in this gourmet grilled cheese.
The mushrooms add depth and richness, while the Swiss cheese adds a creamy, tangy element.
It’s a perfect option for mushroom lovers.
Ingredients
- 4 slices sourdough bread or thick-cut sandwich bread
- 4 slices Swiss cheese
- 1 cup mushrooms, thinly sliced
- 1 large onion, thinly sliced
- 3 tablespoons butter, softened
- 1 tablespoon olive oil
- 1 teaspoon fresh thyme leaves or ½ teaspoon dried thyme
- ¼ teaspoon garlic powder
- ¼ teaspoon black pepper
- ½ teaspoon salt, or to taste
- 1 teaspoon balsamic vinegar (optional)
Instructions
1. Slice the mushrooms and onions
Clean the mushrooms with a damp paper towel and slice them thinly. Peel the onion and cut it into thin strips. Having the ingredients ready before cooking helps the filling cook evenly and makes assembling the sandwiches easier.
2. Caramelize the onions
Heat 1 tablespoon of butter and 1 tablespoon of olive oil in a skillet over medium-low heat. Add the sliced onions and cook for 20–30 minutes, stirring occasionally, until they become soft, golden-brown, and sweet. If the onions begin sticking, add a small splash of water. Stir in the balsamic vinegar, if using, during the final minute of cooking.
3. Sauté the mushrooms
In the same skillet, add the sliced mushrooms and cook over medium-high heat for 5–8 minutes. Allow the moisture to evaporate and let the mushrooms develop a deep brown color. Add the thyme, garlic powder, black pepper, and salt, then stir well. Cook until the mushrooms are tender and fragrant.
4. Prepare the bread
Spread the remaining butter evenly over one side of each bread slice. Make sure the butter reaches the edges to help the bread develop a crisp, golden-brown crust. Place the slices buttered-side down when assembling the sandwiches.
5. Layer the cheese and filling
Place two slices of bread on a clean work surface with the unbuttered sides facing up. Add a slice of Swiss cheese to each, followed by the sautéed mushrooms and caramelized onions. Top with another slice of Swiss cheese to help bind the filling together as it melts. Cover with the remaining bread slices, keeping the buttered sides facing outward.
6. Grill the sandwiches until golden
Heat a nonstick skillet over medium-low heat. Place the sandwiches in the skillet and cook for 3–5 minutes on each side, pressing gently with a spatula. Flip carefully and cook until both sides are crispy and golden-brown and the Swiss cheese is fully melted. Reduce the heat if the bread browns too quickly before the cheese melts.
7. Cut and stack the sandwiches
Transfer the grilled sandwiches to a cutting board and let them rest for about 1 minute. Using a sharp serrated knife, cut each sandwich diagonally in half to expose the melted Swiss cheese, browned mushrooms, and caramelized onions. Stack the halves on a plate, slightly overlapping them, so the filling is visible and the melted cheese can gently ooze out.
8. Serve the sandwich
Serve immediately while the bread is warm and crispy and the cheese is still gooey. Enjoy it on its own or pair it with tomato soup or a fresh green salad.
Tip
For the best flavor and texture, cook the mushrooms until their moisture has evaporated before adding them to the sandwich. Wet mushrooms can make the bread soggy. Keep the heat at medium-low while grilling so the bread becomes beautifully crisp while the Swiss cheese melts into a rich, stretchy filling.
13. Turkey and Cranberry Grilled Cheese
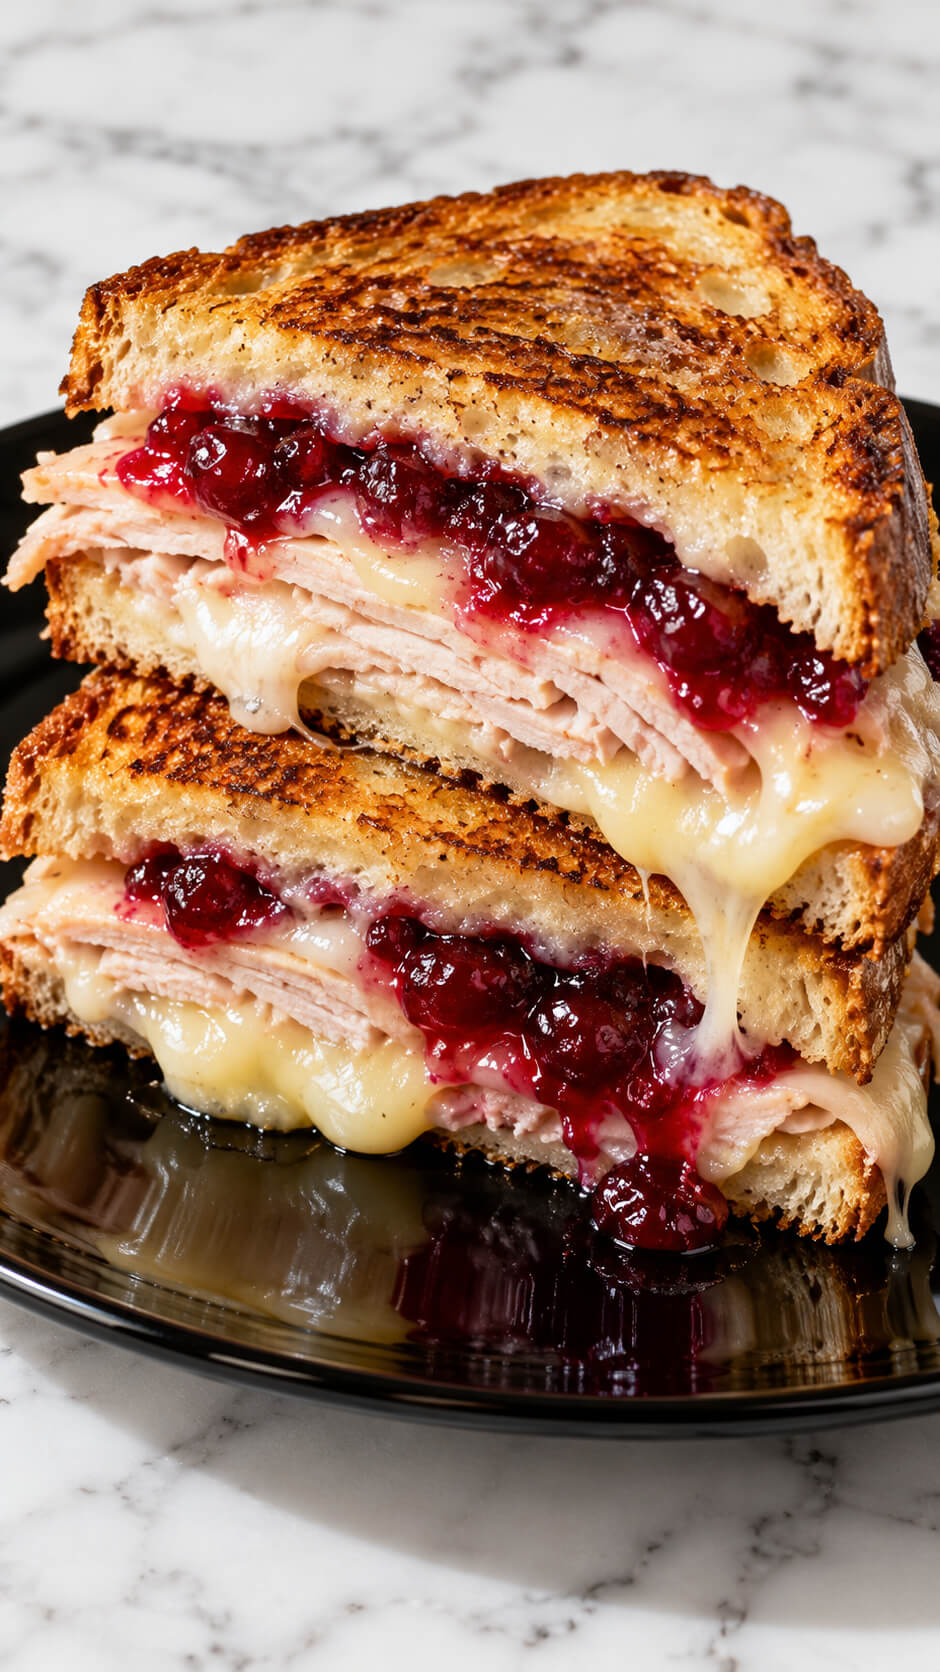
Turn your Thanksgiving leftovers into a masterpiece with turkey and cranberry sauce grilled cheese.
The savory turkey and tart cranberry sauce make this sandwich a sweet and salty delight.
It’s a comforting way to enjoy those post-holiday meals in a whole new way.
Ingredients
- 4 slices sourdough bread or thick-cut sandwich bread
- 6–8 slices cooked turkey breast
- 4 slices Swiss cheese or provolone cheese
- ⅓ cup whole-berry cranberry sauce
- 3 tablespoons unsalted butter, softened
- 1 teaspoon Dijon mustard (optional)
- ¼ teaspoon black pepper
- 1 tablespoon mayonnaise (optional, for extra creaminess)
Instructions
1. Prepare the bread
Lay the bread slices on a clean work surface. Spread softened butter evenly over one side of each slice, making sure to cover the edges for a crisp, golden-brown crust when grilled.
2. Prepare the turkey filling
Arrange the turkey breast slices on a plate and season lightly with black pepper. If desired, mix the Dijon mustard with the mayonnaise and spread a thin layer over the unbuttered sides of the bread for extra flavor and creaminess.
3. Add the first layer of cheese
Place one slice of Swiss cheese on the unbuttered side of two bread slices. The cheese creates a creamy base that melts around the turkey and helps hold the sandwich together.
4. Layer the turkey and cranberry sauce
Arrange the turkey slices evenly over the cheese. Spoon the cranberry sauce over the turkey, spreading it gently so every bite has a balance of sweet, tangy cranberry flavor and savory meat. Avoid adding too much sauce near the edges to prevent excessive leakage while grilling.
5. Complete the sandwich layers
Place another slice of Swiss or provolone cheese over the cranberry-covered turkey. Top with the remaining bread slices, keeping the buttered sides facing outward. Press the sandwiches gently so the layers hold together during cooking.
6. Grill the sandwiches until golden
Heat a skillet or nonstick frying pan over medium-low heat. Place the sandwiches in the pan and cook for 3–5 minutes on each side, pressing gently with a spatula. Turn carefully and cook until both sides are crisp and golden brown and the cheese is fully melted. Reduce the heat if the bread browns too quickly.
7. Melt the cheese completely
If the bread is golden but the cheese has not melted fully, cover the skillet for 1–2 minutes over low heat. The trapped heat helps the Swiss cheese become gooey and stretchy while keeping the turkey warm and tender.
8. Cut and stack the sandwiches
Transfer the grilled sandwiches to a cutting board and let them rest for 1–2 minutes. Cut each sandwich diagonally in half with a sharp serrated knife to reveal the layers of toasted bread, melted cheese, turkey, and cranberry sauce. Stack the halves slightly on top of one another to showcase the filling.
9. Plate and serve the sandwich
Place the stacked sandwich halves on a plate. Allow some melted cheese and cranberry sauce to remain visible along the cut edges for an appetizing presentation. Serve immediately while the bread is crisp and the cheese is warm and stretchy.
Tip
For the most delicious result, use whole-berry cranberry sauce and thick slices of sourdough bread. Cook the sandwich over medium-low heat rather than high heat so the cheese melts completely before the bread becomes too dark. For an extra indulgent finish, add a little more Swiss cheese near the edges so it melts and gently oozes out when the sandwich is cut.
14. Buffalo Chicken Grilled Cheese
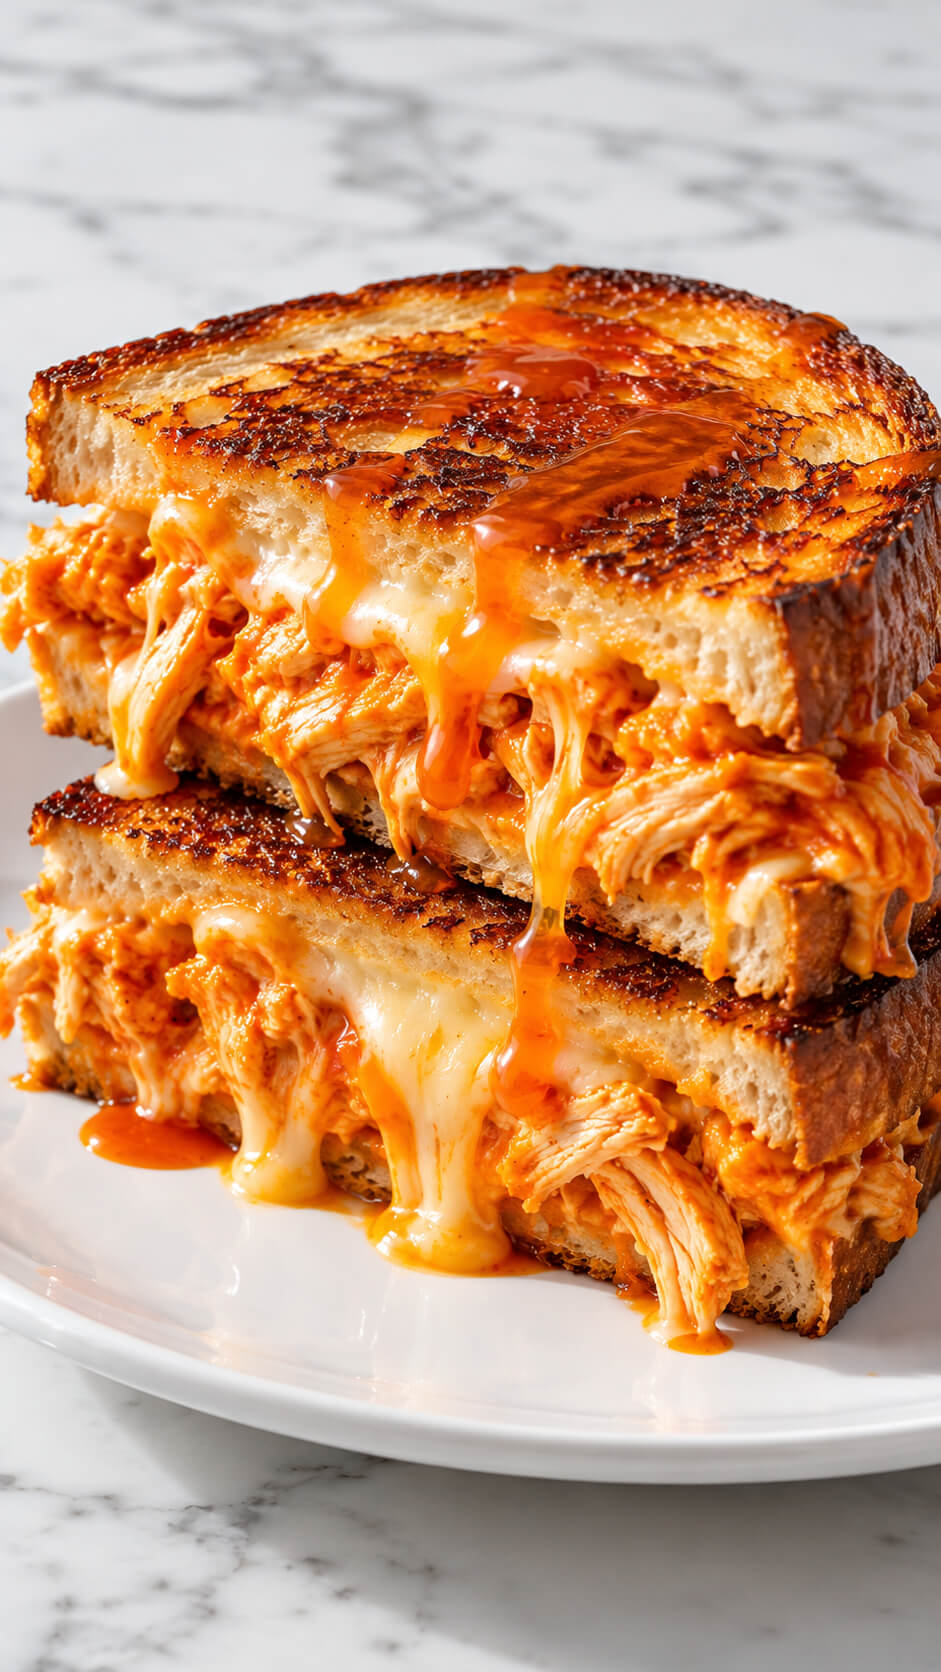
Spice up your grilled cheese by adding buffalo chicken.
Toss shredded chicken in buffalo sauce and layer it with your choice of cheese—preferably something mild like mozzarella or provolone to balance the heat.
This sandwich is a dream for fans of bold, spicy flavors.
Ingredients
- 2 cups cooked chicken breast, shredded
- 4 slices thick-cut sourdough or sandwich bread
- 1 cup shredded mozzarella cheese
- ½ cup shredded cheddar cheese
- ¼ cup buffalo sauce, plus extra for drizzling
- 2 tablespoons unsalted butter, softened
- 2 tablespoons cream cheese, softened
- 1 tablespoon mayonnaise
- ½ teaspoon garlic powder
- ¼ teaspoon smoked paprika
- ⅛ teaspoon black pepper
Instructions
1. Prepare the buffalo chicken filling
Combine the shredded chicken, buffalo sauce, cream cheese, garlic powder, smoked paprika, and black pepper in a mixing bowl. Stir thoroughly until the chicken is evenly coated in the vibrant orange sauce and the cream cheese makes the filling creamy. Adjust the buffalo sauce to your preferred spice level.
2. Mix the cheeses
Combine the shredded mozzarella and cheddar in a separate bowl. Mozzarella provides a stretchy, gooey texture, while cheddar adds a rich, savory flavor. Mixing them beforehand helps the cheese melt evenly throughout the sandwich.
3. Assemble the sandwiches
Spread a thin layer of mayonnaise on one side of each bread slice. Place two slices mayonnaise-side down on a clean surface. Divide half the cheese mixture between them, add the buffalo chicken filling evenly, and top with the remaining cheese. Cover with the other bread slices, keeping the mayonnaise-coated sides facing outward.
4. Heat the skillet
Place a large nonstick skillet over medium-low heat and allow it to warm for about 2 minutes. Spread the softened butter evenly over the outer sides of the assembled sandwiches or directly onto the skillet before adding them. The moderate heat helps the bread develop a crisp, golden crust without burning before the cheese melts.
5. Grill the sandwiches until golden
Place the sandwiches in the heated skillet and cook for 3–5 minutes on the first side. Press gently with a spatula to help the bread make even contact with the pan. Flip carefully and cook for another 3–5 minutes, until both sides are golden brown with a few lightly charred spots.
6. Melt the cheese completely
Reduce the heat to low if the bread is browning too quickly. Cover the skillet for 1–2 minutes to trap heat and help the cheese melt thoroughly around the buffalo chicken. The filling should be hot, creamy, and gooey, with the melted cheese binding the shredded chicken together.
7. Drizzle with buffalo sauce and serve
Transfer the sandwiches to a plate and let them rest for about 1 minute. Drizzle a little extra buffalo sauce over the crispy bread, then slice each sandwich diagonally to reveal the orange chicken filling and melted cheese. Serve immediately while the bread is crunchy and the cheese is still stretchy.
Tip
For the ultimate crispy, cheesy sandwich, cook it over medium-low heat rather than high heat. This gives the cheese enough time to melt before the bread becomes too dark. For extra flavor, mix a little buffalo sauce into the mayonnaise before spreading it on the bread, and use freshly shredded cheese for a smoother melt.
15. Caprese Grilled Cheese
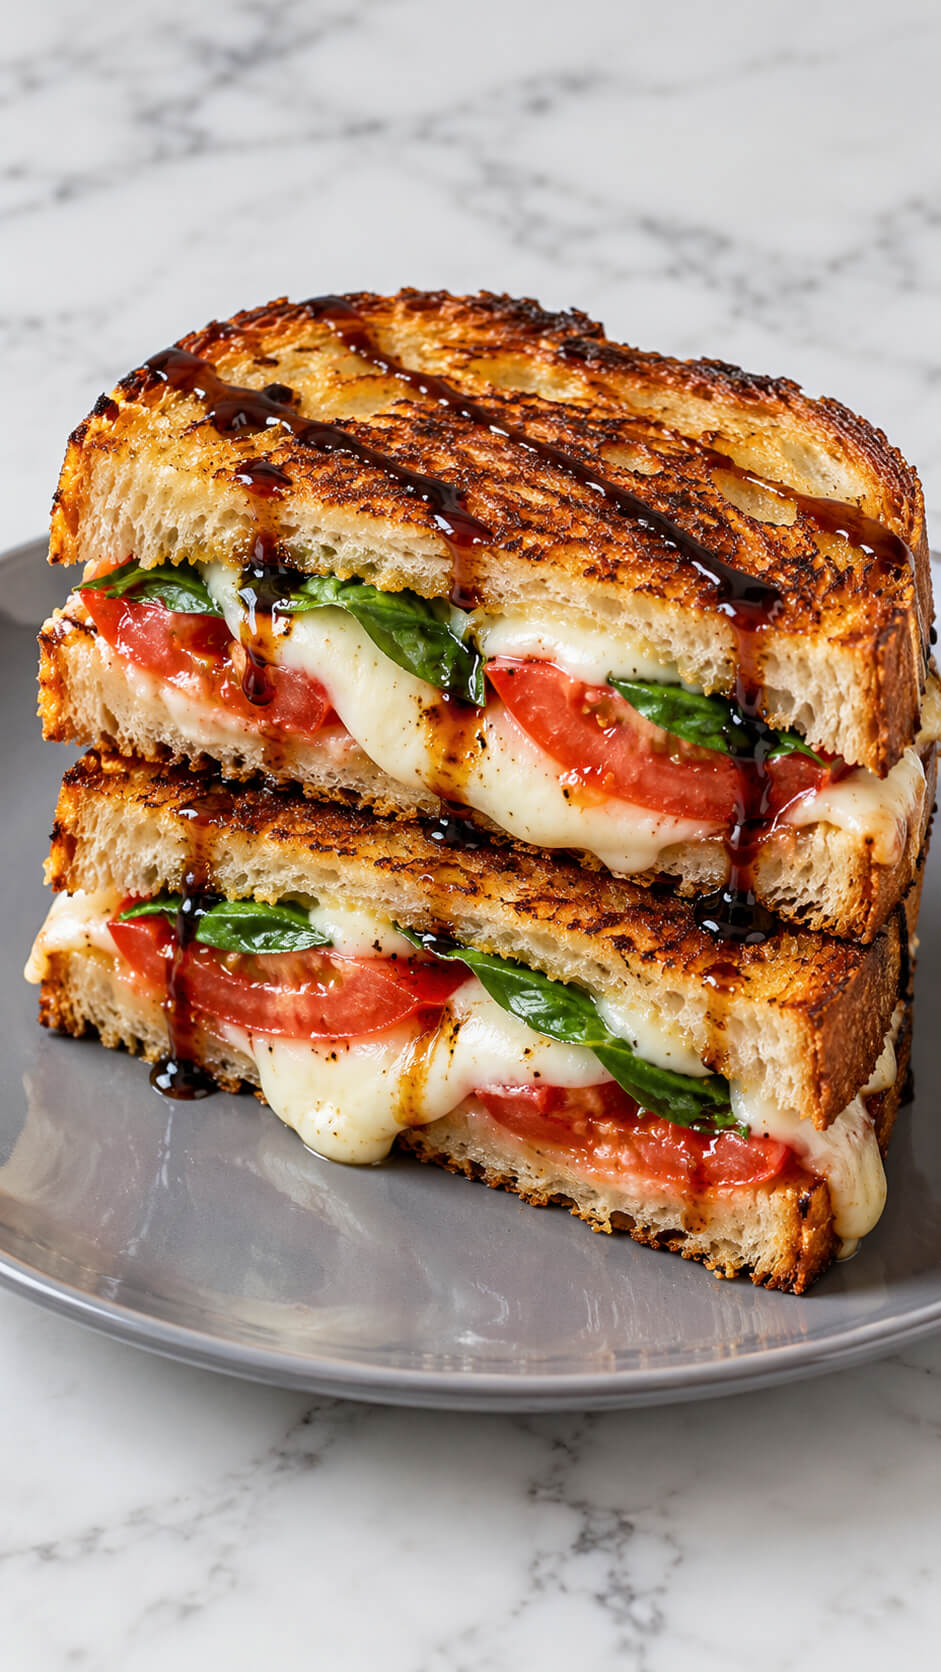
Take a cue from the Italian classic by combining mozzarella, tomatoes, and fresh basil in your grilled cheese.
Drizzle a bit of balsamic glaze over the top for added sweetness and depth.
This version feels light and fresh yet retains the cozy warmth of grilled cheese.
Ingredients
- 4 thick slices of sourdough or rustic bread
- 200 g fresh mozzarella cheese, sliced
- 2 medium ripe tomatoes, sliced
- 8–10 fresh basil leaves
- 2 tablespoons butter, softened
- 2 tablespoons balsamic glaze
- 1 tablespoon olive oil
- Salt and black pepper, to taste
Instructions
1. Prepare the ingredients
Slice the mozzarella and tomatoes into even slices. Pat the tomato slices gently with paper towels to remove excess moisture, which helps prevent the bread from becoming soggy. Wash and dry the fresh basil leaves, and keep the softened butter ready for spreading.
2. Assemble the sandwiches
Place the bread slices on a clean work surface. Layer the mozzarella, tomato slices, and fresh basil leaves onto two slices of bread. Season lightly with salt and black pepper, then cover with the remaining bread slices to form two sandwiches. Press gently to hold the fillings together.
3. Butter the bread
Spread the softened butter evenly over the outside of each sandwich. Make sure the edges are covered so the bread develops a crisp, golden-brown crust when grilled. The butter also adds a rich flavor and helps the bread toast evenly.
4. Heat the skillet
Place a nonstick skillet or frying pan over medium-low heat. Allow it to warm for a few minutes before adding the sandwiches. Keeping the heat moderate helps the bread turn golden and crispy while giving the mozzarella enough time to melt without burning the crust.
5. Grill the sandwiches until golden
Place the sandwiches in the warm skillet and cook for approximately 3–5 minutes on the first side. Press them gently with a spatula to encourage even browning. When the bread is golden and crisp, carefully flip each sandwich and cook the other side for another 3–5 minutes.
6. Melt the mozzarella completely
Continue cooking over medium-low heat until the mozzarella becomes soft, creamy, and melted. If the bread is browning too quickly, reduce the heat and cover the skillet briefly with a lid to help the cheese melt evenly. The tomatoes should become slightly warm while the basil retains its fresh flavor.
7. Cut the sandwiches in half
Transfer the grilled sandwiches to a cutting board and let them rest for about 1 minute. Using a sharp serrated knife, cut each sandwich diagonally in half. Arrange the halves slightly overlapping on a plate, with the cut sides facing forward to showcase the layers of melted mozzarella, juicy tomatoes, and fresh basil.
8. Drizzle with balsamic glaze
Drizzle the balsamic glaze lightly over the top of the toasted sandwiches. Allow a little glaze to run down the crisp crust and into the exposed filling. Use just enough to add a sweet, tangy contrast to the creamy mozzarella and fresh tomatoes without overpowering their flavors.
9. Serve the sandwiches
Serve the Caprese grilled cheese immediately while the bread is still crispy and the mozzarella is warm and soft. Arrange the sandwich halves neatly on the plate and enjoy as a light lunch, a satisfying snack, or a simple dinner.
Tip
For the best results, use ripe but firm tomatoes and fresh mozzarella that has been drained well. Excess moisture can make the sandwich soggy. Cook the sandwiches over medium-low heat for a crisp, evenly browned crust and perfectly melted cheese. For an extra flavor boost, add a small pinch of dried oregano or a little freshly ground black pepper before grilling.
16. Grilled Cheese with Caramelized Onions
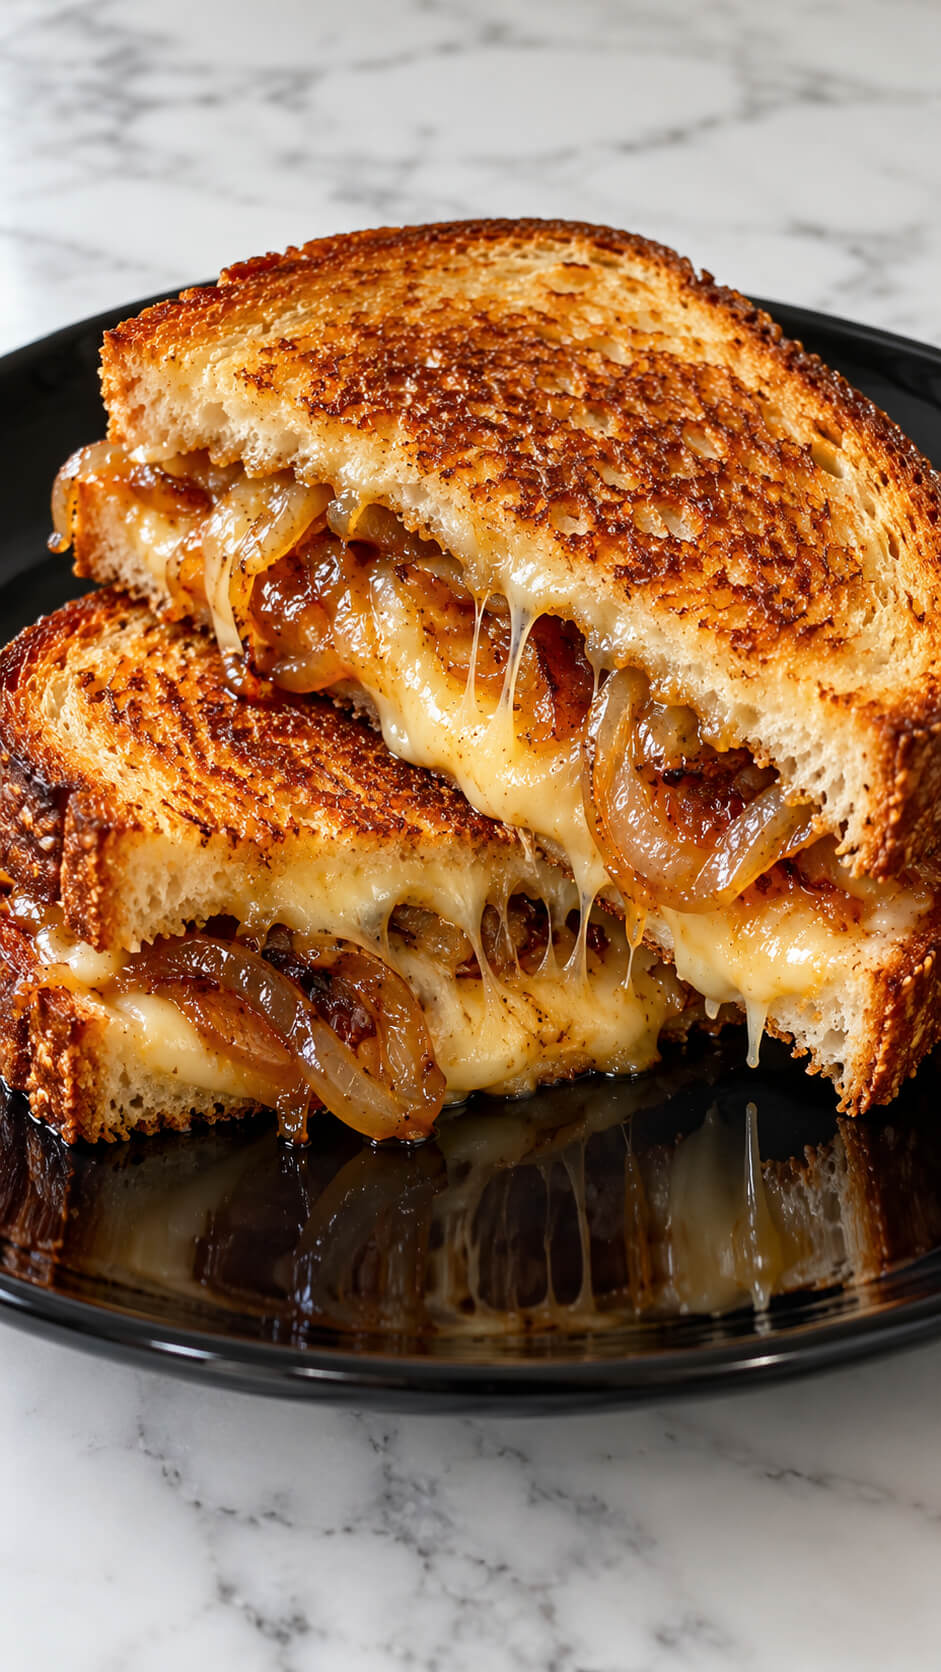
Elevate your grilled cheese by adding sweet, caramelized onions.
The deep, rich flavor of the onions blends perfectly with sharp cheddar or Gruyere, creating a sandwich that’s complex yet comforting.
It’s ideal for adults looking for a more grown-up version of this childhood favorite.
Ingredients
- 4 slices sourdough bread or thick-cut white bread
- 2 cups (200 g) shredded sharp cheddar cheese
- 1 cup (100 g) shredded mozzarella cheese
- 2 large yellow onions, thinly sliced
- 2 tablespoons butter for caramelizing the onions
- 2 tablespoons butter, softened, for the bread
- 1 tablespoon olive oil
- 1 teaspoon brown sugar (optional)
- ½ teaspoon salt, divided
- ¼ teaspoon black pepper
- 1 teaspoon balsamic vinegar (optional)
Instructions
1. Slice the onions
Thinly slice the onions into even strips so they cook consistently. Separate the slices with your fingers to help them soften evenly in the pan.
2. Caramelize the onions
Heat the olive oil and 2 tablespoons of butter in a skillet over medium-low heat. Add the sliced onions and a pinch of salt, then cook for 25–35 minutes, stirring every few minutes. Allow the onions to soften gradually until they become deeply golden brown, tender, and glossy. Add a little water if they begin sticking to the pan.
3. Add the finishing flavors
Stir in the brown sugar, if using, and cook for another 1–2 minutes. Add the balsamic vinegar for extra depth and sweetness, then season with black pepper. Remove the caramelized onions from the pan and set them aside.
4. Prepare the cheese filling
Combine the shredded cheddar and mozzarella in a bowl. The sharp cheddar provides a rich, savory flavor, while the mozzarella creates a smooth, stretchy texture when melted.
5. Butter the bread
Spread softened butter evenly over one side of each bread slice. Cover the surface all the way to the edges to help the bread develop a crisp, golden crust during cooking.
6. Assemble the sandwich
Place two bread slices buttered-side down on a clean surface. Distribute half of the cheese mixture over each slice, followed by a generous layer of caramelized onions. Add the remaining cheese on top of the onions to help bind the filling together, then close each sandwich with the remaining bread slices, buttered-side facing outward.
7. Toast the sandwiches
Heat a clean skillet over medium-low heat. Place the sandwiches in the skillet and cook for 3–5 minutes per side, pressing gently with a spatula. Flip carefully when the first side is golden brown and crispy. Continue cooking until both sides are evenly toasted and the cheese has melted completely.
8. Melt the cheese thoroughly
If the bread is browning too quickly before the cheese melts, reduce the heat and cover the skillet for 1–2 minutes. This traps heat inside the pan and helps the cheese become soft, gooey, and stretchy without burning the crust.
9. Cut and serve the sandwich
Transfer the sandwiches to a cutting board and let them rest for about 1 minute. Cut each sandwich diagonally in half to reveal the melted cheese and caramelized onions inside. Arrange the halves on a plate and serve immediately while the filling is warm and gooey.
Tip
For the most flavorful sandwich, caramelize the onions slowly over medium-low heat rather than cooking them quickly over high heat. This develops their natural sweetness and rich flavor. For an extra-crispy crust, use softened butter on the outside of the bread and keep the skillet at medium-low heat so the bread turns golden while the cheese melts evenly.
17. Mac and Cheese Grilled Cheese
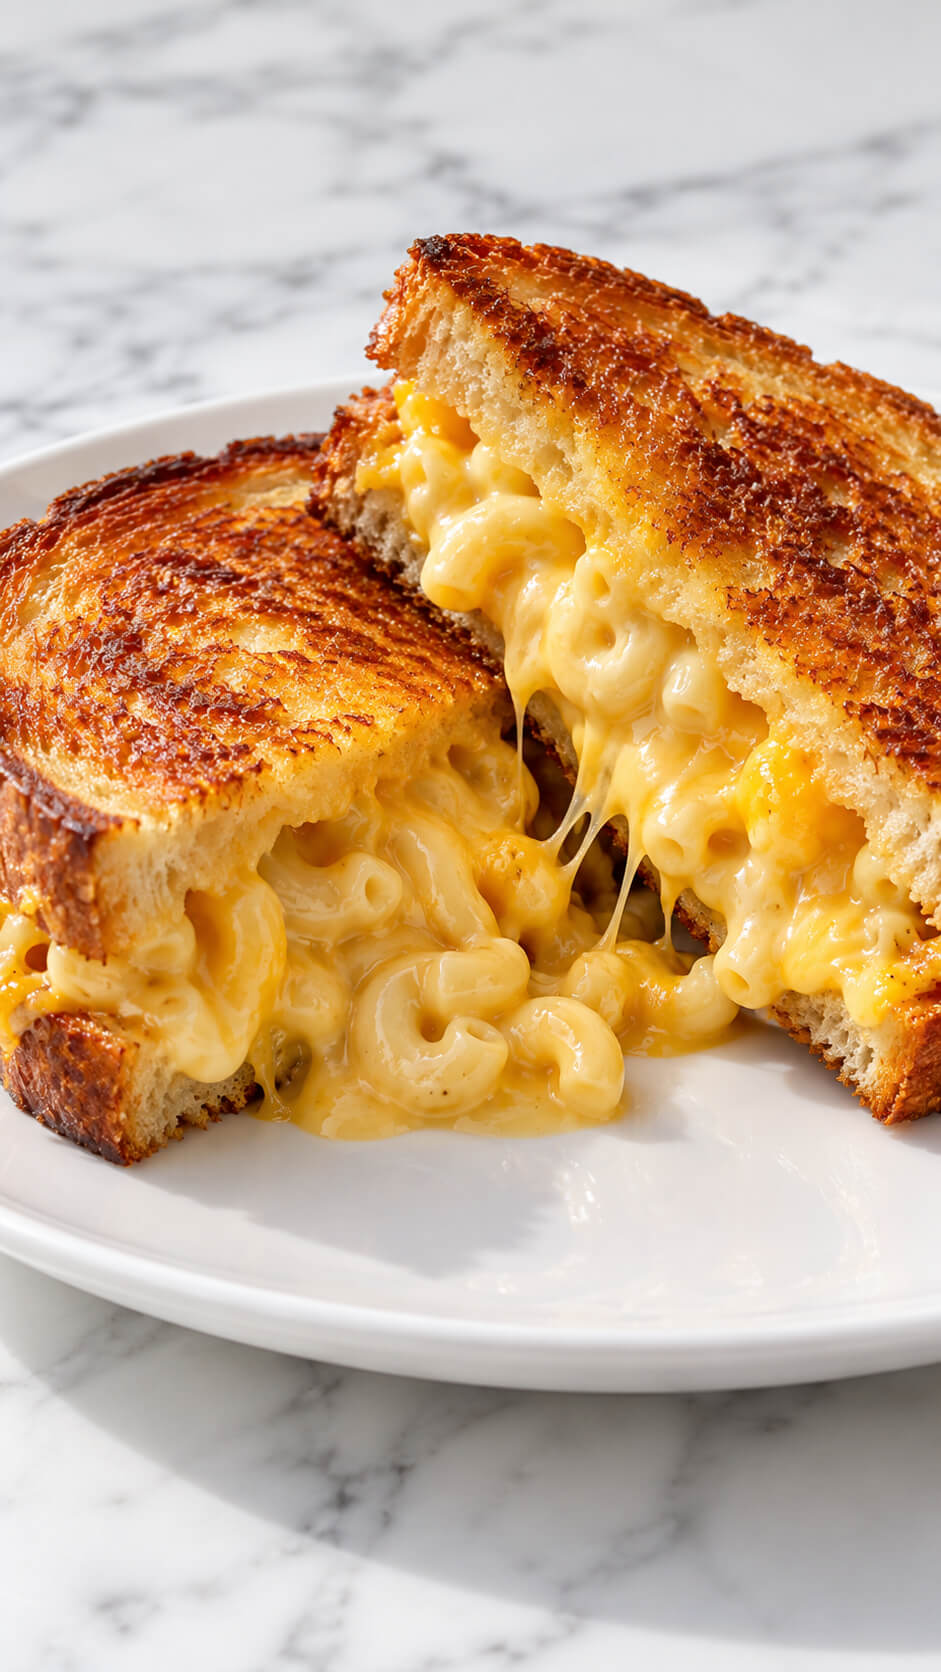
Why settle for one cheesy dish when you can have two?
Spread a layer of creamy mac and cheese between two slices of bread for the ultimate indulgent treat.
This over-the-top sandwich is perfect for those who can’t get enough of cheesy goodness.
Ingredients
- 4 slices thick-cut bread, such as sourdough or white bread
- 1 cup (100 g) elbow macaroni
- 2 tablespoons butter, divided
- 1 tablespoon all-purpose flour
- ¾ cup (180 ml) milk
- 1 cup (100 g) shredded cheddar cheese
- ½ cup (50 g) shredded mozzarella cheese
- ¼ teaspoon garlic powder
- ¼ teaspoon paprika (optional)
- Salt and black pepper, to taste
Instructions
1. Boil the macaroni
Bring a pot of salted water to a boil. Add the elbow macaroni and cook according to the package instructions until tender but still slightly firm. Drain the pasta thoroughly and set it aside.
2. Prepare the creamy cheese sauce
Melt 1 tablespoon of butter in a saucepan over medium-low heat. Stir in the flour and cook for about 1 minute, stirring continuously. Gradually whisk in the milk until smooth, then cook for 2–3 minutes until the sauce thickens slightly.
3. Melt the cheese into the sauce
Reduce the heat to low and add the shredded cheddar and mozzarella cheese. Stir until the cheese melts into a smooth, creamy sauce. Season with garlic powder, paprika if using, salt, and black pepper.
4. Combine the macaroni and cheese sauce
Add the cooked macaroni to the cheese sauce and stir until every piece of pasta is coated. Allow the mixture to cool for 2–3 minutes so it thickens slightly and becomes easier to place inside the sandwich.
5. Butter the bread slices
Spread the remaining tablespoon of butter evenly over one side of each bread slice. These buttered sides will form the crispy, golden exterior of the grilled cheese sandwich.
6. Fill the sandwiches with mac and cheese
Place two bread slices on a clean surface with the buttered sides facing down. Spoon the creamy macaroni and cheese onto the unbuttered sides, dividing it evenly between the slices. Spread the filling almost to the edges, then top each with another bread slice, keeping the buttered sides facing outward.
7. Grill the sandwiches until golden
Heat a nonstick skillet over medium-low heat. Place the sandwiches in the skillet and cook for 3–5 minutes on each side, pressing gently with a spatula. Turn them carefully and cook until both sides are deeply golden brown, crispy, and the cheese inside is hot and melted.
8. Cut the sandwiches in half
Transfer the grilled sandwiches to a cutting board and let them rest for about 1 minute. Slice each sandwich diagonally with a sharp knife to reveal the creamy macaroni and cheese filling. Allow some of the cheesy pasta to spill out naturally for an extra-indulgent presentation.
9. Plate and serve the sandwiches
Arrange the sandwich halves on a plate with the cut sides facing upward to showcase the creamy filling. Serve immediately while the bread is crisp and the cheese is warm, gooey, and delicious.
Tip
For the ultimate cheese pull, use a combination of sharp cheddar for bold flavor and mozzarella for extra stretchiness. Keep the skillet on medium-low heat so the bread becomes beautifully golden and crispy while the mac and cheese filling heats through without burning the outside.
18. Grilled Cheese with Prosciutto
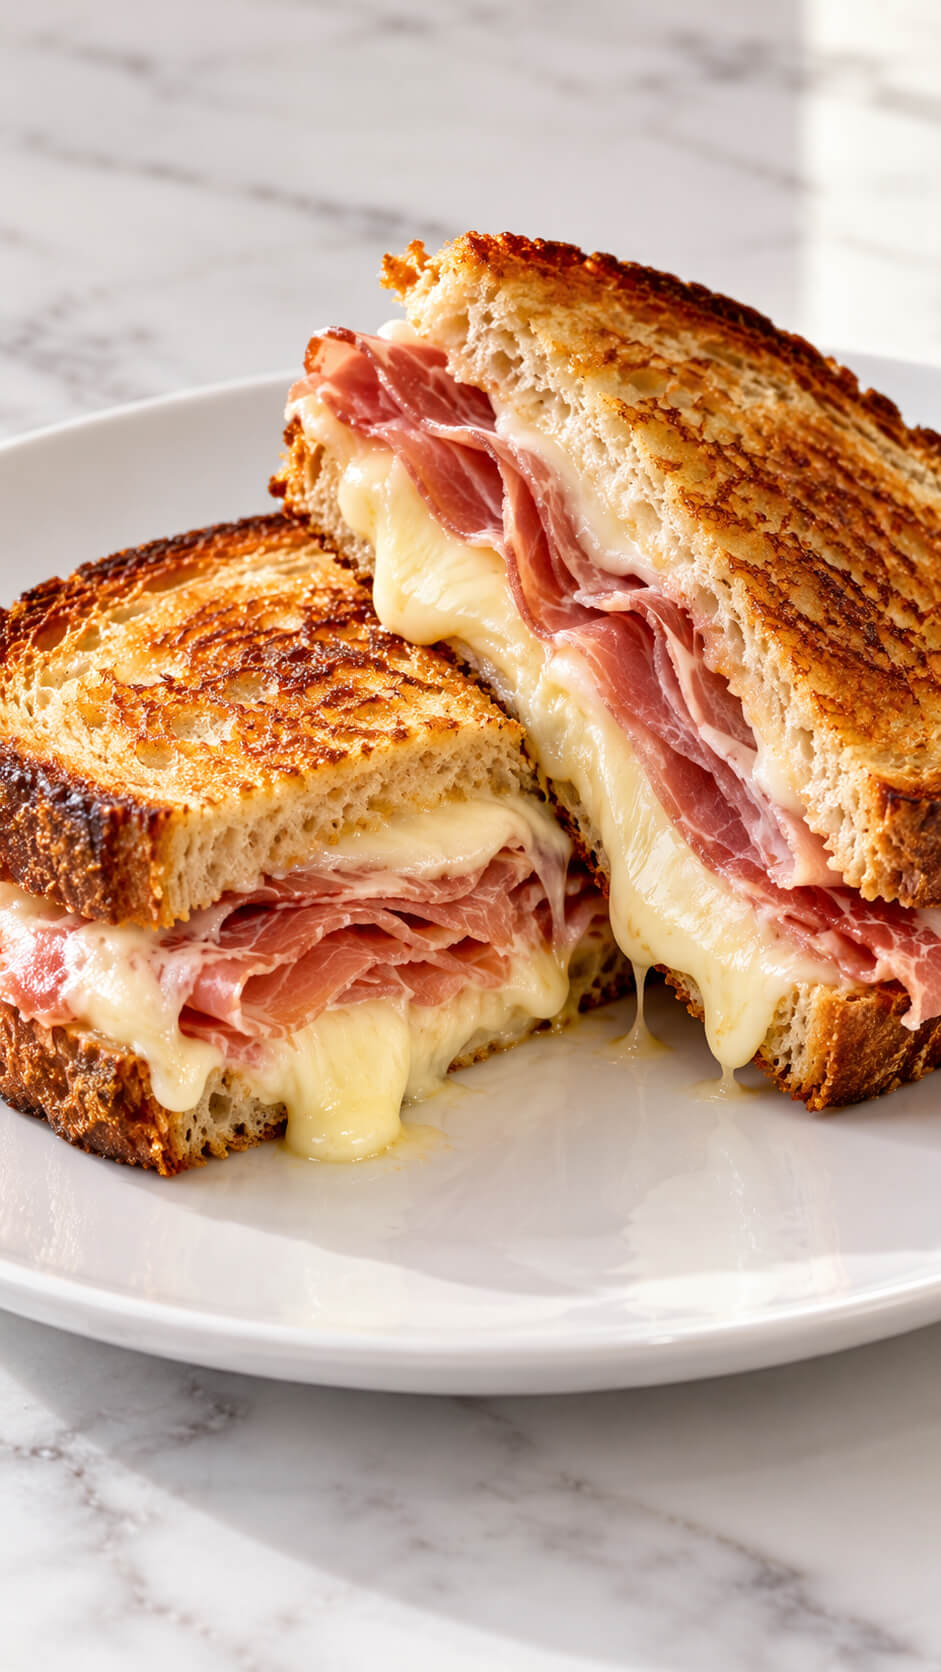
Take your grilled cheese up a notch by adding thin slices of salty prosciutto.
The delicate texture of the prosciutto pairs well with soft cheeses like fontina or brie.
It’s a great way to turn a simple sandwich into something more refined and flavorful.
Ingredients
- 4 thick slices of sourdough or artisan bread
- 4–6 thin slices prosciutto
- 1 cup (100 g) shredded mozzarella cheese
- 2 slices provolone or Swiss cheese
- 2 tablespoons softened butter
- 1 tablespoon mayonnaise (optional, for extra crispiness)
- 1 teaspoon Dijon mustard (optional)
- Freshly ground black pepper, to taste
Instructions
1. Prepare the bread
Place the bread slices on a clean work surface. Spread softened butter evenly over one side of each slice. For an extra-crispy crust, mix the butter with a little mayonnaise before spreading it over the bread.
2. Layer the cheese and prosciutto
Turn the bread slices over so the unbuttered sides face up. Spread a thin layer of Dijon mustard on two slices, if desired. Add the provolone or Swiss cheese, followed by the prosciutto, folding the ham into loose layers for a fuller texture. Sprinkle the shredded mozzarella generously over the prosciutto to create a rich, gooey filling.
3. Assemble the sandwich
Place the remaining bread slices on top of the fillings, with the buttered sides facing outward. Press gently to hold everything together without squeezing out the cheese and ham.
4. Heat the skillet
Place a nonstick skillet or heavy frying pan over medium-low heat. Allow it to warm for 2–3 minutes before adding the sandwiches. Keeping the heat moderate helps the bread turn golden while allowing the cheese to melt completely.
5. Toast the sandwich until golden
Place the sandwiches in the heated skillet and cook for 3–5 minutes on the first side, until the bread develops a deep golden-brown crust. Press gently with a spatula to encourage even contact with the pan.
6. Flip and melt the cheese
Carefully flip the sandwiches and cook for another 3–5 minutes. Reduce the heat slightly if the bread browns too quickly. Continue cooking until both sides are crisp and the cheese is melted, creamy, and beginning to ooze from the edges.
7. Cut the sandwich in half
Transfer the toasted sandwiches to a cutting board and let them rest for 1–2 minutes. Using a sharp serrated knife, cut each sandwich diagonally in half to reveal the layers of pink prosciutto and melted cheese.
8. Plate and serve the sandwich
Arrange the sandwich halves on a plate, with the cut sides facing upward to showcase the filling. Serve immediately while the bread is still crunchy and the cheese is warm and stretchy.
Tip
For the most indulgent result, use a combination of mozzarella for stretchiness and provolone for a richer, savory flavor. Cook the sandwich over medium-low heat rather than high heat so the cheese melts thoroughly before the bread becomes too dark. For an extra-special finish, let a little melted cheese ooze out into the skillet and turn golden and crispy before removing the sandwich.
19. Breakfast Grilled Cheese
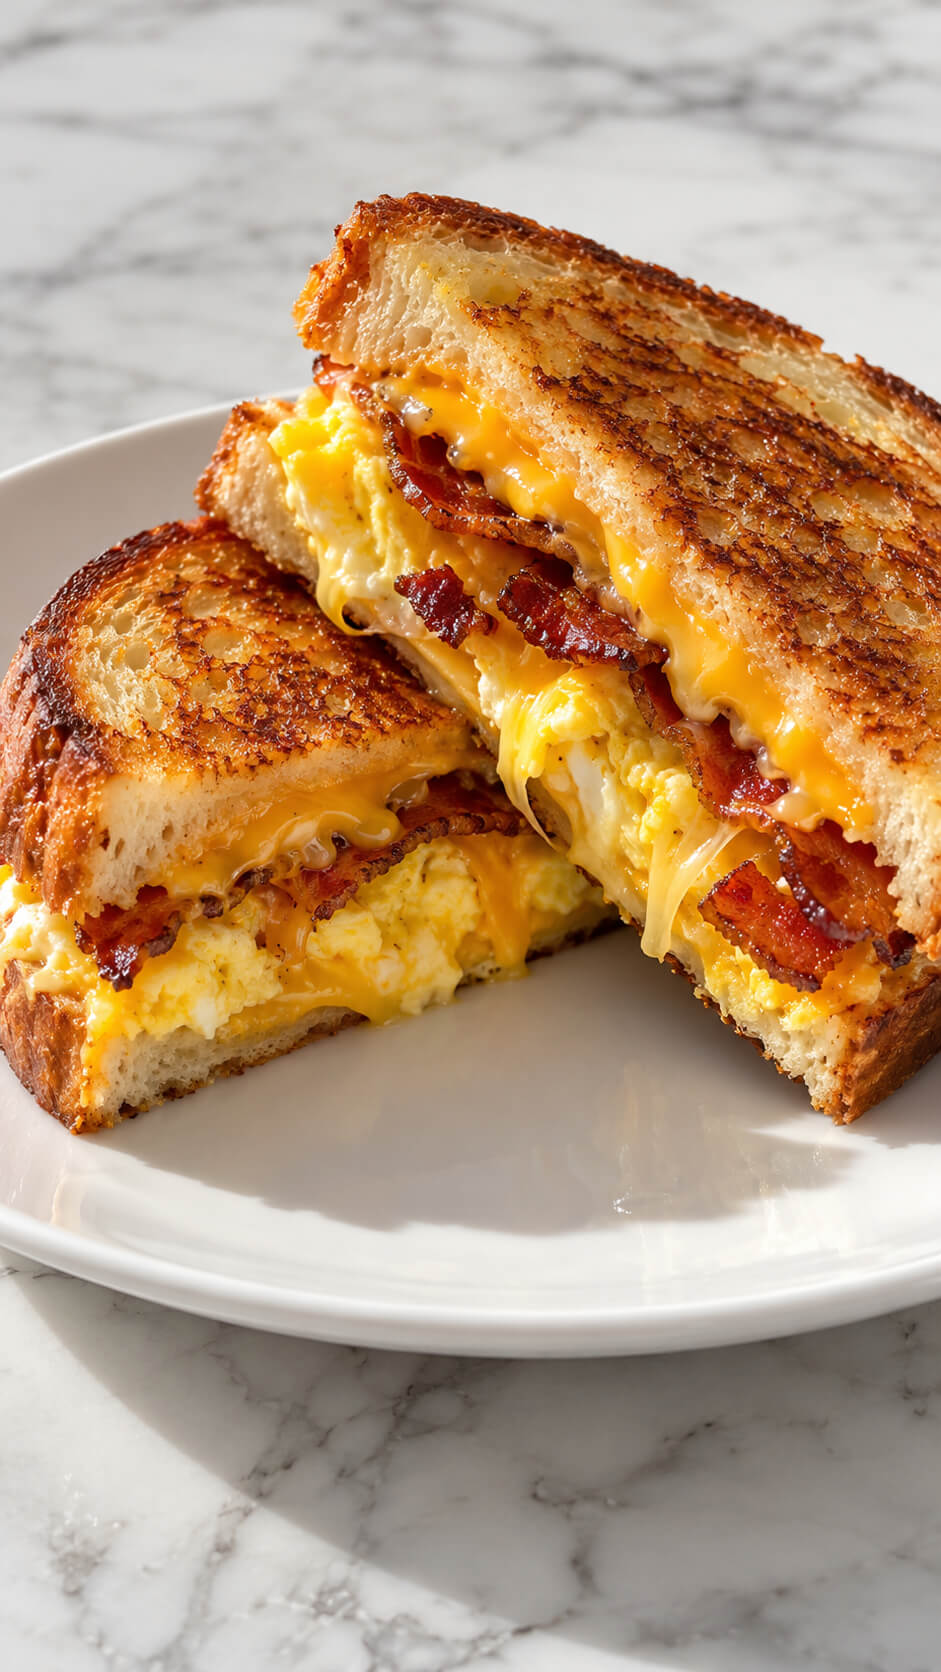
Turn your grilled cheese into a hearty breakfast by adding scrambled eggs, crispy bacon, and your favorite cheese.
This savory combination is perfect for mornings when you want something filling and satisfying.
It’s a great way to kickstart your day with protein and flavor.
Ingredients
- 4 slices thick-cut bread (sourdough or white bread)
- 4 large eggs
- 4 strips bacon
- 4 slices cheddar cheese or American cheese
- 2 tablespoons butter, softened
- 2 tablespoons milk (optional, for fluffier eggs)
- ¼ teaspoon salt, or to taste
- ¼ teaspoon black pepper, or to taste
- 1 teaspoon cooking oil, if needed
Instructions
1. Cook the bacon
Place the bacon strips in a cold frying pan and cook over medium heat for 6–10 minutes, turning occasionally, until golden brown and crispy. Transfer the bacon to a paper towel-lined plate to drain excess grease. Once slightly cooled, cut the strips in half if necessary to fit the bread.
2. Prepare the scrambled eggs
Crack the eggs into a bowl and add the milk, salt, and black pepper. Whisk until the mixture is evenly combined. Melt a little butter in a nonstick frying pan over low to medium-low heat, then pour in the eggs. Gently stir with a spatula for 2–4 minutes until soft, fluffy curds form and the eggs are cooked through. Remove from the heat.
3. Butter the bread
Spread the softened butter evenly over one side of each bread slice. The butter helps create a crisp, golden-brown crust while adding rich flavor to the sandwich.
4. Assemble the sandwich
Place two bread slices on a clean surface with the buttered sides facing down. Add a slice of cheese to each, followed by the scrambled eggs and crispy bacon. Top with another slice of cheese to help bind the filling together as it melts. Cover each sandwich with the remaining bread slices, keeping the buttered sides facing outward.
5. Grill the sandwiches
Heat a clean frying pan over medium-low heat. Place the assembled sandwiches in the pan and cook for 3–5 minutes on each side, pressing gently with a spatula. Flip carefully when the bread becomes golden brown and crispy. Continue cooking until both sides are toasted and the cheese has melted completely.
6. Melt the cheese evenly
If the bread is browning before the cheese melts, reduce the heat to low and cover the pan for 1–2 minutes. This traps heat inside the pan, helping the cheese become soft and gooey while preventing the bread from burning.
7. Cut the sandwiches in half
Transfer the grilled sandwiches to a cutting board and let them rest for about 1 minute. Use a sharp knife to cut each sandwich diagonally into two halves, exposing the fluffy scrambled eggs, crispy bacon, and melted cheese. Arrange the halves on a plate with the cut sides facing upward.
8. Serve the sandwich
Serve immediately while the bread is crisp and the cheese is warm and melted. Enjoy the sandwich on its own or pair it with your favorite breakfast drink for a satisfying meal.
Tip
For the ultimate crispy and gooey grilled cheese sandwich, cook it slowly over medium-low heat rather than using high heat. Use freshly grated cheddar if you prefer extra-melty cheese, and avoid overcooking the scrambled eggs so they remain soft and fluffy inside the sandwich.
Wrap Up
Grilled cheese sandwiches are so easy to make and delicious!
Whether you like classic cheese or want to try new flavors, there’s a recipe for everyone.
From simple to fancy, grilled cheese can be the perfect meal for any time of day.
Enjoy and stay cheesy!